Super Smash Bros. 4

Ryu (SSB4)/Down tilt: Difference between revisions

From SmashWiki, the Super Smash Bros. wiki
Jump to navigationJump to search
No edit summary
 
Line 112: Line 112:
!Hitboxes
!Hitboxes
|2-3
|2-3
|-
!Repeat window
|6-14
|-
|-
!Interruptible
!Interruptible
Line 121: Line 124:


{{FrameStripStart}}
{{FrameStripStart}}
{{FrameStrip|t=Lag|c=1}}{{FrameStrip|t=Hitbox|c=2}}{{FrameStrip|t=Lag|c=11}}
{{FrameStrip|t=Lag|c=1}}{{FrameStrip|t=Hitbox|c=2}}{{FrameStrip|t=Lag|c=3|e=LagLoopS}}{{FrameStrip|t=Lag|c=8|s=LagLoopE}}
{{FrameStripEnd}}
{{FrameStripEnd}}
===Held===
===Held===
{|class="wikitable"
{|class="wikitable"

Latest revision as of 09:16, June 21, 2024

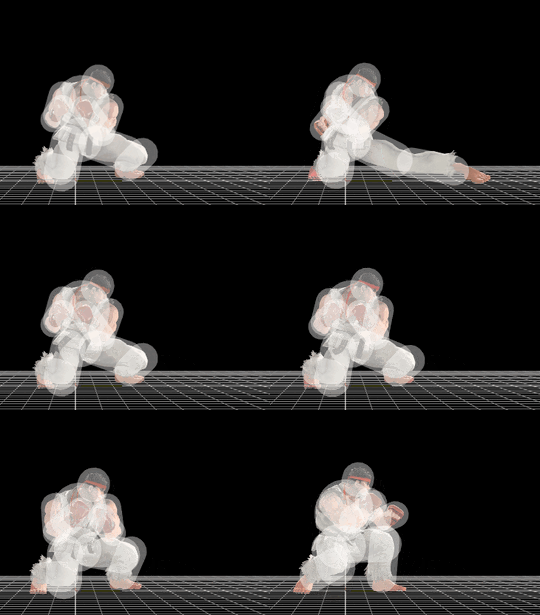
Hitbox visualization showing Ryu's tapped down tilt.
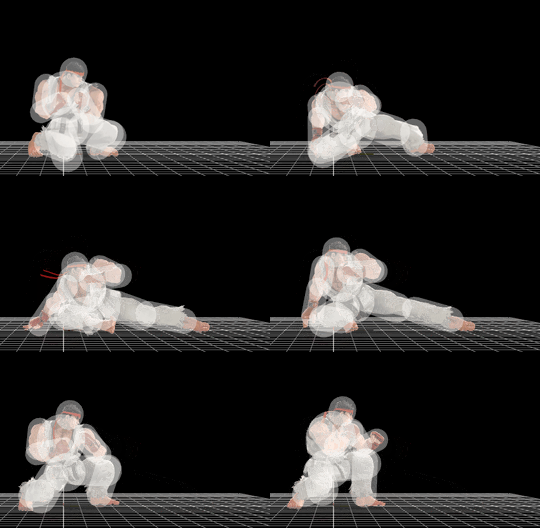
Hitbox visualization showing Ryu's held down tilt.

Overview[edit]

Competitive.png This article or section may require competitive expertise.
You can discuss this issue on the talk page or edit this page to improve it.

Hitboxes[edit]

Tapped[edit]

ID Part Damage SD Angle BK KS FKV Radius Bone Offset SDIx T% Clang Rebound Type Effect G A Sound Direct
0 0 1.6% 0 AngleIcon50.png 0 100 9 3.5 0 0.0 3.0 to 3.4 9.0 to 7.5 1.0x 2.2x 0% HitboxTableIcon(Clang).png HitboxTableIcon(Rebound).png Foot (type) Normal (effect) HitboxTableIcon(GroundedTrue).png HitboxTableIcon(AerialFalse).png S Ryu Kick SpecialsDirect.png
1 0 1.6% 0 AngleIcon50.png 0 100 11 2.8 0 0.0 3.3 to 4.2 11.5 to 7.5 1.0x 2.2x 0% HitboxTableIcon(Clang).png HitboxTableIcon(Rebound).png Foot (type) Normal (effect) HitboxTableIcon(GroundedFalse).png HitboxTableIcon(AerialTrue).png S Ryu Kick SpecialsDirect.png
2 0 1.6% 0 AngleIcon50.png 0 100 5 3.5 0 0.0 2.5 to 3.4 13.0 to 7.5 1.0x 2.2x 0% HitboxTableIcon(Clang).png HitboxTableIcon(Rebound).png Foot (type) Normal (effect) HitboxTableIcon(GroundedTrue).png HitboxTableIcon(AerialFalse).png S Ryu Kick SpecialsDirect.png

Held[edit]

ID Part Damage SD Angle BK KS FKV Radius Bone Offset SDIx T% Clang Rebound Type Effect G A Sound Direct
0 0 7% 0 AngleIcon64.png 70 23 0 4.0 0 0.0 2.8 to 3.8 12.0 to 7.0 1.0x 1.8x 30% HitboxTableIcon(Clang).png HitboxTableIcon(Rebound).png Foot (type) Normal (effect) HitboxTableIcon(GroundedTrue).png HitboxTableIcon(AerialTrue).png M Ryu Kick SpecialsDirect.png
1 0 5.5% 0 AngleIcon55.png 70 23 0 3.3 0 0.0 2.2 to 3.8 17.2 to 7.0 1.0x 1.8x 30% HitboxTableIcon(Clang).png HitboxTableIcon(Rebound).png Foot (type) Normal (effect) HitboxTableIcon(GroundedTrue).png HitboxTableIcon(AerialTrue).png M Ryu Kick SpecialsDirect.png

Timing[edit]

Tapped[edit]

Hitboxes 2-3
Repeat window 6-14
Interruptible 15
Animation length 14
FrameIcon(Lag).png FrameIcon(Hitbox).png FrameIcon(Hitbox).png FrameIcon(Lag).png FrameIcon(Lag).png FrameIcon(LagLoopS).png FrameIcon(LagLoopE).png FrameIcon(Lag).png FrameIcon(Lag).png FrameIcon(Lag).png FrameIcon(Lag).png FrameIcon(Lag).png FrameIcon(Lag).png FrameIcon(Lag).png

Held[edit]

Hitboxes 6-7
Interruptible 28
Animation length 31
FrameIcon(Lag).png FrameIcon(Lag).png FrameIcon(Lag).png FrameIcon(Lag).png FrameIcon(Lag).png FrameIcon(Hitbox).png FrameIcon(Hitbox).png FrameIcon(Lag).png FrameIcon(Lag).png FrameIcon(Lag).png FrameIcon(Lag).png FrameIcon(Lag).png FrameIcon(Lag).png FrameIcon(Lag).png FrameIcon(Lag).png FrameIcon(Lag).png FrameIcon(Lag).png FrameIcon(Lag).png FrameIcon(Lag).png FrameIcon(Lag).png FrameIcon(Lag).png FrameIcon(Lag).png FrameIcon(Lag).png FrameIcon(Lag).png FrameIcon(Lag).png FrameIcon(Lag).png FrameIcon(Lag).png FrameIcon(Interruptible).png FrameIcon(Interruptible).png FrameIcon(Interruptible).png FrameIcon(Interruptible).png
Legend (1 square = 1 frame)
Lag
Lag time
Hitbox
Hitbox
Interruptibility
Interruptible