King Dedede (SSBB)/Neutral attack/Infinite: Difference between revisions
From SmashWiki, the Super Smash Bros. wiki
Jump to navigationJump to search
(New Page: {{ArticleIcons|ssbb=y}} ==Overview== {{competitive expertise}} ==Hitboxes== {{technical data}} ==Timing== Animation length is only for the finisher. {|class="wikitable" !Hitboxes |7, 1...) |
No edit summary |
||
| (2 intermediate revisions by 2 users not shown) | |||
| Line 1: | Line 1: | ||
{{ArticleIcons|ssbb=y}} | {{ArticleIcons|ssbb=y}} | ||
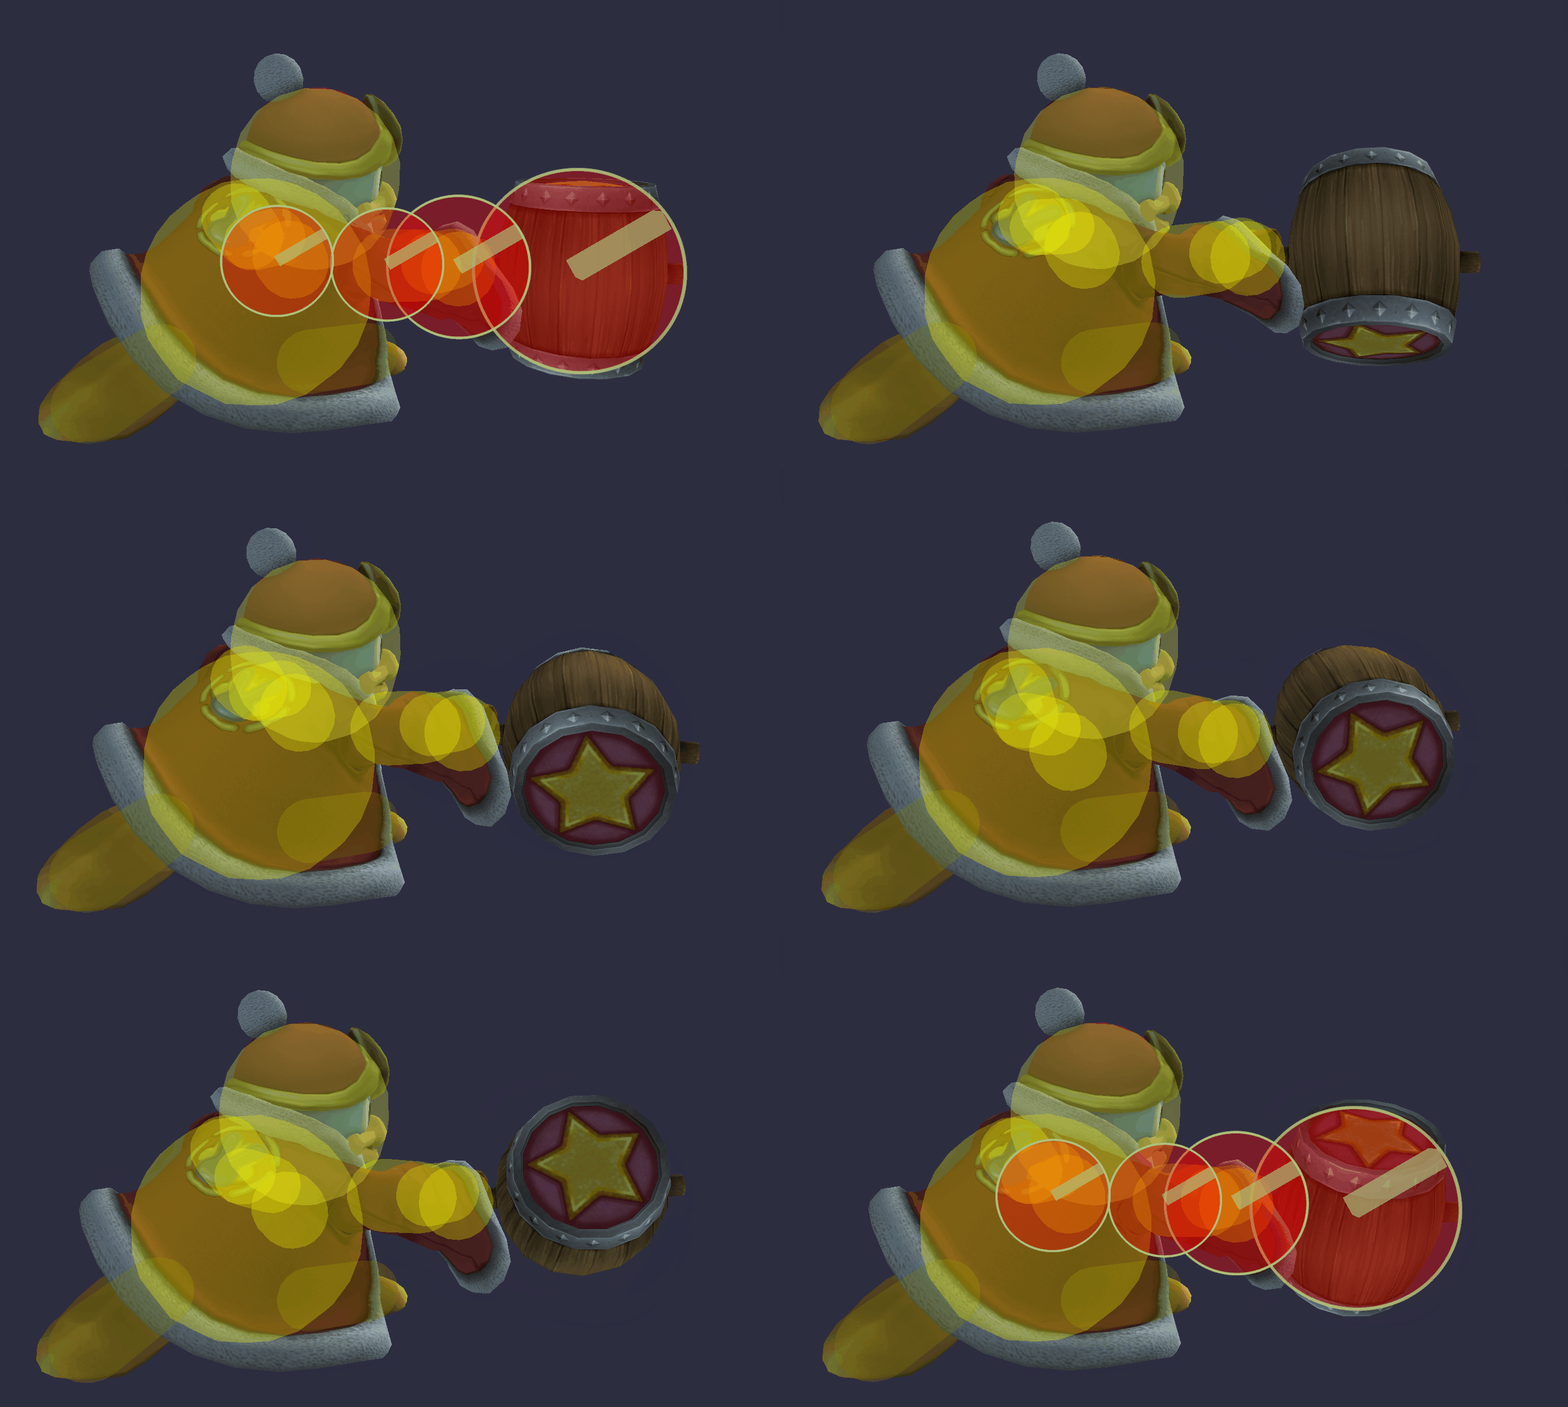
[[File:KingDededeJabRapidSSBB.gif|thumb|400px|Hitbox visualization showing King Dedede's neutral infinite.]] | |||
==Overview== | |||
{{SSBB|King Dedede}} twirls his hammer. While the multihits themselves are inconsistent, on [[shield]], the move is quite beneficial. Using the wide window to begin the rapid jab from the [[King Dedede (SSBB)/Neutral attack/Hit 2|second hit]] is also a decent way to force Dedede's way through shield. It's also -7 on shield, making this a relatively low-risk option to go for. Due to the high animation length overall, however, it's generally not good outside of this scenario, with [[King Dedede (SSBB)/Forward tilt|forward tilt]] almost always being a better option. | |||
==Hitboxes== | ==Hitboxes== | ||
{{ | {{BrawlHitboxTableHeader}} | ||
{{BrawlHitboxTableRow | |||
|bn=55 | |||
|id=0 | |||
|damage=2% | |||
|angle=30 | |||
|fkv=0 | |||
|ks=20 | |||
|sd=0 | |||
|bk=30 | |||
|r=240000 | |||
|xpos=-240000 | |||
|ypos=0 | |||
|zpos=0 | |||
|trip=0 | |||
|ff=60000 | |||
|sdi=60000 | |||
|rawflags=00111010110000110001111000000000 | |||
}} | |||
{{BrawlHitboxTableRow | |||
|bn=55 | |||
|id=1 | |||
|damage=2% | |||
|angle=30 | |||
|fkv=0 | |||
|ks=20 | |||
|sd=0 | |||
|bk=30 | |||
|r=240000 | |||
|xpos=240000 | |||
|ypos=0 | |||
|zpos=0 | |||
|trip=0 | |||
|ff=60000 | |||
|sdi=60000 | |||
|rawflags=00111010110000110001111000000000 | |||
}} | |||
{{BrawlHitboxTableRow | |||
|bn=55 | |||
|id=2 | |||
|damage=2% | |||
|angle=30 | |||
|fkv=0 | |||
|ks=20 | |||
|sd=0 | |||
|bk=30 | |||
|r=300000 | |||
|xpos=540000 | |||
|ypos=0 | |||
|zpos=0 | |||
|trip=0 | |||
|ff=60000 | |||
|sdi=60000 | |||
|rawflags=00111010110000110001111000000000 | |||
}} | |||
{{BrawlHitboxTableRow | |||
|bn=55 | |||
|id=3 | |||
|damage=2% | |||
|angle=30 | |||
|fkv=0 | |||
|ks=20 | |||
|sd=0 | |||
|bk=30 | |||
|r=420000 | |||
|xpos=1020000 | |||
|ypos=0 | |||
|zpos=0 | |||
|trip=0 | |||
|ff=60000 | |||
|sdi=60000 | |||
|rawflags=00111010110000110001111000000000 | |||
}} | |||
|} | |||
==Timing== | ==Timing== | ||
Animation length is only for the finisher. | Animation length is only for the finisher. | ||
Latest revision as of 23:07, May 21, 2024
Overview[edit]
King Dedede twirls his hammer. While the multihits themselves are inconsistent, on shield, the move is quite beneficial. Using the wide window to begin the rapid jab from the second hit is also a decent way to force Dedede's way through shield. It's also -7 on shield, making this a relatively low-risk option to go for. Due to the high animation length overall, however, it's generally not good outside of this scenario, with forward tilt almost always being a better option.
Hitboxes[edit]
Timing[edit]
Animation length is only for the finisher.
| Hitboxes | 7, 10, 13, 16, 19, 22, 25, 28, 31, 34, 37, 40, 43, 46 |
|---|---|
| Animation length | 12 |
Lag time |
Hitbox |
Loop point |
|
