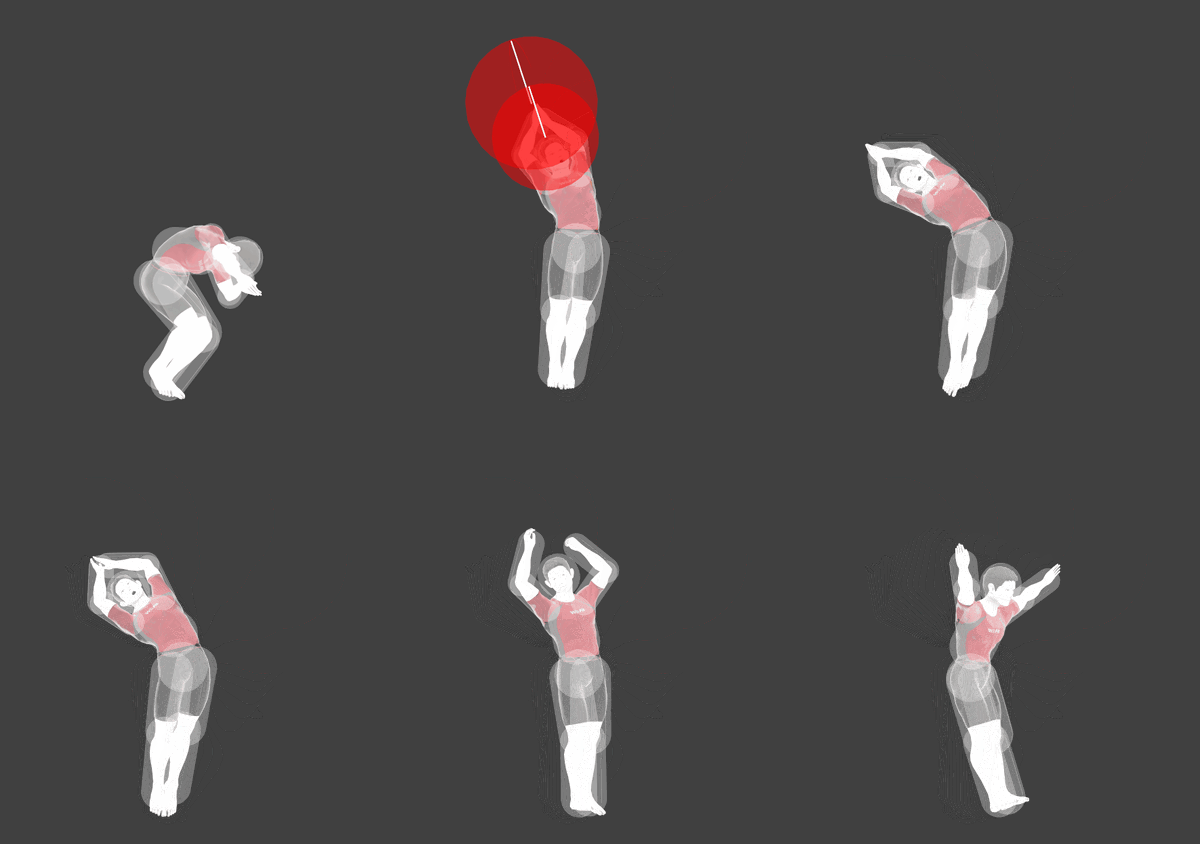
Wii Fit Trainer (SSBU)/Up aerial: Difference between revisions
m (Protected "Wii Fit Trainer (SSBU)/Up aerial": Bot: Protecting a list of files. ([Edit=Allow only autoconfirmed users] (indefinite) [Move=Allow only autoconfirmed users] (indefinite))) |
(→Timing) |
||
| (4 intermediate revisions by 4 users not shown) | |||
| Line 1: | Line 1: | ||
{{ArticleIcons|ssbu=y}} | {{ArticleIcons|ssbu=y}} | ||
[[File:WFT Up Air.gif|thumb|400px|Hitbox visualization showing Wii Fit Trainer's up aerial.]] | [[File:WFT Up Air.gif|thumb|400px|Hitbox visualization showing Wii Fit Trainer's up aerial.]] | ||
==Overview== | |||
Wii Fit Trainer performs the Half-Moon pose, clasping both hands above her head and bending sideways at the waist. Although up aerial has average [[KO]] and combo ability, its main strength comes from its surprisingly large disjoint and consequently huge coverage both horizontally and vertically. This strength allows the move to successfully challenge and beat out many aggressive landings, as well as [[shark]] extremely well at the ledge, to the point of being able to reach past other massive moves such as {{SSBU|Wolf}}'s down smash in many instances. On taller characters, landing up aerial can be used as a good combo starter at low percents, most notably leading into [[Header]] for massive damage at percents before neutral aerial into Header works. Funnily enough, up aerial's first active frame actually reaches significantly farther forward than Wii Fit Trainer's forward aerial, and as such can be used fairly well to catch opponents directly in front of her. Overall, up aerial doesn't have any glaring weaknesses; it's simply an all-around solid move with above average coverage that can help cover blindspots and secure kills at high percents. | |||
==Hitboxes== | ==Hitboxes== | ||
{{UltimateHitboxTableHeader}} | {{UltimateHitboxTableHeader}} | ||
{{UltimateHitboxTableRow | {{UltimateHitboxTableRow | ||
|id=0 | |id=0 | ||
|damage=10.0% | |damage=10.0% | ||
|angle=72 | |angle=72 | ||
| Line 19: | Line 20: | ||
|zpos=0.0 | |zpos=0.0 | ||
|type=Hand | |type=Hand | ||
|sfx=Punch | |sfx=Punch | ||
|slvl=M | |slvl=M | ||
| Line 26: | Line 25: | ||
{{UltimateHitboxTableRow | {{UltimateHitboxTableRow | ||
|id=1 | |id=1 | ||
|damage=10.0% | |damage=10.0% | ||
|angle=72 | |angle=72 | ||
| Line 38: | Line 36: | ||
|zpos=0.0 | |zpos=0.0 | ||
|type=Hand | |type=Hand | ||
|sfx=Punch | |sfx=Punch | ||
|slvl=M | |slvl=M | ||
| Line 54: | Line 50: | ||
|- | |- | ||
!Ending autocancel | !Ending autocancel | ||
|36 | |36- | ||
|- | |||
!Interruptible | |||
|40 | |||
|- | |- | ||
!Animation length | !Animation length | ||
| Line 72: | Line 71: | ||
|- | |- | ||
!Animation length | !Animation length | ||
| | |14 | ||
|} | |} | ||
{{FrameStripStart}} | {{FrameStripStart}} | ||
{{FrameStrip|t=Lag|c=9}}{{FrameStrip|t=Interruptible|c= | {{FrameStrip|t=Lag|c=9}}{{FrameStrip|t=Interruptible|c=5}} | ||
{{FrameStripEnd}} | {{FrameStripEnd}} | ||
Latest revision as of 15:24, July 27, 2022
Overview[edit]
Wii Fit Trainer performs the Half-Moon pose, clasping both hands above her head and bending sideways at the waist. Although up aerial has average KO and combo ability, its main strength comes from its surprisingly large disjoint and consequently huge coverage both horizontally and vertically. This strength allows the move to successfully challenge and beat out many aggressive landings, as well as shark extremely well at the ledge, to the point of being able to reach past other massive moves such as Wolf's down smash in many instances. On taller characters, landing up aerial can be used as a good combo starter at low percents, most notably leading into Header for massive damage at percents before neutral aerial into Header works. Funnily enough, up aerial's first active frame actually reaches significantly farther forward than Wii Fit Trainer's forward aerial, and as such can be used fairly well to catch opponents directly in front of her. Overall, up aerial doesn't have any glaring weaknesses; it's simply an all-around solid move with above average coverage that can help cover blindspots and secure kills at high percents.
Hitboxes[edit]
Timing[edit]
Attack[edit]
| Initial autocancel | 1-5 |
|---|---|
| Hitboxes | 6-10 |
| Ending autocancel | 36- |
| Interruptible | 40 |
| Animation length | 39 |
Landing lag[edit]
| Interruptible | 10 |
|---|---|
| Animation length | 14 |
Lag time |
Hitbox |
Autocancel |
Interruptible |
|
