Jigglypuff (SSBU)/Back aerial: Difference between revisions
From SmashWiki, the Super Smash Bros. wiki
Jump to navigationJump to search
m (Protected "Jigglypuff (SSBU)/Back aerial": Bot: Protecting a list of files. ([Edit=Allow only autoconfirmed users] (indefinite) [Move=Allow only autoconfirmed users] (indefinite))) |
|||
| (6 intermediate revisions by 3 users not shown) | |||
| Line 1: | Line 1: | ||
{{ArticleIcons|ssbu=y}} | {{ArticleIcons|ssbu=y}} | ||
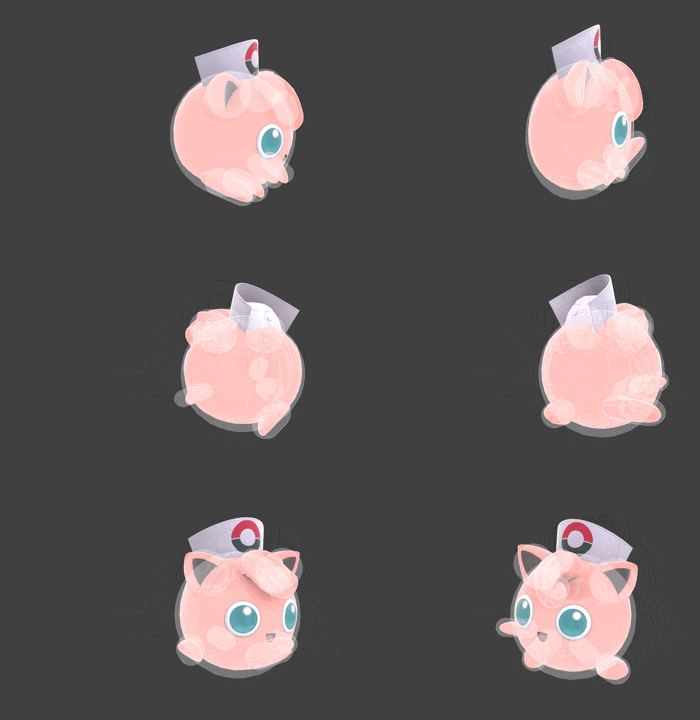
[[File:JigglypuffBAirSSBU.gif|thumb| | [[File:JigglypuffBAirSSBU.gif|thumb|350px|Hitbox visualization showing Jigglypuff's back aerial.]] | ||
{{competitive expertise}} | {{competitive expertise}} | ||
==Overview== | ==Overview== | ||
==Update History== | |||
'''{{GameIcon|ssbu}} {{SSBU|2.0.0}}''' | |||
*{{buff|Back aerial has less startup lag (frame 12 → 10) with its total duration (FAF 40 → 38) and late auto-cancel window (frame 28 → 26) subsequently reduced.}} | |||
'''{{GameIcon|ssbu}} {{SSBU|13.0.0}}''' | |||
*{{buff|Back aerial has less ending lag (FAF 38 → 36).}} | |||
*{{buff|Back aerial has less landing lag (11 frames → 8).}} | |||
==Hitboxes== | ==Hitboxes== | ||
{{UltimateHitboxTableHeader}} | {{UltimateHitboxTableHeader}} | ||
| Line 8: | Line 15: | ||
|id=0 | |id=0 | ||
|damage=13.0% | |damage=13.0% | ||
|af=3 | |||
|angle=42 | |angle=42 | ||
|bk=0 | |bk=0 | ||
| Line 27: | Line 35: | ||
|damage=13.0% | |damage=13.0% | ||
|angle=42 | |angle=42 | ||
|af=3 | |||
|bk=30 | |bk=30 | ||
|ks=120 | |ks=120 | ||
| Line 55: | Line 64: | ||
|- | |- | ||
!Ending autocancel | !Ending autocancel | ||
| | |26- | ||
|- | |- | ||
!Interruptible | !Interruptible | ||
| | |36 | ||
|- | |- | ||
!Animation length | !Animation length | ||
| Line 65: | Line 74: | ||
{{FrameStripStart}} | {{FrameStripStart}} | ||
{{FrameStrip|t=Lag|c=8|e=LagStateS}}{{FrameStrip|t=Lag|c=1|s=LagStateE}}{{FrameStrip|t=Hitbox|c=2}}{{FrameStrip|t=Lag|c= | {{FrameStrip|t=Lag|c=8|e=LagStateS}}{{FrameStrip|t=Lag|c=1|s=LagStateE}}{{FrameStrip|t=Hitbox|c=2}}{{FrameStrip|t=Lag|c=24}}{{FrameStrip|t=Interruptible|c=17}} | ||
|- | |- | ||
{{FrameStrip|t=Autocancel|c=3}}{{FrameStrip|t=Blank|c= | {{FrameStrip|t=Autocancel|c=3}}{{FrameStrip|t=Blank|c=22}}{{FrameStrip|t=Autocancel|c=27}} | ||
{{FrameStripEnd}} | {{FrameStripEnd}} | ||
===Landing lag=== | ===Landing lag=== | ||
{|class="wikitable" | {|class="wikitable" | ||
!Interruptible | |||
|9 | |||
|- | |||
!Animation length | !Animation length | ||
| | |20 | ||
|} | |} | ||
{{FrameStripStart}} | {{FrameStripStart}} | ||
{{FrameStrip|t=Lag|c= | {{FrameStrip|t=Lag|c=8}}{{FrameStrip|t=Interruptible|c=12}} | ||
{{FrameStripEnd}} | {{FrameStripEnd}} | ||
{{FrameIconLegend|lag=y|hitbox=y|autocancel=y|interruptible=y|state=y}} | {{FrameIconLegend|lag=y|hitbox=y|autocancel=y|interruptible=y|state=y}} | ||
Latest revision as of 08:54, June 7, 2022
Overview[edit]
Update History[edit]
 Back aerial has less startup lag (frame 12 → 10) with its total duration (FAF 40 → 38) and late auto-cancel window (frame 28 → 26) subsequently reduced.
 Back aerial has less ending lag (FAF 38 → 36).
 Back aerial has less landing lag (11 frames → 8).
Hitboxes[edit]
Timing[edit]
Attack[edit]
| Initial autocancel | 1-3 |
|---|---|
| Turnaround | 9 |
| Hitboxes | 10-11 |
| Ending autocancel | 26- |
| Interruptible | 36 |
| Animation length | 52 |
Landing lag[edit]
| Interruptible | 9 |
|---|---|
| Animation length | 20 |
Lag time |
Hitbox |
State change |
Autocancel |
Interruptible |
|

