[dismiss]
| Welcome to SmashWiki! Log in or create an account and join the community, and don't forget to read this first! |
| Notices |
|---|
| The Skill parameter has been removed from Smasher infoboxes, and in its place are the new "Best historical ranking" and "Best tournament result" parameters. SmashWiki needs help adding these new parameters to Smasher infoboxes, refer to the guidelines here for what should be included in these new parameters. |
| When adding results to Smasher pages, include each tournament's entrant number in addition to the player's placement, and use the {{Trn}} template with the matching game specified. Please also fix old results on Smasher pages that do not abide to this standard. Refer to our Smasher article guidelines to see how results tables should be formatted. |
| Check out our project page for ongoing projects that SmashWiki needs help with. |
Template:SSB4-U omega stage table: Difference between revisions
From SmashWiki, the Super Smash Bros. wiki
Jump to navigationJump to search
(To match the default table) Tag: Mobile edit |
mNo edit summary Tag: Undo |
||
| Line 20: | Line 20: | ||
|colspan=2|[[File:SSB4UBattlefieldOmega.jpg|150x80px|link=Big Battlefield]]<br>[[Big Battlefield]] Ω<br>{{symbol|ssb|20px}} | |colspan=2|[[File:SSB4UBattlefieldOmega.jpg|150x80px|link=Big Battlefield]]<br>[[Big Battlefield]] Ω<br>{{symbol|ssb|20px}} | ||
|colspan=2|[[File:SSB4 WII U Final-Destination.jpg|150x80px|link=Final Destination (SSB4)]]<br>{{SSB4|Final Destination}} Ω<br>{{symbol|ssb|20px}} | |colspan=2|[[File:SSB4 WII U Final-Destination.jpg|150x80px|link=Final Destination (SSB4)]]<br>{{SSB4|Final Destination}} Ω<br>{{symbol|ssb|20px}} | ||
|colspan=2|[[File:SSB4UMushroomKingdomUOmega.jpg|150x80px|link=Mushroom Kingdom U]]<br>[[Mushroom Kingdom U]] Ω<br>{{symbol| | |colspan=2|[[File:SSB4UMushroomKingdomUOmega.jpg|150x80px|link=Mushroom Kingdom U]]<br>[[Mushroom Kingdom U]] Ω<br>{{symbol|mario|20px}} | ||
|colspan=2|[[File:SSB4UMarioGalaxyOmega.jpg|150x80px|link=Mario Galaxy]]<br>[[Mario Galaxy]] Ω<br>{{symbol| | |colspan=2|[[File:SSB4UMarioGalaxyOmega.jpg|150x80px|link=Mario Galaxy]]<br>[[Mario Galaxy]] Ω<br>{{symbol|mario|20px}} | ||
|colspan=2|[[File:SSB4UMarioCircuit8Omega.jpg|150x80px|link=Mario Circuit (SSB4)]]<br><span style="font-size:95%">{{SSB4|Mario Circuit}} Ω</span><br>{{symbol| | |colspan=2|[[File:SSB4UMarioCircuit8Omega.jpg|150x80px|link=Mario Circuit (SSB4)]]<br><span style="font-size:95%">{{SSB4|Mario Circuit}} Ω</span><br>{{symbol|mario|20px}} | ||
|colspan=2|[[File:SuperMarioMakerOmegaWiiU.jpg|150x80px|link=Super Mario Maker]]<br><span style="font-size:90%">[[Super Mario Maker]] Ω</span> <small>(DLC)</small><br>{{symbol| | |colspan=2|[[File:SuperMarioMakerOmegaWiiU.jpg|150x80px|link=Super Mario Maker]]<br><span style="font-size:90%">[[Super Mario Maker]] Ω</span> <small>(DLC)</small><br>{{symbol|mario|20px}} | ||
|- | |- | ||
|colspan=2|[[File:SSB4UWoollyWorldOmega.jpg|150x80px|link=Woolly World]]<br>[[Woolly World]] Ω<br>{{symbol|yoshi|20px}} | |colspan=2|[[File:SSB4UWoollyWorldOmega.jpg|150x80px|link=Woolly World]]<br>[[Woolly World]] Ω<br>{{symbol|yoshi|20px}} | ||
| Line 39: | Line 39: | ||
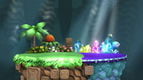
|colspan=2|[[File:SSB4UGardenOfHopeOmega.jpg|150x80px|link=Garden of Hope]]<br>[[Garden of Hope]] Ω<br>{{symbol|pikmin|20px}} | |colspan=2|[[File:SSB4UGardenOfHopeOmega.jpg|150x80px|link=Garden of Hope]]<br>[[Garden of Hope]] Ω<br>{{symbol|pikmin|20px}} | ||
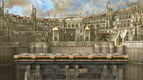
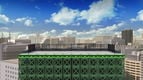
|colspan=2|[[File:SSB4UTown&CityOmega.jpg|150x80px|link=Town and City]]<br>[[Town and City]] Ω<br>{{symbol|ac|20px}} | |colspan=2|[[File:SSB4UTown&CityOmega.jpg|150x80px|link=Town and City]]<br>[[Town and City]] Ω<br>{{symbol|ac|20px}} | ||
|colspan=2|[[File:SSB4UBoxingRingOmega.jpg|150x80px|link=Boxing Ring]]<br>[[Boxing Ring]] Ω<br>{{symbol|po|20px}} | |||
|- | |||
|colspan=2|[[File:SSB4UWiiFitStudioOmega.jpg|150x80px|link=Wii Fit Studio]]<br>[[Wii Fit Studio]] Ω<br>{{symbol|wf|20px}} | |colspan=2|[[File:SSB4UWiiFitStudioOmega.jpg|150x80px|link=Wii Fit Studio]]<br>[[Wii Fit Studio]] Ω<br>{{symbol|wf|20px}} | ||
|colspan=2|[[File:SSB4UGaurPlainOmega.jpg|150x80px|link=Gaur Plain]]<br>[[Gaur Plain]] Ω<br>{{symbol|xb|20px}} | |colspan=2|[[File:SSB4UGaurPlainOmega.jpg|150x80px|link=Gaur Plain]]<br>[[Gaur Plain]] Ω<br>{{symbol|xb|20px}} | ||
|colspan=2|[[File:SSB4UDuckHuntStageOmega.jpg|150x80px|link=Duck Hunt (stage)]]<br>'''{{b|Duck Hunt|stage}}''' Ω<br>{{symbol|dh|20px}} | |colspan=2|[[File:SSB4UDuckHuntStageOmega.jpg|150x80px|link=Duck Hunt (stage)]]<br>'''{{b|Duck Hunt|stage}}''' Ω<br>{{symbol|dh|20px}} | ||
|colspan=2|[[File:SSB4UWindyHillZoneOmega.jpg|150x80px|link=Windy Hill Zone]]<br>[[Windy Hill Zone]] Ω<br>{{symbol|sonic|20px}} | |colspan=2|[[File:SSB4UWindyHillZoneOmega.jpg|150x80px|link=Windy Hill Zone]]<br>[[Windy Hill Zone]] Ω<br>{{symbol|sonic|20px}} | ||
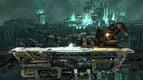
|colspan=2|[[File:SSB4UWilyCastleOmega.jpg|150x80px|link=Wily Castle]]<br>[[Wily Castle]] Ω<br>{{symbol|megaman|20px}} | |colspan=2|[[File:SSB4UWilyCastleOmega.jpg|150x80px|link=Wily Castle]]<br>[[Wily Castle]] Ω<br>{{symbol|megaman|20px}} | ||
|colspan=2|[[File:SSB4UPac-LandOmega.jpg|150x80px|link=Pac-Land]]<br>'''[[Pac-Land]]''' Ω<br>{{symbol|pacman|20px}} | |colspan=2|[[File:SSB4UPac-LandOmega.jpg|150x80px|link=Pac-Land]]<br>'''[[Pac-Land]]''' Ω<br>{{symbol|pacman|20px}} | ||
|colspan=2|[[File:SSB4USuzakuCastleOmega.jpg|150x80px|link=Suzaku Castle]]<br>[[Suzaku Castle]] Ω <small>(DLC)</small><br>{{symbol|sf|20px}} | |colspan=2|[[File:SSB4USuzakuCastleOmega.jpg|150x80px|link=Suzaku Castle]]<br>[[Suzaku Castle]] Ω <small>(DLC)</small><br>{{symbol|sf|20px}} | ||
|- | |||
| | |||
|colspan=2|[[File:Midgar Omega.JPG|150x80px|link=Midgar]]<br>[[Midgar]] Ω <small>(DLC)</small><br>{{symbol|ff|20px}} | |colspan=2|[[File:Midgar Omega.JPG|150x80px|link=Midgar]]<br>[[Midgar]] Ω <small>(DLC)</small><br>{{symbol|ff|20px}} | ||
|colspan=2|[[File:Umbra Clock Tower wii u omega.jpg|150x80px|link=Umbra Clock Tower]]<br><span style="font-size:85%">[[Umbra Clock Tower]] Ω</span> <small>(DLC)</small><br>{{symbol|bayonetta|20px}} | |colspan=2|[[File:Umbra Clock Tower wii u omega.jpg|150x80px|link=Umbra Clock Tower]]<br><span style="font-size:85%">[[Umbra Clock Tower]] Ω</span> <small>(DLC)</small><br>{{symbol|bayonetta|20px}} | ||
|colspan=2|[[File:SSB4UWreckingCrewOmega.jpg|150x80px|link=Wrecking Crew]]<br>[[Wrecking Crew]] Ω<br>{{symbol|wreckingcrew|20px}} | |||
|colspan=2|[[File:SSB4UPilotwingsOmega.jpg|150x80px|150x80px|link=Pilotwings]]<br>[[Pilotwings]] Ω<br>{{symbol|pw|20px}} | |||
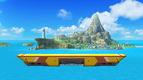
|colspan=2|[[File:SSB4UWuhuIslandOmega.jpg|150x80px|link=Wuhu Island]]<br>[[Wuhu Island]] Ω<br>{{symbol|wuhu|20px}} | |||
|colspan=2|[[File:MiiverseOmegaForm.jpg|150x80px|link=Miiverse]]<br>[[Miiverse]] Ω <small>(1.0.8)</small><br>{{symbol|miiverse|20px}} | |||
| | | | ||
|- | |- | ||
!colspan=14|Returning stages (21) | !colspan=14|Returning stages (21) | ||
|- | |- | ||
|colspan=2|[[File:WiiUPeach'sCastleOmega.jpg|150x80px|link=Peach's Castle]]<br>{{gameIcon|SSB}} <span style="font-size:72%">[[Peach's Castle|Peach's Castle (64)]] Ω</span> <small>(DLC)</small><br>{{symbol| | |colspan=2|[[File:WiiUPeach'sCastleOmega.jpg|150x80px|link=Peach's Castle]]<br>{{gameIcon|SSB}} <span style="font-size:72%">[[Peach's Castle|Peach's Castle (64)]] Ω</span> <small>(DLC)</small><br>{{symbol|mario|20px}} | ||
|colspan=2|[[File:SSB4UDelfinoPlazaOmega.jpg|150x80px|link=Delfino Plaza]]<br>{{gameIcon|SSBB}} [[Delfino Plaza]] Ω<br>{{symbol| | |colspan=2|[[File:SSB4UDelfinoPlazaOmega.jpg|150x80px|link=Delfino Plaza]]<br>{{gameIcon|SSBB}} [[Delfino Plaza]] Ω<br>{{symbol|mario|20px}} | ||
|colspan=2|[[File:SSB4UMarioCircuitOmega.jpg|150x80px|link=Mario Circuit (Brawl)]]<br>{{gameIcon|SSBB}} <span style="font-size:95%">[[Mario Circuit (Brawl)]] Ω</span><br>{{symbol| | |colspan=2|[[File:SSB4UMarioCircuitOmega.jpg|150x80px|link=Mario Circuit (Brawl)]]<br>{{gameIcon|SSBB}} <span style="font-size:95%">[[Mario Circuit (Brawl)]] Ω</span><br>{{symbol|mario|20px}} | ||
|colspan=2|[[File:SSB4ULuigisMansionOmega.jpg|150x80px|link=Luigi's Mansion]]<br>{{gameIcon|SSBB}} [[Luigi's Mansion]] Ω<br>{{symbol| | |colspan=2|[[File:SSB4ULuigisMansionOmega.jpg|150x80px|link=Luigi's Mansion]]<br>{{gameIcon|SSBB}} [[Luigi's Mansion]] Ω<br>{{symbol|mario|20px}} | ||
|colspan=2|[[File:SSB4UYoshisIslandOmega.jpg|150x80px|link=Yoshi's Island (SSBM)]]<br>{{gameIcon|SSBM}} {{SSBM|Yoshi's Island}} Ω<br>{{symbol|yoshi|20px}} | |colspan=2|[[File:SSB4UYoshisIslandOmega.jpg|150x80px|link=Yoshi's Island (SSBM)]]<br>{{gameIcon|SSBM}} {{SSBM|Yoshi's Island}} Ω<br>{{symbol|yoshi|20px}} | ||
|colspan=2|[[File:SSB4UKongoJungle64Omega.jpg|150x80px|link=Kongo Jungle (SSB)|Kongo Jungle 64]]<br>{{gameIcon|SSB}} '''[[Kongo Jungle 64]]''' Ω<br>{{symbol|dk|20px}} | |colspan=2|[[File:SSB4UKongoJungle64Omega.jpg|150x80px|link=Kongo Jungle (SSB)|Kongo Jungle 64]]<br>{{gameIcon|SSB}} '''[[Kongo Jungle 64]]''' Ω<br>{{symbol|dk|20px}} | ||
Revision as of 00:22, December 22, 2022
| New stages (34) | |||||||||||||
|---|---|---|---|---|---|---|---|---|---|---|---|---|---|
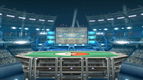
 Battlefield Ω |
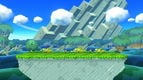
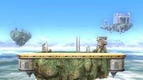
Big Battlefield Ω |
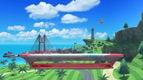
 Final Destination Ω |
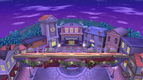
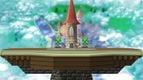
 Mushroom Kingdom U Ω |
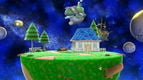 Mario Galaxy Ω |
 Mario Circuit Ω |
 Super Mario Maker Ω (DLC) | |||||||
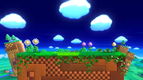
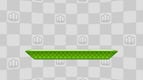
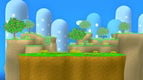
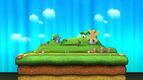 Woolly World Ω |
 Jungle Hijinxs Ω |
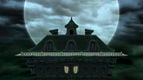
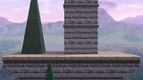
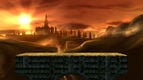
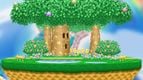
 Skyloft Ω |
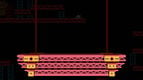
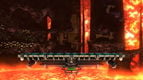
 Pyrosphere Ω |
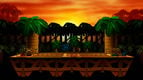
 The Great Cave Offensive Ω |
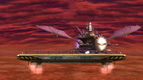
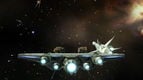
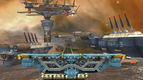
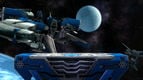 Orbital Gate Assault Ω |
 Kalos Pokémon League Ω | |||||||
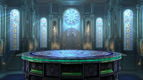
 Coliseum Ω |
 Flat Zone X Ω |
 Palutena's Temple Ω |
 Gamer Ω |
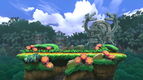
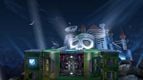
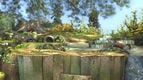 Garden of Hope Ω |
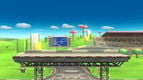
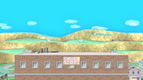
 Town and City Ω |
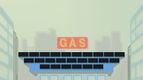
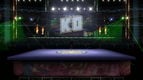 Boxing Ring Ω | |||||||
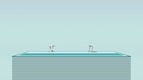 Wii Fit Studio Ω |
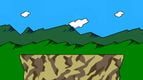
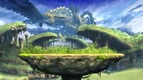 Gaur Plain Ω |
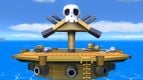
 Duck Hunt Ω |
 Windy Hill Zone Ω |
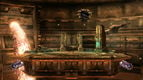
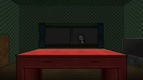
 Wily Castle Ω |
 Pac-Land Ω |
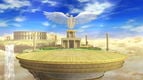
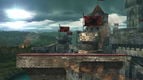
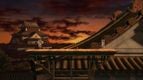 Suzaku Castle Ω (DLC) | |||||||
 Midgar Ω (DLC) |
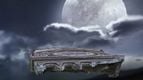 Umbra Clock Tower Ω (DLC) |
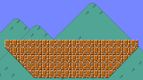
 Wrecking Crew Ω |
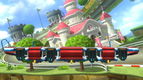
 Pilotwings Ω |
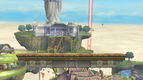
 Wuhu Island Ω |
 Miiverse Ω (1.0.8) |
||||||||
| Returning stages (21) | |||||||||||||
 |
 |
 |
 |
 |
 |
 | |||||||
 |
 |
 |
 |
 |
 |
 | |||||||
 |
 |
 |
 |
 |
 |
 | |||||||
Bold denotes unlockable stages.
