Ness (SSB)/Down special
Overview
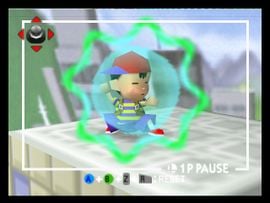
Ness' down special move in Super Smash Bros. is Psychic-Magnet, a projectile absorbing move that involves Ness putting a green-hued ball around himself on all sides. Energy projectile attacks, such as Fox's blaster or the effects of the Ray Gun will be absorbed by the move, healing Ness two times the damage of said move, rounded up. It can't, however, absorb projectiles that aren't energy-based such as Link's Boomerang or Bomb. Whenever Ness successfully absorbs an attack, there is a unique crowd applause that is heard.
Competitive Play and Advanced Techniques
Competitively, the move is rarely used for its original purpose. This is because the move, despite its moderate startup lag, has very high ending lag, which increases even more when Ness successfully absorbs an attack, making it quite punishable. However, due to its healing properties, it is quite useful in teams, especially on Hyrule Castle. This was made most notable by the team of Nintendude and Firo, using Fireballs and PSI Magnet respectably, or with other top Ness mains with Fox as teammates.
There is also a technique called Magnet Cancel, sometimes called Magnet Ledge-Cancel, which involves using PSI Magnet while jumping over the ledge of a stage. This cancels the ending lag, allowing Ness to quickly regrab. This is a stalling technique, making Ness's otherwise bad getup better. It also grants brief extra invincibility, and if used with perfect timing, it is possible to edgeguard using it. However, if the opponent fires a projectile at Ness while trying to Magnet Cancel, Ness will absorb the move and will be unable to stall as the ending animation is forced to occur. This sets up a free edgeguard scenario.
Timing
| Absorbs | 15-[(release*10)+20] |
|---|---|
| Animation length | [(release*10)+65] |
Lag time |
Loop point |
Absorb |
Properties
| Absorption radius | 450u |
|---|---|
| Absorption multiplier | 2.0x |
| Absorption lag | 24 |
