From SmashWiki, the Super Smash Bros. wiki

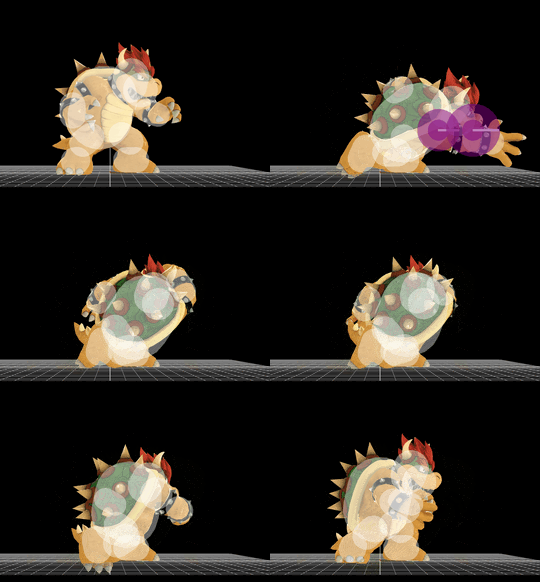
Hitbox visualization showing Bowser's grounded Flying Slam.

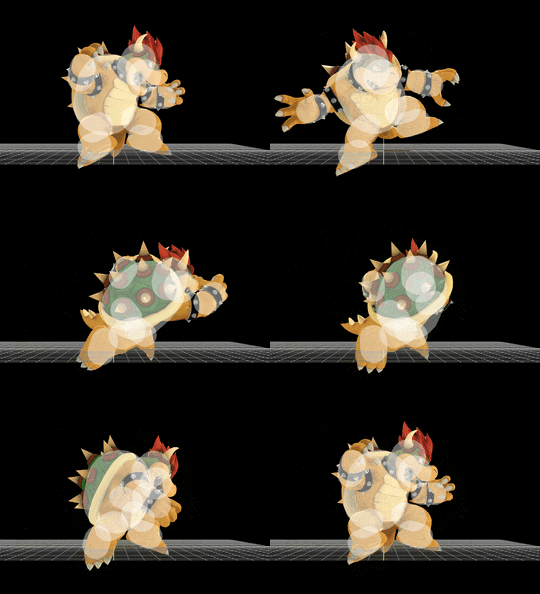
Hitbox visualization showing Bowser's aerial Flying Slam.

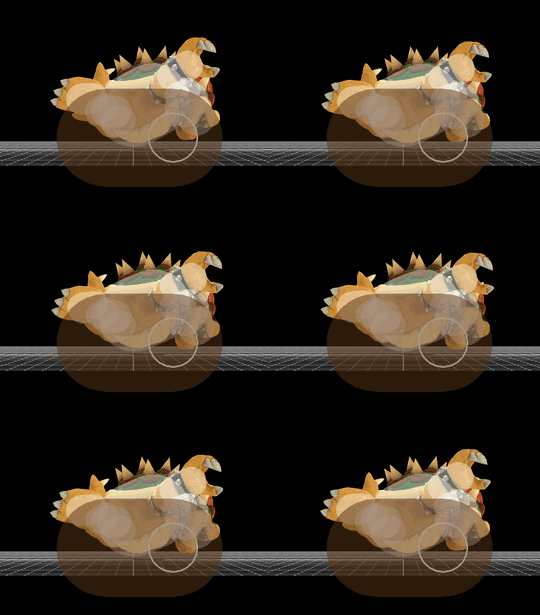
Hitbox visualization showing Bowser's Flying Slam's collateral.

|
This article or section may require additional technical data.
You can discuss this issue on the talk page or edit this page to improve it.
|
Overview
Bowser swings his arm in front of him to grab an opponent. The move is one of Bowser's best neutral options due to its property of being able to auto-cancel upon landing. This allows him to have tricky movement and to end the lag of his bulky aerials, which alleviate Bowser's weaknesses in having to land with the long end lag of his moves. Besides its utility in the neutral, the move boasts as a powerful KO option and can KO opponents at medium-high percents with rage when used on the top platform of common stages such as Battlefield and Smashville.
The move provides enough pressure to force the opponent to consider whether or not to shield or to jump. It's a powerful alternative to Bowser's already strong grab and grab game, and due to the move's knockback sending at an upward angle, it can DI mixup an opponent as if they hold in, they do to the top, and if they hold out, they die straight to the side, forcing the opponent to DI down and away, sending them offstage for an edgeguard. It also puts them in the air, giving more opportunity to pressure the opponent and juggle them.
Update history
 1.0.4
1.0.4
 Sacrificial KOs using Flying Slam now KO Bowser first instead of the opponent. When Bowser is KO'd, the opponent is released from the grab, potentially allowing them to recover back onto the stage.
 1.0.6
1.0.6
 Bowser has more control over Flying Slam's trajectory.
 1.1.3
1.1.3
 Flying Slam's grab to slam transition speed increased. This makes it function similarly to how it did in Brawl.
 All variations of Flying Slam now have invincibility frames before Bowser leaves the ground.
 1.1.4
1.1.4
 All variations of Flying Slam's grab range increased.
 Ground Hand Hitbox Size: 4/3 → 5/4.
 Large Hitbox X Position: 17 → 17.5.
 Ground to Air Hand Hitbox: 1/1 → 2/2.
 Outer Hitbox X Position: 17 → 17.5.
 Air Hand Hitbox: 5/3.5 → 6/4.5.
 Large Hitbox X Position: 15 → 15.5.
Hitboxes
Ground Grab
| ID |
Radius |
Bone |
Offset |
Stretch |
G |
A
|
| 0 |
5.0 |
0 |
0.0 |
8.0 |
17.5 |
— |
 |

|
| 1 |
4.0 |
0 |
0.0 |
8.0 |
11.0 |
— |
 |

|
| 2 |
2.0 |
0 |
0.0 |
8.0 |
17.5 |
— |
 |

|
| 3 |
2.0 |
0 |
0.0 |
8.0 |
11.0 |
— |
 |

|
Air Grab
| ID |
Radius |
Bone |
Offset |
Stretch |
G |
A
|
| 0 |
6.0 |
0 |
0.0 |
8.0 |
15.5 |
— |
 |

|
| 1 |
4.5 |
0 |
0.0 |
8.0 |
10.0 |
— |
 |

|
Throw
| ID |
Damage |
Angle |
BK |
KS |
FKV |
Bone |
FFx |
Type |
Effect |
Sound
|
| 0 |
18% |
 |
Forwards |
80 |
60 |
0 |
0 |
None |
 |
 |
 None None
|
| 1 |
5% |
 |
Forwards |
60 |
30 |
0 |
0 |
None |
 |
 |
 None None
|
Collateral
| ID |
Part |
Damage |
SD |
Angle |
BK |
KS |
FKV |
Radius |
Bone |
Offset |
SDIx |
H× |
T% |
Clang |
Rebound |
Type |
Effect |
G |
A |
Sound |
Direct |
Stretch
|
| 0 |
0 |
15% |
1 |
 |
80 |
80 |
0 |
8.0 |
0 |
0.0 |
2.0 |
6.5 |
1x |
1x |
0% |
 |
 |
 |
 |
 |
 |
 Kick Kick |
 |
0.0 |
2.0 |
-4.5
|
 Sacrificial KOs using Flying Slam now KO Bowser first instead of the opponent. When Bowser is KO'd, the opponent is released from the grab, potentially allowing them to recover back onto the stage.
 Bowser has more control over Flying Slam's trajectory.
 Flying Slam's grab to slam transition speed increased. This makes it function similarly to how it did in Brawl.
 All variations of Flying Slam now have invincibility frames before Bowser leaves the ground.
 All variations of Flying Slam's grab range increased.
 Ground Hand Hitbox Size: 4/3 → 5/4.
 Large Hitbox X Position: 17 → 17.5.
 Ground to Air Hand Hitbox: 1/1 → 2/2.
 Outer Hitbox X Position: 17 → 17.5.
 Air Hand Hitbox: 5/3.5 → 6/4.5.
 Large Hitbox X Position: 15 → 15.5.