| Welcome to SmashWiki! Log in or create an account and join the community, and don't forget to read this first! |
| Notices |
|---|
| The Skill parameter has been removed from Smasher infoboxes, and in its place are the new "Best historical ranking" and "Best tournament result" parameters. SmashWiki needs help adding these new parameters to Smasher infoboxes, refer to the guidelines here for what should be included in these new parameters. |
| When adding results to Smasher pages, include each tournament's entrant number in addition to the player's placement, and use the {{Trn}} template with the matching game specified. Please also fix old results on Smasher pages that do not abide to this standard. Refer to our Smasher article guidelines to see how results tables should be formatted. |
| Check out our project page for ongoing projects that SmashWiki needs help with. |
List of meteor smashes (SSBB): Difference between revisions
| Line 340: | Line 340: | ||
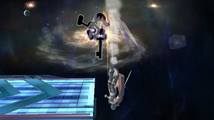
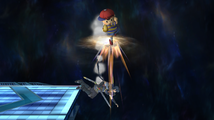
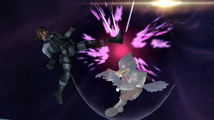
*[[Green Greens]] - If a player touches a bomb block from below, they will be knocked downwards. | *[[Green Greens]] - If a player touches a bomb block from below, they will be knocked downwards. | ||
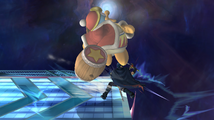
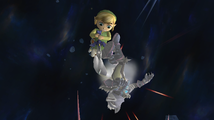
*[[Jungle Japes]] - If a player touches a Klaptrap, they are powerfully meteor smashed. | *[[Jungle Japes]] - If a player touches a Klaptrap, they are powerfully meteor smashed. | ||
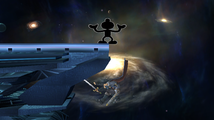
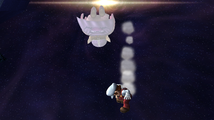
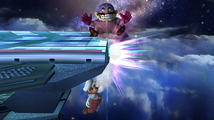
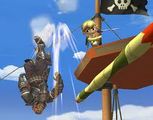
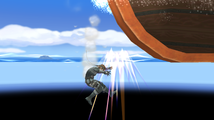
*[[Pirate Ship]] - If a player touches the bottom of the front end of the ship, they will be meteor smashed with [[OHKO]] power. | *[[Pirate Ship]] - If a player touches the bottom of the front end of the ship, they will be meteor smashed with [[OHKO]] power. [http://www.youtube.com/watch?v=IpeG2sgocI4&t=32s Going under the boat itself using Pikachu's Quick Attack will also meteor smash in the same way]. | ||
<center> | <center> | ||
<gallery widths="250"> | <gallery widths="250"> | ||
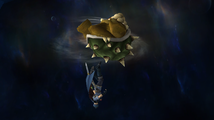
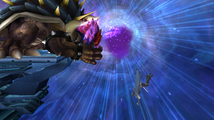
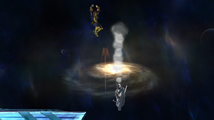
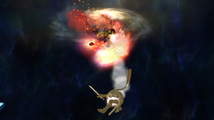
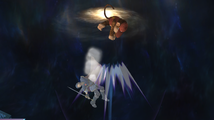
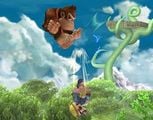
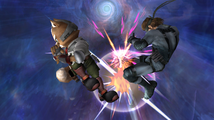
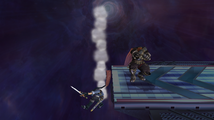
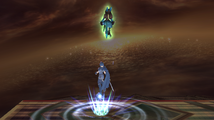
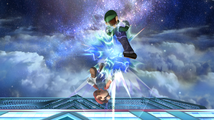
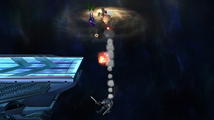
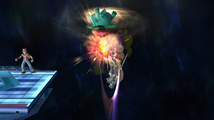
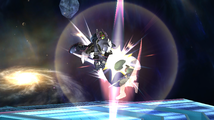
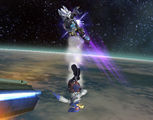
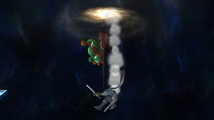
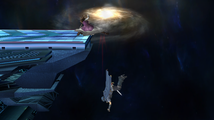
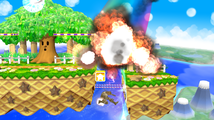
File:Green Greens Meteor Smash Brawl.png|In Green Greens. | File:Green Greens Meteor Smash Brawl.png|In Green Greens. | ||
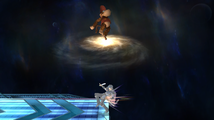
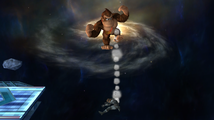
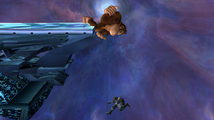
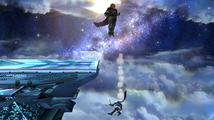
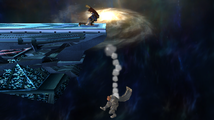
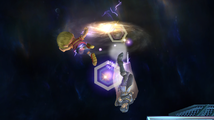
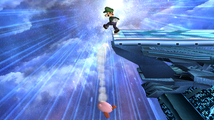
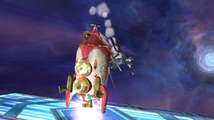
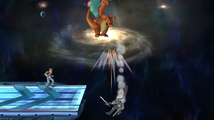
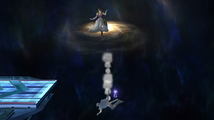
File:Jungle Japes Klaptrap Meteor Smash Brawl.png|Meteor smashed by the Klaptrap. | File:Jungle Japes Klaptrap Meteor Smash Brawl.png|Meteor smashed by the Klaptrap. | ||
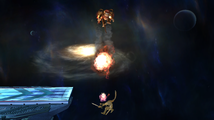
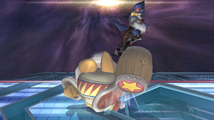
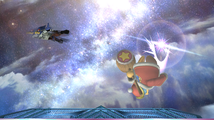
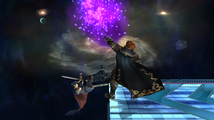
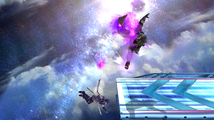
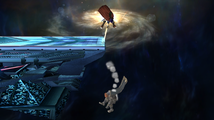
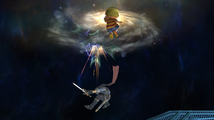
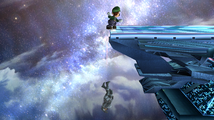
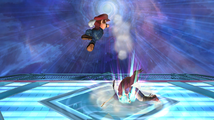
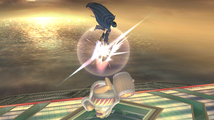
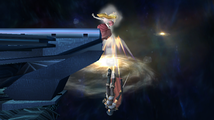
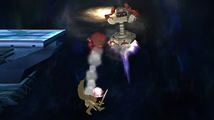
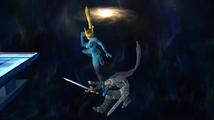
File:Pirate Ship Meteor Smash Brawl.png | File:Pirate Ship Meteor Smash Brawl.png| | ||
</gallery> | </gallery> | ||
</center> | </center> | ||
Revision as of 17:10, August 31, 2013
This is a list of meteor smashes in Super Smash Bros. Brawl.
Characters who have an attack with a meteor smash hitbox are listed here, along with each attack. The thrown Pitfall, a falling Warp Star, Moltres's body, Metagross, Lakitu's Spinys, Deoxys (when it is ascending), Ho-Oh's Sacred Fire and Waluigi's stomp also have this effect. Semi-spikes are not included in this list. No spikes are currently known in Brawl, so all meteors can be cancelled. However, meteor cancelling is not possible when meteor smashed while swimming. Also, meteor smashes can cause tripping on grounded opponents if their damage was too low to produce knockback.
Compared to Melee, meteor smashes are more difficult to land in general in Brawl, due to the physic changes and altered ledge physics significantly aiding recovering players. However, meteor cancelling was altered to be more difficult to perform, and some time must pass now before it can be performed, instead of being performable the instant a player is meteored. As such, while more difficult to land, meteor smashes are significantly more effective when landed in Brawl.
While the Footstool Jump is claimed to be a meteor smash on the Smash Bros. DOJO!!, it does not actually function as one, instead having its own unique mechanics that differ from a meteor smash's. As such, there are still characters in Brawl who lack access to a true meteor smash.
List
Bowser
- Down tilt as Giga Bowser - Sweeps twice with his claws along the ground. Only the first hit meteor smashes, however the first hit is strong enough that airborne opponents aren't dragged into the second hit.
- Down aerial - Only if the final hit is sweetspotted. One of the most impractical meteors in Brawl, as it is extremely weak and difficult to land. Its high ending lag and Bowser's relatively poor recovery also makes it difficult to recover from. Bowser is generally better off using his other, much better and safer edgeguard options.
Captain Falcon
- Down aerial - Captain Falcon's classic stomp, but it will only meteor smash if the opponent is directly underneath him. If they are hit with the upper hitboxes, they will be knocked horizontally, which means that the nipple spike has been removed from Brawl. It is weaker than it was in Melee, along with smaller hitboxes that have shorter duration, which makes it more difficult to land and generally less effective. It has especially low base knockback, so it cannot effectively meteor smash at low damages, but despite the power nerf its knockback scaling is still very high, so landing it offstage at high damages will usually result in a KO.
- Raptor Boost - If used in the air, Captain Falcon will leapfrog over the opponent, thrusting them downwards and himself to safety. This is generally not a safe maneuver, being impractical for edge-guarding purposes, unless when used as a recovery. The meteor smash has high base knockback, enough so that it can KO or gimp if the opponent does not successfully meteor cancel, but its low knockback scaling allows opponents to recover from it at even high percentages if they meteor cancel. Regardless, it is an effective counter edge-guard option against careless edge-guarders. It is much less risky than in Melee because it allows Captain Falcon to leapfrog over anyone it hits, and grab onto ledges.
Diddy Kong
- Down aerial - Diddy Kong thrusts both fists under him, meteor smashing the opponent. It is a fast meteor with above average power, but it can be difficult to land as it has a small hitbox. It is similar to Wolf's down aerial in animation, but stronger with a smaller hitbox.
- Monkey Flip - When he catches the opponent and jumps, the opponent is meteor smashed very weakly.
- Rocketbarrel Boost - If an opponent is hit with this while directly under the barrels, they are meteor smashed weakly.
Donkey Kong
- Down aerial - Donkey Kong stomps beneath him while making a tough guy pose, meteor smashing any opponent powerfully. It has a large hitbox and will always meteor smash, but has slow start-up and risky ending lag. Regardless, it is considered the best and most reliable of his three meteor smashes, and is one of the most effective meteor smashes in Brawl.
- Forward aerial - Donkey Kong swings his fists together in an arc. It hits between frames 25 and 28, with frames 27 and 28 being a meteor smash. It is slightly weaker than his down aerial but is still powerful. While it has good horizontal reach, it still has very slow start-up and ending lag, but Brawl's physics make it a less risky meteor to attempt than it was in Melee. If the non-meteor smash hitbox is landed, it instead hits the opponent horizontally with very powerful horizontal knockback.
- Headbutt - If this hits an aerial opponent and makes contact when the head is near the bottom, rather than embedding them in the ground, it launches them downwards weakly. It is generally too weak and difficult to land to be useful for edge-guarding purposes however.
Falco
- Down aerial - Falco does a drill kick, meteor smashing powerfully during its initial hitboxes. Start-up lag wise, it is the fastest meteor smash in Brawl, having a start-up of only five frames. Considered to be one of the best meteor smashes in Brawl, as its extremely fast start-up that doesn't require the landing of specific hitboxes (like Marth's down aerial) makes it much easier to land than other meteor smashes, while still having the power to be effective. It is especially effective at landing quick meteor smashes near the ledge and meteor smashing opponents recovering high (due to Falco's high jumping prowess). Like the other meteors that were spikes in Melee, it additionally sends opponents at a slight diagonal angle instead of straight down. Due to Falco's lackluster recovery and its rather high duration, this attack is a moderate risk to use offstage. The move only meteor smashes during its initial hitboxes; landing the later hitboxes hits the opponent away with weak horizontal knockback. The move also has low base knockback, which prevents it from KOing or gimping most characters at low percents (it has high knockback scaling though to be effective at higher percents).
- Falco Phantasm - When used while Falco is airborne, it meteor smashes airborne opponents it connects with. However, unless used as a recovery, this is an impractical edge-guarding maneuver that will result in a self-destruct under normal circumstances. It is very weak as well (in both base knockback and knockback scaling), generally only succeeding at successfully KOing/gimping an opponent when they are at very high damage and were caught offguard or have a poor vertical recovery.
Fox
- Down aerial - Fox performs a drilling kick downwards, being an extremely weak drill meteor smash. Like the other meteors that were spikes in Melee, this sends opponents at a slight diagonal angle instead of straight down, but this is hardly noticeable due to its extremely weak knockback. However, it does have fast start-up lag, and can "drag" opponents down, but due to its long duration and Fox's high falling speed, this attack is risky to use for edgeguarding, and can only really be used to gimp low recovering opponents who have a poor vertical recovery.
Ganondorf
- Down aerial - Ganondorf performs a mighty stomp downwards, and anyone caught in the stomp is electrocuted and sent flying downward if they are in the air, regardless of how it connects. It has rather low ending lag in the air, making it easy to recover from (just like it was in Melee), but it has slow start-up and high landing lag. It is still the most powerful meteor smash in the game and is still the only meteor that reliably KOs grounded opponents under 100%. It is also the most powerful aerial attack in Brawl when it hits an airborne opponent (like in Melee, there are very few aerials that hit grounded opponents harder, such as Link's sweetspotted down aerial). It is one of the few meteors capable of meteor smashing at 0% with its very high base knockback, and is a highly effective meteor smash when meteor smashing opponents recovering from below. Ganondorf's down aerial is most notable for its extremely high knockback scaling (which ensures KOs for opponents who are even just slightly damaged), which is equal to Ike's uncharged forward smash.
- Flame Choke - Ganondorf lifts his opponent by the head and launches them directly into the ground. If it is used over a ledge, they are sent downwards very weakly, and will grab any ledge which can be grabbed at any percentages, as it has set knockback.
- Wizard's Foot - A stall-then-fall. If used in the air, the first few frames of this move meteor smashes airborne opponents. While it is one of the most powerful meteor smashes in Brawl, with very high base knockback and knockback scaling, it is difficult to use without self-destructing, due to its high duration, high ending lag, and the fact it puts Ganondorf in a fastfall at the end of the move. Mostly inferior to the down aerial meteor as it is weaker, generally more difficult to land, and much more difficult to recover from. Like the other meteors that were spikes in Melee, this sends opponents at a slight diagonal angle instead of straight down. It is notable for being the strongest meteor smash in Brawl with a diagonal trajectory.
- Beast Ganon (Final Smash) - If Ganondorf stuns his opponent, but does not hit them, they will be launched straight down. Usually only performable if the opponent is on the ledge. When items are counted, it has the highest base knockback of any meteor smash in Brawl, having a monstrous knockback velocity of 6207 at 0% (which is OHKO power).
Ice Climbers
- Forward aerial - The Ice Climbers swing their hammers in an arc. While it is a powerful meteor smash, only Nana's hit can meteor smash. Therefore, the forward aerial is unable to meteor smash as a solo climber.
Ike
- Down tilt - Ike crouches and sweeps his blade forward along the ground. It is a very strong meteor smash with good reach, yet it has slow start-up and ending lag. It is by far the strongest tilt meteor smash with very high base knockback and high knockback scaling, and it is overall one of the strongest meteor smashes in Brawl. If it hits the opponent with the handle, it sends them horizontally instead but with the same power as the meteor hitbox, making it still deadly to recovering opponents. While it will usually result in a KO if it lands on an offstage opponent, it is difficult to hit with due to the aforementioned lag issues and its lack of vertical reach, which is exacerbated by Brawl's ledges.
- Down aerial - Ike thrusts his blade below him. The entirety of the blade meteor smashes anyone very powerfully who is hit at the initial thrust, though landing its later hitboxes will hit the opponent vertically with less power. It has slow start-up lag, with heavy ending and landing lag, but has a long, disjointed hitbox, that reaches far downward. It is the second or third strongest meteor smash in Brawl depending on the situation (aerial Wizard's Foot is stronger below 100% and reaches fatal knockback at a lower percent, but Ike's dair is stronger above 100% and can KO grounded opponents faster). Its power is capable of star KOing grounded opponents well under 150%, as it has high base knockback and very high knockback scaling. When edge-guarding, it's one of the more effective meteor smashes, with its power and reach, but it carries some risk with its high ending lag and Ike's subpar recovery.
- Aether - Meteor smashes airborne opponents with the downwards slash, similar to Kirby's Final Cutter. Unlike Final Cutter, it does not have set knockback, but its knockback scaling is near nonexistent, making it an ineffective meteor smash at even high percentages if the opponent is not near the lower blast line. Its high base knockback can allow it to gimp though if it catches an opponent at stage level or below. By using a "reverse Aether", a player can edgeguard with it by using Aether near the ledge while facing away; this allows Ike to cover some area offstage while grabbing the ledge prevents the landing hit of Aether (which otherwise cancels the meteor smash) from occurring.
King Dedede
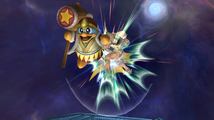
- Super Dedede Jump - Meteor smashes airborne opponents when falling down. It is a very powerful meteor however, with especially high base knockback, that can easily KO a careless edge-guarder if it lands. It's impractical however for edge-guarding purposes, due to ensuring a self-destruct under normal circumstances if used for such purposes, and the fact the move takes so long to perform.
Kirby
- Down aerial - Kirby does a drill kick downwards. A very weak drill meteor smash. Kirby can fastfall while using this move to "drag" the opponent down with him, increasing the meteor smash's effectiveness. It's one of the more effective meteor smashes in Brawl despite its lack of power, as it has respectable start-up lag and hitbox size for a meteor, and Kirby can perform multiple meteor smashes on a recovering opponent and still recover safely, or perform a footstool jump after landing the meteor which usually results in a KO. It's especially effective at meteor smashing opponents recovering from below, where its hitbox size and long duration makes it difficult for vertically recovering characters to avoid. Due to its lack of power however, it's ineffective at edge-guarding characters with long distanced vertical recoveries, and it can't effectively edge-guard characters recovering high.
- Final Cutter - This move meteor smashes airborne opponents with the downwards slash. Mostly it combos someone into the shock wave, but it can be used on the edge to meteor smash. It has very high base knockback, which can allow it to KO and gimp if landed below the stage, but it has set knockback, making it ineffective at any percent if not landed near the bottom blast line or on a character with an especially poor vertical recovery. It can be used to counter edge-guard if it catches an opponent on a ledge, or as a suicide move to get some near the bottom of the screen.
Link
- Down tilt - Link sweeps his sword along the ground, meteor smashing when sweetspotted. It has extremely high base knockback, enough to possibly KO or gimp at 0%, along with sending the opponent on a slight diagonal trajectory. However, it has very low knockback scaling, allowing characters with good vertical recoveries to survive it up to high percents. It is also extremely difficult to land due to its hitbox being much smaller than the non-meteor smashing hitboxes, and its unintuitive location being near the hilt of the sword. Besides requiring very specific spacing to land, it can really only potentially hit offstage opponents who are hanging on the ledge. The extreme difficulty and limitation in landing it, along with the non-meteor smashing hitboxes hitting vertically, make the move impractical for edge-guarding.
- Link Down Tilt Meteor Smash Brawl.png
Down tilt.
Lucario
- Aura Storm - As Lucario flies up to perform Aura Storm, any opponent who overlaps his body will be meteor smashed. It has set knockback, though the knockback is still affected by Aura.
Lucas
- Back aerial - Lucas sweeps a downwards arc behind him with his legs, accompanied by PSI Hexagons. The hexagons are the sweetspot and send the opponents flying away, but only the tip of his foot will meteor smash. The meteor smash has only slightly above average power even when sweetspotted, with its below average base knockback preventing it from KOing/gimping early, and its only above average knockback scaling allowing opponents to survive it at even high damage. It is also very difficult to land, with its meteor smashing hitboxes being small and existing only during a very short portion of the move. The angle at which the opponent is sent downwards (possible deviation of about 20 degrees to either side) is also hard to predict, and this may cause the opponent to get smashed down onto the stage if the meteor smash is performed near the edge.
- Down aerial - Lucas stomps downwards four times with four PSI Hexagons. The first three hits have little vertical knockback while the fourth hit weakly meteor smashes. When sourspotted, it instead produces weak horizontal knockback instead. With extremely low base knockback and very low knockback scaling, the move cannot potentially KO or gimp until very high damages. The move's long duration combined with Lucas' long recovery also makes the move risky to use offstage.
Luigi
- Down tilt - Luigi pokes his foot out while crouching. Airborne opponents must be directly under Luigi in order to be meteor smashed; the primary part of the attack (Luigi's foot) only meteor smashes on grounded opponents. It's mostly impractical for edge-guarding, having very weak knockback (in both base knockback and knockback scaling), preventing it from effectively KOing or gimping, and its poor reach and specific spacing making it really only possible to land on offstage opponents who are hanging on the ledge.
- Down aerial - Luigi performs a quick drill kick, with a meteor smash hitbox being on Luigi's body. It is a meteor smash with slightly above average power, with low base knockback (preventing it from KOing and gimping at low damages), but rather high knockback scaling. Just like in Melee, it is especially difficult to land, as the meteor smashing hitbox is not overlapped by the other hitboxes only in a small location on Luigi's backside. It does have fast start-up lag however, with low ending lag, making the move generally unrisky to use offstage. Just like in Melee, not landing the meteor smash hitbox still sends the opponent on a horizontal trajectory at the same power, making it useful for edgeguarding even if the meteor smash hitbox is not landed (though the move is considerably weaker in Brawl).
- Down Taunt - Luigi kicks his foot into the ground, producing a very small hitbox on his foot just like in Melee (one of the only two taunts in Brawl that have a damaging hitbox). If it hits an opponent, it will meteor smash them with immense set knockback. Even though its knockback is set, its base knockback is so high it can effectively KO and gimp any offstage opponent it hits regardless of damage (it is in fact the strongest meteor smash at 0% in Brawl when items are not counted). While potentially lethal, the move still has very slow start-up lag, which when combined with its extremely limited reach that can only hit offstage opponents that are hanging on the ledge, it's about impossible to successfully edge-guard with it in a serious match.
Mario
- Forward aerial - Mario swings his fist in an arc, meteor smashing opponents when landing during the middle part of the move. While slightly stronger than it was in Melee, it's still weak for a single hit meteor smash, having very low base knockback and slightly above average knockback scaling, so it can't effectively KO or gimp until high damages. It still also has slow start-up and ending lag, though Brawl's physics make the move less risky offstage than it was in Melee. While it now requires sweetspotting to meteor smash, the move is slightly better at edge-guarding in Brawl, due to the aforementioned slight power buff and less risk, as well as the fact it now sends opponents at a slight diagonal angle.
Marth
- Down aerial - Marth swings his sword below him in a large arc. Anyone caught with the tip is sent downwards, meteor smashing powerfully. Start-up lag wise, it is the third fastest meteor smash in Brawl (Falco's and Fox's are faster by 1 frame), but it is also one of the laggiest as well (has high landing and ending lag). Despite its very fast start-up and great reach, it's one of the more difficult meteor smashes to land in Brawl, as only the absolute tip of Marth's sword will meteor smash (while the rest of its hitboxes will hit an opponent weakly vertically). It's also one of the riskiest to use offstage, and Marth cannot use it below the stage without self-destructing. Like the other meteors that were spikes in Melee, this sends opponents at a slight diagonal angle instead of straight down.
- Dancing Blade - If the third attack is down (green), the move produces a meteor smash. The tip of the sword, like in Melee, does not meteor smash.
Mr. Game & Watch
- Down aerial - Mr. Game & Watch stalls in the air, then falls quickly with his key extended downwards. Anyone hit in the air with the initial fall is meteor smashed with powerfully knockback. Despite being a stall-then-fall, the move is safe as the move ends soon enough for Mr. Game & Watch to recover. This is a very difficult meteor smash to land however, as the opponent must be touching Mr. Game & Watch before he falls and a specific hitbox within the move, while the start-up lag of the move is rather slow.
- Down throw - Juggles opponent in the air like a ball then meteor smashes them into the ground. If done close to the edge, it's possible for the opponent to be meteor smashed off the stage.
Ness
- Down aerial - Ness's classic stomp, with slow start-up lag, but a decent sized hitbox. It has extremely high base knockback (the second highest base knockback among meteor smashes in Brawl), allowing it to KO and gimp offstage opponents at even 0%. Its knockback scaling is rather low however, which can allow characters with good vertical recoveries to survive it up to higher damages, but its base knockback is high enough to make the meteor smash lethal regardless. When sourspotted, it hits opponents with powerful horizontal knockback instead. Overall it's one of the most effective meteor smashes in Brawl, being easier to land than most, while being one of the deadliest.
Olimar
- Down aerial - Olimar thrusts a Pikmin below him, with the first few frames meteor smashing the opponent. The effect and power of the meteor smash is different depending on which Pikmin is used; white Pikmin produce a weak meteor smash, yellow Pikmin produce a rather powerful meteor smash with electric damage, blue and purple Pikmin produce a very powerful meteor smash with no special effects, and red Pikmin produce one of the strongest meteor smashes in Brawl with fire damage. Regardless of the Pikmin, Olimar's down aerial has lower base knockback, but much higher knockback scaling. Due to its small hitbox and even smaller sweetspot with a short duration, this is a difficult meteor smash to land, despite its rather fast start-up lag.
- End of Day - If a midair opponent (opponents on the ground are buried instead) makes contact with the Hocotate Ship when it appears, they are sent downwards very quickly.
Peach
- Down tilt - Peach sweeps her hand along the ground with fairly short reach. While all of its hitboxes meteor smash grounded opponents, the body and arm hitboxes meteor smash airborne opponents while the larger hand hitbox hits airborne opponents vertically instead. It is powerful, having very high base knockback and above average knockback scaling. The move has extreme difficulties in being landed on offstage opponents however, as the only way to hit an offstage opponent with a hitbox other than the hand is for them to be handing on the ledge (which then requires specific spacing). When the landing issues are combined with the hand hitbox hitting opponents vertically with less power, it makes the move ineffective for edge-guarding.
Pit
- Down tilt - Pit sweeps his blade along the ground, meteor smashing opponents when sweetspotted. Functions identically to Link's down tilt, meteor smashing opponents at a diagonal angle who were hit by the hilt of the sword, with abnormally high base knockback but very low knockback scaling, while its sourspot hitboxes hit opponents upwards. While faster than Link's, it's weaker, and it's just as difficult and impractical to land, being only possibly useable on offstage opponents who are hanging on the ledge while requiring very specific spacing.
Pokémon Trainer
Ivysaur
- Down aerial - Ivysaur turns upside down and shoots a burst of powder from its bulb. Very situational due to its high ending lag and the risk of Ivysaur getting edge-hogged. It is also difficult to land the meteor smashing hitbox. Looks like its up aerial, except upside down. Unlike its up aerial, it is an extremely weak aerial attack (being very weak in both base knockback and knockback scaling), and it's the weakest single hit aerial meteor smash in Brawl that isn't a special move. As such, even when landed, an opponent can survive it to very high damages.
Charizard
- Down aerial - Charizard stomps beneath itself, and regardless of where it connects, it will meteor smash airborne opponents. It has slow start-up lag, but it produces a large hitbox that meteor smashes powerfully, and is of relatively low risk due to Charizard's recovery. On grounded opponents, it produces a different, slightly stronger hitbox that does not meteor smash, instead sending opponents vertically at a diagonal angle.
R.O.B.
- Down aerial - R.O.B. fires his thrusters downwards. The meteor smash usually has average power, though there's a small sweetspot right below R.O.B.'s thrusters that is especially powerful with average base knockback and high knockback scaling. The move has essentially zero risk when used offstage, as it halts R.O.B.'s momentum until the move finishes. However, even though its hitboxes are large and it has long duration, this move is very difficult to land, as it has very slow start-up, and its halting momentum property prevents R.O.B. from moving through the air with it.
Samus
- Down aerial - Samus swings her arm-cannon in a downwards sweep. The attack has fairly large hitbox and will always meteor smash, though it has slow start-up lag, and very weak base knockback. While ineffective at low damages, it has very high knockback scaling, making it a deadly meteor smash at high damages. Its low ending lag and Samus' floatiness also make it a very low risk meteor smash.
Snake
- Forward aerial - Snake does an ax-heel kick, bringing his leg down from above his head to below him. Anyone caught in his foot arc will get meteor smashed very powerfully. If the leg connects, it instead send the opponent upwards with slightly weaker, but still powerful vertical knockback. It is by far the strongest forward aerial meteor in Brawl, with high base knockback and very high knockback scaling, as well as great horizontal reach. It does have very slow start-up however, which when combined with the specific spacing require, makes the meteor smash very difficult to land. Its very high ending lag also puts Snake at risk to be edge-guarded if he failed to hit the opponent with move.
Toon Link
- Down aerial - Toon Link stalls in the air, then falls quickly with a sword thrust downwards. It has fast start-up lag, and produces a powerful meteor smash with the initial hitbox. But if Toon Link misses the opponent while offstage, he will plunge to his demise due to the fast speed at which Toon Link falls and the very long duration of the attack. Additionally, if the initial hitbox is not landed, the down aerial instead produces average vertical knockback. While not a difficult meteor smash to land, the extreme risk of the move usually makes it not worth it to attempt edge-guarding with it.
Wario
- Down aerial as Wario-Man - Wario-Man faces his head downward and drills, falling at a very fast speed. A very strong meteor smash, covers a great distance and since he can fly, he can easily land this attack off-stage without self destructing.
- Down throw as Wario-Man - When used next to a stage ledge, it will very powerfully meteor smash anyone he has grabbed. It is easier to use if Wario-Man is facing towards the stage.
Wolf
- Down aerial - Wolf thrusts his arms downwards, meteor smashing opponents regardless of how it is landed. While it has slow start-up lag, it has a surprisingly large hitbox, with disjointed reach that extends far below him (which reaches far enough to hit below thin platforms and ledges). It has very weak base knockback, making it ineffective at lower damages, but its high knockback scaling allows it to be effective for KOing and gimping at higher damages. While its ending lag isn't particularly heavy, Wolf's fast falling speed and poor vertical recovery can make the move risky to use offstage, especially if the stage lacks huggable ledges.
- Wolf Flash - The very end of the attack in his lower hitbox produces a decently powerful meteor smash. It can only be feasibly used without SDing to meteor smash with as a counter edge-guard maneuver, where it can be effective for catching careless edge-guarders (particularly those who try to edge hog the ledge too early).
Yoshi
- Forward aerial - Similar to Mario's and Donkey Kong's forward aerials, except Yoshi swings his head in an arc. The move meteor smashes at the more extended parts of his head. It's much weaker than it was in Melee, where instead of being one of the strongest meteor smashes, its power is only above average. While it has high knockback scaling, it has extremely low base knockback, preventing it from being effective at KOing and gimping at lower damages. It's start-up lag is slow, but it's still one of the easier meteor smashes to land, having good reach and large hitboxes, while being of very low risk. It can also be used to finish off a grab-release chain grab.
- Down aerial - Yoshi performs his classic flutter kick, rapidly kicking his feet under him. It's the most damaging drill meteor smash and aerial attack in Brawl, with 14 hits and a maximum damage potential of 35%. It is an incredibly weak meteor smash however, but being a "drill" meteor, Yoshi can "drag" the opponent down with him, increasing its effectiveness, though this is risky due to Yoshi's subpar vertical recovery.
Zelda
- Down tilt - Zelda sticks her foot out, normally popping people up. If it hits an airborne opponent and is sweetspotted, it meteor smashes them very weakly. It has very fast start-up lag, but its poor reach severely limits it capabilities as an edge-guard move.
- Down aerial - Zelda sticks her foot downwards, with rather low start-up and ending lag. If it hits on the first frame of execution and Zelda's foot connects, the opponent is electrocuted and shot downwards with high power, being one of the strongest meteor smashes in Brawl. If the sweetspot is not landed, it is an incredibly weak meteor smash with a slight diagonal trajectory, that won't KO at even sudden death damages. While the move is fast, its small hitbox and even smaller sweetspot make the move very difficult to land. Oddly, the sweetspot hitbox cannot be landed on grounded opponents.
Zero Suit Samus
- Down aerial - Zero suit Samus stalls, then performs a dive kick downwards at a rapid speed. It's a very weak diagonal meteor smash that hits during the entire falling portion. Due to the fast speed at which Zero Suit Samus falls and the very long duration of the attack, she will almost always self-destruct if used offstage, even if it hits, making this a rather impractical meteor smash to use unless one intends to perform a sacrificial KO or attempt to be hit by the opponent's recovery attack.
- Flip Jump - Zero Suit Samus does a flip jump. If an attack button is pressed while she performs this, she sticks out her foot pointing towards the center of the arc of the jump. Anyone who is hit with the foot during the initial hitbox is meteor smashed very powerfully. The move has very high base knockback, enough so that it can potentially KO and gimp at 0%, while still having respectably high knockback scaling, making it one of the most powerful meteor smashes in Brawl. With its very large hitbox, it can be effective at edge-guarding, and it can be used as a fatal combo finisher out of a down smash landed on an offstage opponent.
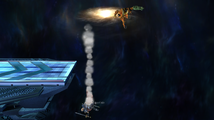
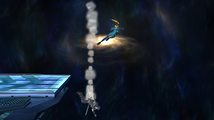
- Plasma Wire - This move shoots upwards, meteor smashing anyone above Zero Suit Samus down on the last hit. While the meteor smash has extremely low knockback scaling, its very high base knockback can allow it to successfully meteor smash an opponent when they're caught off guard or if landed on an opponent with a poor vertical recovery. However, due to the fact that the opponent must be well above Zero Suit Samus for the meteor smash to land, it is only feasible to use as a meteor smash when she is being edge-guarded from above, and it also can't be done below the ledge when close enough, as the whip will grab onto the ledge instead.
- Zero Suit Samus Plasma Wire Meteor Smash brawl.png
Items that meteor smash
- Pitfall - When a Pitfall is thrown at an airborne opponent, they will be sent downwards.
- Warp Star - During the falling portion of the move, airborne opponents hit by it will be meteor smashed powerfully.
Stage hazards
- Green Greens - If a player touches a bomb block from below, they will be knocked downwards.
- Jungle Japes - If a player touches a Klaptrap, they are powerfully meteor smashed.
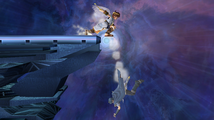
- Pirate Ship - If a player touches the bottom of the front end of the ship, they will be meteor smashed with OHKO power. Going under the boat itself using Pikachu's Quick Attack will also meteor smash in the same way.
Enemies and bosses
- Galleom - The non-bury hitboxes of the Multihop meteor smash.
- Master Hand/Crazy Hand - The Power Punch is a meteor smash.
- Porky - Porky's jump attack has a metor smash while he falls.
- Spaak - When a Spaak loops around to fire a lightning bolt of either type, its body has a meteor smash hitbox.
Meteor smash chart
The following is a chart showcasing the post-calculation data of the meteor smashes in Super Smash Bros. Brawl (negligible meteor smashes and those that can't be landed on airborne opponents are not included in the chart). The data shown is the data of the strongest hitbox within the attack that meteor smashes. Meteor smashes are ranked based on the knockback they produce on Mario at 100%.
Base knockback is the knockback produced at 0%, while knockback scaling is the amount of knockback increase per percentage point.
Legend
- * = Meteor smash produces a diagonal downwards trajectory instead of straight down.
- (aerial) = Attack used while airborne.
| Rank | Character/Meteor smash | Base Knockback | Knockback at 100% | Knockback at 200% | Knockback at 300% | Knockback Scaling |
|---|---|---|---|---|---|---|
| 1. | Ganondorf's down aerial | 2811 | 8528 | 14245 | 19962 | 57.17 |
| 2. | Ike's down aerial | 2587 | 6869 | 11151 | 15433 | 42.82 |
| 3. | Ganondorf's Wizard's Foot* (aerial) | 2827 | 6869 | 10912 | 14955 | 40.43 |
| 4. | Ike's down tilt | 2910 | 6714 | 10517 | 14321 | 38.04 |
| 5. | Zelda down aerial | 2725 | 6578 | 10432 | 14286 | 38.54 |
| 6. | Olimar's down aerial (Red Pikmin) | 2265 | 6547 | 10829 | 15111 | 42.82 |
| 7. | Snake's forward aerial | 2505 | 6547 | 10590 | 14633 | 40.43 |
| 8. | Zero Suit Samus' Flip Jump | 2931 | 6256 | 9582 | 12907 | 33.25 |
| 9. | Donkey Kong's down aerial | 2393 | 6247 | 10100 | 13954 | 38.54 |
| 10. | King Dedede's Super Dedede Jump | 2905 | 6140 | 9374 | 12608 | 32.34 |
| 11. | Ness' down aerial | 3598 | 5925 | 8253 | 10581 | 23.27 |
| 12. | Olimar's down aerial (Blue/Purple Pikmin) | 2105 | 5908 | 9712 | 13516 | 38.04 |
| 13. | Toon Link's down aerial | 2327 | 5753 | 9178 | 12604 | 34.26 |
| 14. | Donkey Kong's forward aerial | 2070 | 5710 | 9349 | 12989 | 36.40 |
| 15. | Peach's down tilt | 2811 | 5658 | 8505 | 11352 | 28.47 |
| 16. | R.O.B.'s down aerial* | 2032 | 5597 | 9161 | 12726 | 35.65 |
| 17. | Charizard's down aerial | 1783 | 5586 | 9390 | 13193 | 38.03 |
| 17. | Mr. Game & Watch's down aerial | 1783 | 5586 | 9390 | 13193 | 38.03 |
| 19. | Ice Climbers' forward aerial | 2045 | 5370 | 8696 | 12022 | 33.26 |
| 20. | Samus' down aerial | 1280 | 5323 | 9366 | 13409 | 40.43 |
| 21. | Diddy Kong's down aerial | 1965 | 5290 | 8615 | 11941 | 33.25 |
| 22. | Captain Falcon's down aerial | 1461 | 5262 | 9068 | 12871 | 38.03 |
| 23. | Marth's down aerial* | 2199 | 5242 | 8285 | 11328 | 30.43 |
| 24. | Olimar's down aerial (Yellow Pikmin) | 1910 | 5235 | 8561 | 11886 | 33.25 |
| 25. | Link's down tilt* | 3398 | 5061 | 6723 | 8386 | 16.63 |
| 26. | Falco's down aerial* | 1388 | 4952 | 8517 | 12081 | 35.64 |
| 27. | Wolf's down aerial | 1288 | 4926 | 8565 | 12203 | 36.38 |
| 28. | Lucas' back aerial* | 1810 | 4803 | 7796 | 10788 | 29.93 |
| 29. | Wolf's Wolf Flash | 1562 | 4796 | 8031 | 11265 | 32.34 |
| 30. | Yoshi's forward aerial | 1094 | 4733 | 8371 | 12010 | 36.39 |
| 31. | Luigi's down taunt | 4725 | 4725 | 4725 | 4725 | 0.00 |
| 32. | Luigi's down aerial | 1580 | 4666 | 7752 | 10838 | 30.86 |
| 33. | Pit's down tilt* | 3045 | 4588 | 6131 | 7674 | 15.43 |
| 34. | Zero Suit Samus' Plasma Wire | 2988 | 4144 | 5300 | 6456 | 11.56 |
| 35. | Mario's forward aerial* | 1444 | 4117 | 6790 | 9464 | 26.73 |
| 36. | Olimar's down aerial (White Pikmin) | 1745 | 4113 | 6482 | 8851 | 23.69 |
| 37. | Captain Falcon's Raptor Boost (aerial) | 2488 | 3938 | 5429 | 6920 | 14.91 |
| 38. | Zero Suit Samus' down aerial* | 1727 | 3213 | 4699 | 6185 | 14.80 |
| 39. | Ivysaur's down aerial | 1267 | 3162 | 5057 | 6952 | 18.95 |
| 40. | Donkey Kong's Headbutt | 1419 | 2925 | 4432 | 5938 | 15.06 |
| 41. | Kirby's Final Cutter | 2902 | 2902 | 2902 | 2902 | 0.00 |
| 42. | Ike's Aether | 2687 | 2899 | 3110 | 3321 | 2.11 |
| 43. | Lucas' down aerial | 1055 | 2871 | 4688 | 6504 | 18.16 |
| 44. | Diddy Kong's Rocket Barrel | 1405 | 2829 | 4252 | 5676 | 14.24 |
| 45. | Falco's Falco Phantasm (aerial) | 1637 | 2583 | 3528 | 4473 | 9.45 |
| 46. | Kirby's down aerial | 1285 | 2284 | 3283 | 4283 | 9.99 |
| 47. | Fox's down aerial* | 1309 | 1778 | 2248 | 2717 | 4.69 |
| 48. | Yoshi's down aerial | 654 | 1592 | 2531 | 3469 | 9.38 |
