Super Smash Bros. Melee

Roy (SSBM)/Neutral special: Difference between revisions

From SmashWiki, the Super Smash Bros. wiki
Jump to navigationJump to search
No edit summary
(→‎Hitboxes: fix wrong copy-paste from Marth's neutral special)
 
Line 123: Line 123:
|}
|}


<nowiki>*</nowiki> Releasing the charge between the final frame of a loop and the starting frame of the next counts as completing that loop. As a result, there is only a one-frame window to release a charge made of four loops, due to the attack automatically reaching and using full charge afterwards - though unlike similar moves, there is no practical advantage to doing do, as the "just under fully charged" attack does 1 less damage and equal knockback compared to the fully charged attack.
<nowiki>*</nowiki> Releasing the charge between the final frame of a loop and the starting frame of the next counts as completing that loop. As a result, there is only a one-frame window to release a charge made of seven loops, due to the attack automatically reaching and using full charge afterwards. The "just under fully charged" attack has higher knockback scaling compared to the fully charged attack, which becomes relevant in the [[Home-Run Contest]].


===Resulting charge levels===
Line 140: Line 140:
|5||120-149||26%||{{#expr:26*0.7+1}}%
|5||120-149||26%||{{#expr:26*0.7+1}}%
|-
|-
|6||150||31%||{{#expr:31*0.7+1}}%
|6||150-179||31%||{{#expr:31*0.7+1}}%
|-
|-
|7||180||36%||{{#expr:36*0.7+1}}%
|7||180-209||36%||{{#expr:36*0.7+1}}%
|-
|-
|8||210||41%||{{#expr:41*0.7+1}}%
|8||210||41%||{{#expr:41*0.7+1}}%

Latest revision as of 18:17, July 16, 2023

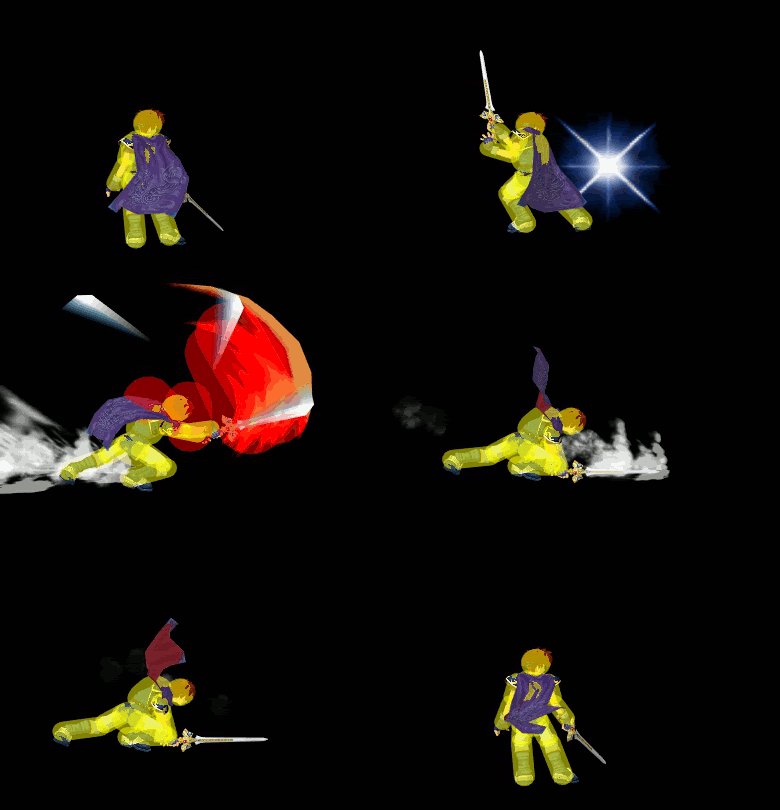
Hitbox visualization showing Flare Blade.
Competitive.png This article or section may require competitive expertise.
You can discuss this issue on the talk page or edit this page to improve it.

Overview[edit]

Hitboxes[edit]

  • L: number of charging loops completed, from 0 to 7*
ID Part Damage SD Angle BK KS FKV Radius Bone Offset Clang Rebound Effect G A Sound
Not fully charged
0 0 6+(8*L) +1 Sakurai angle 40 110 0 3.906 78 5.4684 0.0 0.0 HitboxTableIcon(NoClang).png HitboxTableIcon(Rebound).png Flame (effect) HitboxTableIcon(GroundedTrue).png HitboxTableIcon(AerialTrue).png L Burn
1 0 6+(8*L) +1 Sakurai angle 40 110 0 4.2966 78 2.7342 0.0 0.0 HitboxTableIcon(NoClang).png HitboxTableIcon(Rebound).png Flame (effect) HitboxTableIcon(GroundedTrue).png HitboxTableIcon(AerialTrue).png L Burn
2 0 6+(8*L) +1 Sakurai angle 40 110 0 2.7342 73 0.0 0.0 0.0 HitboxTableIcon(NoClang).png HitboxTableIcon(Rebound).png Flame (effect) HitboxTableIcon(GroundedTrue).png HitboxTableIcon(AerialTrue).png L Burn
3 0 6+(8*L) +1 Sakurai angle 40 110 0 3.04668 27 0.0 0.0 0.0 HitboxTableIcon(NoClang).png HitboxTableIcon(Rebound).png Flame (effect) HitboxTableIcon(GroundedTrue).png HitboxTableIcon(AerialTrue).png L Burn
Fully charged
0 0 50 +30 Sakurai angle 50 83 0 4.6872 76 0.0 3.906 5.859 HitboxTableIcon(NoClang).png HitboxTableIcon(Rebound).png Flame (effect) HitboxTableIcon(GroundedTrue).png HitboxTableIcon(AerialTrue).png L Burn
1 0 50 +30 Sakurai angle 50 83 0 4.6872 71 0.0 3.906 13.671 HitboxTableIcon(NoClang).png HitboxTableIcon(Rebound).png Flame (effect) HitboxTableIcon(GroundedTrue).png HitboxTableIcon(AerialTrue).png L Burn
2 0 50 +30 Sakurai angle 50 83 0 4.6872 25 0.0 3.906 21.483 HitboxTableIcon(NoClang).png HitboxTableIcon(Rebound).png Flame (effect) HitboxTableIcon(GroundedTrue).png HitboxTableIcon(AerialTrue).png L Burn

* Releasing the charge between the final frame of a loop and the starting frame of the next counts as completing that loop. As a result, there is only a one-frame window to release a charge made of seven loops, due to the attack automatically reaching and using full charge afterwards. The "just under fully charged" attack has higher knockback scaling compared to the fully charged attack, which becomes relevant in the Home-Run Contest.

Resulting charge levels[edit]

Charge level Charge time (frames) Damage Damage to shields (blade/tip)
1 (uncharged) 0-29 6% 5.2%
2 30-59 11% 8.7%
3 60-89 16% 12.2%
4 90-119 21% 15.7%
5 120-149 26% 19.2%
6 150-179 31% 22.7%
7 180-209 36% 26.2%
8 210 41% 29.7%
9 (fully charged) 211 50% 65%

Timing[edit]

Uncharged[edit]

Hitbox 16-21
Animation length 44
FrameIcon(Lag).png FrameIcon(Lag).png FrameIcon(Lag).png FrameIcon(Lag).png FrameIcon(Lag).png FrameIcon(Lag).png FrameIcon(Lag).png FrameIcon(Lag).png FrameIcon(Lag).png FrameIcon(Lag).png FrameIcon(Lag).png FrameIcon(Lag).png FrameIcon(Lag).png FrameIcon(Lag).png FrameIcon(Lag).png FrameIcon(Hitbox).png FrameIcon(Hitbox).png FrameIcon(Hitbox).png FrameIcon(Hitbox).png FrameIcon(Hitbox).png FrameIcon(Hitbox).png FrameIcon(Lag).png FrameIcon(Lag).png FrameIcon(Lag).png FrameIcon(Lag).png FrameIcon(Lag).png FrameIcon(Lag).png FrameIcon(Lag).png FrameIcon(Lag).png FrameIcon(Lag).png FrameIcon(Lag).png FrameIcon(Lag).png FrameIcon(Lag).png FrameIcon(Lag).png FrameIcon(Lag).png FrameIcon(Lag).png FrameIcon(Lag).png FrameIcon(Lag).png FrameIcon(Lag).png FrameIcon(Lag).png FrameIcon(Lag).png FrameIcon(Lag).png FrameIcon(Lag).png FrameIcon(Lag).png

Charged[edit]

Charge loop 12-41
Hitbox [release+5]-[release+10]
Animation length [release+33]
FrameIcon(Lag).png FrameIcon(Lag).png FrameIcon(Lag).png FrameIcon(Lag).png FrameIcon(Lag).png FrameIcon(Lag).png FrameIcon(Lag).png FrameIcon(Lag).png FrameIcon(Lag).png FrameIcon(Lag).png FrameIcon(LagLoopS).png FrameIcon(LagLoopE).png FrameIcon(Lag).png FrameIcon(Lag).png FrameIcon(Lag).png FrameIcon(Lag).png FrameIcon(Lag).png FrameIcon(Lag).png FrameIcon(Lag).png FrameIcon(Lag).png FrameIcon(Lag).png FrameIcon(Lag).png FrameIcon(Lag).png FrameIcon(Lag).png FrameIcon(Lag).png FrameIcon(Lag).png FrameIcon(Lag).png FrameIcon(Lag).png FrameIcon(Lag).png FrameIcon(Lag).png FrameIcon(Lag).png FrameIcon(Lag).png FrameIcon(Lag).png FrameIcon(Lag).png FrameIcon(Lag).png FrameIcon(Lag).png FrameIcon(Lag).png FrameIcon(Lag).png FrameIcon(Lag).png FrameIcon(Lag).png FrameIcon(LagLoopS).png FrameIcon(LagLoopE).png FrameIcon(Lag).png FrameIcon(Lag).png FrameIcon(Lag).png FrameIcon(Hitbox).png FrameIcon(Hitbox).png FrameIcon(Hitbox).png FrameIcon(Hitbox).png FrameIcon(Hitbox).png FrameIcon(Hitbox).png FrameIcon(Lag).png FrameIcon(Lag).png FrameIcon(Lag).png FrameIcon(Lag).png FrameIcon(Lag).png FrameIcon(Lag).png FrameIcon(Lag).png FrameIcon(Lag).png FrameIcon(Lag).png FrameIcon(Lag).png FrameIcon(Lag).png FrameIcon(Lag).png FrameIcon(Lag).png FrameIcon(Lag).png FrameIcon(Lag).png FrameIcon(Lag).png FrameIcon(Lag).png FrameIcon(Lag).png FrameIcon(Lag).png FrameIcon(Lag).png FrameIcon(Lag).png FrameIcon(Lag).png FrameIcon(Lag).png
Legend (1 square = 1 frame)
Lag
Lag time
Hitbox
Hitbox
FrameIcon(BlankLoopS).pngFrameIcon(BlankLoopE).png
Loop point