Bowser (SSB4)/Up tilt: Difference between revisions
From SmashWiki, the Super Smash Bros. wiki
Jump to navigationJump to search
SuperSqank (talk | contribs) m (→Update history) |
SuperSqank (talk | contribs) m (→Update history) |
||
| Line 7: | Line 7: | ||
==Update history== | ==Update history== | ||
'''{{GameIcon|ssb4}} [[1.0.8]]''' | '''{{GameIcon|ssb4}} [[1.0.8]]''' | ||
*{{buff|Startup/ | *{{buff|Startup/hitbox duration (frames 12-16 → 11-16).}} | ||
*{{buff|Ending lag (FAF 51 → 41).}} | *{{buff|Ending lag (FAF 51 → 41).}} | ||
*{{ | *{{nerf|Damage (10% → 9%).}} | ||
==Hitboxes== | ==Hitboxes== | ||
Latest revision as of 12:59, July 23, 2021
Overview[edit]
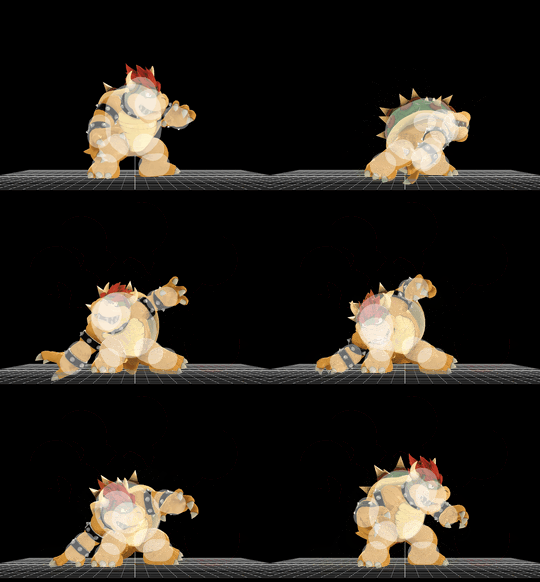
Bowser swings his arm in an overhead arc, the trail from his claws forming the visible arc. The move has two hitboxes, being the claw tipper and the arm hitbox. The tipper can KO at medium-high percents and is a good anti-air due to its large coverage. The arm hitbox sends upwards and isn't safe on shield. Bowser's up tilt can combo from his up throw, adding on percent to lead for Bowser's other grab followups. It can also be utilized to cover the ledge, as it can soft punish roll and poke the opponent's shield if spaced correctly.
Update history[edit]
 Startup/hitbox duration (frames 12-16 → 11-16).
 Ending lag (FAF 51 → 41).
 Damage (10% → 9%).
Hitboxes[edit]
Timing[edit]
| Hitboxes | 11-16 |
|---|---|
| Interruptible | 41 |
| Animation length | 42 |
Lag time |
Hitbox |
Interruptible |
|
