Cloud (SSBU)/Down throw: Difference between revisions
From SmashWiki, the Super Smash Bros. wiki
Jump to navigationJump to search
(New Page: {{ArticleIcons|ssbu=y}} {{competitive expertise}} {|class="wikitable" style="float:right; margin:4pt;" !colspan=5|Cloud down throw hurtbox visualization |- |File:CloudDThrowSSBU.gif|4...) |
m (→Overview) Tags: Mobile edit Advanced mobile edit |
||
| Line 9: | Line 9: | ||
==Overview== | ==Overview== | ||
Cloud slams the opponent onto the ground with one arm and launches opponents behind him. It is among the strongest down throws in the game and Cloud's strongest throw when he performs the throw while facing away from the ledge. However, It has low base knockback, making it a very ineffective throw for combos. | |||
<!-- Kill%s were done in Ruben's Calculator, which while very accurate does not consider model hurtboxes. As such, give them a 5% margin of error. --> | |||
{| class="wikitable" | |||
|- | |||
! colspan="3" | Cloud Down Throw KO%s on [[Battlefield]] VS {{SSBU|Mario}} w/Optimal DI | |||
|- | |||
! Circumstance !! Kill% !! Stick angle | |||
|- | |||
| At the ledge || 213.46% || 214° | |||
|- | |||
| At the ledge (max [[rage]]) || 185.7% || 214° | |||
|- | |||
| Edge of Side Platform || 215.74% || 241° | |||
|- | |||
| Edge of Side Platform (max rage) || 187.78% || 241° | |||
|- | |||
| Edge of Top Platform || 219.78% || 289° | |||
|- | |||
| Edge of Top Platform (max rage) || 191.44% || 289° | |||
|} | |||
==Throw Data== | ==Throw Data== | ||
{{UltimateThrowTableHeader}} | {{UltimateThrowTableHeader}} | ||
Revision as of 00:53, June 6, 2021
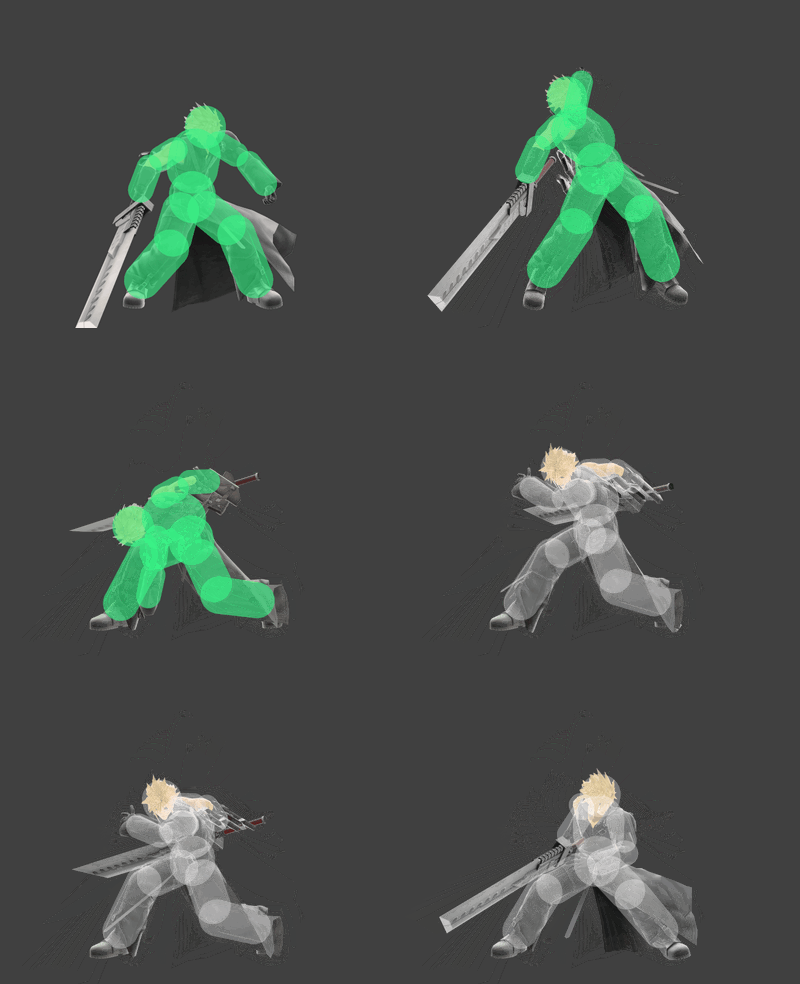
| Cloud down throw hurtbox visualization | ||||
|---|---|---|---|---|

| ||||
Overview
Cloud slams the opponent onto the ground with one arm and launches opponents behind him. It is among the strongest down throws in the game and Cloud's strongest throw when he performs the throw while facing away from the ledge. However, It has low base knockback, making it a very ineffective throw for combos.
| Cloud Down Throw KO%s on Battlefield VS Mario w/Optimal DI | ||
|---|---|---|
| Circumstance | Kill% | Stick angle |
| At the ledge | 213.46% | 214° |
| At the ledge (max rage) | 185.7% | 214° |
| Edge of Side Platform | 215.74% | 241° |
| Edge of Side Platform (max rage) | 187.78% | 241° |
| Edge of Top Platform | 219.78% | 289° |
| Edge of Top Platform (max rage) | 191.44% | 289° |
Throw Data
| Kind | ID | Damage | Angle | Angle type | BK | KS | FKV | H× | Effect | Type | Sound |
|---|---|---|---|---|---|---|---|---|---|---|---|
| Throw | 0 | 7.0% | Forward | 40 | 110 | 0 | 0.0× |
Timing
| Invincibility | 1-18 |
|---|---|
| Throw Release | 18 |
| Interruptible | 44 |
| Animation length | 57 |
Lag time |
Vulnerable |
Invincible |
Throw point |
Interruptible |
|
