Bowser Bomb: Difference between revisions
Mr Bubbles (talk | contribs) m (Added note that Bowser will drift during the stall portion of this move, which needs to be taken into account to properly execute an "Edge-canceled Bowser Bomb". Also corrected the part about "facing".) |
m (→Customization) |
||
| Line 31: | Line 31: | ||
{{CustomSet|Bowser|Down|name1=Bowser Bomb|desc1=Butt-stomp your enemies. On the ground, you can lift opponents with your horns.|name2=Turbulent Bomb|desc2=Jump up diagonally, and push opponents with a gust of wind when you land.|name3=Slip Bomb|desc3=Drop down and shake the ground, causing nearby opponents to fall over.|altlink3=Slip Bomb (Bowser)}} | {{CustomSet|Bowser|Down|name1=Bowser Bomb|desc1=Butt-stomp your enemies. On the ground, you can lift opponents with your horns.|name2=Turbulent Bomb|desc2=Jump up diagonally, and push opponents with a gust of wind when you land.|name3=Slip Bomb|desc3=Drop down and shake the ground, causing nearby opponents to fall over.|altlink3=Slip Bomb (Bowser)}} | ||
# '''Bowser Bomb''': Default. | # '''Bowser Bomb''': Default. | ||
# '''Turbulent Bomb''' (known as '''Turbulence Bomb''' in the [[PAL]] version): Pushes away anyone next to where the move lands. It does 4% damage rising, 9% damage on slam, and the slam has much weaker knockback. The horizontal range of the vortex extends to about a third of the length of Battlefield. | # '''Turbulent Bomb''' (known as '''Turbulence Bomb''' in the [[PAL]] version): Pushes away anyone next to where the move lands. It does 4% damage rising, 9% damage on slam, and the slam has much weaker knockback. Additionally, there is no hitbox at all on the way down when used in the air. The horizontal range of the vortex extends to about a third of the length of Battlefield. Has increased startup on the ground, and increased landing lag all around. | ||
# '''Slip Bomb''': Causes enemies near the landing location to slip. Doesn't | # '''Slip Bomb''': Causes enemies near the landing location to slip. Doesn't headbutt opponents into the slam when used on the ground, and only deals 18% damage on the slam, and 2% when the enemy is tripped, however the shockwave on landing deals 13% damage at point blank range. Furthermore, both the grounded and aerial variants have less startup and landing lag. | ||
<gallery> | <gallery> | ||
VortexSlam.jpg|Turbulent Bomb | VortexSlam.jpg|Turbulent Bomb | ||
Revision as of 08:18, December 19, 2017
| Bowser Bomb | |
|---|---|
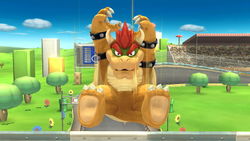 Bowser Bomb in Super Smash Bros. for Wii U. | |
| User | Bowser Giga Bowser |
| Universe | Mario |
| Article on Super Mario Wiki | Bowser Bomb (move) |
| “ | Leap up and plunge onto enemies rapidly with considerable force. | ” |
| —Melee's instruction manual | ||
| “ | Use this from high up to crush unsuspecting foes. | ” |
| —Brawl's instruction manual | ||
| “ | Drop down, and smash opponents with your rump. | ” |
| —Description from Smash for 3DS's foldout | ||
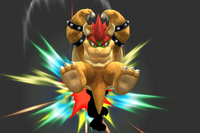
Bowser Bomb (クッパドロップ, Koopa Drop) is Bowser's down special move.
Overview
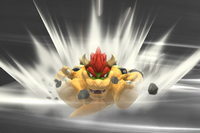
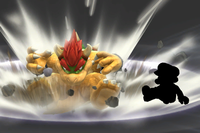
The Bowser Bomb is a stall-then-fall move. If Bowser is on the ground when initiating the move, he will leap forward diagonally, pause briefly, then slam down to the ground with a high-power ground pound. When used in the air, Bowser remains airborne for a short time before landing down with the ground pound. Upon impact, the move produces small hitboxes in the form of shockwaves at both of Bowser's sides, which cause 8% damage in Super Smash Bros. Melee, and 11% damage in Super Smash Bros. Brawl and Super Smash Bros. 4. In Brawl and SSB4, an additional hitbox was added to Bowser during the diagonal jump when used on the ground, dealing 4% damage to anyone it connects with. The knockback from this hitbox can also combo into the ground pound itself.
In Brawl, Bowser does not get any freeze frames when he hits someone while falling, but the falling attack does have freeze frame properties in Super Smash Bros. 4.
When Bowser lands during the ground pound, he suffers significant ending lag, leaving him defenseless for a short period of time. However, he is still able to grab onto stage edges while falling as long as he is close enough to one, which eliminates the ending lag and also allows for an effective edge-guarding technique on opponents who are close to the edge while attempting to recover or hanging from the edge itself, as long as they are not affected by the initial intangibility frames.
In SSB4, Bowser Bomb deals drastically more shield damage, being able to shatter a full shield if all its hitboxes connect. However, this can be troublesome to perform, as the opponent may slide out of harm's way on the initial hitbox.
Bowser Bomb is shared by Giga Bowser, both in his boss appearance in Melee and in his playable appearance in Brawl and SSB4. Giga Bowser's variation of the move also features a glitch in Brawl. In Brawl and Super Smash Bros. 4, Giga Bowser's Bowser Bomb does not get any freeze frames.
Customization
Special Move customization was added in Super Smash Bros. 4. These are the variations:
| 1. Bowser Bomb | 2. Turbulent Bomb | 3. Slip Bomb |
|---|---|---|
| "Butt-stomp your enemies. On the ground, you can lift opponents with your horns." | "Jump up diagonally, and push opponents with a gust of wind when you land." | "Drop down and shake the ground, causing nearby opponents to fall over." |
- Bowser Bomb: Default.
- Turbulent Bomb (known as Turbulence Bomb in the PAL version): Pushes away anyone next to where the move lands. It does 4% damage rising, 9% damage on slam, and the slam has much weaker knockback. Additionally, there is no hitbox at all on the way down when used in the air. The horizontal range of the vortex extends to about a third of the length of Battlefield. Has increased startup on the ground, and increased landing lag all around.
- Slip Bomb: Causes enemies near the landing location to slip. Doesn't headbutt opponents into the slam when used on the ground, and only deals 18% damage on the slam, and 2% when the enemy is tripped, however the shockwave on landing deals 13% damage at point blank range. Furthermore, both the grounded and aerial variants have less startup and landing lag.
Edge-canceled Bowser Bomb
An edge-canceled Bowser Bomb happens when Bowser uses this move on an edge (while facing either direction). The animation and momentum of the Bowser Bomb is canceled out by the action of Bowser grabbing on to the ledge. This is very useful when recovering from above.
Note however that this requires precise positioning to successfully grab the edge. This positioning is made even more difficult by the fact that if Bowser is moving horizontally in the air before using Bowser Bomb, Bowser will continue to drift in that direction during the stall portion of the move.
Origin
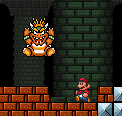
The move is based on Bowser's attack pattern in Super Mario Bros. 3 during his final boss battle, where he jumps diagonally forward and does a Ground Pound while facing the screen to attack Mario, breaking bricks below him. To beat him without powerups, Mario has to make Bowser break all bricks on an area with the move, causing him to fall downwards into a pit.
Trivia
- Unusually, while CPUs in Melee rarely shield physical attacks, they have a special programmation for dodging Bowser Bomb at all costs: when using this move against a CPU, it will always roll away, or air dodge when airborne. A similar thing happens with his up smash, where CPUs will always air dodge, or roll persistently back and forth when used below a CPU on a platform.
- Bowser Bomb's 2nd custom special, Slip Bomb, shares the same name with the 1st custom move of Samus's down special.
Gallery
Bowser Bomb in Super Smash Bros. for Nintendo 3DS.
