Zero Suit Samus (SSB4)/Forward aerial: Difference between revisions
From SmashWiki, the Super Smash Bros. wiki
Jump to navigationJump to search
(added missing category) |
SuperSqank (talk | contribs) No edit summary |
||
| Line 1: | Line 1: | ||
{{ArticleIcons|ssb4=y}} | {{ArticleIcons|ssb4=y}} | ||
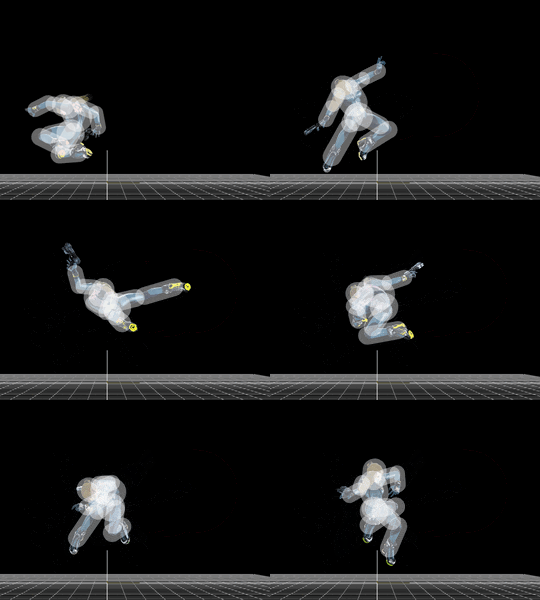
[[File:ZSSFAir.gif|thumb|270px|Hitbox visualization showing Zero Suit Samus's forward aerial.]] | [[File:ZSSFAir.gif|thumb|270px|Hitbox visualization showing Zero Suit Samus's forward aerial.]] | ||
==Overview== | |||
{{competitive expertise}} | {{competitive expertise}} | ||
==Hitboxes== | ==Hitboxes== | ||
{{SSB4HitboxTableHeader}} | {{SSB4HitboxTableHeader|special=y}} | ||
{{HitboxTableTitle|Hit 1|42}} | {{HitboxTableTitle|Hit 1|42}} | ||
{{ | {{SSB4SpecialHitboxTableRow | ||
|id=0 | |id=0 | ||
|part=0 | |part=0 | ||
|damage=5% | |damage=5% | ||
|angle=361 | |angle=361 | ||
|af=3 | |||
|bk=50 | |bk=50 | ||
|ks=50 | |ks=50 | ||
| Line 27: | Line 29: | ||
|slvl=S | |slvl=S | ||
}} | }} | ||
{{ | {{SSB4SpecialHitboxTableRow | ||
|id=1 | |id=1 | ||
|part=0 | |part=0 | ||
|damage=5% | |damage=5% | ||
|angle=361 | |angle=361 | ||
|af=3 | |||
|bk=50 | |bk=50 | ||
|ks=50 | |ks=50 | ||
| Line 47: | Line 50: | ||
}} | }} | ||
{{HitboxTableTitle|Hit 2|42}} | {{HitboxTableTitle|Hit 2|42}} | ||
{{ | {{SSB4SpecialHitboxTableRow | ||
|id=0 | |id=0 | ||
|part=0 | |part=0 | ||
|damage=7% | |damage=7% | ||
|angle=361 | |angle=361 | ||
|af=3 | |||
|bk=40 | |bk=40 | ||
|ks=116 | |ks=116 | ||
| Line 66: | Line 70: | ||
|slvl=L | |slvl=L | ||
}} | }} | ||
{{ | {{SSB4SpecialHitboxTableRow | ||
|id=1 | |id=1 | ||
|part=0 | |part=0 | ||
|damage=7% | |damage=7% | ||
|angle=361 | |angle=361 | ||
|af=3 | |||
|bk=40 | |bk=40 | ||
|ks=116 | |ks=116 | ||
Revision as of 15:26, December 9, 2021
Overview
Hitboxes
Timing
| Initial autocancel | 1-3 |
|---|---|
| Hit 1 | 6-7 |
| Hit 2 | 16-17 |
| Ending autocancel | 38- |
| Interruptibility | 47 |
| Animation length | 74 |
Landing lag
| Animation length | 16 |
|---|
Lag time |
Hitbox |
Autocancel |
Interruptible |
|

