Luigi (SSB4)/Back throw: Difference between revisions
From SmashWiki, the Super Smash Bros. wiki
Jump to navigationJump to search
Serpent King (talk | contribs) |
Serpent King (talk | contribs) |
||
| Line 13: | Line 13: | ||
|damage=10% | |damage=10% | ||
|angle=45 | |angle=45 | ||
|af=3 | |||
|bk=80 | |bk=80 | ||
|ks=65 | |ks=65 | ||
|fkv=0 | |fkv=0 | ||
|disableff=t | |||
|bn=0 | |bn=0 | ||
|type=Throwing | |type=Throwing | ||
| Line 25: | Line 27: | ||
|damage=3% | |damage=3% | ||
|angle=361 | |angle=361 | ||
|af=3 | |||
|bk=40 | |bk=40 | ||
|ks=100 | |ks=100 | ||
|fkv=0 | |fkv=0 | ||
|disableff=t | |||
|bn=0 | |bn=0 | ||
|type=Throwing | |type=Throwing | ||
Revision as of 16:22, February 4, 2018
Overview
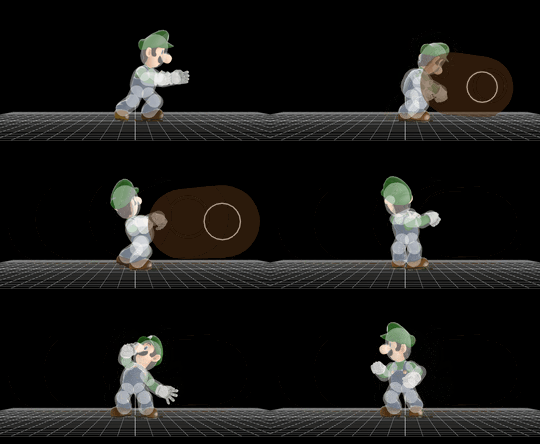
Luigi spins around with the opponent three times and then throws them. The animation is based on how Mario threw Bowser in Super Mario 64. Luigi himself throws Bowser the same way in Super Mario 64 DS.
Hitboxes
Throw
| ID | Damage | Angle | BK | KS | FKV | Bone | FFx | Type | Effect | Sound | |
|---|---|---|---|---|---|---|---|---|---|---|---|
| 0 | 10% | Forwards | 80 | 65 | 0 | 0 | None | ||||
| 1 | 3% | Forwards | 40 | 100 | 0 | 0 | None | ||||
Collateral
| ID | Part | Damage | SD | Angle | BK | KS | FKV | Radius | Bone | Offset | SDIx | H× | T% | Clang | Rebound | Type | Effect | G | A | Sound | Direct | Stretch | ||||
|---|---|---|---|---|---|---|---|---|---|---|---|---|---|---|---|---|---|---|---|---|---|---|---|---|---|---|
| 0 | 0 | 6% | 0 | 30 | 100 | 0 | 6.0 | 3 | 2.5 | 15.0 | 0.0 | 1.0x | 1.0x | 0% | 2.5 | 8.0 | 0.0 | |||||||||
|

