Captain Falcon (SSBM)/Neutral special: Difference between revisions
Mariogeek2 (talk | contribs) m (Added hitbox visualization) |
|||
| (11 intermediate revisions by 7 users not shown) | |||
| Line 1: | Line 1: | ||
{{ArticleIcons|ssbm=y}} | {{ArticleIcons|ssbm=y}} | ||
{{disambig2|the hitbox visualization in ''[[Super Smash Bros. Melee]]|the move itself|Falcon Punch}} | |||
==Overview== | ==Overview== | ||
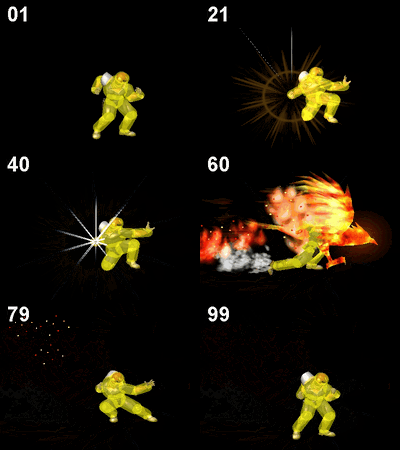
Captain Falcon's | [[File:CFalcon SSBM Neutral Special.gif|thumb|200px|Hitbox visualization of Captain Falcon's Falcon Punch]] | ||
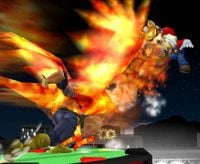
This attack is very rarely used in competitive situations. Due to the high starting and end lag, it is very predictable and easily punished by experienced players. However, it is an integral part to the [[Sacred Combo]], and is sometimes used in | [[File:SSBMWebsiteCaptainFalcon4.jpg|thumb|Screenshot from the Japanese ''Melee'' website.]] | ||
{{ | Captain Falcon's neutral special in ''Melee'' is [[Falcon Punch]]. After about a second (52 frames) of charging the move up, Captain Falcon unleashes a powerful, flaming punch in the shape of a falcon. The attack sends enemies flying upon contact, but leaves Captain Falcon vulnerable to certain attacks. | ||
{{ | This attack is very rarely used in competitive situations. Due to the high starting and end lag, it is very predictable and easily punished by experienced players. However, it is an integral part to the [[Sacred Combo]], and is sometimes used in "hard read" situations. | ||
Slower than in the last game, Falcon Punch has three different hitboxes, dependent on distance. When it is used in the air, all hitboxes deal slightly higher knockback and the sweetspots are larger. | |||
==Hitboxes== | |||
{{MeleeHitboxTableHeader}} | |||
{{HitboxTableTitle|Grounded|42}} | |||
{{MeleeHitboxTableRow | |||
|id=0 | |||
|part=0 | |||
|damage=27% | |||
|angle=361 | |||
|bk=30 | |||
|ks=102 | |||
|fkv=0 | |||
|r=1000 | |||
|bn=45 | |||
|xpos=600 | |||
|effect=Normal | |||
|sfx=Kick | |||
|slvl=L | |||
}} | |||
{{MeleeHitboxTableRow | |||
|id=1 | |||
|part=0 | |||
|damage=25% | |||
|angle=361 | |||
|bk=30 | |||
|ks=102 | |||
|fkv=0 | |||
|r=900 | |||
|bn=45 | |||
|xpos=-600 | |||
|effect=Normal | |||
|sfx=Kick | |||
|slvl=L | |||
}} | |||
{{MeleeHitboxTableRow | |||
|id=2 | |||
|part=0 | |||
|damage=23% | |||
|angle=361 | |||
|bk=30 | |||
|ks=102 | |||
|fkv=0 | |||
|r=1250 | |||
|bn=47 | |||
|xpos=1000 | |||
|effect=Normal | |||
|sfx=Kick | |||
|slvl=L | |||
}} | |||
{{HitboxTableTitle|Aerial|42}} | |||
{{MeleeHitboxTableRow | |||
|id=0 | |||
|part=0 | |||
|damage=27% | |||
|angle=361 | |||
|bk=40 | |||
|ks=102 | |||
|fkv=0 | |||
|r=1350 | |||
|bn=45 | |||
|xpos=600 | |||
|effect=Normal | |||
|sfx=Kick | |||
|slvl=L | |||
}} | |||
{{MeleeHitboxTableRow | |||
|id=1 | |||
|part=0 | |||
|damage=25% | |||
|angle=361 | |||
|bk=40 | |||
|ks=102 | |||
|fkv=0 | |||
|r=1200 | |||
|bn=45 | |||
|xpos=-600 | |||
|effect=Normal | |||
|sfx=Kick | |||
|slvl=L | |||
}} | |||
{{MeleeHitboxTableRow | |||
|id=2 | |||
|part=0 | |||
|damage=23% | |||
|angle=361 | |||
|bk=40 | |||
|ks=102 | |||
|fkv=0 | |||
|r=1250 | |||
|bn=47 | |||
|xpos=1000 | |||
|effect=Normal | |||
|sfx=Kick | |||
|slvl=L | |||
}} | |||
|} | |||
==Timing== | |||
{|class="wikitable" | |||
!Hitbox | |||
|52-56 | |||
|- | |||
!Animation length | |||
|99 | |||
|} | |||
{{FrameStripStart}} | |||
{{FrameStrip|t=Lag|c=51}}{{FrameStrip|t=Hitbox|c=5}}{{FrameStrip|t=Lag|c=43}} | |||
{{FrameStripEnd}} | |||
{{FrameIconLegend|lag=y|hitbox=y}} | |||
{{MvSubNavCaptainFalcon|g=SSBM}} | {{MvSubNavCaptainFalcon|g=SSBM}} | ||
Latest revision as of 19:18, October 17, 2024
Overview[edit]
Captain Falcon's neutral special in Melee is Falcon Punch. After about a second (52 frames) of charging the move up, Captain Falcon unleashes a powerful, flaming punch in the shape of a falcon. The attack sends enemies flying upon contact, but leaves Captain Falcon vulnerable to certain attacks. This attack is very rarely used in competitive situations. Due to the high starting and end lag, it is very predictable and easily punished by experienced players. However, it is an integral part to the Sacred Combo, and is sometimes used in "hard read" situations.
Slower than in the last game, Falcon Punch has three different hitboxes, dependent on distance. When it is used in the air, all hitboxes deal slightly higher knockback and the sweetspots are larger.
Hitboxes[edit]
Timing[edit]
| Hitbox | 52-56 |
|---|---|
| Animation length | 99 |
Lag time |
Hitbox |
|

