Boss: Difference between revisions
Ramin Flage (talk | contribs) m (→Galleom: Only a small thing is added, what happens after Pokemon Trainer and Lucas are released.) |
m (Undid edit by 104.176.246.139: Unexplained removal.) Tag: Undo |
||
| (317 intermediate revisions by more than 100 users not shown) | |||
| Line 1: | Line 1: | ||
{{ArticleIcons| | {{ArticleIcons|series=y}} | ||
:'' | {{disambig2|the game mechanic|the smasher|Smasher:Boss}} | ||
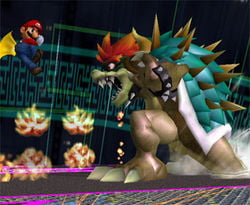
[[File:GigaBowserMelee.jpg|thumb|250px|Mario fighting Giga Bowser in ''Melee'']] | |||
A '''boss''' is a [[non-playable character]] that appears as a strong opponent in specific circumstances in one-player modes or on certain stages in multiplayer modes. Bosses in the ''{{b|Super Smash Bros.|series}}'' series are usually significantly larger than [[fighter|playable character]]s, and are usually immune to [[knockback]] and [[flinch]]ing, meaning that instead of defeating them with an offstage [[KO]], they must instead be defeated by reducing their [[HP]] to zero. When a boss is defeated, the game usually freezes and sometimes zooms in with a special background visual, an effect Masahiro Sakurai officially refers to as "[https://www.youtube.com/watch?v=OdVkEOzdCPw&t=62s Boss Stop]," followed by an animation of the boss being defeated. | |||
Fighting bosses are an entirely different matter than normal fights. Compared to the playable cast, bosses usually have fewer attacks available. These attacks tend to be telegraphed with long startups and end lag, making them more avoidable; on the other hand, they generally deal higher damage and knockback should they connect. Bosses' immunity to knockback also means that the player's moveset will have to be used differently - for example, [[grab]]s and [[throws]] will nearly always be useless, and moves of high knockback but low damage are ineffective. On the other hand, bosses' large size and predictable movements and behavior often mean that they have difficulty dodging attacks, and so powerful moves with long startups such as [[Falcon Punch]] can be highly effective. | |||
In ''[[Super Smash Bros.]]'' and ''[[Super Smash Bros. Melee]]'', boss characters were usable in normal games through hacks or the [[debug menu]]. In ''[[Super Smash Bros. Brawl]]'' onwards the character IDs for the bosses have been removed, meaning they are unplayable even with hacks, although in ''Brawl'' they are controllable in [[Boss Battles]] mode via hacks. While the character IDs for bosses are still absent in ''[[Super Smash Bros. Ultimate]]'', Giga Bowser still has a character ID and can be made playable with hacks. Additionally in ''Ultimate'', {{SSBU|Master Hand}} can be controlled for one battle in [[World of Light]], which is the first intended instance of a boss being playable. | |||
== | ==List of bosses== | ||
[[ | {|class="wikitable" | ||
|- | |||
!Key | |||
|None/Unknown | |||
|style="background-color:#bebeff;"|Classic Mode | |||
|style="background-color:#96ff80;"|Other Solo Modes | |||
|style="background-color:#b0e8db;"|Classic & Solo Modes | |||
|style="background-color:#ffffaf;"|Non-Boss Appearance | |||
|} | |||
{|class="wikitable sortable" style="text-align:center" | |||
!width="20%"|Boss | |||
!width="20%"|Universe | |||
!width="10%"|{{GameIcon|SSB|24px}} | |||
!width="10%"|{{GameIcon|SSBM|24px}} | |||
!width="10%"|{{GameIcon|SSBB|24px}} | |||
!width="5%"|{{GameIcon|SSB4-3|24px}} | |||
!width="5%"|{{GameIcon|SSB4-U|24px}} | |||
!width="10%"|{{GameIcon|SSBU|24px}} | |||
|- | |||
|style="text-align:left"|[[Crazy Hand]] | |||
|style="text-align:left"|{{symbol|ssb|24px}}{{uv|Super Smash Bros.}} | |||
|{{n}} | |||
|style="background-color:#bebeff;"|{{y}} | |||
|style="background-color:#bebeff;"|{{y}} | |||
|colspan=2 style="background-color:#bebeff;"|{{y}} | |||
|style="background-color:#b0e8db;"|{{y}} | |||
|- | |||
|style="text-align:left"|[[Dharkon]] | |||
|style="text-align:left"|{{symbol|wol|24px}}''[[World of Light]]'' | |||
|{{n}} | |||
|{{n}} | |||
|{{n}} | |||
|colspan=2|{{n}} | |||
|style="background-color:#96ff80;|{{y}} | |||
|- | |||
|style="text-align:left"|[[Dracula]] | |||
|style="text-align:left"|{{symbol|castlevania|24px}}{{uv|Castlevania}} | |||
|{{n}} | |||
|{{n}} | |||
|{{n}} | |||
|colspan=2|{{n}} | |||
|style="background-color:#b0e8db;"|{{y}} | |||
|- | |||
|style="text-align:left"|[[Duon]] | |||
|style="text-align:left"|{{symbol|sse|24px}}''[[The Subspace Emissary]]'' | |||
|{{n}} | |||
|{{n}} | |||
|style="background-color:#96ff80;"|{{y}} | |||
|colspan=2|{{n}} | |||
|style="background-color:#ffffaf;"|{{n}} | |||
|- | |||
|style="text-align:left"|[[False characters]] | |||
|style="text-align:left"|{{symbol|ssb|24px}}''[[Super Smash Bros.]]'' | |||
|{{n}} | |||
|{{n}} | |||
|style="background-color:#96ff80;"|{{y}} | |||
|colspan=2|{{n}} | |||
|style="background-color:#96ff80;"|{{y}} | |||
|- | |||
|style="text-align:left"|[[Fighting Alloy Team]] | |||
|style="text-align:left"|{{symbol|ssb|24px}}''[[Super Smash Bros.]]'' | |||
|{{n}} | |||
|{{n}} | |||
|style="background-color:#96ff80;|{{y}} | |||
|colspan=2|{{n}} | |||
|style="background-color:#ffffaf;"|{{n}} | |||
|- | |||
|style="text-align:left"|[[Fighting Mii Team]] | |||
|style="text-align:left"|{{symbol|ssb|24px}}''[[Super Smash Bros.]]'' | |||
|{{n}} | |||
|{{n}} | |||
|{{n}} | |||
|colspan=2 style="background-color:#96ff80;"|{{y}} | |||
|style="background-color:#96ff80;|{{y}} | |||
|- | |||
|style="text-align:left"|[[Fighting Polygon Team]] | |||
|style="text-align:left"|{{symbol|ssb|24px}}''[[Super Smash Bros.]]'' | |||
|style="background-color:#96ff80;|{{y}} | |||
|{{n}} | |||
|{{n}} | |||
|colspan=2|{{n}} | |||
|{{n}} | |||
|- | |||
|style="text-align:left"|[[Fighting Wire Frames]] | |||
|style="text-align:left"|{{symbol|ssb|24px}}''[[Super Smash Bros.]]'' | |||
|{{n}} | |||
|style="background-color:#96ff80;|{{y}} | |||
|{{n}} | |||
|colspan=2|{{n}} | |||
|{{n}} | |||
|- | |||
|style="text-align:left|[[Galeem]] | |||
|style="text-align:left|{{symbol|wol|24px}}''[[World of Light]]'' | |||
|{{n}} | |||
|{{n}} | |||
|{{n}} | |||
|colspan=2|{{n}} | |||
|style=background-color:#96ff80;|{{y}} | |||
|- | |||
|style="text-align:left"|[[Galleom]] | |||
|style="text-align:left"|{{symbol|sse|24px}}''[[The Subspace Emissary]]'' | |||
|{{n}} | |||
|{{n}} | |||
|style="background-color:#96ff80;"|{{y}} | |||
|colspan=2|{{n}} | |||
|style="background-color:#b0e8db;"|{{y}} | |||
|- | |||
|style="text-align:left"|[[Ganon]] | |||
|style="text-align:left"|{{symbol|zelda|24px}}{{uv|The Legend of Zelda}} | |||
|{{n}} | |||
|{{n}} | |||
|{{n}} | |||
|colspan=2|{{n}} | |||
|style="background-color:#b0e8db;"|{{y}} | |||
|- | |||
|style="text-align:left"|[[Giant Donkey Kong]] | |||
|style="text-align:left"|{{symbol|dk|24px}}''[[Donkey Kong]]'' | |||
|style="background-color:#96ff80;|{{y}} | |||
|style="background-color:#ffffaf;"|{{n}} | |||
|style="background-color:#ffffaf;"|{{n}} | |||
|colspan=2 style="background-color:#ffffaf;"|{{n}} | |||
|style="background-color:#ffffaf;"|{{n}} | |||
|- | |||
|style="text-align:left"|[[Giga Bowser]] | |||
|style="text-align:left"|{{symbol|ssb|24px}}{{uv|Super Smash Bros.}} | |||
|{{n}} | |||
|style="background-color:#96ff80;"|{{y}} | |||
|style="background-color:#ffffaf;"|{{n}} | |||
|colspan=2 style="background-color:#ffffaf;"|{{n}} | |||
|style="background-color:#b0e8db;"|{{y}} | |||
|- | |||
|style="text-align:left"|[[Marx]] | |||
|style="text-align:left"|{{symbol|kirby|24px}}{{uv|Kirby}} | |||
|{{n}} | |||
|{{n}} | |||
|{{n}} | |||
|colspan=2|{{n}} | |||
|style="background-color:#b0e8db;"|{{y}} | |||
|- | |||
|style="text-align:left"|[[Master Core]] | |||
|style="text-align:left"|{{symbol|ssb|24px}}{{uv|Super Smash Bros.}} | |||
|{{n}} | |||
|{{n}} | |||
|{{n}} | |||
|colspan=2 style="background-color:#bebeff;"|{{y}} | |||
|style="background-color:#ffffaf;"|{{n}} | |||
|- | |||
|style="text-align:left"|[[Master Hand]] | |||
|style="text-align:left"|{{symbol|ssb|24px}}{{uv|Super Smash Bros.}} | |||
|style="background-color:#bebeff;"|{{y}} | |||
|style="background-color:#bebeff;"|{{y}} | |||
|style="background-color:#b0e8db;"|{{y}} | |||
|colspan=2 style="background-color:#bebeff;"|{{y}} | |||
|style="background-color:#b0e8db;"|{{y}} | |||
|- | |||
|style="text-align:left"|[[Meta Ridley]] | |||
|style="text-align:left"|{{symbol|metroid|24px}}{{uv|Metroid}} | |||
|{{n}} | |||
|{{n}} | |||
|style="background-color:#96ff80;"|{{y}} | |||
|colspan=2|{{n}} | |||
|style="background-color:#ffffaf;"|{{n}} | |||
|- | |||
|style="text-align:left"|[[Metal Mario]] | |||
|style="text-align:left"|{{symbol|mario|24px}}''[[Mario]]'' | |||
|style="background-color:#96ff80;|{{y}} | |||
|style="background-color:#ffffaf;"|{{n}} | |||
|style="background-color:#ffffaf;"|{{n}} | |||
|colspan=2 style="background-color:#ffffaf;"|{{n}} | |||
|style="background-color:#ffffaf;"|{{n}} | |||
|- | |||
|style="text-align:left"|[[Petey Piranha]] | |||
|style="text-align:left"|{{symbol|smb|24px}}{{uv|Mario}} | |||
|{{n}} | |||
|{{n}} | |||
|style="background-color:#96ff80;"|{{y}} | |||
|colspan=2|{{n}} | |||
|style="background-color:#ffffaf;"|{{n}} | |||
|- | |||
|style="text-align:left"|[[Porky]] | |||
|style="text-align:left"|{{symbol|eb|24px}}{{uv|EarthBound}} | |||
|{{n}} | |||
|{{n}} | |||
|style="background-color:#96ff80;"|{{y}} | |||
|{{n}} | |||
|style="background-color:#ffffaf;"|{{n}} | |||
|{{n}} | |||
|- | |||
|style="text-align:left"|[[Rathalos]] | |||
|style="text-align:left"|{{symbol|other|24px}}{{uv|Monster Hunter}} | |||
|{{n}} | |||
|{{n}} | |||
|{{n}} | |||
|colspan=2|{{n}} | |||
|style="background-color:#b0e8db;"|{{y}} | |||
|- | |||
|style="text-align:left"|[[Rayquaza]] | |||
|style="text-align:left"|{{symbol|pokemon|24px}}{{uv|Pokémon}} | |||
|{{n}} | |||
|{{n}} | |||
|style="background-color:#96ff80;"|{{y}} | |||
|{{n}} | |||
|style="background-color:#ffffaf;"|{{n}} | |||
|style="background-color:#ffffaf;"|{{n}} | |||
|- | |||
|style="text-align:left"|[[Ridley]] | |||
|style="text-align:left"|{{symbol|metroid|24px}}{{uv|Metroid}} | |||
|{{n}} | |||
|{{n}} | |||
|style="background-color:#96ff80;"|{{y}} | |||
|{{n}} | |||
|style="background-color:#ffffaf;"|{{n}} | |||
|style="background-color:#ffffaf;"|{{n}} | |||
|- | |||
|style="text-align:left"|[[Tabuu]] | |||
|style="text-align:left"|{{symbol|sse|24px}}''[[The Subspace Emissary]]'' | |||
|{{n}} | |||
|{{n}} | |||
|style="background-color:#96ff80;"|{{y}} | |||
|colspan=2|{{n}} | |||
|style="background-color:#ffffaf;"|{{n}} | |||
|- | |||
|- | |||
! colspan="2"|'''Total''' | |||
! style="text-align:center" |4 | |||
! style="text-align:center" |4 | |||
! style="text-align:center" |12 | |||
! style="text-align:center" |4 | |||
! style="text-align:center" |4 | |||
! style="text-align:center" |12 | |||
|} | |||
==From ''[[Super Smash Bros.]]''== | |||
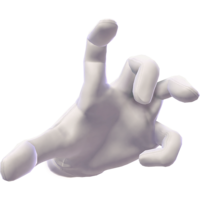
===Master Hand=== | |||
{{Main|Master Hand}} | {{Main|Master Hand}} | ||
The first | [[File:Master Hand SSBU.png|thumb|Master Hand’s official art in ''Ultimate''.]] | ||
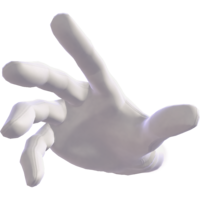
The first "true" boss of the ''Smash Bros.'' series, '''Master Hand''' is the master of ceremonies for the ''Smash Bros.'' series. In the first ''[[Super Smash Bros.]]'', according to the intro movie, he is meant to represent the hand of a child playing with his toys and staging fights between his favorite Nintendo characters, who are represented by dolls. He appears at the end of the [[1P Game]] as the final boss. Upon being defeated, Master Hand lets out a deep roar that resembles laughter, and flies off, writhing and exploding, into the distance. | |||
Master Hand reappears in ''[[Super Smash Bros. Melee]]'' and ''[[Super Smash Bros. Brawl]]'', reprising his role as the final boss in the [[1-Player mode]], now known as [[Classic Mode]]. Master Hand is fought on [[Final Destination]], which is very similar to the {{SSB|Final Destination}} stage of ''SSB''. He fights essentially the same way as he did in the original game, but with a few new attacks. Upon being defeated, he leaves the stage in the same way that he did in the original game. In ''Melee'', he can also be fought in [[Event 50: Final Destination Match]], where the player faces off against him and [[Crazy Hand]] at the same time. Due to a [[Master Hand glitch|glitch]] in this game only, Master Hand can be used as a playable character in certain settings. In ''Brawl'', he also has an important plot role in [[The Subspace Emissary]] and appears in [[Boss Battles Mode]] as one of the game's ten bosses. | |||
In ''[[Super Smash Bros. 4]]'', Master Hand continues to be fought at the end of Classic Mode on Final Destination and has new attacks; however, on high enough [[difficulty]] settings he will now transform into [[Master Core]] near the beginning of the fight, and the player will defeat Master Core in Master Hand's place. In {{forwiiu}}, Master Hand has his own mode named after him, [[Master Orders]]. | |||
Master Hand reprises his role as a boss at the end of Classic Mode in ''[[Super Smash Bros. Ultimate]]''. In Adventure mode: World of Light, an army of Master Hands fights for Galeem, but are destroyed when Galeem uses their power to destroy all the fighters, except for Kirby, who escapes. He also appears as a boss in [[Adventure Mode: World of Light]]. | |||
Master Hand | Outside of ''Smash'', Master Hand appears in the Game Boy Advance game, ''Kirby and the Amazing Mirror'', in which he appears as a miniboss in multiple areas. Upon being defeated, Kirby can inhale him, like other minibosses, and gains the Smash ability, which is based on Kirby’s moveset in ''Melee''. Master Hand, alongside Crazy Hand, also appears as the boss of the Candy Constellation. This is Crazy Hand’s only appearance in the game. The two, like in ''Melee'', have attacks that they use in conjunction with each other. In this battle, neither can be inhaled; they both explode upon defeat. | ||
{{clr}} | |||
===Giant Donkey Kong=== | |||
{{Main|Giant Donkey Kong}} | |||
[[File:Giantdonkeykong.png|thumb|Giant Donkey Kong in ''Smash 64''.]] | |||
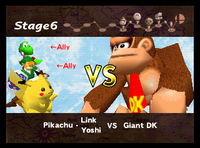
An enlarged version of {{SSB|Donkey Kong}}, '''Giant Donkey Kong''' is fought on stage 6 of the [[1P Game]] in ''[[Super Smash Bros.]]'' He is pitted against the player and two [[CPU]] allies. | |||
In ''Melee'' and in subsequent games, with the introduction of the [[Super Mushroom]], Giant DK is no longer strictly unplayable. Also, the randomized nature of {{SSBM|Classic Mode}} can give the "giant" modifier to playable characters. | |||
{{ | {{clr}} | ||
== | ===Metal Mario=== | ||
[[File: | {{Main|Metal Mario}} | ||
[[File:Metal Mario SSB.png|thumb|Metal Mario in ''Smash 64''.]] | |||
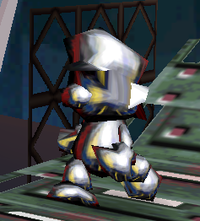
A super-heavy fighter bearing an edited [[Mario (universe)|Mario series]] symbol. '''Metal Mario''' is a metallic version of {{SSB|Mario}}. He is fought on stage 9 of the 1P Game. | |||
In ''Melee'', Metal Mario reappears in stage 11 of {{SSBM|Adventure Mode}} after defeating the [[Fighting Wire Frames]] and as a random opponent with other metal characters in stage 10 of Classic Mode as well as a trophy. A Metal {{SSBM|Luigi}} will also appear if Luigi is unlocked. Similar to Giant Donkey Kong, with the introduction of the [[Metal Box]] powerup in Melee, Metal Mario is no longer strictly unplayable. The randomized nature of {{SSBM|Classic Mode}} can also give the "metal" modifier to any fighter. | |||
{{clr}} | |||
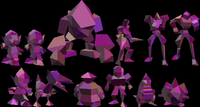
===Fighting Polygon Team=== | |||
{{Main|Fighting Polygon Team}} | |||
[[File:ThePolygons.png|thumb|The Fighting Polygon Team in ''Smash 64''.]] | |||
The '''Fighting Polygon Team''' is faced on stage 10 of the 1P Game, as well as in the {{SSB|Race to the Finish}} bonus game. The team is made up of polygonal models of the [[Original 12|12 playable characters]], but are weak and lack [[Special move|specials]]. | |||
{{clr}} | |||
==From ''[[Super Smash Bros. Melee]]''== | |||
===Crazy Hand=== | |||
{{Main|Crazy Hand}} | {{Main|Crazy Hand}} | ||
[[File:Crazy Hand SSBU.png|thumb|Crazy Hand’s official art in ''Ultimate''.]] | |||
Where Master Hand represents the constructive side of creativity, '''Crazy Hand''' is his destructive left-handed counterpart. He was introduced in ''Super Smash Bros. Melee'' as a secret boss who fights alongside Master Hand under specific conditions (when Classic Mode is cleared on Normal difficulty or higher in under 15 minutes, Crazy Hand will join Master Hand when Master Hand has half of his health left.) As noted above, Crazy Hand also appears in Event 50, where he and Master Hand are fought together on Final Destination with 300 HP each. | |||
When compared to Master Hand, Crazy Hand can be considered to be much more erratic (i.e. "crazy"). His idle pose is a strange, erratic movement, and he has multiple strange attacks that are unique to him. Many of his attacks also have side effects compared to Master Hand, such as [[Frozen|freezing]] and [[flower]]ing. When Master Hand and Crazy Hand are fought together, they have several moves that they use in conjunction with each other, such as a high-powered clapping attack. | |||
Crazy Hand reappears in ''Brawl'' at the end of Classic Mode under similar conditions as in ''Melee'', where the player must beat the mode on Hard difficulty or higher in under 9 minutes. Instead of appearing halfway through, Master Hand and Crazy Hand will appear simultaneously at the beginning of the battle. As with Master Hand, Crazy Hand also appears as a separate boss in ''Brawl''{{'}}s "Boss Battles" mode, though he does not make any appearances in The Subspace Emissary. | |||
In ''Smash 4'', Crazy Hand continues to be fought alongside Master Hand at the end of Classic Mode on Final Destination, and the two will appear together at the beginning of the battle; however, the conditions are now different. In {{for3ds}}, the player gains the choice to fight Crazy Hand when on [[Intensity]] 3.0 or higher in return for more rewards; on Intensity 8.0 or higher, the player has no choice but to fight Crazy Hand. In {{forwiiu}}, the player will always fight Crazy Hand as long as the Intensity is 3.0 or higher. However, in both games, if Crazy Hand (and Master Hand) are fought on Intensity 5.1 or higher, Master Core will appear in their place soon after the beginning of the battle. | |||
Like Master Hand, Crazy Hand has his own mode named after him in {{forwiiu}}, [[Crazy Orders]]. | |||
Crazy Hand | Crazy Hand reprises his role as a boss at the end of Classic Mode in ''Ultimate''. An army of Crazy Hand's fight for Dharkon in World of Light. He also appears as a boss in [[Adventure Mode: World of Light]]. | ||
{{ | {{clr}} | ||
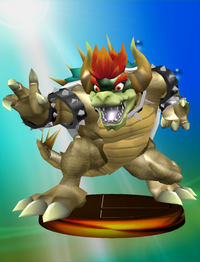
==Giga Bowser== | ===Giga Bowser=== | ||
{{Main|Giga Bowser}} | {{Main|Giga Bowser}} | ||
'''Giga Bowser''' ( | [[File:Giga Bowser Melee Trophy.png|thumb|Giga Bowser|Giga Bowser's Trophy in ''Melee''.]] | ||
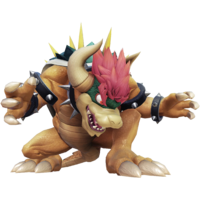
'''Giga Bowser''' (Japanese name '''Giga Koopa''') is the secret final boss of [[Adventure Mode]] in ''[[Super Smash Bros. Melee]]''. As his name suggests, he is a large, powered-up version of {{SSBM|Bowser}}. Giga Bowser is treated as a character, making him a rare exception to many boss properties - unlike other bosses, he has a damage percentage, takes knockback, has a full moveset, and can use items. (However, like other bosses, he cannot [[shield]] or be grabbed.) With a manic expression, a darker, more malevolent color scheme, and a hulking size, Giga Bowser is surely a boss to be remembered. | |||
Upon clearing Adventure Mode in fewer than 18 minutes on Normal difficulty (or higher), Bowser’s trophy, previously thrown into a mysterious abyss below Final Destination, rises back up onto the stage and is struck by a bolt of strange lightning, transforming it into Giga Bowser. During the battle with Giga Bowser, a distorted version of the Final Destination theme that cannot be found in the Sound Test plays. Many of Giga Bowser’s attacks are powered up versions of Bowser’s: his [[down smash]] attack has a [[freezing]] effect, his [[forward smash]] has [[explosive]] properties and his [[forward tilt]] has [[darkness]] effects. Unlike Bowser, Giga Bowser's [[Fire Breath]] attack never diminishes. | |||
Along with {{SSBM|Mewtwo}} and {{SSBM|Ganondorf}}, Giga Bowser appears in [[Event 51: The Showdown]]. The three-team up against the player, who must defeat them to complete the event. | |||
In ''[[Super Smash Bros. Brawl]]'' and ''[[Super Smash Bros. 4]]'', Giga Bowser no longer appears as a boss. Instead, he makes a semi-playable appearance from [[Bowser]]'s [[Final Smash]], {{b|Giga Bowser|Final Smash}}. When used, Bowser temporarily transforms into Giga Bowser, who is largely unchanged from ''Melee'', keeping the elemental abilities of his attacks as well as his massive size. Some changes include that Giga Bowser no longer flinches (making him more similar to other bosses in this regard) and that his [[down special]], Giga [[Bowser Bomb]], no longer has a wind effect as it does in ''Melee''. | |||
[[File:Giga Bowser SSBU.png|left|thumb|Giga Bowser's official art in ''Ultimate''.]] | |||
In ''[[Super Smash Bros. Ultimate]]'', Bowser's Final Smash is no longer a controllable transformation, with the player instead aiming a targeting reticle that unleashes a single powerful punch from Giga Bowser on their opponents. However, Giga Bowser returns as a boss in {{SSBU|Classic Mode}} and [[Adventure Mode: World of Light]]. Like his Final Smash incarnations in ''Brawl'' and ''Smash 4'', the player must deplete his [[HP]] in order to defeat him, and he does not [[flinch]] from almost all attacks. | |||
{{clr}} | |||
===Fighting Wire Frames=== | |||
{{main|Fighting Wire Frames}} | |||
[[File:Fighting Wire Frames Trophy.png|thumb|The Fighting Wire Frames trophy in ''Melee''.]] | |||
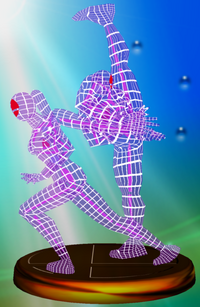
The spiritual successors to the Polygon Team, the '''Fighting Wire Frames''' come in male and female varieties. They appear in Adventure Mode, as well as the various forms of [[Multi-Man Melee]]. | |||
{{clr}} | |||
==Petey Piranha== | ==From ''[[Super Smash Bros. Brawl]]''== | ||
===Petey Piranha=== | |||
{{Main|Petey Piranha}} | |||
[[File:Petey.jpg|thumb|Petey Piranha's official art.]] | [[File:Petey.jpg|thumb|Petey Piranha's official art.]] | ||
'''Petey Piranha''' (Japanese name '''Boss Pakkun''') was the first revealed boss character in ''Brawl'', and is the first major boss to come from another series of games, as opposed to being unique to ''Smash''. He appears as a boss in [[The Subspace Emissary]] storyline, holding cages that contain {{SSBB|Zelda}} and {{SSBB|Peach}}. He uses both these cages, as well as his own abilities, to attack {{SSBB|Kirby}}. After Kirby attacks a cage enough to break it, Petey will be defeated and explode. While whichever princess contained within the broken cage will be freed, the other princess is turned into a [[trophy]] and subsequently taken by {{SSBB|Wario}}. If Petey himself is attacked, both cages will take damage. If he is the only entity attacked and defeated, a random princess will be selected to be taken by Wario. Petey Piranha has previously appeared as a playable character in ''Mario Kart: Double Dash'' and a boss in ''[[Super Mario Sunshine]]''. | |||
'''Petey Piranha''' ( | |||
{{ | Petey Piranha returns in ''[[Super Smash Bros. Ultimate]]'' as {{SSBU|Piranha Plant}}'s [[Final Smash]] [[Petey Piranha (Final Smash)|of the same name]], complete with the two cages he carried in The Subspace Emissary. When summoned by Piranha Plant, he will begin jumping around while swinging the two cages in hopes of catching one of Piranha Plant's opponents. Then, he breathes fire on the cage before slamming them into the ground to launch the opponents and disappearing. This makes Petey Piranha the second boss character to become part of a Final Smash, following Giga Bowser. | ||
{{clr}} | |||
==Rayquaza== | ===Rayquaza=== | ||
{{Main|Rayquaza}} | {{Main|Rayquaza}} | ||
[[File:Rayquaza.jpg|thumb|Rayquaza's official art.]] | |||
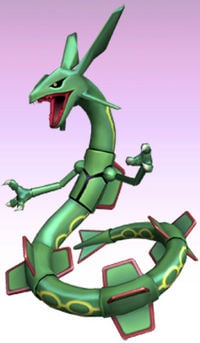
{{ | '''Rayquaza''' is the first ''Pokémon'' to be a boss. It first appears in The Subspace Emissary in the jungle after {{SSBB|Diddy Kong}} goes to investigate a crashed [[Arwing]], where it comes out of the water, destroys the Arwing with an energy ball, and then kidnaps Diddy. As it goes back into the water, {{SSBB|Fox}} exits the destroyed Arwing and attacks the aggressive beast, causing it to lose its grip on Diddy Kong. Rayquaza then fires an energy ball at Fox, but Fox [[Reflector|reflects]] the attack back at the monstrous dragon, sending it tumbling back into the water. After this, Diddy Kong and Fox fight it. Its attacks are loosely based on the ''Pokémon'' games, and it has an exceedingly large amount of resistance. | ||
{{clr}} | |||
==Porky | ===Porky=== | ||
{{Main|Porky Minch}} | {{Main|Porky Minch}} | ||
As one of the bosses of | [[File:Porky.jpg|thumb|Porky's official art.]] | ||
As one of the bosses of The Subspace Emissary and a high-ranked member of the Subspace Army, '''Porky''' sends [[Primid]]s to divert {{SSBB|Lucas}} and sends in his giant statue, the [[Pig King Statue]], which soon hunts Lucas down. The statue is indestructible, so Lucas has no choice but to run; the giant statue destroys giant containers, barrels, enemies, and even metallic buildings as it chases him. Lucas finally comes to a giant marsh which seems to save him as the statue sinks, but it soon respawns. | |||
Lucas then stumbles, and just as the giant statue is about to crush him, | Lucas then stumbles, and just as the giant statue is about to crush him, {{SSBB|Ness}} appears and uses a [[PK Thunder]], which causes the statue to tip over. The statue once again recovers and flies into the air, this time to crush Ness. However, Ness uses a [[PK Flash]] and the statue explodes, revealing Porky himself inside (in his bed-mecha from ''Mother 3''). A boss battle then ensues. He attacks by running around and by using a variety of lasers. Lucas and Ness eventually take him down. Like all Subspace Emissary bosses, Porky is brought back by Tabuu to distract the heroes in [[The Great Maze]]. In his origin series, he appears as an antagonist in ''[[EarthBound]]'' and ''[[Mother 3]]''. | ||
{{clr}} | {{clr}} | ||
==Galleom== | ===Galleom=== | ||
{{Main|Galleom}} | {{Main|Galleom}} | ||
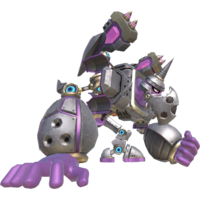
'''Galleom''' is a large transforming robot found in the desert by {{SSBB|Marth}}, {{SSBB|Ike}}, and {{SSBB|Meta Knight}}. Galleom's initial form is a large armored tank equipped with ramming spikes and missiles, but when confronted by the three | [[File:Galleom.jpg|thumb|Galleom's official art from ''Brawl''.]] | ||
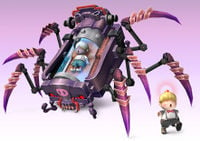
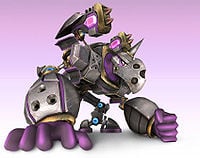
'''Galleom''' is a large transforming robot found during The Subspace Emissary in the desert by {{SSBB|Marth}}, {{SSBB|Ike}}, and {{SSBB|Meta Knight}}. Galleom's initial form is a large armored tank equipped with ramming spikes and missiles, but when confronted by the three swordsmen, the tank transforms into an immense purple robot. In this form, he attacks with his large fists and missiles and tries to crush the protagonists with his sheer bulk. The mechanoid is finally defeated, but not destroyed. He then leaps off a cliff and falls through the ground into a tunnel system. There, he confronts Lucas and the {{SSBB|Pokémon Trainer}}. After he is defeated a second time, he grabs the two companions and blasts into the sky, revealing a [[Subspace Bomb]] concealed in his head. Lucas uses PK Thunder to separate Galleom's arm from his body, releasing the two boys, who are then rescued by Meta Knight. Galleom is finally destroyed by the detonation of the Subspace Bomb. He is later brought back by Tabuu to confront the heroes yet again in The Great Maze. | |||
[[File:Galleom_SSBU.png|thumb|left|Galleom's official art from ''Ultimate''.]] | |||
[[File: | Galleom returns as a boss in ''[[Super Smash Bros. Ultimate]]'''s [[Adventure Mode: World of Light]] and {{SSBU|Classic Mode}}. He has familiar attacks as well as new ones, delivering powerful punches and stomps along with barrages of missiles. | ||
{{clr}} | |||
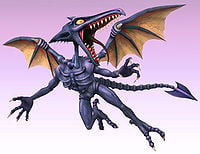
===Ridley/Meta Ridley=== | |||
{{main|Ridley|Meta Ridley}} | {{main|Ridley|Meta Ridley}} | ||
'''Ridley''' | [[File:RidleyBrawl.jpg|thumb|Ridley's official art from ''Brawl''.]] | ||
'''Ridley''' appears as a boss in The Subspace Emissary in ''Brawl'', where he meets {{SSBB|Samus}} and {{SSBB|Pikachu}} and proceeds to scratch Samus's Power Suit against the wall. Pikachu frees Samus with {{b|Thunder|Pokémon}}, and the pair then fights Ridley, eventually defeating him. | |||
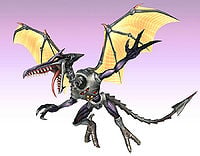
Ridley reappears in his cybernetic form known as '''Meta Ridley''' | [[File:Meta Ridley SSBB.jpg|thumb|left|Meta Ridley's official art from ''Brawl''.]] | ||
Ridley later reappears in his cybernetic form known as '''Meta Ridley''', where he chases {{SSBB|R.O.B.}}, {{SSBB|Olimar}}, Pikachu, Samus, {{SSBB|Captain Falcon}}, {{SSBB|Donkey Kong}}, and Diddy Kong in the [[Falcon Flyer]] as the protagonists are escaping the [[Isle of the Ancients]] as it is about to detonate. Unlike other boss battles, there is a 2-minute time limit. They battle him atop the Flyer, defeating him and sending his body crashing back into the factory's vents, just as the whole island is destroyed. | |||
Both Ridley forms are reincarnated by Tabuu as enemies in The Great Maze. | Both Ridley forms are reincarnated by Tabuu as individual enemies in The Great Maze. | ||
==Duon== | Ridley returns in {{forwiiu}} as a [[stage hazard]] on [[Pyrosphere]]. Damaging him will make him team up with his attacker, similarly to the [[Flying Man]]. He can transform into Meta Ridley at certain points during the battle. | ||
Ridley also returns in ''[[Super Smash Bros. Ultimate]]'', becoming a [[fighter|playable character]] with Meta Ridley being an [[alternate costume]]. This also makes Ridley the first boss in the series to become a playable character (excluding [[Giga Bowser]] and [[Master Hand]], the former being a [[Final Smash]] and the latter being playable via [[Master Hand glitch|a glitch]] in ''Melee'' and a portion of ''World of Light''). | |||
{{clr}} | |||
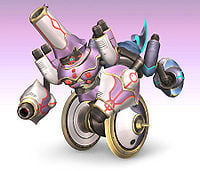
===Duon=== | |||
{{Main|Duon}} | {{Main|Duon}} | ||
[[File:Duon.jpg|thumb|Duon's official art.]] | [[File:Duon.jpg|thumb|Duon's official art.]] | ||
'''Duon''' is an immense, double-sided robot fought on the | '''Duon''' is an immense, double-sided robot fought in The Subspace Emissary on the [[Halberd]]. Duon is created when {{SSBB|Snake}}, {{SSBB|Lucario}}, and Meta Knight destroy the {{SSBB|Mr. Game & Watch}} clones that are maintaining the bridge. As mentioned, Duon has two different sides: one is a bright blue and specializes at melee attacks, while the other is pink and possesses long-range attacks. The blue side has two drill-like appendages and a large blade on his head. He can also fire explosive mines from his shoulders. The pink side can fire several energy blasts from his arm cannons in quick succession. He also fires three blue energy blasts from his head cannon and launches missiles from his shoulders. The beast can also leap into the air to try to crush the heroes and can spin around to cause damage. Upon his defeat, Duon dissolves and noticeably shrinks into a puddle of Shadow Bugs and reveals the trophy of Mr. Game & Watch. As with the other bosses, Duon will attempt to stop the heroes again in The Great Maze. | ||
Maze | {{clr}} | ||
{{ | |||
==Tabuu== | ===Tabuu=== | ||
{{Main|Tabuu}} | |||
[[File:Tabuu (Wings) - Brawl Trophy.png|thumb|One of Tabuu's trophies in ''Brawl''.]] | [[File:Tabuu (Wings) - Brawl Trophy.png|thumb|One of Tabuu's trophies in ''Brawl''.]] | ||
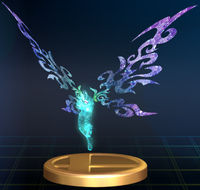
'''Tabuu''' is the final boss of The Subspace Emissary in ''Super Smash Bros. Brawl''. He has many devastating attacks, most dangerously his [[Off Waves]] which can [[one-hit KO]] and are hard to dodge, but most of his attacks have a large amount of start-up [[lag]]. While playing in The Subspace Emissary, six characters are chosen to fight Tabuu. | |||
'''Tabuu''' is the final boss of | {{clr}} | ||
===Fighting Alloy Team=== | |||
{{Main|Fighting Alloy Team}} | |||
[[File:SSBU spirit Fighting Alloy Team.png|thumb|The Fighting Alloy Team in ''Brawl''.]] | |||
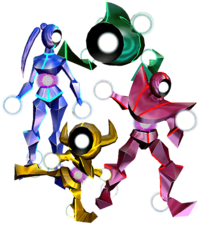
The successor to the Fighting Wire Frame and Polygon teams. The '''Fighting Alloy Team''' comes in red, blue, yellow, and green varieties. | |||
{{clr}} | |||
===False characters=== | |||
{{Main|False character}} | |||
[[File:Lakeshore Subspace Emissary.png|thumb|A false version of {{SSBB|Bowser}} in ''Brawl''.]] | |||
'''False characters''' are clones of characters made of [[Shadow Bug]]s, appearing as occasional bosses in [[Adventure Mode: The Subspace Emissary]]. | |||
[[File:False characters SSBU.png|thumb|left|Puppet fighters in ''Ultimate''.]] | |||
In ''Ultimate'', they are known as '''puppet fighters''' and appear in [[Adventure Mode: World of Light]] as clones created by [[Galeem]] and [[Dharkon]]. Special puppet fighters very similar to ''Brawl''{{'}}s false characters appear as obstacles in World of Light's final boss battle. | |||
{{clr}} | |||
==From ''[[Super Smash Bros. 4]]''== | |||
===Master Core=== | |||
{{Main|Master Core}} | |||
[[File:MasterCore_render.png|thumb|Master Core's official artwork for ''Super Smash Bros. for Nintendo 3DS'']] | |||
Introduced in {{for3ds}}, '''Master Core''' is a transformation of Master Hand and appears as a secret final boss in Classic Mode only when the [[Intensity]] is set to 5.1 or higher, after Master Hand and Crazy Hand are damaged enough. It possesses several forms that are fought in order: the humanoid-like Master Giant, the scorpion-like Master Beast, the swords-like Master Edges, a shadow duplicate of the player character named Master Shadow, a massive sub-stage of its own called the Master Fortress (exclusive to the ''Wii U'' version), and finally the Master Core itself. What forms are fought depends on the Intensity; numbers vary between versions but in general the higher the Intensity setting the more forms that are fought, causing Master Core to have more HP overall and take longer to defeat. After all previous forms are defeated, the true Master Core will appear; it is normally completely defenseless, but if not defeated quickly enough, it will unleash five waves, each powerful enough to cause a [[one-hit KO]]. | |||
{{clr}} | |||
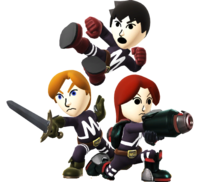
===Fighting Mii Team=== | |||
{{main|Fighting Mii Team}} | |||
[[File:FightingMiiTeam.png|thumb|Fighting Mii Team trophy in ''For Wii U''.]] | |||
The '''Fighting Mii Team''' appears as the opponents of [[Multi-Man Smash]] in ''Smash 4'' and ''Ultimate'', and as mid-bosses in ''Smash 4''<nowiki>'s</nowiki> {{SSB4|Classic Mode}}. | |||
{{clr}} | |||
==From ''[[Super Smash Bros. Ultimate]]''== | |||
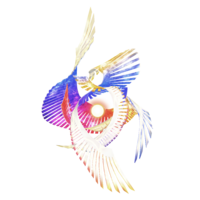
===Galeem=== | |||
{{Main|Galeem}} | |||
[[File:Galeem SSBU.png|thumb|Galeem's official art from ''Ultimate''.]] | |||
'''Galeem''' appears as the main antagonist of [[World of Light]]. He is first confronting the fighters with an army of {{SSBU|Master Hand}}s. He then proceeds to absorbs his army of Master Hands before unleashing his ultimate attack to destroy and imprison all the fighters (except {{SSBU|Kirby}} who escapes with his Warp Star) while transforming non-playable characters into [[spirit]]s. He then rewrites the universe in his own image, leaving it inhabited by hostile spirits and [[False character|puppet fighters]] cloned from the fighters he has captured. | |||
He is surrounded by a shield which can only be broken by defeating [[Giga Bowser]], [[Rathalos]], and [[Galleom]] in any order, and then facing off against {{SSBU|Master Hand}}. After being defeated, [[Dharkon]] and his army of {{SSBU|Crazy Hand}}s appear, which prompts the weakened Galeem to flee and leave much of his remaining puppet fighters to be stolen by Dharkon. Galeem returns after Dharkon is defeated for the first time, and the two armies clash in the Final Battle. Galeem may be confronted either by himself or with Dharkon, but either fight gives Galeem additional moves. Defeating only Galeem has Dharkon plunge the world into darkness while defeating both triggers the true ending. | |||
{{clr}} | |||
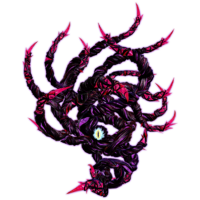
===Dharkon=== | |||
{{Main|Dharkon}} | |||
[[File:Dharkon SSBU.png|thumb|Dharkon's official art from ''Ultimate''.]] | |||
As the secondary antagonist and counterpart to Galeem, '''Dharkon''' appears in [[World of Light]]. He represents corruption, chaos, and destruction. He warps the world into a twisted chaotic mess, which is in strong contrast to the organized near-perfectly fit world Galeem creates. In the final stage the player can either face him or Dharkon and Galeem combined, but either fight gives Dharkon additional moves. Defeating only Dharkon has Galeem unleash his power a second time akin to the beginning of the game, but this time no one escapes. | |||
{{clr}} | |||
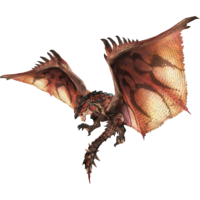
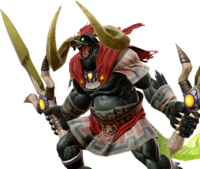
===Rathalos=== | |||
{{Main|Rathalos}} | |||
[[File:Rathalos SSBU.png|thumb|Rathalos's official art from ''Ultimate''.]] | |||
'''Rathalos''' appears as a boss in [[World of Light]] and {{SSBU|Classic Mode}}. He is also the first boss in the series to appear as an [[Assist Trophy]]. He can be found flying around [[Forest Hill]]. | |||
{{clr}} | |||
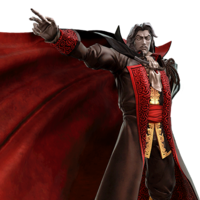
===Dracula=== | |||
{{Main|Dracula}} | |||
[[File:Dracula Phase 1 SSBU.png|thumb|Dracula's official art from ''Ultimate''.]] | |||
Residing at the top of [[Dracula's Castle (World of Light)|his castle]], '''Dracula''' appears as a boss in [[World of Light]] and {{SSBU|Classic Mode}}. He is the first boss to be from a major third-party universe. His attacks are based heavily on his boss battle in ''Castlevania: Symphony of the Night''. | |||
{{clr}} | |||
===Ganon=== | |||
{{Main|Ganon}} | |||
[[File:Ganon SSBU.png|thumb|Ganon's official art from ''Ultimate''.]] | |||
'''Ganon''' appears as a boss in [[World of Light]] and {{SSBU|Classic Mode}}. He can be fought in the [[Sacred Land]]. His fight is reminiscent of the final battle of ''The Legend of Zelda: Ocarina of Time''. | |||
{{clr}} | |||
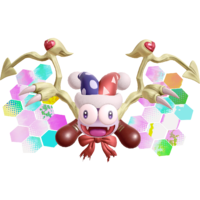
===Marx=== | |||
{{Main|Marx}} | |||
[[File:Marx SSBU.png|thumb|Marx's official art from ''Ultimate''.]] | |||
In the center of a vortex in a [[Mysterious Dimension]], '''Marx''' appears as a boss in [[World of Light]] and {{SSBU|Classic Mode}}. Many of his attacks are taken from his battle at the end of Milky Way Wishes in ''Kirby Super Star'', although he does have several original moves in his ''Smash Bros.'' appearance. | |||
{{clr}} | |||
==Trivia== | |||
*When most bosses' stamina is reduced to half, they will get stronger and attack in a different way. Examples include: | |||
**Master Hand's gun will shoot 3 times (if he is below 100 HP in ''Smash 64'' and ''Melee''). | |||
**Petey Piranha will jump twice and swing cages more often. | |||
**Duon will perform his dash attack twice. | |||
**Ridley will perform his tail attack across the stage twice. | |||
**Meta Ridley will perform a stomp that pushes the Falcon Flyer down below the lower blast line and launch a powerful fireball more often. | |||
**Most of Rayquaza's attacks will be used three times in a row. | |||
*In ''Brawl'', whenever any boss is defeated in any mode, the same pattern of vertical dark green lines will appear over the screen. | |||
*Ridley is the only boss to become a fully playable character, with Meta Ridley as one of his palette swaps. | |||
*Porky is the only boss in the series to have no appearance in ''Ultimate''. It is unknown whether or not he was supposed to be referenced with the Absolutely Safe Capsule spirit, which he uses at the end of his boss fight in ''Mother 3''. | |||
*Master Hand, Crazy Hand, Giga Bowser, and Galleom are the only original characters in the series to appear as bosses in more than one game. | |||
**However, Giga Bowser appears separately in ''Super Smash Bros. Brawl'' and ''Super Smash Bros. 4'' as Bowser's [[Final Smash]]. | |||
== | ==See also== | ||
*[[Fighter]] | |||
*[[Non-playable character]] | |||
{{Bosses}} | {{Bosses}} | ||
[[Category:Bosses]] | [[Category:Bosses]] | ||
[[es:Jefe]] | |||
Latest revision as of 11:38, August 31, 2024
A boss is a non-playable character that appears as a strong opponent in specific circumstances in one-player modes or on certain stages in multiplayer modes. Bosses in the Super Smash Bros. series are usually significantly larger than playable characters, and are usually immune to knockback and flinching, meaning that instead of defeating them with an offstage KO, they must instead be defeated by reducing their HP to zero. When a boss is defeated, the game usually freezes and sometimes zooms in with a special background visual, an effect Masahiro Sakurai officially refers to as "Boss Stop," followed by an animation of the boss being defeated.
Fighting bosses are an entirely different matter than normal fights. Compared to the playable cast, bosses usually have fewer attacks available. These attacks tend to be telegraphed with long startups and end lag, making them more avoidable; on the other hand, they generally deal higher damage and knockback should they connect. Bosses' immunity to knockback also means that the player's moveset will have to be used differently - for example, grabs and throws will nearly always be useless, and moves of high knockback but low damage are ineffective. On the other hand, bosses' large size and predictable movements and behavior often mean that they have difficulty dodging attacks, and so powerful moves with long startups such as Falcon Punch can be highly effective.
In Super Smash Bros. and Super Smash Bros. Melee, boss characters were usable in normal games through hacks or the debug menu. In Super Smash Bros. Brawl onwards the character IDs for the bosses have been removed, meaning they are unplayable even with hacks, although in Brawl they are controllable in Boss Battles mode via hacks. While the character IDs for bosses are still absent in Super Smash Bros. Ultimate, Giga Bowser still has a character ID and can be made playable with hacks. Additionally in Ultimate, Master Hand can be controlled for one battle in World of Light, which is the first intended instance of a boss being playable.
List of bosses[edit]
| Key | None/Unknown | Classic Mode | Other Solo Modes | Classic & Solo Modes | Non-Boss Appearance |
|---|
From Super Smash Bros.[edit]
Master Hand[edit]
The first "true" boss of the Smash Bros. series, Master Hand is the master of ceremonies for the Smash Bros. series. In the first Super Smash Bros., according to the intro movie, he is meant to represent the hand of a child playing with his toys and staging fights between his favorite Nintendo characters, who are represented by dolls. He appears at the end of the 1P Game as the final boss. Upon being defeated, Master Hand lets out a deep roar that resembles laughter, and flies off, writhing and exploding, into the distance.
Master Hand reappears in Super Smash Bros. Melee and Super Smash Bros. Brawl, reprising his role as the final boss in the 1-Player mode, now known as Classic Mode. Master Hand is fought on Final Destination, which is very similar to the Final Destination stage of SSB. He fights essentially the same way as he did in the original game, but with a few new attacks. Upon being defeated, he leaves the stage in the same way that he did in the original game. In Melee, he can also be fought in Event 50: Final Destination Match, where the player faces off against him and Crazy Hand at the same time. Due to a glitch in this game only, Master Hand can be used as a playable character in certain settings. In Brawl, he also has an important plot role in The Subspace Emissary and appears in Boss Battles Mode as one of the game's ten bosses.
In Super Smash Bros. 4, Master Hand continues to be fought at the end of Classic Mode on Final Destination and has new attacks; however, on high enough difficulty settings he will now transform into Master Core near the beginning of the fight, and the player will defeat Master Core in Master Hand's place. In Super Smash Bros. for Wii U, Master Hand has his own mode named after him, Master Orders.
Master Hand reprises his role as a boss at the end of Classic Mode in Super Smash Bros. Ultimate. In Adventure mode: World of Light, an army of Master Hands fights for Galeem, but are destroyed when Galeem uses their power to destroy all the fighters, except for Kirby, who escapes. He also appears as a boss in Adventure Mode: World of Light.
Outside of Smash, Master Hand appears in the Game Boy Advance game, Kirby and the Amazing Mirror, in which he appears as a miniboss in multiple areas. Upon being defeated, Kirby can inhale him, like other minibosses, and gains the Smash ability, which is based on Kirby’s moveset in Melee. Master Hand, alongside Crazy Hand, also appears as the boss of the Candy Constellation. This is Crazy Hand’s only appearance in the game. The two, like in Melee, have attacks that they use in conjunction with each other. In this battle, neither can be inhaled; they both explode upon defeat.
Giant Donkey Kong[edit]
An enlarged version of Donkey Kong, Giant Donkey Kong is fought on stage 6 of the 1P Game in Super Smash Bros. He is pitted against the player and two CPU allies.
In Melee and in subsequent games, with the introduction of the Super Mushroom, Giant DK is no longer strictly unplayable. Also, the randomized nature of Classic Mode can give the "giant" modifier to playable characters.
Metal Mario[edit]
A super-heavy fighter bearing an edited Mario series symbol. Metal Mario is a metallic version of Mario. He is fought on stage 9 of the 1P Game.
In Melee, Metal Mario reappears in stage 11 of Adventure Mode after defeating the Fighting Wire Frames and as a random opponent with other metal characters in stage 10 of Classic Mode as well as a trophy. A Metal Luigi will also appear if Luigi is unlocked. Similar to Giant Donkey Kong, with the introduction of the Metal Box powerup in Melee, Metal Mario is no longer strictly unplayable. The randomized nature of Classic Mode can also give the "metal" modifier to any fighter.
Fighting Polygon Team[edit]
The Fighting Polygon Team is faced on stage 10 of the 1P Game, as well as in the Race to the Finish bonus game. The team is made up of polygonal models of the 12 playable characters, but are weak and lack specials.
From Super Smash Bros. Melee[edit]
Crazy Hand[edit]
Where Master Hand represents the constructive side of creativity, Crazy Hand is his destructive left-handed counterpart. He was introduced in Super Smash Bros. Melee as a secret boss who fights alongside Master Hand under specific conditions (when Classic Mode is cleared on Normal difficulty or higher in under 15 minutes, Crazy Hand will join Master Hand when Master Hand has half of his health left.) As noted above, Crazy Hand also appears in Event 50, where he and Master Hand are fought together on Final Destination with 300 HP each.
When compared to Master Hand, Crazy Hand can be considered to be much more erratic (i.e. "crazy"). His idle pose is a strange, erratic movement, and he has multiple strange attacks that are unique to him. Many of his attacks also have side effects compared to Master Hand, such as freezing and flowering. When Master Hand and Crazy Hand are fought together, they have several moves that they use in conjunction with each other, such as a high-powered clapping attack.
Crazy Hand reappears in Brawl at the end of Classic Mode under similar conditions as in Melee, where the player must beat the mode on Hard difficulty or higher in under 9 minutes. Instead of appearing halfway through, Master Hand and Crazy Hand will appear simultaneously at the beginning of the battle. As with Master Hand, Crazy Hand also appears as a separate boss in Brawl's "Boss Battles" mode, though he does not make any appearances in The Subspace Emissary.
In Smash 4, Crazy Hand continues to be fought alongside Master Hand at the end of Classic Mode on Final Destination, and the two will appear together at the beginning of the battle; however, the conditions are now different. In Super Smash Bros. for Nintendo 3DS, the player gains the choice to fight Crazy Hand when on Intensity 3.0 or higher in return for more rewards; on Intensity 8.0 or higher, the player has no choice but to fight Crazy Hand. In Super Smash Bros. for Wii U, the player will always fight Crazy Hand as long as the Intensity is 3.0 or higher. However, in both games, if Crazy Hand (and Master Hand) are fought on Intensity 5.1 or higher, Master Core will appear in their place soon after the beginning of the battle.
Like Master Hand, Crazy Hand has his own mode named after him in Super Smash Bros. for Wii U, Crazy Orders.
Crazy Hand reprises his role as a boss at the end of Classic Mode in Ultimate. An army of Crazy Hand's fight for Dharkon in World of Light. He also appears as a boss in Adventure Mode: World of Light.
Giga Bowser[edit]
Giga Bowser (Japanese name Giga Koopa) is the secret final boss of Adventure Mode in Super Smash Bros. Melee. As his name suggests, he is a large, powered-up version of Bowser. Giga Bowser is treated as a character, making him a rare exception to many boss properties - unlike other bosses, he has a damage percentage, takes knockback, has a full moveset, and can use items. (However, like other bosses, he cannot shield or be grabbed.) With a manic expression, a darker, more malevolent color scheme, and a hulking size, Giga Bowser is surely a boss to be remembered.
Upon clearing Adventure Mode in fewer than 18 minutes on Normal difficulty (or higher), Bowser’s trophy, previously thrown into a mysterious abyss below Final Destination, rises back up onto the stage and is struck by a bolt of strange lightning, transforming it into Giga Bowser. During the battle with Giga Bowser, a distorted version of the Final Destination theme that cannot be found in the Sound Test plays. Many of Giga Bowser’s attacks are powered up versions of Bowser’s: his down smash attack has a freezing effect, his forward smash has explosive properties and his forward tilt has darkness effects. Unlike Bowser, Giga Bowser's Fire Breath attack never diminishes.
Along with Mewtwo and Ganondorf, Giga Bowser appears in Event 51: The Showdown. The three-team up against the player, who must defeat them to complete the event.
In Super Smash Bros. Brawl and Super Smash Bros. 4, Giga Bowser no longer appears as a boss. Instead, he makes a semi-playable appearance from Bowser's Final Smash, Giga Bowser. When used, Bowser temporarily transforms into Giga Bowser, who is largely unchanged from Melee, keeping the elemental abilities of his attacks as well as his massive size. Some changes include that Giga Bowser no longer flinches (making him more similar to other bosses in this regard) and that his down special, Giga Bowser Bomb, no longer has a wind effect as it does in Melee.
In Super Smash Bros. Ultimate, Bowser's Final Smash is no longer a controllable transformation, with the player instead aiming a targeting reticle that unleashes a single powerful punch from Giga Bowser on their opponents. However, Giga Bowser returns as a boss in Classic Mode and Adventure Mode: World of Light. Like his Final Smash incarnations in Brawl and Smash 4, the player must deplete his HP in order to defeat him, and he does not flinch from almost all attacks.
Fighting Wire Frames[edit]
The spiritual successors to the Polygon Team, the Fighting Wire Frames come in male and female varieties. They appear in Adventure Mode, as well as the various forms of Multi-Man Melee.
From Super Smash Bros. Brawl[edit]
Petey Piranha[edit]
Petey Piranha (Japanese name Boss Pakkun) was the first revealed boss character in Brawl, and is the first major boss to come from another series of games, as opposed to being unique to Smash. He appears as a boss in The Subspace Emissary storyline, holding cages that contain Zelda and Peach. He uses both these cages, as well as his own abilities, to attack Kirby. After Kirby attacks a cage enough to break it, Petey will be defeated and explode. While whichever princess contained within the broken cage will be freed, the other princess is turned into a trophy and subsequently taken by Wario. If Petey himself is attacked, both cages will take damage. If he is the only entity attacked and defeated, a random princess will be selected to be taken by Wario. Petey Piranha has previously appeared as a playable character in Mario Kart: Double Dash and a boss in Super Mario Sunshine.
Petey Piranha returns in Super Smash Bros. Ultimate as Piranha Plant's Final Smash of the same name, complete with the two cages he carried in The Subspace Emissary. When summoned by Piranha Plant, he will begin jumping around while swinging the two cages in hopes of catching one of Piranha Plant's opponents. Then, he breathes fire on the cage before slamming them into the ground to launch the opponents and disappearing. This makes Petey Piranha the second boss character to become part of a Final Smash, following Giga Bowser.
Rayquaza[edit]
Rayquaza is the first Pokémon to be a boss. It first appears in The Subspace Emissary in the jungle after Diddy Kong goes to investigate a crashed Arwing, where it comes out of the water, destroys the Arwing with an energy ball, and then kidnaps Diddy. As it goes back into the water, Fox exits the destroyed Arwing and attacks the aggressive beast, causing it to lose its grip on Diddy Kong. Rayquaza then fires an energy ball at Fox, but Fox reflects the attack back at the monstrous dragon, sending it tumbling back into the water. After this, Diddy Kong and Fox fight it. Its attacks are loosely based on the Pokémon games, and it has an exceedingly large amount of resistance.
Porky[edit]
As one of the bosses of The Subspace Emissary and a high-ranked member of the Subspace Army, Porky sends Primids to divert Lucas and sends in his giant statue, the Pig King Statue, which soon hunts Lucas down. The statue is indestructible, so Lucas has no choice but to run; the giant statue destroys giant containers, barrels, enemies, and even metallic buildings as it chases him. Lucas finally comes to a giant marsh which seems to save him as the statue sinks, but it soon respawns.
Lucas then stumbles, and just as the giant statue is about to crush him, Ness appears and uses a PK Thunder, which causes the statue to tip over. The statue once again recovers and flies into the air, this time to crush Ness. However, Ness uses a PK Flash and the statue explodes, revealing Porky himself inside (in his bed-mecha from Mother 3). A boss battle then ensues. He attacks by running around and by using a variety of lasers. Lucas and Ness eventually take him down. Like all Subspace Emissary bosses, Porky is brought back by Tabuu to distract the heroes in The Great Maze. In his origin series, he appears as an antagonist in EarthBound and Mother 3.
Galleom[edit]
Galleom is a large transforming robot found during The Subspace Emissary in the desert by Marth, Ike, and Meta Knight. Galleom's initial form is a large armored tank equipped with ramming spikes and missiles, but when confronted by the three swordsmen, the tank transforms into an immense purple robot. In this form, he attacks with his large fists and missiles and tries to crush the protagonists with his sheer bulk. The mechanoid is finally defeated, but not destroyed. He then leaps off a cliff and falls through the ground into a tunnel system. There, he confronts Lucas and the Pokémon Trainer. After he is defeated a second time, he grabs the two companions and blasts into the sky, revealing a Subspace Bomb concealed in his head. Lucas uses PK Thunder to separate Galleom's arm from his body, releasing the two boys, who are then rescued by Meta Knight. Galleom is finally destroyed by the detonation of the Subspace Bomb. He is later brought back by Tabuu to confront the heroes yet again in The Great Maze.
Galleom returns as a boss in Super Smash Bros. Ultimate's Adventure Mode: World of Light and Classic Mode. He has familiar attacks as well as new ones, delivering powerful punches and stomps along with barrages of missiles.
Ridley/Meta Ridley[edit]
Ridley appears as a boss in The Subspace Emissary in Brawl, where he meets Samus and Pikachu and proceeds to scratch Samus's Power Suit against the wall. Pikachu frees Samus with Thunder, and the pair then fights Ridley, eventually defeating him.
Ridley later reappears in his cybernetic form known as Meta Ridley, where he chases R.O.B., Olimar, Pikachu, Samus, Captain Falcon, Donkey Kong, and Diddy Kong in the Falcon Flyer as the protagonists are escaping the Isle of the Ancients as it is about to detonate. Unlike other boss battles, there is a 2-minute time limit. They battle him atop the Flyer, defeating him and sending his body crashing back into the factory's vents, just as the whole island is destroyed.
Both Ridley forms are reincarnated by Tabuu as individual enemies in The Great Maze.
Ridley returns in Super Smash Bros. for Wii U as a stage hazard on Pyrosphere. Damaging him will make him team up with his attacker, similarly to the Flying Man. He can transform into Meta Ridley at certain points during the battle.
Ridley also returns in Super Smash Bros. Ultimate, becoming a playable character with Meta Ridley being an alternate costume. This also makes Ridley the first boss in the series to become a playable character (excluding Giga Bowser and Master Hand, the former being a Final Smash and the latter being playable via a glitch in Melee and a portion of World of Light).
Duon[edit]
Duon is an immense, double-sided robot fought in The Subspace Emissary on the Halberd. Duon is created when Snake, Lucario, and Meta Knight destroy the Mr. Game & Watch clones that are maintaining the bridge. As mentioned, Duon has two different sides: one is a bright blue and specializes at melee attacks, while the other is pink and possesses long-range attacks. The blue side has two drill-like appendages and a large blade on his head. He can also fire explosive mines from his shoulders. The pink side can fire several energy blasts from his arm cannons in quick succession. He also fires three blue energy blasts from his head cannon and launches missiles from his shoulders. The beast can also leap into the air to try to crush the heroes and can spin around to cause damage. Upon his defeat, Duon dissolves and noticeably shrinks into a puddle of Shadow Bugs and reveals the trophy of Mr. Game & Watch. As with the other bosses, Duon will attempt to stop the heroes again in The Great Maze.
Tabuu[edit]
Tabuu is the final boss of The Subspace Emissary in Super Smash Bros. Brawl. He has many devastating attacks, most dangerously his Off Waves which can one-hit KO and are hard to dodge, but most of his attacks have a large amount of start-up lag. While playing in The Subspace Emissary, six characters are chosen to fight Tabuu.
Fighting Alloy Team[edit]
The successor to the Fighting Wire Frame and Polygon teams. The Fighting Alloy Team comes in red, blue, yellow, and green varieties.
False characters[edit]
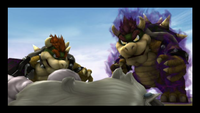
False characters are clones of characters made of Shadow Bugs, appearing as occasional bosses in Adventure Mode: The Subspace Emissary.
In Ultimate, they are known as puppet fighters and appear in Adventure Mode: World of Light as clones created by Galeem and Dharkon. Special puppet fighters very similar to Brawl's false characters appear as obstacles in World of Light's final boss battle.
From Super Smash Bros. 4[edit]
Master Core[edit]
Introduced in Super Smash Bros. for Nintendo 3DS, Master Core is a transformation of Master Hand and appears as a secret final boss in Classic Mode only when the Intensity is set to 5.1 or higher, after Master Hand and Crazy Hand are damaged enough. It possesses several forms that are fought in order: the humanoid-like Master Giant, the scorpion-like Master Beast, the swords-like Master Edges, a shadow duplicate of the player character named Master Shadow, a massive sub-stage of its own called the Master Fortress (exclusive to the Wii U version), and finally the Master Core itself. What forms are fought depends on the Intensity; numbers vary between versions but in general the higher the Intensity setting the more forms that are fought, causing Master Core to have more HP overall and take longer to defeat. After all previous forms are defeated, the true Master Core will appear; it is normally completely defenseless, but if not defeated quickly enough, it will unleash five waves, each powerful enough to cause a one-hit KO.
Fighting Mii Team[edit]
The Fighting Mii Team appears as the opponents of Multi-Man Smash in Smash 4 and Ultimate, and as mid-bosses in Smash 4's Classic Mode.
From Super Smash Bros. Ultimate[edit]
Galeem[edit]
Galeem appears as the main antagonist of World of Light. He is first confronting the fighters with an army of Master Hands. He then proceeds to absorbs his army of Master Hands before unleashing his ultimate attack to destroy and imprison all the fighters (except Kirby who escapes with his Warp Star) while transforming non-playable characters into spirits. He then rewrites the universe in his own image, leaving it inhabited by hostile spirits and puppet fighters cloned from the fighters he has captured.
He is surrounded by a shield which can only be broken by defeating Giga Bowser, Rathalos, and Galleom in any order, and then facing off against Master Hand. After being defeated, Dharkon and his army of Crazy Hands appear, which prompts the weakened Galeem to flee and leave much of his remaining puppet fighters to be stolen by Dharkon. Galeem returns after Dharkon is defeated for the first time, and the two armies clash in the Final Battle. Galeem may be confronted either by himself or with Dharkon, but either fight gives Galeem additional moves. Defeating only Galeem has Dharkon plunge the world into darkness while defeating both triggers the true ending.
Dharkon[edit]
As the secondary antagonist and counterpart to Galeem, Dharkon appears in World of Light. He represents corruption, chaos, and destruction. He warps the world into a twisted chaotic mess, which is in strong contrast to the organized near-perfectly fit world Galeem creates. In the final stage the player can either face him or Dharkon and Galeem combined, but either fight gives Dharkon additional moves. Defeating only Dharkon has Galeem unleash his power a second time akin to the beginning of the game, but this time no one escapes.
Rathalos[edit]
Rathalos appears as a boss in World of Light and Classic Mode. He is also the first boss in the series to appear as an Assist Trophy. He can be found flying around Forest Hill.
Dracula[edit]
Residing at the top of his castle, Dracula appears as a boss in World of Light and Classic Mode. He is the first boss to be from a major third-party universe. His attacks are based heavily on his boss battle in Castlevania: Symphony of the Night.
Ganon[edit]
Ganon appears as a boss in World of Light and Classic Mode. He can be fought in the Sacred Land. His fight is reminiscent of the final battle of The Legend of Zelda: Ocarina of Time.
Marx[edit]
In the center of a vortex in a Mysterious Dimension, Marx appears as a boss in World of Light and Classic Mode. Many of his attacks are taken from his battle at the end of Milky Way Wishes in Kirby Super Star, although he does have several original moves in his Smash Bros. appearance.
Trivia[edit]
- When most bosses' stamina is reduced to half, they will get stronger and attack in a different way. Examples include:
- Master Hand's gun will shoot 3 times (if he is below 100 HP in Smash 64 and Melee).
- Petey Piranha will jump twice and swing cages more often.
- Duon will perform his dash attack twice.
- Ridley will perform his tail attack across the stage twice.
- Meta Ridley will perform a stomp that pushes the Falcon Flyer down below the lower blast line and launch a powerful fireball more often.
- Most of Rayquaza's attacks will be used three times in a row.
- In Brawl, whenever any boss is defeated in any mode, the same pattern of vertical dark green lines will appear over the screen.
- Ridley is the only boss to become a fully playable character, with Meta Ridley as one of his palette swaps.
- Porky is the only boss in the series to have no appearance in Ultimate. It is unknown whether or not he was supposed to be referenced with the Absolutely Safe Capsule spirit, which he uses at the end of his boss fight in Mother 3.
- Master Hand, Crazy Hand, Giga Bowser, and Galleom are the only original characters in the series to appear as bosses in more than one game.
- However, Giga Bowser appears separately in Super Smash Bros. Brawl and Super Smash Bros. 4 as Bowser's Final Smash.
See also[edit]
| Bosses | |
|---|---|
| Super Smash Bros. | Master Hand · Metal Mario · Giant Donkey Kong · Fighting Polygon Team |
| Melee | Master Hand · Crazy Hand · Giga Bowser · Fighting Wire Frames (Male · Female) |
| Brawl | Master Hand · Crazy Hand · Petey Piranha · Rayquaza · Porky · Galleom · Ridley · Duon · Meta Ridley · Tabuu · Fighting Alloy Team (Red · Blue · Yellow · Green) · False characters |
| Smash 4 | Master Hand · Crazy Hand · Master Core · Fighting Mii Team |
| Ultimate | Master Hand · Crazy Hand · Rathalos · Galleom · Giga Bowser · Galeem · Dharkon · Dracula · Ganon · Marx · Fighting Mii Team · False characters |
