Ness (SSB): Difference between revisions
No edit summary |
|||
| (165 intermediate revisions by 80 users not shown) | |||
| Line 1: | Line 1: | ||
{{ArticleIcons| | {{ArticleIcons|ssb=y}} | ||
{{disambig2|Ness' appearance in ''Super Smash Bros | {{disambig2|Ness' appearance in ''Super Smash Bros''|the character in other contexts|Ness}} | ||
{{Infobox Character | {{Infobox Character | ||
|name | |name = Ness | ||
|image | |image = [[File:Ness SSB.png]] | ||
|game | |symbol = preBrawl | ||
|ssbgame1 | |game = SSB | ||
|ssbgame2 | |ssbgame1 = SSBM | ||
|ssbgame2 = SSBB | |||
|ssbgame3 = SSB4 | |||
|ssbgame4 = SSBU | |||
|availability = [[Unlockable character|Unlockable]] | |availability = [[Unlockable character|Unlockable]] | ||
|tier | |tier = C | ||
|ranking | |tierJP = ? | ||
|ranking = 10 | |||
|rankingJP = 5 | |||
}} | }} | ||
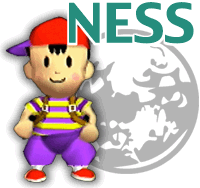
'''Ness''' ({{ja|ネス}}, '' | '''Ness''' ({{ja|ネス|Nesu}}, ''Ness'') is one of the main characters from the {{uv|EarthBound}} franchise and appears in ''[[Super Smash Bros.]]'' as one of the four [[unlockable character]]s. He is voiced by Makiko Ōmoto, who would go on to voice him in later iterations. | ||
Ness ranks | Ness ranks 10th on the [[tier list]], the third lowest ranked character. He is well-known for his unique [[double jump]] and technical movement: he, along with {{SSB|Yoshi}}, can cancel his double jump with an attack, granting him a burst of speed he can use to move and attack extremely quickly. Ness's fast movement combined with his powerful aerials give him a strong and flexible combo game. He's able to both juggle and tech chase his opponent, frequently using his up tilt and up air as launchers to setup a down air spike onto a platform. After building up damage, Ness has many ways to finish opponents, including kill throws, multiple high knockback aerials, and strong smash attacks. | ||
Although his weaknesses are few in number they can be easily exploitable. His long distanced recovery is hindered by being slow, predictable, and easy to interrupt, leaving him one of the easiest characters in the game to [[gimp]]. Although his double jump cancel gives him very fast grounded movement, his slowness in the air can make it very difficult to deal with air camping, especially from characters with strong down aerials like {{SSB|Kirby}} or {{SSB|Jigglypuff}}. The low range of most of his aerials compounds this weakness and can make it difficult to approach characters with better [[disjoint]]. As a result, despite his strengths he has poor matchups and low tournament representation and results. Conversely, Ness is ranked 5th on the Japanese tier list because he is much stronger in the Japanese version, rather than the international release, in which he was [[nerf]]ed. | |||
==How to unlock== | ==How to unlock== | ||
Complete [[1P Game]] on normal difficulty or higher with three stocks or less without continuing, then defeat Ness on | Complete [[1P Game]] on normal difficulty or higher with three stocks or less without continuing, then defeat Ness on {{SSB|Dream Land}}. Players that lose the fight against Ness can re-fight him by completing 1P Game under those aforementioned conditions again. In cases where {{SSB|Captain Falcon}} or {{SSB|Jigglypuff}} have not been unlocked and either of their unlock match requirements are simultaneously met, Ness will still be the fighter players face. | ||
==Attributes== | ==Attributes== | ||
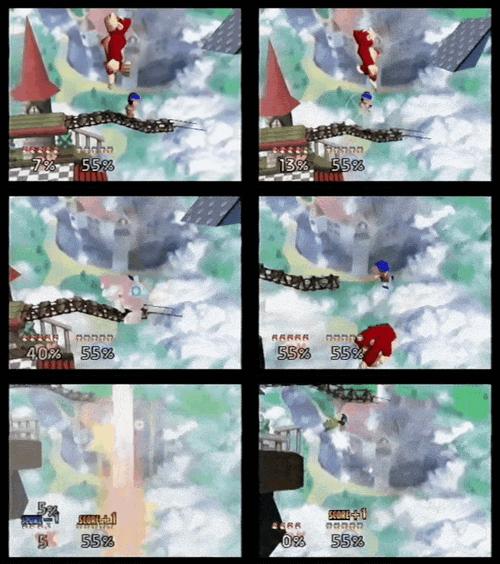
[[File:Ness | [[File:SSB64 Congratulations Ness.png|thumb|300px|Ness's [[congratulations screen]].]] | ||
Ness is a fairly small | Ness is a fairly small character with below average [[weight]]. He is very slow on the ground with the slowest [[walk]] and [[dash]] speeds (although he does have a fast initial dash) and his air mobility is below average outside of [[double jump cancel]]ing. This naturally gives Ness trouble with approaching, as most of the cast can easily outrun him. Ness also has average [[falling speed]] and [[gravity]]. | ||
Ness' tools on the ground are a mixed bag overall. His jab is one of the fastest in the game, which allows it to lead his grab (via a [[jab grab]]) which is quite effective due to the strength of his throws, although both his jab and grab have short range. Up tilt is a solid combo starter which can easily lead to combos at lower percents at KO confirms at higher percents although it has limited horizontal range and it is rather unsafe. Forward tilt and dash attack are situational overall as they are both rather risky and not highly rewarding while down tilt is borderline useless, due to being unsafe on hit at realistic percents. Ness' smash attacks are not the most effective but they are solid overall. Forward smash and up smash are not incredibly strong but they are safe and the latter can lead into combos at some percents, while down smash is fairly powerful, disjointed and lingers for a very long time. Ness does have a strong grab game however. While his grab has a short amount of range, both his forward and back throw are among the strongest in the game, Easily leading to KOes and edgeguards at fairly low percents. | |||
Ness' aerial game is his strongest aspect. Ness has access to double jump canceling, which easily allows him to pressure opponents with his aerials, especially since if the opponent shields an aerial, Ness has the ability to perform a [[shield break combo]] by stringing together double jump canceled aerials on a shielding opponents. In addition to this, all of his aerials are solid on their own. Neutral aerial has decent power and lingers for almost the entire animation, back aerial has a good amount of power and forward aerial is decent at setting up combos and edgeguards, although it is his weakest aerial overall. Ness' best aerials however are his up and down aerials. Up aerial is a disjointed aerial which hits all around Ness and it has strong vertical knockback, which makes it an excellent combo tool at lower percents (especially when combined with double jump canceling) and a solid KO move at higher percents. Down aerial is an incredibly fast and powerful [[meteor smash]], which makes it an incredible edgeguarding tool off stage as well as an excellent combo tool on stage. It can easily set up combos against grounded opponents and it can put aerial opponents into a [[tech chase]] situation where the opponent can potentially get hit by another down aerial to reset the situation. | |||
Ness unfortunately possesses a poor set of special moves. [[PK Fire]] is a projectile which creates a pillar of fire if it hits an opponent. While this can lead into followups, PK Fire is a slow and laggy projectile, which does not cover a lot of distance. It is easily avoidable and punishable and even if it hits the opponent, they can easily [[SDI]] out of the pillar and even potentially punish Ness. PK Thunder is a projectile which can be controlled and if it hits Ness, he will shoot forwards, travelling a long distance with a powerful hitbox (known as PK Thunder 2). While PK Thunder lasts for a long time and it can be controlled, it is rather laggy and the opponent can hit the PK Thunder to beat it out. If Ness is in the air after PK Thunder is destroyed, he will go into [[helpless|free fall]], which can lead to him falling to the end of his stock off stage. PK Thunder 2 is Ness' main recovery move and while it does travel a long distance and can be angled in any direction, it takes a long time to set up, it can be interrupted during the second half of the dash and if Ness lands after entering free fall, he will have a ton of landing lag, all of which make PK Thunder and PK Thunder 2 an incredibly exploitable recovery move. [[PSI Magnet]] can be used to [[absorb]] projectiles however, it takes a long time to start absorbing projectiles and if Ness does absorb a projectile, he is put in a considerable amount of lag, which can potentially be punished. | |||
Ness' main strength is his combo and shield pressuring potential. Ness overall has a relatively easy time starting combos at lower percents, especially compared to other low tiers. Ness' up aerial, down aerial and up tilt are all excellent combo tools at lower percents, with the latter two still being strong combo tools at higher percents as well. Moves such as Ness' other aerials and up smash can also be used for combos at some percents. Ness overall does not have too much trouble with KOing his opponent after hitting them at 0%. Ness' double jump cancel in general gives him quick and easy access to his aerials, allowing them to be used as fast and powerful combo starters. This also extends to his shield pressure, as all of his aerials are incredibly safe on shield and his double jump cancel can easily allow his aerials to quickly hit a shielding opponent and put Ness in a spot to throw out another aerial and reset the situation until the shield breaks. Ness also has a jab grab as a strong shield pressuring tool, as well as a strong tool to use as a quick and powerful option when he is in a pressure situation. | |||
Ness has some strong KO options. Ness' down aerial is the overall strongest meteor smash in the game which makes it a devastating move against off stage opponents. Ness can combo into down aerial off stage with an up aerial, up tilt, up smash or a neutral aerial which can all lead to very early KOes. Ness' throws also lead to very early KOes, especially at the ledge and moves such as back aerial, down smash and up aerial are also strong KO moves. | |||
Ness | Ness also has strong edgeguarding. Down aerial in particular is simultaneously the fastest and strongest meteor smash in the game which along with it having a chunk of active frames and very low ending lag, makes it an absolutely devastating move against off stage opponents as mentioned earlier and with Ness having a long ranged recovery, he can make it back from far distances. Ness also has moves such as neutral/forward/back aerials which are also strong options to get the opponent off stage or to edgeguard. | ||
Ness does have rather notable weaknesses however. Ness has very poor mobility and his range is very short which gives him a very hard time approaching. Opponents can easily keep Ness out due to his poor range and mobility and Ness cannot easily keep opponents out himself due to his range and mobility. Opponents can play around Ness' short range and punish him from there. Ness also cannot really camp due to his very slow and overall poor projectiles and while he does have a reflector and an absorption move, they are both very slow and punishable, which makes them very difficult to take advantage of. | |||
Ness is also light and has average falling speed/gravity, which both make him a fairly easy character to combo and KO. Ness gets comboed easily at lower percents and dies rather early at higher percents due to his low weight, especially horizontally. He also does not have strong options to get out of combos or juggles. Ness has a slow double jump, he lacks any fully intangible options in the air and his only real options to escape combos are his neutral and down aerials which both have unimpressive range and they easily lose to disjoints. | |||
Ness' other major weakness is his recovery. Distance-wise, it can go quite far not only due to PK Thunder 2's long range and ability to be angled but also because of Ness having a long ranged double jump. However, there are multiple downsides to Ness' recovery which make it one of the worst in the game. While Ness' double jump travels a long distance, it is rather slow and Ness has poor air speed, which makes it rather easy for the opponent to hit Ness out of it. Ness also cannot use his aerials to challenge opponents when trying to recover due to his double jump cancel, so his only real option is to try and play around the opponent with his double jump. When Ness has to use PK Thunder, it takes a long time for Ness to be able to set up PK Thunder 2 which gives the opponent time to either hit Ness out of the move or to hit/get hit by the PK Thunder itself, which can easily lead to him losing a stock. Even if Ness does get to use PK Thunder 2, it can be punished if the opponent is not too close to Ness when he activates it. Ness' best bet to recover is to use PK Thunder as low as he can and uses it diagonally to barely get back on stage. This means that various characters cannot challenge the PK Thunder projectile without risking their own stock and if Ness recovers just right, he can [[auto-cancel]] the PK Thunder 2, giving it a lot less lag than normal although this can still be punished. Characters who can go deep for edgeguards like {{SSB|Pikachu}} and {{SSB|Kirby}} however can challenge PK Thunder even from max distance which leaves Ness in a really poor spot against these characters. | |||
Overall, Ness is a character who performs well when he gets his game plan going but he struggles when he does not have the advantage. Ness has a strong offensive game with strong aerials and an excellent double jump cancel but he has poor mobility and range, which makes it very difficult for him to land one of his attacks and start his strong punish game and when he ends up offstage, he heavily struggles to get back on stage against a strong opponent. Ness' punish game unfortunately is not strong enough to make up for his poor defence, approach and recovery. This naturally results in Ness having an unspectacular matchups in the North American version. Ness struggles against stronger characters who all outspeed and outrange Ness, with Kirby being considered to be his worst matchup. Kirby can easily outrange Ness with his large/safe disjoints and his incredible edgeguarding is naturally highly detrimental for Ness. Kirby's floaty nature also makes him awkward for Ness to combo while Kirby can combo Ness with ease. It is overall an extremely difficult matchup for Ness at the top level. Ness' matchups against the low tiers are closer, with Ness potentially winning against some of them although not by much. | |||
As a result of all of these factors, while Ness was once considered a strong character in the game's early meta due to his strong punish game, he dropped off considerably over time due to the severity of his weaknesses, which ultimately resulted in him being considered to be one of the weakest characters in the game, and subsequently getting below average results and representation in tournaments in the international versions of the game. | |||
In the Japanese version however, Ness is considered to be a much stronger character. This is because in the Japanese version, Ness had a stronger combo game (with an up tilt which could combo for much longer) and he had many stronger KO moves (such as all of his smash attacks, up aerial and PK Thunder 2). Ness' combos in general were more consistent and harder to escape due to the lower [[hitlag]]/strength of SDI, which particularly made his combos into down aerial off stage considerably more consistent. Ness also had a better recovery as PK Thunder 2 was not only much stronger but it also had more [[invincibility]], a larger hitbox and more active frames which made it considerably harder and riskier to challenge (although his recovery overall was still very poor). All these factors combined made Ness an even scarier character with an even stronger punish game and a slightly better recovery, with Ness being considered a mid tier in the Japanese version. Ness received a plethora of impactful nerfs in the North American version which pushed him down into the low tier, which was then also carried into the PAL versions. | |||
==Differences between game versions== | |||
Ness was noticeably nerfed in his transition to NTSC-U. His disproportionate KO power was weakened, his moves deal less damage and the higher presence of [[SDI]] makes his DJC combos easier to escape. As a result, he is noticeably worse than in the Japanese version. | |||
===Ground attacks=== | |||
*{{change|The second hit of neutral attack now has a small punch sound instead of a small kick.}} | |||
*{{nerf|Up tilt deals less damage (8% → 7%).}} | |||
*{{nerf|Up tilt has increased base knockback (70 → 80), hindering its combo potential, especially when it is stale.}} | |||
*{{buff|Up tilt launches opponents at a slightly lower angle (96° → 100°).}} | |||
*{{nerf|Forward smash deals less damage (20% → 18%) and has decreased knockback scaling (67 → 65).}} | |||
*{{buff|Forward smash has an increased reflection multiplier (1.5x → 1.8x).}} | |||
*{{nerf|Up smash's clean hit deals less damage (19% → 17%) and sends opponents at a less favorable angle (105° → 110°) hindering its KO potential despite its increased base knockback (0 → 20).}} | |||
**{{buff|However, these changes improve its combo potential.}} | |||
*{{nerf|Mid and late up smash deal less damage (17% (mid)/14% (late) → 15%/13%) with the mid hit also sending opponents at a less favorable angle (90° → 78°).}} | |||
*{{nerf|Down smash deals less damage (21% → 19%).}} | |||
===Aerial attacks=== | |||
*{{nerf|Up aerial deals 2% less damage (17% → 15%) and has decreased knockback scaling (120 → 110) hindering its KO potential.}} | |||
**{{buff|However, these changes improve its combo potential.}} | |||
*{{nerf|Up aerial has a smaller hitbox (190u → 175u).}} | |||
===Special attacks=== | |||
*{{buff|[[PK Fire]] deals more damage (2% (fire & pillar) → 7% (fire), 3% (pillar), 16% → 25% (total)).}} | |||
*{{nerf|PK Fire travels a shorter distance.}} | |||
*{{nerf|[[PK Thunder 2]] deals less damage (35% → 30%) and knockback (50 (base), 100 (scaling) → 40/84).}} | |||
*{{nerf|PK Thunder 2 has a smaller hitbox (200u → 150u).}} | |||
*{{nerf|PK Thunder 2 has a shorter duration (frames 1-28 → 1-18), less [[invincibility]] (frames 1-17 → 1-9), and more landing lag (30 frames → 42).}} | |||
==Moveset== | ==Moveset== | ||
''For a gallery of Ness's hitboxes, see [[Ness (SSB)/Hitboxes|here]].'' | |||
[[File:SSB64 Ness.gif|right]] | [[File:SSB64 Ness.gif|right]] | ||
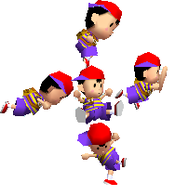
[[File:NESS SSB Air Attacks.PNG | [[File:NESS SSB Air Attacks.PNG|thumb|175px|Ness' aerial attacks.]] | ||
{{MovesetTable | {{MovesetTable | ||
|game=SSB | |game=SSB | ||
|neutralcount=3 | |neutralcount=3 | ||
|neutralname= | |neutralname=Hook ({{ja|フック|Fukku}})<br>Straight ({{ja|ストレート|Sutorēto}})<br>Middle Kick ({{ja|ミドルキック|Midoru Kikku}}) | ||
|neutral1dmg=2% | |neutral1dmg=2% | ||
|neutral2dmg= | |neutral2dmg=2% | ||
|neutral3dmg=4% | |neutral3dmg=4% | ||
|neutraldesc=Two fairly fast punches, followed by a kick. Very similar to {{SSB|Mario}}'s and {{SSB|Luigi}}'s, but it has short range. | |neutraldesc=Two fairly fast punches, followed by a kick. Very similar to {{SSB|Mario}}'s and {{SSB|Luigi}}'s, but it has short range. | ||
|ftiltname= | |ftiltangles=3 | ||
| | |ftiltname=Spinning Kick ({{ja|スピニングキック|Supiningu Kikku}}) | ||
|ftiltupdmg=11% | |||
|ftiltsidedmg=10% | |||
|ftiltdowndmg=9% | |||
|ftiltdesc=Kicks in front rapidly, his body moves with it, giving it minor ending lag. Decent close-up spacer. | |ftiltdesc=Kicks in front rapidly, his body moves with it, giving it minor ending lag. Decent close-up spacer. | ||
|utiltname= | |utiltname=Toss ({{ja|トス|Tosu}}) | ||
|utiltdmg=7% | |utiltdmg=7%, 8% (NTSC-J) | ||
|utiltdesc=Two-handed open-palm uppercut. Thrusts both his hands directly upwards above him, which is a great aerial setup, especially because of its good speed and decent power. | |utiltdesc=Two-handed open-palm uppercut. Thrusts both his hands directly upwards above him as he leaps in place, which is a great aerial setup, especially because of its good speed and decent power. | ||
|dtiltname= | |dtiltname=Crouching Kick ({{ja|クラウチングキック|Kurauchingu Kikku}}) | ||
|dtiltdmg=3% | |dtiltdmg=3% | ||
|dtiltdesc=Does a fast kick while crouching, which can chain into itself, or a grab. | |dtiltdesc=Does a fast kick while crouching, which can chain into itself, or a grab. | ||
|dashname= | |dashname=Hand Stamp ({{ja|ハンドスタンプ|Hando Sutanpu}}) | ||
|dashdmg= | |dashdmg=12% (clean), 9% (late) | ||
|dashdesc=Puts both of his hands in front of him with good duration. Usually launches foes in front of him. | |dashdesc=Puts both of his hands in front of him with good duration. Usually launches foes in front of him. | ||
|fsmashname= | |fsmashname=Batter Up! ({{ja|バットスイング|Batto Suingu}}, ''Bat Swing'') | ||
|fsmashdmg=18% | |fsmashdmg=18%, 20% (NTSC-J) | ||
|fsmashdesc=Home-run swing. Takes out a bat and swings it, making a pinging sound if it connects. | |fsmashdesc=Home-run swing. Takes out a bat and swings it, making a pinging sound if it connects. Good speed, range, and power. Can also be used as a reflector. | ||
|usmashname= | |usmashname=Around the World ({{ja|シャトルループ|Shatoru Rūpu}}, ''Shuttle Loop'') | ||
|usmashdmg=17% | |usmashdmg=17% (clean), 15% (mid), 13% (late), 19% (NTSC-J clean), 17% (NTSC-J mid), 14% (NTSC-J late), | ||
|usmashdesc=Does | |usmashdesc=Does an "around the world" yo-yo swing, which acts as a good anti-air move. Strange hitbox, does not hit short characters on ground. Above average speed. | ||
|dsmashname=Yo- | |dsmashname=Walk the Dog ({{ja|ヨーヨーショット|Yōyō Shotto}}, ''Yo-Yo Shot'') | ||
|dsmashdmg=19% | |dsmashdmg=19%, 21% (NTSC-J) | ||
|dsmashdesc=Extremely low hitbox, though extremely long range. Longest horizontal range of all | |dsmashdesc=Ness does a "walk the dog" yo-yo swing. Extremely low hitbox, though it has extremely long range and an extremely long duration. Longest horizontal range of all down smashes. | ||
|nairname= | |nairname=Ness Kick ({{ja|ネスキック|Nesu Kikku}}) | ||
|nairdmg=14% | |nairdmg=14% (clean), 11% (late) | ||
|nairdesc=Does a | |nairdesc=Does a forwards split kick, somewhat similar to {{SSB|Jigglypuff}}'s. The hitbox is Ness's entire body. Has similar properties to a [[sex kick]]. Good spacing move. | ||
|fairname= | |fairname=Aerial Hand Stamp ({{ja|空中ハンドスタンプ|Kūchū Hando Sutanpu}}, "Midair Hand Stamp") | ||
|fairdmg=12% | |fairdmg=12% (clean), 10% (late) | ||
|fairdesc=Similar to his dash attack, puts both hands in front of him for good damage and knockback. Quick attacking move, though the range is restricted to his small opened hands. | |fairdesc=Similar to his dash attack, puts both hands in front of him for good damage and knockback. Quick attacking move, though the range is restricted to his small opened hands. | ||
|bairname= | |bairname=Backward Drop Kick ({{ja|後方ドロップキック|Kōhō Doroppu Kikku}}) | ||
|bairdmg=16% | |bairdmg=16% (clean), 10% (late) | ||
|bairdesc=Thrusts his feet backwards for tremendous KO power. | |bairdesc=Thrusts his feet backwards for tremendous KO power. | ||
|uairname=Headbutt | |uairname=Jumping Headbutt ({{ja|ジャンピングヘッドバット|Janpingu Heddobatto}}) | ||
|uairdmg=15% | |uairdmg=15%, 17% (NTSC-J) | ||
|uairdesc=He does a quick and short ranged headbutt above him with good power. Good for juggling. | |uairdesc=He does a quick and short ranged headbutt above him with good power. Good for juggling. Ness's head is invincible during this attack. | ||
|dairname= | |dairname=Needle Kick ({{ja|ニードルキック|Nīdoru Kikku}}) | ||
|dairdmg=15% | |dairdmg=15% | ||
|dairdesc=A [[stomp]] kick | |dairdesc=A [[Stomp (archetype)|stomp]] kick. Comes out extremely quickly and is a powerful [[meteor smash]], though lacks range. With [[double jump cancel]], it can be used to rack up extremely high damage, in some cases being used in zero-to-death combos. | ||
|grabname= | |grabname=Grab ({{ja|つかみ|Tsukami}}) | ||
|grabdesc= | |grabdesc= | ||
|fthrowname= | |fthrowname=PK Throw ({{ja|PKスルー|Pīkei Surū}}) | ||
|fthrowdmg=16% | |fthrowdmg=16% (throw), 10% (collateral) | ||
|fthrowdesc=Takes foe, lifts them with PSI, and twirls them whilst launching them forward for great power. High knockback. | |fthrowdesc=Takes foe, lifts them with PSI, and twirls them whilst launching them forward for great power. High knockback. | ||
|bthrowname= | |bthrowname=Reverse PK Throw ({{ja|リバースPKスルー|Ribāsu Pīkei Surū}}) | ||
|bthrowdmg=16% | |bthrowdmg=16% (throw), 10% (collateral) | ||
|bthrowdesc=Similar to his | |bthrowdesc=Similar to his forward throw, only he takes the foe and launches them behind him. | ||
|floorbname= | |floorbname= | ||
|floorbdmg=6% | |floorbdmg=6% | ||
| Line 94: | Line 152: | ||
|edgesdesc=Gets up and punches slowly. | |edgesdesc=Gets up and punches slowly. | ||
|nsname=PK Fire | |nsname=PK Fire | ||
|nsdmg=25% maximum | |nsdmg=25% maximum, 16% maximum (NTSC-J) | ||
|nsdesc=Fires a lightning-bolt shaped fire projectile that, if it hits, traps the opponent in a multi-hitting pillar of flame. If it does not hit either of the aforementioned objects within a few feet or hits a wall, then it dissipates. If used in midair, travels downwards at a 45 degree angle. | |nsdesc=Fires a lightning-bolt shaped fire projectile that, if it hits, traps the opponent in a multi-hitting pillar of flame. If it does not hit either of the aforementioned objects within a few feet or hits a wall, then it dissipates. If used in midair, travels downwards at a 45 degree angle. | ||
|usname=PK Thunder | |usname=PK Thunder | ||
|usdmg=6% ( | |usdmg=6% (PK Thunder head), 3% (PK Thunder tail), 30% (PK Thunder 2), 35% (NTSC-J PK Thunder 2) | ||
|usdesc=Creates a stream of thunder which is controlled using the Control Stick (Ness cannot do anything while the thunder stream is on the screen). The thunder | |usdesc=Creates a stream of thunder which is controlled using the Control Stick (Ness cannot do anything while the thunder stream is on the screen). The thunder must be aimed into Ness so that he can launch in a direction (recovery move, referred to as [[PK Thunder 2]]. If the thunder hits an opponent or a wall, it will disappear and Ness will become helpless, meaning that the thunder can be jumped into to cancel out Ness's recovery. Ness is also extremely vulnerable to aerial attacks and meteor smashes when controlling the thunder. This is one of the main reasons why Ness dropped severely from the [[List of SSB tier lists (NTSC)|first tier list to the second]]. | ||
|dsname=PSI Magnet | |dsname=Psychic-Magnet | ||
|dsdmg=0% | |dspage=PSI Magnet | ||
|dsdesc=The PSI Magnet is not an attack. Rather, it heals damage if an [[energy]] or [[electric]] projectile hits it. | |dsdmg=0% | ||
|dsdesc=The PSI Magnet is not an attack. Rather, it heals 2.0x damage if an [[energy]] or [[electric]] projectile hits it. | |||
}} | }} | ||
=== | ===[[Announcer]] call=== | ||
<gallery> | |||
File: Ness Announcer SSB.wav|English/Japanese/Chinese | |||
File: Ness French Announcer SSB.wav|French | |||
File: Ness German Announcer SSB.wav|German | |||
</gallery> | |||
== | ===[[On-screen appearance]]=== | ||
= | {{Appearance | ||
= | |desc=Uses {{iw|wikibound|Teleport}} and crashes onto the stage. | ||
|char=Ness | |||
|game=SSB}} | |||
=== | ===[[Taunt]]=== | ||
{{ | {{Taunt/SSB|char=Ness|desc=Says "Okay!" while turning to his right, then nods his head while putting hands on hips.}} | ||
=== | ===[[Crowd cheer]]=== | ||
:''See also: [[:Category:Ness | {| class="wikitable" border="1" cellpadding="4" cellspacing="1" | ||
*{{Sm|Firo|USA}} | |- | ||
*{{Sm|Nangoku|Japan}} | !{{{name|}}} | ||
*{{Sm| | !Cheer (International) | ||
*{{Sm| | !Cheer (Japanese) | ||
|- | |||
! scope="row"|Cheer | |||
|[[File:Ness Cheer International SSB.ogg|center]]||[[File:Ness Cheer Japanese SSB.ogg|center]] | |||
|- | |||
! scope="row"|Description | |||
|Go - Ness! *claps 3 times* || Ne - ss! *claps 3 times* | |||
|} | |||
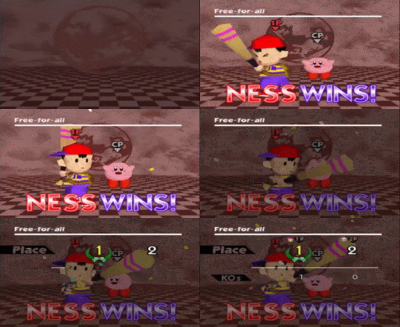
===[[Victory pose]]s=== | |||
{{Victory/SSB | |||
|victory-theme=NessTheme64.ogg | |||
|victory-desc=The final four Sound Stone Melodies from ''[[EarthBound (game)|EarthBound]]''. They also play in the game's credits, ''Smiles and Tears''. | |||
|desc-1=Trots in place, then stands with hands on his hips, nodding confidently. | |||
|desc-2=Looks over shoulders and scratches head grinning (also his character selection animation). | |||
|desc-3=Swings his bat twice to the sides, then poses. | |||
|char=Ness}} | |||
==In [[competitive play]]== | |||
===Most historically significant players=== | |||
<!--This character has a ten player limit for this section. Before adding and/or removing a player, read these guidelines: https://www.ssbwiki.com/SmashWiki:Notability#%22Most_historically_significant_players%22_guidelines --> | |||
:''See also: [[:Category:Ness players (SSB)]]'' | |||
*{{Sm|Firo|USA}} - The best Ness player in the United States during the mid-2010s. His best results are 4th at {{Trn|The Empire Smashes Back}} and 5th at {{Trn|SuperBoomed}}, the latter being where he defeated {{Sm|TR3GTheZ}} and {{Sm|Robert}} and is tied as the highest solo-Ness placement at a major tournament. He has not been seen competing ever since 2017. | |||
*{{Sm|Fray|Canada}} - The current best Ness player in the world. Gained notoriety through his 9th place at {{Trn|Get On My Level 2017}} and online showings during the pandemic such as his 5th place at {{Trn|Quarantined Rapport}} East{{OnlineIcon}}, and then placed 3rd at {{Trn|Crovy Fest}} and 17th at {{Trn|Supernova 2024}}. He is currently ranked 21st on the [[2023 Smash 64 Power Rankings]]. | |||
*{{Sm|Nangoku|Japan}} - The best Ness player from Japan and the previous best in the world. He holds some of the best Ness results to this day with regionals such as 5th at {{Trn|Autumn Kanto Tournament}} and 9th at {{Trn|Kansai 2020}} and a major placement of 8th at {{Trn|Apex 2013}}. He has been inactive from tournaments since 2020. | |||
*{{Sm|Raychu|USA}} - One of the best Ness players in the world prior to his death. He was considered the best Ness player during 2019 shown with his placements of 3rd at {{Trn|Shine 2019}} and 7th at {{Trn|Smashtoberfest}}, ultimately being ranked 23rd on the [[2019-2020 Smash 64 Power Rankings]]. Even after 2019, he remained one of the most consistent Ness players, placing 7th at {{Trn|Apex 2022}} and 17th at {{Trn|Supernova 2024}}. He passed away in October of 2024. | |||
*{{Sm|Tokiwa|Japan}} - The second best Ness player in Japan. His 5th place at {{Trn|Kansai 2022}} is the best Ness result seen in the region post-pandemic, beating both {{Sm|Hebiichigo}} and {{Sm|Shizuku}} at the event. He is tied for having the best solo-Ness placement at a major tournament with 5th at {{Trn|Kanto 2017}} and had a streak of nationals during 2017 with 13th at {{Trn|Kansai 2017}} and {{Trn|Japan Smash Cup 2017}}. | |||
===Tier placement and history=== | ===Tier placement and history=== | ||
Ness used to rank very high at 3rd place on the first '' | Ness used to rank very high at 3rd place on the first ''Smash 64'' tier list, just only below {{SSB|Pikachu}} and {{SSB|Kirby}}. With [[double jump cancelling]], Ness was a dominant force in the ''Smash 64'' metagame, as his DJC'ed aerials can rack up a huge amount of damage, and can be used to perform deadly [[zero-to-death combo]]s. However, Ness became less effective as the metagame progressed. His short range in his attacks made his DJC combos lose recognition and effectiveness, and Ness' recovery, despite covering a great distance, can be exploitable due to it being predictable. This caused Ness to drop from a top tier 3rd place to a low-mid tier 8th place by the second tier list and dropping again to 9th in the third tier list and by the fourth tier list, to 10th. This is also currently the proportionally largest tier list drop of any character in any ''Smash Bros.'' game. Ness is currently 5th of the Japanese matchups, he is in a higher position due to the fact he is stronger than the international versions. | ||
==Techniques== | ==Techniques== | ||
| Line 132: | Line 223: | ||
===Double jump landing=== | ===Double jump landing=== | ||
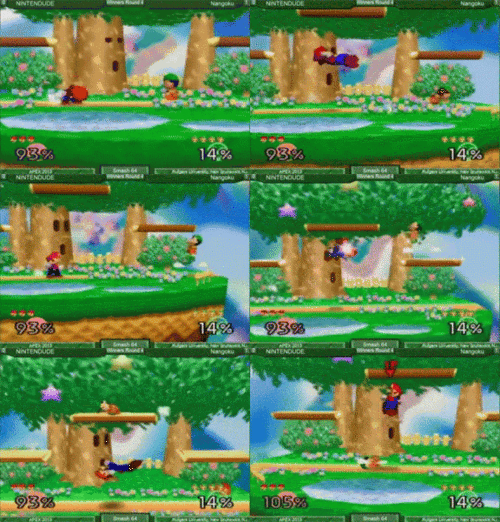
[[File:Nesslevator.gif|250px|thumb|{{Sm|Nangoku}} performing the | [[File:Nesslevator.gif|250px|thumb|{{Sm|Nangoku}} performing a double jump land onto the side platform, then quickly attacking {{Sm|Nintendude}}.]] | ||
By double jumping, then immediately canceling the 2nd jump with an aerial when he reaches the height of a platform, Ness can quickly move to platforms. | |||
===Double jump rushing=== | ===Double jump rushing=== | ||
| Line 154: | Line 245: | ||
*[[EarthBound (game)|EarthBound]] (SNES) | *[[EarthBound (game)|EarthBound]] (SNES) | ||
==[[ | ==[[Alternate costume (SSB)#Ness|Alternate costumes]]== | ||
[[File: | {|style="margin:1em auto 1em auto;text-align:center" | ||
|- | |||
|colspan=4|[[File:Ness Palette (SSB).png]] | |||
|- | |||
|{{Head|Ness|g=SSB|s=25px}} | |||
|{{Head|Ness|g=SSB|s=25px|cl=Yellow}} | |||
|{{Head|Ness|g=SSB|s=25px|cl=Blue}} | |||
|{{Head|Ness|g=SSB|s=25px|cl=Green}} | |||
|} | |||
==Trivia== | ==Trivia== | ||
*This is Ness's only appearance on the [[Nintendo 64]]. The only other playable character to share this distinction is {{SSB|Samus}}. | *This is Ness's only appearance on the [[Nintendo 64]]. The only other playable character to share this distinction is {{SSB|Samus}}. | ||
**This also marks the first appearance of Ness in three-dimensional format. | **This also marks the first appearance of Ness in three-dimensional format. This quality is shared with Kirby and Samus. | ||
*On the [[Character selection screen]], Ness's portrait greatly resembles [[wikibound:File:Ness.png|his artwork]] from ''{{b|EarthBound|game}}''. | |||
*Ness's [[congratulations screen]] is the only one in ''Smash 64'' to feature characters who are otherwise not present anywhere else in the game. | |||
**Additionally, his congratulations screen features the lead singers of the Runaway Five, who appear with their Japanese design from ''EarthBound''. In the Western version of ''EarthBound'', they wore red and green suits. | |||
*Prior to ''Ultimate'', this is the only game in the ''Smash'' series where Ness's back throw is not the strongest back throw in the game. | |||
{{SSBCharacters}} | {{SSBCharacters}} | ||
{{EarthBound universe}} | {{EarthBound universe}} | ||
[[Category: | [[Category:Ness (SSB)| ]] | ||
[[ | [[es:Ness (SSB)]] | ||
Latest revision as of 20:58, January 13, 2025
| Ness in Super Smash Bros. | |
|---|---|
| |
| Universe | EarthBound |
| Other playable appearances | in Melee in Brawl in SSB4 in Ultimate |
| Availability | Unlockable |
| Tier | C (10) (North America) ? (5) (Japan) |
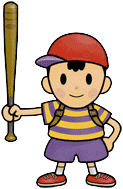
Ness (ネス, Ness) is one of the main characters from the EarthBound franchise and appears in Super Smash Bros. as one of the four unlockable characters. He is voiced by Makiko Ōmoto, who would go on to voice him in later iterations.
Ness ranks 10th on the tier list, the third lowest ranked character. He is well-known for his unique double jump and technical movement: he, along with Yoshi, can cancel his double jump with an attack, granting him a burst of speed he can use to move and attack extremely quickly. Ness's fast movement combined with his powerful aerials give him a strong and flexible combo game. He's able to both juggle and tech chase his opponent, frequently using his up tilt and up air as launchers to setup a down air spike onto a platform. After building up damage, Ness has many ways to finish opponents, including kill throws, multiple high knockback aerials, and strong smash attacks.
Although his weaknesses are few in number they can be easily exploitable. His long distanced recovery is hindered by being slow, predictable, and easy to interrupt, leaving him one of the easiest characters in the game to gimp. Although his double jump cancel gives him very fast grounded movement, his slowness in the air can make it very difficult to deal with air camping, especially from characters with strong down aerials like Kirby or Jigglypuff. The low range of most of his aerials compounds this weakness and can make it difficult to approach characters with better disjoint. As a result, despite his strengths he has poor matchups and low tournament representation and results. Conversely, Ness is ranked 5th on the Japanese tier list because he is much stronger in the Japanese version, rather than the international release, in which he was nerfed.
How to unlock[edit]
Complete 1P Game on normal difficulty or higher with three stocks or less without continuing, then defeat Ness on Dream Land. Players that lose the fight against Ness can re-fight him by completing 1P Game under those aforementioned conditions again. In cases where Captain Falcon or Jigglypuff have not been unlocked and either of their unlock match requirements are simultaneously met, Ness will still be the fighter players face.
Attributes[edit]
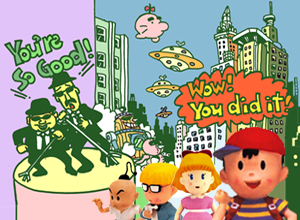
Ness is a fairly small character with below average weight. He is very slow on the ground with the slowest walk and dash speeds (although he does have a fast initial dash) and his air mobility is below average outside of double jump canceling. This naturally gives Ness trouble with approaching, as most of the cast can easily outrun him. Ness also has average falling speed and gravity.
Ness' tools on the ground are a mixed bag overall. His jab is one of the fastest in the game, which allows it to lead his grab (via a jab grab) which is quite effective due to the strength of his throws, although both his jab and grab have short range. Up tilt is a solid combo starter which can easily lead to combos at lower percents at KO confirms at higher percents although it has limited horizontal range and it is rather unsafe. Forward tilt and dash attack are situational overall as they are both rather risky and not highly rewarding while down tilt is borderline useless, due to being unsafe on hit at realistic percents. Ness' smash attacks are not the most effective but they are solid overall. Forward smash and up smash are not incredibly strong but they are safe and the latter can lead into combos at some percents, while down smash is fairly powerful, disjointed and lingers for a very long time. Ness does have a strong grab game however. While his grab has a short amount of range, both his forward and back throw are among the strongest in the game, Easily leading to KOes and edgeguards at fairly low percents.
Ness' aerial game is his strongest aspect. Ness has access to double jump canceling, which easily allows him to pressure opponents with his aerials, especially since if the opponent shields an aerial, Ness has the ability to perform a shield break combo by stringing together double jump canceled aerials on a shielding opponents. In addition to this, all of his aerials are solid on their own. Neutral aerial has decent power and lingers for almost the entire animation, back aerial has a good amount of power and forward aerial is decent at setting up combos and edgeguards, although it is his weakest aerial overall. Ness' best aerials however are his up and down aerials. Up aerial is a disjointed aerial which hits all around Ness and it has strong vertical knockback, which makes it an excellent combo tool at lower percents (especially when combined with double jump canceling) and a solid KO move at higher percents. Down aerial is an incredibly fast and powerful meteor smash, which makes it an incredible edgeguarding tool off stage as well as an excellent combo tool on stage. It can easily set up combos against grounded opponents and it can put aerial opponents into a tech chase situation where the opponent can potentially get hit by another down aerial to reset the situation.
Ness unfortunately possesses a poor set of special moves. PK Fire is a projectile which creates a pillar of fire if it hits an opponent. While this can lead into followups, PK Fire is a slow and laggy projectile, which does not cover a lot of distance. It is easily avoidable and punishable and even if it hits the opponent, they can easily SDI out of the pillar and even potentially punish Ness. PK Thunder is a projectile which can be controlled and if it hits Ness, he will shoot forwards, travelling a long distance with a powerful hitbox (known as PK Thunder 2). While PK Thunder lasts for a long time and it can be controlled, it is rather laggy and the opponent can hit the PK Thunder to beat it out. If Ness is in the air after PK Thunder is destroyed, he will go into free fall, which can lead to him falling to the end of his stock off stage. PK Thunder 2 is Ness' main recovery move and while it does travel a long distance and can be angled in any direction, it takes a long time to set up, it can be interrupted during the second half of the dash and if Ness lands after entering free fall, he will have a ton of landing lag, all of which make PK Thunder and PK Thunder 2 an incredibly exploitable recovery move. PSI Magnet can be used to absorb projectiles however, it takes a long time to start absorbing projectiles and if Ness does absorb a projectile, he is put in a considerable amount of lag, which can potentially be punished.
Ness' main strength is his combo and shield pressuring potential. Ness overall has a relatively easy time starting combos at lower percents, especially compared to other low tiers. Ness' up aerial, down aerial and up tilt are all excellent combo tools at lower percents, with the latter two still being strong combo tools at higher percents as well. Moves such as Ness' other aerials and up smash can also be used for combos at some percents. Ness overall does not have too much trouble with KOing his opponent after hitting them at 0%. Ness' double jump cancel in general gives him quick and easy access to his aerials, allowing them to be used as fast and powerful combo starters. This also extends to his shield pressure, as all of his aerials are incredibly safe on shield and his double jump cancel can easily allow his aerials to quickly hit a shielding opponent and put Ness in a spot to throw out another aerial and reset the situation until the shield breaks. Ness also has a jab grab as a strong shield pressuring tool, as well as a strong tool to use as a quick and powerful option when he is in a pressure situation.
Ness has some strong KO options. Ness' down aerial is the overall strongest meteor smash in the game which makes it a devastating move against off stage opponents. Ness can combo into down aerial off stage with an up aerial, up tilt, up smash or a neutral aerial which can all lead to very early KOes. Ness' throws also lead to very early KOes, especially at the ledge and moves such as back aerial, down smash and up aerial are also strong KO moves.
Ness also has strong edgeguarding. Down aerial in particular is simultaneously the fastest and strongest meteor smash in the game which along with it having a chunk of active frames and very low ending lag, makes it an absolutely devastating move against off stage opponents as mentioned earlier and with Ness having a long ranged recovery, he can make it back from far distances. Ness also has moves such as neutral/forward/back aerials which are also strong options to get the opponent off stage or to edgeguard.
Ness does have rather notable weaknesses however. Ness has very poor mobility and his range is very short which gives him a very hard time approaching. Opponents can easily keep Ness out due to his poor range and mobility and Ness cannot easily keep opponents out himself due to his range and mobility. Opponents can play around Ness' short range and punish him from there. Ness also cannot really camp due to his very slow and overall poor projectiles and while he does have a reflector and an absorption move, they are both very slow and punishable, which makes them very difficult to take advantage of.
Ness is also light and has average falling speed/gravity, which both make him a fairly easy character to combo and KO. Ness gets comboed easily at lower percents and dies rather early at higher percents due to his low weight, especially horizontally. He also does not have strong options to get out of combos or juggles. Ness has a slow double jump, he lacks any fully intangible options in the air and his only real options to escape combos are his neutral and down aerials which both have unimpressive range and they easily lose to disjoints.
Ness' other major weakness is his recovery. Distance-wise, it can go quite far not only due to PK Thunder 2's long range and ability to be angled but also because of Ness having a long ranged double jump. However, there are multiple downsides to Ness' recovery which make it one of the worst in the game. While Ness' double jump travels a long distance, it is rather slow and Ness has poor air speed, which makes it rather easy for the opponent to hit Ness out of it. Ness also cannot use his aerials to challenge opponents when trying to recover due to his double jump cancel, so his only real option is to try and play around the opponent with his double jump. When Ness has to use PK Thunder, it takes a long time for Ness to be able to set up PK Thunder 2 which gives the opponent time to either hit Ness out of the move or to hit/get hit by the PK Thunder itself, which can easily lead to him losing a stock. Even if Ness does get to use PK Thunder 2, it can be punished if the opponent is not too close to Ness when he activates it. Ness' best bet to recover is to use PK Thunder as low as he can and uses it diagonally to barely get back on stage. This means that various characters cannot challenge the PK Thunder projectile without risking their own stock and if Ness recovers just right, he can auto-cancel the PK Thunder 2, giving it a lot less lag than normal although this can still be punished. Characters who can go deep for edgeguards like Pikachu and Kirby however can challenge PK Thunder even from max distance which leaves Ness in a really poor spot against these characters.
Overall, Ness is a character who performs well when he gets his game plan going but he struggles when he does not have the advantage. Ness has a strong offensive game with strong aerials and an excellent double jump cancel but he has poor mobility and range, which makes it very difficult for him to land one of his attacks and start his strong punish game and when he ends up offstage, he heavily struggles to get back on stage against a strong opponent. Ness' punish game unfortunately is not strong enough to make up for his poor defence, approach and recovery. This naturally results in Ness having an unspectacular matchups in the North American version. Ness struggles against stronger characters who all outspeed and outrange Ness, with Kirby being considered to be his worst matchup. Kirby can easily outrange Ness with his large/safe disjoints and his incredible edgeguarding is naturally highly detrimental for Ness. Kirby's floaty nature also makes him awkward for Ness to combo while Kirby can combo Ness with ease. It is overall an extremely difficult matchup for Ness at the top level. Ness' matchups against the low tiers are closer, with Ness potentially winning against some of them although not by much.
As a result of all of these factors, while Ness was once considered a strong character in the game's early meta due to his strong punish game, he dropped off considerably over time due to the severity of his weaknesses, which ultimately resulted in him being considered to be one of the weakest characters in the game, and subsequently getting below average results and representation in tournaments in the international versions of the game.
In the Japanese version however, Ness is considered to be a much stronger character. This is because in the Japanese version, Ness had a stronger combo game (with an up tilt which could combo for much longer) and he had many stronger KO moves (such as all of his smash attacks, up aerial and PK Thunder 2). Ness' combos in general were more consistent and harder to escape due to the lower hitlag/strength of SDI, which particularly made his combos into down aerial off stage considerably more consistent. Ness also had a better recovery as PK Thunder 2 was not only much stronger but it also had more invincibility, a larger hitbox and more active frames which made it considerably harder and riskier to challenge (although his recovery overall was still very poor). All these factors combined made Ness an even scarier character with an even stronger punish game and a slightly better recovery, with Ness being considered a mid tier in the Japanese version. Ness received a plethora of impactful nerfs in the North American version which pushed him down into the low tier, which was then also carried into the PAL versions.
Differences between game versions[edit]
Ness was noticeably nerfed in his transition to NTSC-U. His disproportionate KO power was weakened, his moves deal less damage and the higher presence of SDI makes his DJC combos easier to escape. As a result, he is noticeably worse than in the Japanese version.
Ground attacks[edit]
 The second hit of neutral attack now has a small punch sound instead of a small kick.
 Up tilt deals less damage (8% → 7%).
 Up tilt has increased base knockback (70 → 80), hindering its combo potential, especially when it is stale.
 Up tilt launches opponents at a slightly lower angle (96° → 100°).
 Forward smash deals less damage (20% → 18%) and has decreased knockback scaling (67 → 65).
 Forward smash has an increased reflection multiplier (1.5x → 1.8x).
 Up smash's clean hit deals less damage (19% → 17%) and sends opponents at a less favorable angle (105° → 110°) hindering its KO potential despite its increased base knockback (0 → 20).
 However, these changes improve its combo potential.
 Mid and late up smash deal less damage (17% (mid)/14% (late) → 15%/13%) with the mid hit also sending opponents at a less favorable angle (90° → 78°).
 Down smash deals less damage (21% → 19%).
Aerial attacks[edit]
 Up aerial deals 2% less damage (17% → 15%) and has decreased knockback scaling (120 → 110) hindering its KO potential.
 However, these changes improve its combo potential.
 Up aerial has a smaller hitbox (190u → 175u).
Special attacks[edit]
 PK Fire deals more damage (2% (fire & pillar) → 7% (fire), 3% (pillar), 16% → 25% (total)).
 PK Fire travels a shorter distance.
 PK Thunder 2 deals less damage (35% → 30%) and knockback (50 (base), 100 (scaling) → 40/84).
 PK Thunder 2 has a smaller hitbox (200u → 150u).
 PK Thunder 2 has a shorter duration (frames 1-28 → 1-18), less invincibility (frames 1-17 → 1-9), and more landing lag (30 frames → 42).
Moveset[edit]
For a gallery of Ness's hitboxes, see here.
| Name | Damage | Description | ||
|---|---|---|---|---|
| Neutral attack | Hook (フック) Straight (ストレート) Middle Kick (ミドルキック) |
2% | Two fairly fast punches, followed by a kick. Very similar to Mario's and Luigi's, but it has short range. | |
| 2% | ||||
| 4% | ||||
| Forward tilt | ↗ | Spinning Kick (スピニングキック) | 11% | Kicks in front rapidly, his body moves with it, giving it minor ending lag. Decent close-up spacer. |
| → | 10% | |||
| ↘ | 9% | |||
| Up tilt | Toss (トス) | 7%, 8% (NTSC-J) | Two-handed open-palm uppercut. Thrusts both his hands directly upwards above him as he leaps in place, which is a great aerial setup, especially because of its good speed and decent power. | |
| Down tilt | Crouching Kick (クラウチングキック) | 3% | Does a fast kick while crouching, which can chain into itself, or a grab. | |
| Dash attack | Hand Stamp (ハンドスタンプ) | 12% (clean), 9% (late) | Puts both of his hands in front of him with good duration. Usually launches foes in front of him. | |
| Forward smash | Batter Up! (バットスイング, Bat Swing) | 18%, 20% (NTSC-J) | Home-run swing. Takes out a bat and swings it, making a pinging sound if it connects. Good speed, range, and power. Can also be used as a reflector. | |
| Up smash | Around the World (シャトルループ, Shuttle Loop) | 17% (clean), 15% (mid), 13% (late), 19% (NTSC-J clean), 17% (NTSC-J mid), 14% (NTSC-J late), | Does an "around the world" yo-yo swing, which acts as a good anti-air move. Strange hitbox, does not hit short characters on ground. Above average speed. | |
| Down smash | Walk the Dog (ヨーヨーショット, Yo-Yo Shot) | 19%, 21% (NTSC-J) | Ness does a "walk the dog" yo-yo swing. Extremely low hitbox, though it has extremely long range and an extremely long duration. Longest horizontal range of all down smashes. | |
| Neutral aerial | Ness Kick (ネスキック) | 14% (clean), 11% (late) | Does a forwards split kick, somewhat similar to Jigglypuff's. The hitbox is Ness's entire body. Has similar properties to a sex kick. Good spacing move. | |
| Forward aerial | Aerial Hand Stamp (空中ハンドスタンプ, "Midair Hand Stamp") | 12% (clean), 10% (late) | Similar to his dash attack, puts both hands in front of him for good damage and knockback. Quick attacking move, though the range is restricted to his small opened hands. | |
| Back aerial | Backward Drop Kick (後方ドロップキック) | 16% (clean), 10% (late) | Thrusts his feet backwards for tremendous KO power. | |
| Up aerial | Jumping Headbutt (ジャンピングヘッドバット) | 15%, 17% (NTSC-J) | He does a quick and short ranged headbutt above him with good power. Good for juggling. Ness's head is invincible during this attack. | |
| Down aerial | Needle Kick (ニードルキック) | 15% | A stomp kick. Comes out extremely quickly and is a powerful meteor smash, though lacks range. With double jump cancel, it can be used to rack up extremely high damage, in some cases being used in zero-to-death combos. | |
| Grab | Grab (つかみ) | — | ||
| Forward throw | PK Throw (PKスルー) | 16% (throw), 10% (collateral) | Takes foe, lifts them with PSI, and twirls them whilst launching them forward for great power. High knockback. | |
| Back throw | Reverse PK Throw (リバースPKスルー) | 16% (throw), 10% (collateral) | Similar to his forward throw, only he takes the foe and launches them behind him. | |
| Forward roll Back roll |
— | — | ||
| Techs | — | — | ||
| Floor attack (front) Floor getups (front) |
6% | Gets up and twirls around with his foot extended. | ||
| Floor attack (back) Floor getups (back) |
6% | Gets up and twirls around with his foot extended. | ||
| Edge attack (fast) Edge getups (fast) |
6% | Lunges upwards and twirls. | ||
| Edge attack (slow) Edge getups (slow) |
6% | Gets up and punches slowly. | ||
| Neutral special | PK Fire | 25% maximum, 16% maximum (NTSC-J) | Fires a lightning-bolt shaped fire projectile that, if it hits, traps the opponent in a multi-hitting pillar of flame. If it does not hit either of the aforementioned objects within a few feet or hits a wall, then it dissipates. If used in midair, travels downwards at a 45 degree angle. | |
| Up special | PK Thunder | 6% (PK Thunder head), 3% (PK Thunder tail), 30% (PK Thunder 2), 35% (NTSC-J PK Thunder 2) | Creates a stream of thunder which is controlled using the Control Stick (Ness cannot do anything while the thunder stream is on the screen). The thunder must be aimed into Ness so that he can launch in a direction (recovery move, referred to as PK Thunder 2. If the thunder hits an opponent or a wall, it will disappear and Ness will become helpless, meaning that the thunder can be jumped into to cancel out Ness's recovery. Ness is also extremely vulnerable to aerial attacks and meteor smashes when controlling the thunder. This is one of the main reasons why Ness dropped severely from the first tier list to the second. | |
| Down special | Psychic-Magnet | 0% | The PSI Magnet is not an attack. Rather, it heals 2.0x damage if an energy or electric projectile hits it. | |
Announcer call[edit]
English/Japanese/Chinese
French
German
On-screen appearance[edit]
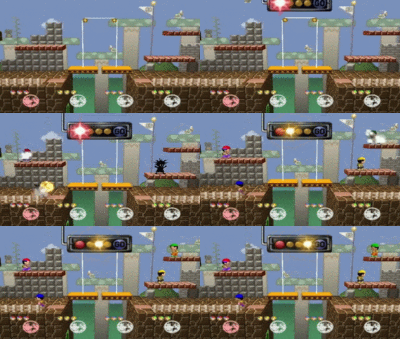
- Uses Teleport and crashes onto the stage.
|
|---|
Taunt[edit]
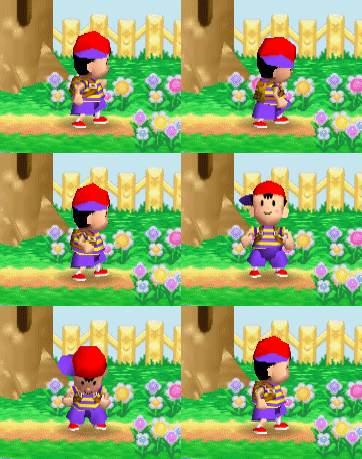
- Says "Okay!" while turning to his right, then nods his head while putting hands on hips.
|
|---|
Crowd cheer[edit]
| Cheer (International) | Cheer (Japanese) | |
|---|---|---|
| Cheer | ||
| Description | Go - Ness! *claps 3 times* | Ne - ss! *claps 3 times* |
Victory poses[edit]
- Trots in place, then stands with hands on his hips, nodding confidently.
- Looks over shoulders and scratches head grinning (also his character selection animation).
- Swings his bat twice to the sides, then poses.
 |
 |
|
|---|
In competitive play[edit]
Most historically significant players[edit]
- See also: Category:Ness players (SSB)
Firo - The best Ness player in the United States during the mid-2010s. His best results are 4th at The Empire Smashes Back and 5th at SuperBoomed, the latter being where he defeated TR3GTheZ and Robert and is tied as the highest solo-Ness placement at a major tournament. He has not been seen competing ever since 2017.
Fray - The current best Ness player in the world. Gained notoriety through his 9th place at Get On My Level 2017 and online showings during the pandemic such as his 5th place at Quarantined Rapport East
, and then placed 3rd at Crovy Fest and 17th at Supernova 2024. He is currently ranked 21st on the 2023 Smash 64 Power Rankings.
Nangoku - The best Ness player from Japan and the previous best in the world. He holds some of the best Ness results to this day with regionals such as 5th at Autumn Kanto Tournament and 9th at Kansai 2020 and a major placement of 8th at Apex 2013. He has been inactive from tournaments since 2020.
Raychu - One of the best Ness players in the world prior to his death. He was considered the best Ness player during 2019 shown with his placements of 3rd at Shine 2019 and 7th at Smashtoberfest, ultimately being ranked 23rd on the 2019-2020 Smash 64 Power Rankings. Even after 2019, he remained one of the most consistent Ness players, placing 7th at Apex 2022 and 17th at Supernova 2024. He passed away in October of 2024.
Tokiwa - The second best Ness player in Japan. His 5th place at Kansai 2022 is the best Ness result seen in the region post-pandemic, beating both Hebiichigo and Shizuku at the event. He is tied for having the best solo-Ness placement at a major tournament with 5th at Kanto 2017 and had a streak of nationals during 2017 with 13th at Kansai 2017 and Japan Smash Cup 2017.
Tier placement and history[edit]
Ness used to rank very high at 3rd place on the first Smash 64 tier list, just only below Pikachu and Kirby. With double jump cancelling, Ness was a dominant force in the Smash 64 metagame, as his DJC'ed aerials can rack up a huge amount of damage, and can be used to perform deadly zero-to-death combos. However, Ness became less effective as the metagame progressed. His short range in his attacks made his DJC combos lose recognition and effectiveness, and Ness' recovery, despite covering a great distance, can be exploitable due to it being predictable. This caused Ness to drop from a top tier 3rd place to a low-mid tier 8th place by the second tier list and dropping again to 9th in the third tier list and by the fourth tier list, to 10th. This is also currently the proportionally largest tier list drop of any character in any Smash Bros. game. Ness is currently 5th of the Japanese matchups, he is in a higher position due to the fact he is stronger than the international versions.
Techniques[edit]
Double jump cancel[edit]
DJCing is a glitch-technique that can be used by Yoshi and Ness. It involves using an aerial or a special move just after starting a double jump. This cancels the momentum of the double jump and allows quicker movement within the attacks, while also being able to speed up short hops, making short hopped DJC'd aerials especially effective when Z-cancelled. It can also help with aerial comboing. DJCing a special move cannot be Z-canceled.
Double jump landing[edit]
By double jumping, then immediately canceling the 2nd jump with an aerial when he reaches the height of a platform, Ness can quickly move to platforms.
Double jump rushing[edit]
Albeit extremely difficult to do outside TAS, Ness can move incredibly quickly on the ground by cancelling multiple double jumps while moving horizontally. This is due to his second jump having very high horizontal movement during its initial frames. Demonstrative video here.
Dash turnaround ledgegrab[edit]
Ness is the only character in the game along with Fox who can use the turnaround animation of his full sprint to grab a ledge. This is due to his turnaround animation changing the faced direction before the character "brakes".
Edge sweetspotting[edit]
Along with Pikachu, Ness can sweetspot the ledge using PK Thunder 2 if he grabs the ledge at the right angle and from the right distance, allowing him to act very quickly after grabbing the edge.
Special ledge cancel[edit]
Ness can grab the ledge while using his PK Thunder move or his PSI Magnet. This makes edgeguarding harder to perform for opponents. Also, these moves cancel his double jump, making them useful for ledge stalling or to refresh the invincibility frames granted by the ledge.
Description[edit]
Ness was a seemingly-average kid from Onett, but in truth, he was destined for much more. When a strange meteorite landed near his hometown, the little boy with psychic powers set out to save the world. Little has been said of Ness' character, and much remains hidden.
Works:
- EarthBound (SNES)
Alternate costumes[edit]

| |||
Trivia[edit]
- This is Ness's only appearance on the Nintendo 64. The only other playable character to share this distinction is Samus.
- This also marks the first appearance of Ness in three-dimensional format. This quality is shared with Kirby and Samus.
- On the Character selection screen, Ness's portrait greatly resembles his artwork from EarthBound.
- Ness's congratulations screen is the only one in Smash 64 to feature characters who are otherwise not present anywhere else in the game.
- Additionally, his congratulations screen features the lead singers of the Runaway Five, who appear with their Japanese design from EarthBound. In the Western version of EarthBound, they wore red and green suits.
- Prior to Ultimate, this is the only game in the Smash series where Ness's back throw is not the strongest back throw in the game.
| Fighters in Super Smash Bros. | |
|---|---|
| Fighters | Captain Falcon · Donkey Kong · Fox · Jigglypuff · Kirby · Link · Luigi · Mario · Ness · Pikachu · Samus · Yoshi |
|
| |
|---|---|
| Fighters | Ness (SSB · SSBM · SSBB · SSB4 · SSBU) · Lucas (SSBB · SSB4 · SSBU) |
| Assist Trophies | Jeff · Starman |
| Bosses | Porky Statue · Porky |
| Stages | Onett · Fourside · New Pork City · Magicant |
| Items | Mr. Saturn · Franklin Badge · Ramblin' Evil Mushroom |
| Enemies | Devil Car · Starman |
| Other | Boney · Flying Man · Kumatora · Paula · Poo · Rope Snake · Ultimate Chimera |
| Trophies, Stickers and Spirits | Trophies (SSBM · SSBB · SSB4) · Stickers · Spirits |
| Music | Brawl · SSB4 · Ultimate |
| Masterpiece | EarthBound |
