Pikachu (SSBB)/Up special: Difference between revisions
(Not that I see a problem with it anymore...) |
m (Text replacement - "== ([^=])" to "== $1") |
||
| (6 intermediate revisions by 4 users not shown) | |||
| Line 1: | Line 1: | ||
{{ArticleIcons|ssbb=y}} | {{ArticleIcons|ssbb=y}} | ||
{{disambig2|the hitbox visualization in ''[[Super Smash Bros. Brawl]]''|the move itself|Quick Attack}} | |||
==Overview== | ==Overview== | ||
[[File:SSBB QAC.gif|thumb|Quick Attack Cancel]] | [[File:SSBB QAC.gif|thumb|Quick Attack Cancel]] | ||
| Line 7: | Line 9: | ||
The move can also be used for the [[Quick Attack Cancel]] (QAC) technique - if the move is aimed down or diagonally down into the ground and Pikachu jumps, the lag will be cancelled and Pikachu will be in the air. This can be used to approach quickly, and it can lead into a KO move such as a {{mvsub|Pikachu|SSBB|neutral aerial}} or {{mvsub|Pikachu|SSBB|down special|alt=Thunder}}. It is also possible to do this off soft platforms. Pikachu can use QAC to quickly maneuver around the stage. It is also possible to aim Quick Attack into a soft platform and drop through it by holding the Control Stick down (this won't make Pikachu helpless). | The move can also be used for the [[Quick Attack Cancel]] (QAC) technique - if the move is aimed down or diagonally down into the ground and Pikachu jumps, the lag will be cancelled and Pikachu will be in the air. This can be used to approach quickly, and it can lead into a KO move such as a {{mvsub|Pikachu|SSBB|neutral aerial}} or {{mvsub|Pikachu|SSBB|down special|alt=Thunder}}. It is also possible to do this off soft platforms. Pikachu can use QAC to quickly maneuver around the stage. It is also possible to aim Quick Attack into a soft platform and drop through it by holding the Control Stick down (this won't make Pikachu helpless). | ||
If the move is aimed downward while [[short hop]]ping out of [[water]], Pikachu will go underwater and float back | If the move is aimed downward while [[short hop]]ping out of [[water]], Pikachu will go underwater and float back up; this allows water stalling. | ||
The move can be used as a [[lock]]ing move. Using it back and forth to keep the opponent trapped is extremely advanced and difficult to do, but it can lead into a [[jab lock]] and then a Thunder or charged forward smash for an easy KO while the opponent is forced to get up [http://www.youtube.com/watch?v=pP0JwYgGuTA]. The best way to start this is with a {{mvsub|Pikachu|SSBB|down throw}}, then a reverse {{mvsub|Pikachu|SSBB|up tilt}} followed by a [[footstool jump]] into the lock. The lock properties of the move can also be used after a [[RAR]] {{mvsub|Pikachu|SSBB|up aerial}} into [[footstool]] jump, while grabbing a [[Banana Peel]] and throwing it towards the opponent to trip them again, allowing the process to be repeated and a jab lock followup [http://www.youtube.com/watch?v=GeMDyO0Uo_Y]. | The move can be used as a [[lock]]ing move. Using it back and forth to keep the opponent trapped is extremely advanced and difficult to do, but it can lead into a [[jab lock]] and then a Thunder or charged forward smash for an easy KO while the opponent is forced to get up [http://www.youtube.com/watch?v=pP0JwYgGuTA]. The best way to start this is with a {{mvsub|Pikachu|SSBB|down throw}}, then a reverse {{mvsub|Pikachu|SSBB|up tilt}} followed by a [[footstool jump]] into the lock. The lock properties of the move can also be used after a [[RAR]] {{mvsub|Pikachu|SSBB|up aerial}} into [[footstool]] jump, while grabbing a [[Banana Peel]] and throwing it towards the opponent to trip them again, allowing the process to be repeated and a jab lock followup [http://www.youtube.com/watch?v=GeMDyO0Uo_Y]. | ||
==Hitboxes== | |||
{{technical data}} | {{technical data}} | ||
== | ==Timing== | ||
{|class="wikitable" | {|class="wikitable" | ||
!Warp 1 hitbox | |||
|15-19 | |||
|- | |||
!Warp 2 hitbox | |||
|30-34 | |||
|- | |||
!Jump-cancellable (first warp/second warp) | |||
|30, 45 | |||
|- | |||
!Animation length (one warp) | |||
|69 | |||
|- | |- | ||
! | !Animation length (two warps) | ||
| | |84 | ||
|} | |} | ||
==== | {{FrameStripStart}} | ||
=====First warp | |'''Warp 1''' {{FrameStrip|t=Lag|c=14}}{{FrameStrip|t=Hitbox|c=5|e=HitboxContinuableS}}{{FrameStrip|t=Lag|c=45|s=LagContinuableE}} | ||
|- | |||
|'''Warp 2''' {{FrameStrip|t=Lag|c=14}}{{FrameStrip|t=Hitbox|c=5|e=HitboxContinuableS}}{{FrameStrip|t=Lag|c=10|s=LagContinuableE}}{{FrameStrip|t=Hitbox|c=5}}{{FrameStrip|t=Lag|c=45}} | |||
{{FrameStripEnd}} | |||
===[[Landing lag]]=== | |||
{|class="wikitable" | |||
!Animation length | |||
|24 | |||
|} | |||
{{FrameStripStart}} | |||
{{FrameStrip|t=Lag|c=24}} | |||
{{FrameStripEnd}} | |||
{{FrameIconLegend|lag=y|intangible=y|vulnerable=y|earliestcontinuable=y}} | |||
===Technical timing=== | |||
=====First warp===== | |||
*1-13: Startup | *1-13: Startup | ||
*14: Startup / QA1 direction input <small>(Control Stick position is read on frame 14 only; therefore, the player may switch directions during startup)</small> | *14: Startup / QA1 direction input <small>(Control Stick position is read on frame 14 only; therefore, the player may switch directions during startup)</small> | ||
| Line 39: | Line 71: | ||
*71: Freefall begins | *71: Freefall begins | ||
===== | =====Both warps===== | ||
*1-13: Startup | *1-13: Startup | ||
*14: Startup / QA1 direction input <small>(Control Stick position is read on frame 14 only; therefore, the player may switch directions during startup)</small> | *14: Startup / QA1 direction input <small>(Control Stick position is read on frame 14 only; therefore, the player may switch directions during startup)</small> | ||
| Line 68: | Line 100: | ||
*86: Freefall begins | *86: Freefall begins | ||
==Other techniques== | |||
====Quick Attack item toss==== | ====Quick Attack item toss==== | ||
This allows Pikachu to immediately throw an item after using Quick Attack. | This allows Pikachu to immediately throw an item after using Quick Attack. | ||
Latest revision as of 23:58, April 12, 2022
Overview[edit]
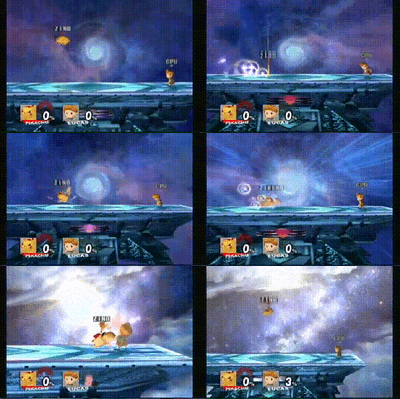
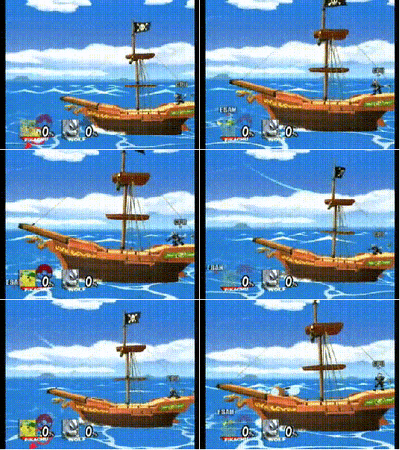
This move is known as Quick Attack. It involves Pikachu moving in one or two directions at warp speed. The directions can be controlled with the Control Stick, with the second being optional. The second warp's direction cannot be the same as the first. The first warp does 3% damage and the second warp does 2%. As with most up special moves, the move triggers the helpless animation after it has finished. The most basic use of the move is as a recovery move - the two warps allow Pikachu to cover a good distance, and also recover in an unpredictable way.
The move can also be used for the Quick Attack Cancel (QAC) technique - if the move is aimed down or diagonally down into the ground and Pikachu jumps, the lag will be cancelled and Pikachu will be in the air. This can be used to approach quickly, and it can lead into a KO move such as a neutral aerial or Thunder. It is also possible to do this off soft platforms. Pikachu can use QAC to quickly maneuver around the stage. It is also possible to aim Quick Attack into a soft platform and drop through it by holding the Control Stick down (this won't make Pikachu helpless).
If the move is aimed downward while short hopping out of water, Pikachu will go underwater and float back up; this allows water stalling.
The move can be used as a locking move. Using it back and forth to keep the opponent trapped is extremely advanced and difficult to do, but it can lead into a jab lock and then a Thunder or charged forward smash for an easy KO while the opponent is forced to get up [1]. The best way to start this is with a down throw, then a reverse up tilt followed by a footstool jump into the lock. The lock properties of the move can also be used after a RAR up aerial into footstool jump, while grabbing a Banana Peel and throwing it towards the opponent to trip them again, allowing the process to be repeated and a jab lock followup [2].
Hitboxes[edit]
Timing[edit]
| Warp 1 hitbox | 15-19 |
|---|---|
| Warp 2 hitbox | 30-34 |
| Jump-cancellable (first warp/second warp) | 30, 45 |
| Animation length (one warp) | 69 |
| Animation length (two warps) | 84 |
| Warp 1 | |||||||||||||||||||||||||||||||||||||||||||||||||||||||||||||||||||||||||||||||
| Warp 2 |
Landing lag[edit]
| Animation length | 24 |
|---|
Lag time |
Vulnerable |
Intangible |
Earliest continuable point |
Technical timing[edit]
First warp[edit]
- 1-13: Startup
- 14: Startup / QA1 direction input (Control Stick position is read on frame 14 only; therefore, the player may switch directions during startup)
- 15: Hitbox
- 16-18: Hitbox / edge grab allowed
- 19: Hitbox / edge grab allowed / first frame able to input QAC actions
- 20: edge grab allowed / RCO activated
- 21: -
- 22-24: Hurtbox stretched (vertical long)
- 25: -
- 26: Hurtbox stretched (horizontal small)
- 27: Hurtbox stretched (horizontal long)
- 28: Hurtbox stretched (horizontal small)
- 29: Last frame able to input QAC actions
- 30: Cooldown / QAC frame
- 31-70: Cooldown
- 71: Freefall begins
Both warps[edit]
- 1-13: Startup
- 14: Startup / QA1 direction input (Control Stick position is read on frame 14 only; therefore, the player may switch directions during startup)
- 15: Hitbox
- 16-18: Hitbox / edge grab allowed
- 19: Hitbox / edge grab allowed / first frame able to input QAC actions
- 20: edge grab allowed / RCO activated
- 21: -
- 22-24: Hurtbox stretched (vertical long)
- 25: -
- 26: Hurtbox stretched (horizontal small)
- 27: Hurtbox stretched (horizontal long)
- 28: Hurtbox stretched (horizontal small)
- 29: QA2 direction input (Control Stick position is read on frame 29 only; therefore, the player may switch directions until then)
- 30: Hitbox
- 31-33: Hitbox / edge grab allowed
- 34: Hitbox / edge grab allowed / first frame able to input QAC actions
- 35: edge grab allowed
- 36: -
- 37-39: Hurtbox stretched (vertical long)
- 40: -
- 41: Hurtbox stretched (horizontal small)
- 42: Hurtbox stretched (vertical long)
- 43: Hurtbox stretched (horizontal small)
- 44: Last frame able to input QAC actions
- 45: Cooldown / QAC frame
- 46-85: Cooldown
- 86: Freefall begins
Other techniques[edit]
Quick Attack item toss[edit]
This allows Pikachu to immediately throw an item after using Quick Attack.
- Grab an item
- Quick Attack into the ground
- Press A (or Z depending on the item)
Pikachu will avoid all of the landing lag and throw the item, even though Quick Attack wasn't interrupted with a jump.
Quick Attack edge cancel[edit]
Pikachu can instantly go off the edge of the stage without entering the helpless animation by aiming Quick Attack southeast/west from the right distance. Pikachu can either instantly grab the edge or fall normally [3]. This can also be done in the air, and Pikachu will still be able to use its double jump. This technique has a lot of uses [4], with edgeguarding being an obvious one.
Quick Attack Lock[edit]
The aforementioned lock properties of Quick Attack allows it to trap the opponent and 0-death them. The best way to start this is to use a down throw, then up tilt, and then a footstool to leave the opponent vulnerable [5]. If an opponent near Pikachu misses a tech, it is possible to start the lock, but this is rather situational.


