Back aerial: Difference between revisions
(Undid edit by Thegameandwatch: ) Tag: Undo |
|||
| (2 intermediate revisions by 2 users not shown) | |||
| Line 1: | Line 1: | ||
{{ArticleIcons|series=y}} | {{ArticleIcons|series=y}} | ||
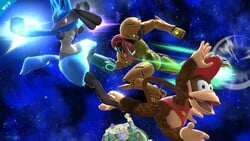
[[File:SSB4 - | [[File:SSB4 - Diddy Kong Screen-7.jpg|thumb|250px|{{SSB4|Diddy Kong}}, {{SSB4|Lucario}} and {{SSB4|Samus}}’s back aerial in {{forwiiu}}.]] | ||
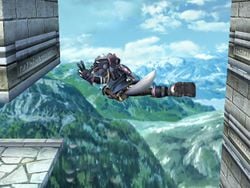
[[File:Wolf Bair.jpg|thumb|250px|{{SSBB|Wolf}}'s back aerial in ''Super Smash Bros. Brawl''.]] | [[File:Wolf Bair.jpg|thumb|250px|{{SSBB|Wolf}}'s back aerial in ''Super Smash Bros. Brawl''.]] | ||
A '''back aerial''' attack ({{ja|後空中攻撃|Ato kūchū kōgeki}}, ''Rear/back midair attack''; commonly abbreviated as '''bair''' or '''B-Air''', and referred to as '''AttackAirB''' internally) is an [[aerial attack]] that can be performed in midair by pressing the attack button and tilting the [[control stick]] in the direction opposite to which the character is facing. Its official term varies between titles; it is known as a '''back midair attack''' in ''[[Super Smash Bros. Melee]]'', and a '''back air attack''' from ''[[Super Smash Bros. Brawl]]'' onward. The majority of these attacks are kicks, and tend to be considerably stronger and/or faster than a fighter's other aerial attacks while also having good range; some are notable for being their fastest and most reliable KO moves, such as those of [[Ike]] and [[Zero Suit Samus]], and can be used to approach with a technique known as a [[reverse aerial rush]]. Back aerials are also good defensive options, as they can catch an opponent trying to attack them from behind where few other attacks would be effective if usable at all. | A '''back aerial''' attack ({{ja|後空中攻撃|Ato kūchū kōgeki}}, ''Rear/back midair attack''; commonly abbreviated as '''bair''' or '''B-Air''', and referred to as '''AttackAirB''' internally) is an [[aerial attack]] that can be performed in midair by pressing the attack button and tilting the [[control stick]] in the direction opposite to which the character is facing. Its official term varies between titles; it is known as a '''back midair attack''' in ''[[Super Smash Bros. Melee]]'', and a '''back air attack''' from ''[[Super Smash Bros. Brawl]]'' onward. The majority of these attacks are kicks, and tend to be considerably stronger and/or faster than a fighter's other aerial attacks while also having good range; some are notable for being their fastest and most reliable KO moves, such as those of [[Ike]] and [[Zero Suit Samus]], and can be used to approach with a technique known as a [[reverse aerial rush]]. Back aerials are also good defensive options, as they can catch an opponent trying to attack them from behind where few other attacks would be effective if usable at all. | ||
| Line 203: | Line 202: | ||
*{{SSB|Samus}}'s back aerial is the strongest in ''Smash 64'' due to its unusually high knockback scaling. In addition to this, it is also one of the fastest back aerials in the game. In later games, the move would become slower, harder to land and weaker although it still remains a powerful KO move. | *{{SSB|Samus}}'s back aerial is the strongest in ''Smash 64'' due to its unusually high knockback scaling. In addition to this, it is also one of the fastest back aerials in the game. In later games, the move would become slower, harder to land and weaker although it still remains a powerful KO move. | ||
**[[Falco]]'s back aerial in ''Smash 4'' and ''Ultimate'' is similar to Samus' in ''Smash 64'' (although it is not quite as powerful) having no base knockback but very high knockback scaling if its clean hit is landed which makes it one of the strongest. It is additionally one of the fastest back aerials in ''Smash 4'' coming out on frame 4 although in ''Ultimate'', it does not come out until frame 9. | **[[Falco]]'s back aerial in ''Smash 4'' and ''Ultimate'' is similar to Samus' in ''Smash 64'' (although it is not quite as powerful) having no base knockback but very high knockback scaling if its clean hit is landed which makes it one of the strongest. It is additionally one of the fastest back aerials in ''Smash 4'' coming out on frame 4 although in ''Ultimate'', it does not come out until frame 9. | ||
*[[Jigglypuff]]'s back aerial in ''Melee'' and | *[[Jigglypuff]]'s back aerial in ''Melee'' is infamous for its deceptively large hitbox, extending well beyond Jigglypuff's actual leg. When combined with its quick speed, low knockback and Jigglypuff's aerial presence, it is able to perform highly effective [[wall of pain]] combos, which continues to a lesser extent in ''Brawl''. In ''Smash 4'', it has increased [[lag]] and knockback, losing its wall of pain ability, but KOing much more reliably at high percents. | ||
*{{SSBB|King Dedede}}'s back aerial in ''Brawl'' is considered to be the best in the game due to its fast startup, low ending lag, good reach, long lasting hitboxes, and strong power. He can perform it twice in one short hop and can string it together repeatedly at low percents as well as use it for the wall of pain and edgeguarding. When it's not stale, it is also a reliable KO move. All of these traits make it arguably King Dedede's best move. In ''Smash 4'' and ''Ultimate'', he has received a new back aerial that has increased KO power, but at the expense of significantly more startup and ending lag along with less range. | *{{SSBB|King Dedede}}'s back aerial in ''Brawl'' is considered to be the best in the game due to its fast startup, low ending lag, good reach, long lasting hitboxes, and strong power. He can perform it twice in one short hop and can string it together repeatedly at low percents as well as use it for the wall of pain and edgeguarding. When it's not stale, it is also a reliable KO move. All of these traits make it arguably King Dedede's best move. In ''Smash 4'' and ''Ultimate'', he has received a new back aerial that has increased KO power, but at the expense of significantly more startup and ending lag along with less range. | ||
*[[Ganondorf]]'s back aerial is one of the strongest in all its appearances. In ''Melee'', it is the second strongest back aerial, surpassed only by Zelda's. | *[[Ganondorf]]'s back aerial is one of the strongest in all its appearances. In ''Melee'', it is the second strongest back aerial, surpassed only by Zelda's. | ||
| Line 214: | Line 213: | ||
*[[Bowser]]'s back aerial in ''Smash 4'' and ''Ultimate'' deals a tremendous 19% damage and is one of the strongest in both games. | *[[Bowser]]'s back aerial in ''Smash 4'' and ''Ultimate'' deals a tremendous 19% damage and is one of the strongest in both games. | ||
*{{SSBU|Steve}}'s back aerial is the only one which changes depending on whether it is performed using the short hop aerial shortcut in ''Ultimate'' or not. It is a more powerful pickaxe swing behind him if performed without the short hop aerial shortcut, but becomes a faster and weaker sword swing with similar properties to [[neutral aerial]] if performed with the short hop aerial shortcut. This property is shared with [[forward aerial]]. Like other moves involving Steve’s weapons, it can be upgraded with dug-up resources, and is incredibly powerful in its diamond form, similarly to Wolf and Robin’s back aerials. | *{{SSBU|Steve}}'s back aerial is the only one which changes depending on whether it is performed using the short hop aerial shortcut in ''Ultimate'' or not. It is a more powerful pickaxe swing behind him if performed without the short hop aerial shortcut, but becomes a faster and weaker sword swing with similar properties to [[neutral aerial]] if performed with the short hop aerial shortcut. This property is shared with [[forward aerial]]. Like other moves involving Steve’s weapons, it can be upgraded with dug-up resources, and is incredibly powerful in its diamond form, similarly to Wolf and Robin’s back aerials. | ||
*In ''Ultimate'', {{SSBU|Ryu}}, {{SSBU|Ken}}, {{SSBU|Terry}} and {{SSBU|Kazuya}} have | *In ''Ultimate'', {{SSBU|Ryu}}, {{SSBU|Ken}}, {{SSBU|Terry}} and {{SSBU|Kazuya}} all have a similar back aerial, a powerful and fairly fast straight roundhouse kick. However, because they automatically turn to face their opponents in 1v1 battles, they are required to cross-up or to use a reverse aerial rush to be able to hit their opponent with their back aerials. | ||
{{Attacks}} | {{Attacks}} | ||
[[Category:Game controls]] | [[Category:Game controls]] | ||
[[es:Ataque aéreo hacia atrás]] | [[es:Ataque aéreo hacia atrás]] | ||
Latest revision as of 21:08, December 4, 2024

A back aerial attack (後空中攻撃, Rear/back midair attack; commonly abbreviated as bair or B-Air, and referred to as AttackAirB internally) is an aerial attack that can be performed in midair by pressing the attack button and tilting the control stick in the direction opposite to which the character is facing. Its official term varies between titles; it is known as a back midair attack in Super Smash Bros. Melee, and a back air attack from Super Smash Bros. Brawl onward. The majority of these attacks are kicks, and tend to be considerably stronger and/or faster than a fighter's other aerial attacks while also having good range; some are notable for being their fastest and most reliable KO moves, such as those of Ike and Zero Suit Samus, and can be used to approach with a technique known as a reverse aerial rush. Back aerials are also good defensive options, as they can catch an opponent trying to attack them from behind where few other attacks would be effective if usable at all.
List of back aerials[edit]
Unless stated otherwise, all back aerials are aimed behind the user.
| Character | Description |
|---|---|
| Banjo & Kazooie | Kazooie performs an aerial Rat-a-Tat Rap 3 times. |
| Bayonetta | Performs a back kick at a high angle. |
| Bowser | |
| Bowser Jr. | Deploys a wrecking ball from the Koopa Clown Car and swings it in a straight line. |
| Byleth | Stabs Areadbhar behind himself. |
| Captain Falcon | Performs a backwards facing back-fist. |
| Charizard | |
| Chrom | Slashes in an upward arc, turning Chrom around after its use. |
| Cloud | Slashes horizontally with the Buster Sword. |
| Corrin | Sprouts dragon wings and thrusts them backward, hovering slightly and propelling himself forward. |
| Daisy | Thrusts her rear, generating a flower particle from it. |
| Dark Pit | Separates the Silver Bow and stabs with both blades simultaneously. |
| Dark Samus | Performs a back kick. |
| Diddy Kong | Performs a roundhouse kick. |
| Donkey Kong | |
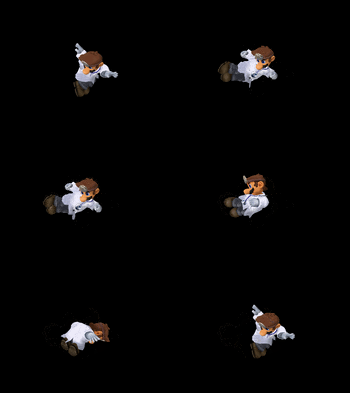
| Dr. Mario | |
| Duck Hunt | The dog thrusts his lower back backward to propel the duck, who performs a turning peck. |
| Falco | |
| Fox | |
| Ganondorf | Performs a backwards facing back-fist. |
| Greninja | Performs three consecutive kicks at different angles. |
| Hero | Slashes in a delayed heavy upward arc. |
| Ice Climbers | Swing their hammers horizontally. |
| Ike | Slashes horizontally with Ragnell. |
| Incineroar | Performs a roundhouse kick. |
| Inkling | Jabs with the Splattershot. |
| Isabelle | Fires a pellet from a slingshot. |
| Ivysaur | Swings one vine after the other in a downward arc. |
| Jigglypuff | Performs a roundhouse kick. Turns Jigglypuff around in Ultimate. |
| Joker | Slashes in an upward arc. If active, Arsene chops in a downward arc, causing the duo's attacks to interlock with each other. |
| Kazuya | Performs a roundhouse kick. |
| Ken | Performs a roundhouse kick. |
| King Dedede | |
| King K. Rool | Punches in a downward arc from a turnaround. |
| Kirby | Performs a dropkick. |
| Link | Kicks twice with one leg after the other. |
| Little Mac | Weakly throws out a spinning backhanded punch. |
| Lucario | Extends one arm and unleashes a blast of aura. |
| Lucas | Performs a somersaulting kick in a downward arc, emitting a PSI spark from his foot. |
| Lucina | Slashes in an upward arc, turning Lucina around after its use. |
| Luigi | |
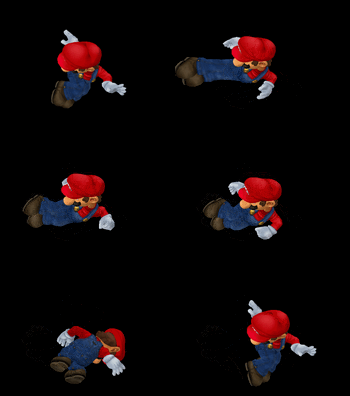
| Mario | |
| Marth | Slashes in an upward arc, turning Marth around after its use. |
| Mega Man | Uses the Slash Claw, generating three crescent-shaped energy swipes from his hand. |
| Meta Knight | Performs three consecutive horizontal slashes at different angles. |
| Mewtwo | Swings its tail in an upward arc. |
| Mii Brawler | Performs a back kick. |
| Mii Gunner | Unleashes a fiery blast from their arm cannon. |
| Mii Swordfighter | Slashes horizontally. |
| Min Min | Fires and extends her ARM behind her. Can change depending on Megawatt, Ramram, and Dragon. |
| Mr. Game & Watch | Holds a turtle behind himself that bites opponents, hitting multiple times. Possesses a landing hitbox. |
| Mythra | Swings the Aegis Sword behind herself in a wide arc starting below herself. |
| Ness | |
| Olimar | Grabs his leading Pikmin by its stem and swings it in an upward arc. If no Pikmin are following Olimar, he still performs the move, but it has no effect. |
| Pac-Man | Performs a dropkick. |
| Palutena | Bashes with her shield. |
| Peach | |
| Pichu | |
| Pikachu | |
| Piranha Plant | Spits out a fiery blast. |
| Pit | Separates the Palutena Bow and stabs with both blades simultaneously. |
| Pyra | Swings the Aegis Sword behind herself in a wide arc starting below herself. |
| R.O.B. | Points his base behind himself and activates his thrusters, propelling himself forward. |
| Richter | Whips horizontally with the Vampire Killer. Can be angled diagonally up or down, and function as a tether recovery. |
| Ridley | Performs a roundhouse kick. |
| Robin | Stabs at a diagonally downward angle. Can use either the Bronze Sword or the Levin Sword. |
| Rosalina & Luma | Rosalina: Performs a dropkick, releasing a miniature spiral galaxy from her feet. Luma: Performs a dropkick. |
| Roy | Slashes in an upward arc, turning Roy around after its use. |
| Ryu | Performs a roundhouse kick. |
| Samus | Performs a back kick. |
| Sephiroth | Performs a horizontal slash with Masamune. |
| Sheik | Performs a back kick. |
| Shulk | Stabs at a slight upward angle with a double grip. |
| Simon | Whips horizontally with the Vampire Killer. Can be angled diagonally up or down, and function as a tether recovery. |
| Snake | Performs a dropkick. |
| Sonic | Performs a roundhouse kick. |
| Sora | Performs a horizontal swing with his Keyblade. |
| Squirtle | |
| Steve | Swings his pickaxe in an arc. If initiated using the short hop aerial shortcut in Ultimate, becomes a quicker swing with a sword instead. |
| Terry | Spins around and kicks behind himself. |
| Toon Link | Slashes in an upward arc. |
| Villager | Fires a pellet from a slingshot. |
| Wario | Leans his full body back, hitting with his head and arms. |
| Wii Fit Trainer | Assumes the Cobra pose to perform a dropkick. |
| Wolf | Performs a back kick. |
| Yoshi | |
| Young Link | Kicks twice with one leg after the other. |
| Zelda | Performs a magically infused lunging kick that is extremely powerful if it hits near Zelda's foot, but extremely weak otherwise. It is known as the Lightning Kick. |
| Zero Suit Samus | Performs a roundhouse kick. |
Notable back aerials[edit]
- Marth, Lucina, Roy, and Chrom's back aerials turn them around in midair, unlike any other aerial attack in the series. In Ultimate, Jigglypuff's back aerial also has this property.
- R.O.B. and Corrin's back aerials propel them forward. R.O.B. covers more overall distance, while Corrin travels faster.
- Simon and Richter's back aerials have two unique distinctions from every other in the series: they can be angled up or down much like forward tilts and forward smashes, and function as tether recoveries. Their forward aerials also have these properties.
- The back aerials of Villager and Isabelle are projectiles, and as such, can be reflected and Pocketed.
- Pikachu's back aerial in Ultimate is infamous for being able to combo into itself multiple times at low percentages.
- Lucas and King K. Rool's back aerials are the only ones in the series that can meteor smash.
- Bowser's back aerial in Brawl and Palutena's back aerial are the only two in the series that provides invincibility (as opposed to intangibility), specifically on Bowser's shell and behind Palutena from her shield, allowing them to safely cancel out any projectile and win trades with opposing aerial attacks. Palutena's in Ultimate is particularly effective due to its solid power and difficulty to punish.
- Zelda's back aerial is one of her Lightning Kicks, and deals very high damage and knockback at high percents when sweetspotted, but is extremely weak when sourspotted. It is the strongest back aerial in every game it appears in. It is particularly powerful in Melee, but its utility has been reduced in later games due to the removal of L-canceling, its sweetspot being smaller and lasting less time as well as receiving much more ending lag and a less favorable auto-cancel window starting in Smash 4.
- Samus's back aerial is the strongest in Smash 64 due to its unusually high knockback scaling. In addition to this, it is also one of the fastest back aerials in the game. In later games, the move would become slower, harder to land and weaker although it still remains a powerful KO move.
- Falco's back aerial in Smash 4 and Ultimate is similar to Samus' in Smash 64 (although it is not quite as powerful) having no base knockback but very high knockback scaling if its clean hit is landed which makes it one of the strongest. It is additionally one of the fastest back aerials in Smash 4 coming out on frame 4 although in Ultimate, it does not come out until frame 9.
- Jigglypuff's back aerial in Melee is infamous for its deceptively large hitbox, extending well beyond Jigglypuff's actual leg. When combined with its quick speed, low knockback and Jigglypuff's aerial presence, it is able to perform highly effective wall of pain combos, which continues to a lesser extent in Brawl. In Smash 4, it has increased lag and knockback, losing its wall of pain ability, but KOing much more reliably at high percents.
- King Dedede's back aerial in Brawl is considered to be the best in the game due to its fast startup, low ending lag, good reach, long lasting hitboxes, and strong power. He can perform it twice in one short hop and can string it together repeatedly at low percents as well as use it for the wall of pain and edgeguarding. When it's not stale, it is also a reliable KO move. All of these traits make it arguably King Dedede's best move. In Smash 4 and Ultimate, he has received a new back aerial that has increased KO power, but at the expense of significantly more startup and ending lag along with less range.
- Ganondorf's back aerial is one of the strongest in all its appearances. In Melee, it is the second strongest back aerial, surpassed only by Zelda's.
- Charizard's back aerial in Smash 4 and Ultimate deals 16% damage and is notorious for its high disjoint and power, being the second strongest back aerial in both games.
- Mr. Game & Watch has the only back aerial in Melee that cannot be L-canceled, due to being coded as a special move. This oddity is also present in his neutral aerial and up aerial.
- Kirby's back aerial is an effective back aerial in every Smash game being a fast and solid KO move (especially in Smash 64 and Smash 4) and it can be used to perform the "fence of pain". It also has great range and very low landing lag especially prior to Smash 4.
- Dr. Mario's back aerial in Melee is a semi-spike with high base knockback, making it effective for edgeguarding.
- Fox's back aerial in Brawl is a powerful semi-spike when sweetspotted, and is very safe to use from a short hop due to its nearly immediate auto-cancel window after its hitboxes cease. From Smash 4 onward, the move has lost its sourspot hitboxes giving it less range and utility and it is considerably weaker compared to the sweetspots in Brawl. It also gained a worse auto-cancel window in Ultimate.
- Wolf's back aerial in Brawl is incredibly fast (frame 6), has good power for its speed, and boasts an extremely lenient auto-cancel window that allows the move to have no lag on landing with good timing. In Ultimate, the move is much slower, having more than twice the startup (frame 13) it did in Brawl along with more ending lag and landing lag. However, it is much more powerful and its generous auto-cancel window remains, giving it great utility for poking and pressuring an opponent's shield and making it one of Wolf's most reliable KO options as well as one of the best back aerials in the game overall.
- Bowser's back aerial in Smash 4 and Ultimate deals a tremendous 19% damage and is one of the strongest in both games.
- Steve's back aerial is the only one which changes depending on whether it is performed using the short hop aerial shortcut in Ultimate or not. It is a more powerful pickaxe swing behind him if performed without the short hop aerial shortcut, but becomes a faster and weaker sword swing with similar properties to neutral aerial if performed with the short hop aerial shortcut. This property is shared with forward aerial. Like other moves involving Steve’s weapons, it can be upgraded with dug-up resources, and is incredibly powerful in its diamond form, similarly to Wolf and Robin’s back aerials.
- In Ultimate, Ryu, Ken, Terry and Kazuya all have a similar back aerial, a powerful and fairly fast straight roundhouse kick. However, because they automatically turn to face their opponents in 1v1 battles, they are required to cross-up or to use a reverse aerial rush to be able to hit their opponent with their back aerials.
| Attacks in the Super Smash Bros. series | |
|---|---|
| Standard ground attacks | Neutral attack · Dash attack |
| Tilt attacks | Forward tilt · Up tilt · Down tilt · Crouching attack |
| Smash attacks | Forward smash · Up smash · Down smash |
| Aerial attacks | Neutral aerial · Forward aerial · Back aerial · Up aerial · Down aerial · Grab aerial · Glide attack |
| Throws | Grab · Pummel · Forward throw · Back throw · Up throw · Down throw |
| Get-up attacks | Floor attack · Edge attack |
| Special moves | Neutral special move · Side special move · Up special move · Down special move · Command-input move · Final Smash |


