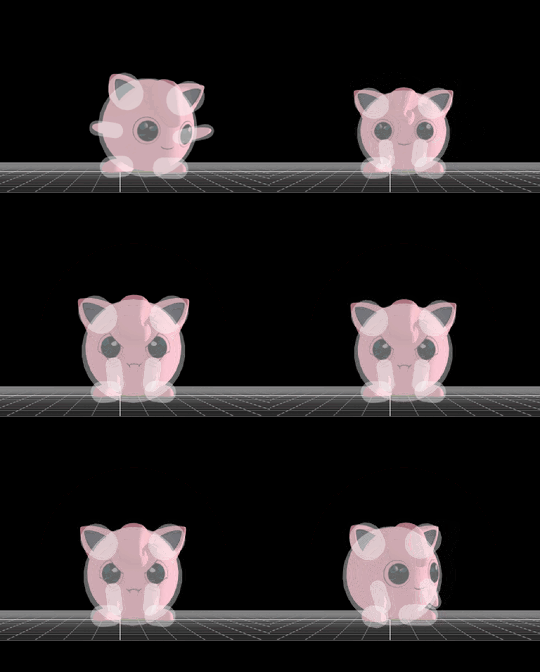
Jigglypuff (SSB4)/Forward throw: Difference between revisions
From SmashWiki, the Super Smash Bros. wiki
Jump to navigationJump to search
m (Text replacement - "== ([^=])" to "== $1") |
|||
| Line 3: | Line 3: | ||
==Overview== | ==Overview== | ||
Jigglypuff quickly puffs itself up knocking the opponent outwards. As with Jigglypuff's other throws, its forward throw is almost exclusively a damage dealing throw. It deals 10% damage total, which is good damage for a forward throw, but it does not have much use beyond this. It's angle and base knockback render it incapable of comboing, as is Jigglypuff's weakest throw in terms of knockback scaling, not KOing at the ledge until beyond 600% damage, making it completely useless for KOes. However, it can be used to set up for edgeguarding, which gives it more use than some of Jigglypuff's other throws, since it has a strong edgeguarding game. | Jigglypuff quickly puffs itself up knocking the opponent outwards. As with Jigglypuff's other throws, its forward throw is almost exclusively a damage dealing throw. It deals 10% damage total, which is good damage for a forward throw, but it does not have much use beyond this. It's angle and base knockback render it incapable of comboing, as is Jigglypuff's weakest throw in terms of knockback scaling, not KOing at the ledge until beyond 600% damage, making it completely useless for KOes. However, it can be used to set up for edgeguarding, which gives it more use than some of Jigglypuff's other throws, since it has a strong edgeguarding game. | ||
Latest revision as of 20:43, April 12, 2022
Overview[edit]
Jigglypuff quickly puffs itself up knocking the opponent outwards. As with Jigglypuff's other throws, its forward throw is almost exclusively a damage dealing throw. It deals 10% damage total, which is good damage for a forward throw, but it does not have much use beyond this. It's angle and base knockback render it incapable of comboing, as is Jigglypuff's weakest throw in terms of knockback scaling, not KOing at the ledge until beyond 600% damage, making it completely useless for KOes. However, it can be used to set up for edgeguarding, which gives it more use than some of Jigglypuff's other throws, since it has a strong edgeguarding game.
Throw and Hitbox Data[edit]
Hitbox[edit]
Throw[edit]
| ID | Damage | Angle | BK | KS | FKV | Bone | FFx | Type | Effect | Sound | |
|---|---|---|---|---|---|---|---|---|---|---|---|
| 0 | 5% | Forwards | 100 | 30 | 0 | 0 | None | ||||
| 1 | 3% | Forwards | 40 | 100 | 0 | 0 | None | ||||
Timing[edit]
| Invincibility | 1-18 |
|---|---|
| Hitbox | 10-11 |
| Throw Release | 12 |
| Animation length | 35 |
| Interruptible | 36 |
Lag time |
Hitbox |
Vulnerable |
Invincible |
Throw point |
|
