Dr. Mario (SSBU)/Floor attack (front): Difference between revisions
From SmashWiki, the Super Smash Bros. wiki
Jump to navigationJump to search
mNo edit summary |
No edit summary |
||
| (One intermediate revision by one other user not shown) | |||
| Line 1: | Line 1: | ||
{{ArticleIcons|ssbu=y}} | {{ArticleIcons|ssbu=y}} | ||
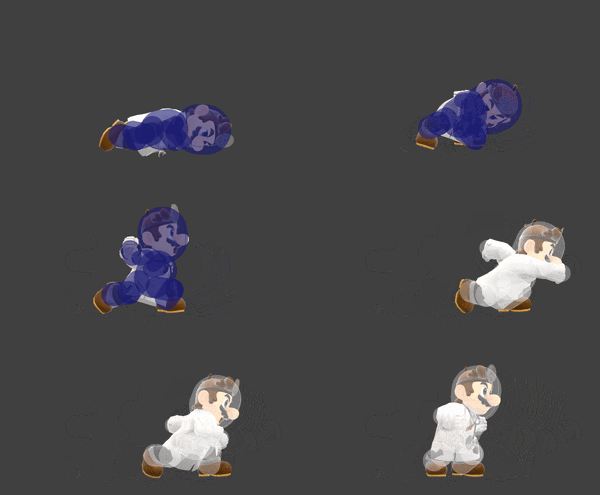
[[File:Dr.MarioGetupAttackFrontSSBU.gif|thumb| | [[File:Dr.MarioGetupAttackFrontSSBU.gif|thumb|300px|Hitbox visualization showing Dr. Mario's getup attack when laying on his front.]] | ||
{{competitive expertise}} | {{competitive expertise}} | ||
==Overview== | ==Overview== | ||
==Hitboxes== | ==Hitboxes== | ||
The damage values are listed as coded in the game's scripts, without Dr. Mario's 1.176× damage multiplier. | |||
{{UltimateHitboxTableHeader}} | {{UltimateHitboxTableHeader}} | ||
{{HitboxTableTitle|Hit 1| | {{HitboxTableTitle|Hit 1|50}} | ||
{{UltimateHitboxTableRow | {{UltimateHitboxTableRow | ||
|id=0 | |id=0 | ||
|damage=6.0% | |damage={{rollover|6.0%|7.056% with Dr. Mario's damage multiplier|y}} | ||
|sd=8.0 | |sd=8.0 | ||
|angle=48 | |angle=48 | ||
| Line 28: | Line 29: | ||
|rebound=f | |rebound=f | ||
}} | }} | ||
{{HitboxTableTitle|Hit 2| | {{HitboxTableTitle|Hit 2|50}} | ||
{{UltimateHitboxTableRow | {{UltimateHitboxTableRow | ||
|id=0 | |id=0 | ||
|damage=6.0% | |damage={{rollover|6.0%|7.056% with Dr. Mario's damage multiplier|y}} | ||
|sd=8.0 | |sd=8.0 | ||
|angle=48 | |angle=48 | ||
| Line 50: | Line 51: | ||
|rebound=f | |rebound=f | ||
}} | }} | ||
|} | |} | ||
Latest revision as of 12:15, June 21, 2022
Overview[edit]
Hitboxes[edit]
The damage values are listed as coded in the game's scripts, without Dr. Mario's 1.176× damage multiplier.
Timing[edit]
| Intangibility | 1-22 |
|---|---|
| Hit 1 | 16-17 |
| Hit 2 | 21-22 |
| Interruptible | 46 |
| Animation length | 51 |
Lag time |
Charge interval |
Hitbox |
Vulnerable |
Intangible |
Interruptible |
|

