Captain Falcon (SSBB)/Down aerial: Difference between revisions
MemeDedede (talk | contribs) m (→Overview) |
No edit summary |
||
| (2 intermediate revisions by 2 users not shown) | |||
| Line 1: | Line 1: | ||
{{ArticleIcons|ssbb=y}} | {{ArticleIcons|ssbb=y}} | ||
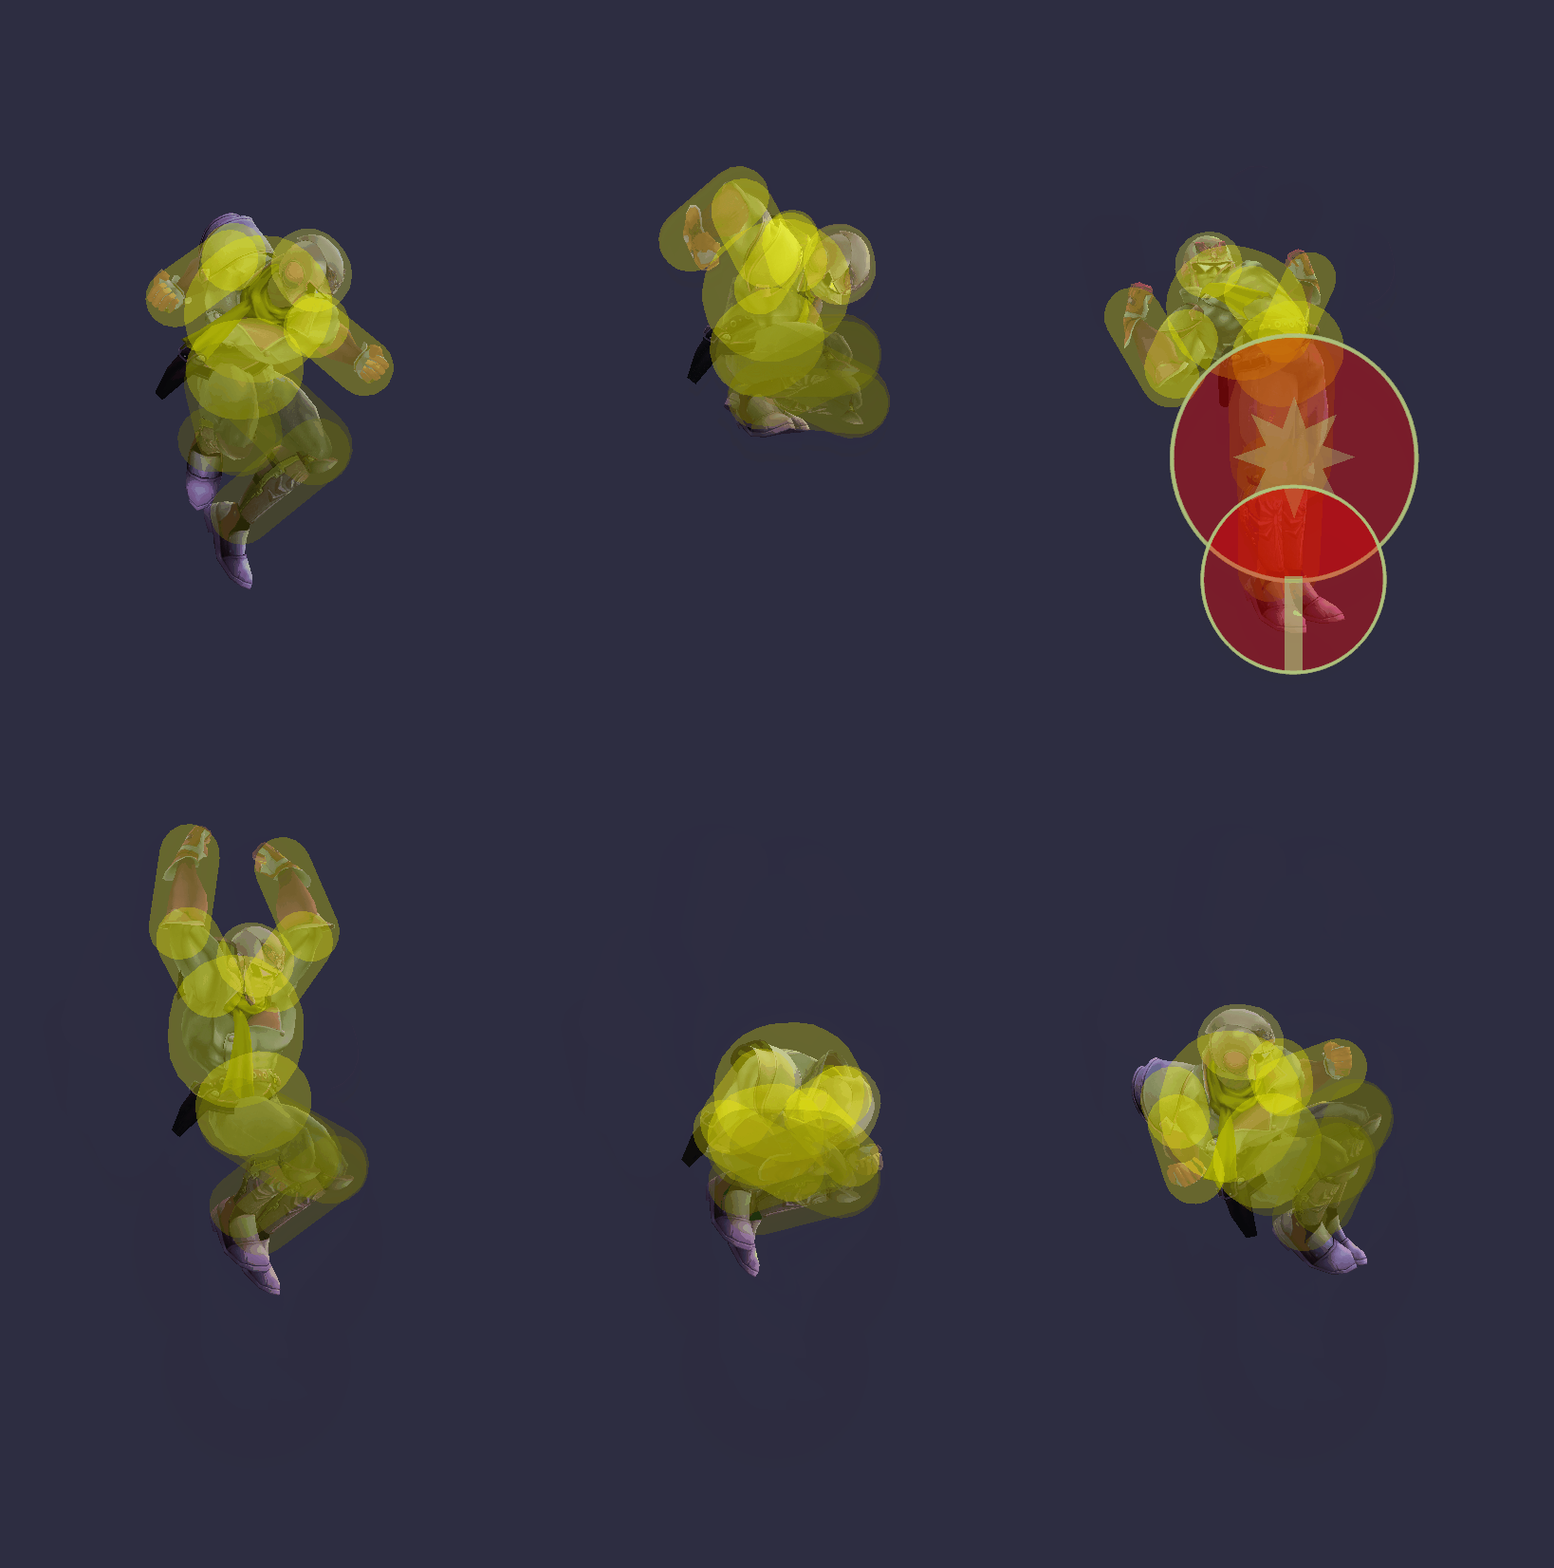
[[File:CaptainFalconDAirSSBB.gif|thumb|350px|Hitbox visualization showing Captain Falcon's down aerial.]] | |||
==Overview== | ==Overview== | ||
{{Competitive expertise}} | |||
Captain Falcon stomps downwards with both of his legs. With the hitbox coming out on frame 16 and ending on frame 45, down aerial can be used as a standard gimping tool, a suboptimal approaching tool, or a combo mixup. This move is primarily used for approaching, gimping opponents offstage, and for comboing. Autocancelled down air can lead to either a [[Captain Falcon (SSBB)/Neutral attack|jab]] or [[Captain Falcon (SSBB)/Forward tilt|forward tilt]]. This can also be used for [[buffer|buffering]] turnarounds or attacking opponents in general. Due to its longer startup and more specific uses, Falcon players prefer to open up with attacks such as his jab or up aerial first, since they have more versatility overall. Down aerial's combo capabilities are limited due to the hitbox's tight placements, limiting this to a handful of characters across select percentages. | Captain Falcon stomps downwards with both of his legs. With the hitbox coming out on frame 16 and ending on frame 45, down aerial can be used as a standard gimping tool, a suboptimal approaching tool, or a combo mixup. This move is primarily used for approaching, gimping opponents offstage, and for comboing. Autocancelled down air can lead to either a [[Captain Falcon (SSBB)/Neutral attack|jab]] or [[Captain Falcon (SSBB)/Forward tilt|forward tilt]]. This can also be used for [[buffer|buffering]] turnarounds or attacking opponents in general. Due to its longer startup and more specific uses, Falcon players prefer to open up with attacks such as his jab or up aerial first, since they have more versatility overall. Down aerial's combo capabilities are limited due to the hitbox's tight placements, limiting this to a handful of characters across select percentages. | ||
| Line 7: | Line 8: | ||
{{BrawlHitboxTableHeader}} | {{BrawlHitboxTableHeader}} | ||
{{BrawlHitboxTableRow | {{BrawlHitboxTableRow | ||
|bn=13 | |bn=13 | ||
|id=0 | |id=0 | ||
| Line 26: | Line 26: | ||
}} | }} | ||
{{BrawlHitboxTableRow | {{BrawlHitboxTableRow | ||
|bn=12 | |bn=12 | ||
|id=1 | |id=1 | ||
| Line 55: | Line 54: | ||
|- | |- | ||
!Ending autocancel | !Ending autocancel | ||
|39 | |39- | ||
|- | |- | ||
!Interruptible | !Interruptible | ||
Latest revision as of 11:31, May 21, 2024
Overview[edit]
Captain Falcon stomps downwards with both of his legs. With the hitbox coming out on frame 16 and ending on frame 45, down aerial can be used as a standard gimping tool, a suboptimal approaching tool, or a combo mixup. This move is primarily used for approaching, gimping opponents offstage, and for comboing. Autocancelled down air can lead to either a jab or forward tilt. This can also be used for buffering turnarounds or attacking opponents in general. Due to its longer startup and more specific uses, Falcon players prefer to open up with attacks such as his jab or up aerial first, since they have more versatility overall. Down aerial's combo capabilities are limited due to the hitbox's tight placements, limiting this to a handful of characters across select percentages.
Hitboxes[edit]
Timing[edit]
| Initial autocancel | 1-3 |
|---|---|
| Hitbox | 16-18 |
| Ending autocancel | 39- |
| Interruptible | 45 |
| Animation length | 54 |
Landing lag[edit]
| Animation length | 21 |
|---|
Lag time |
Hitbox |
Autocancel |
Interruptible |
|

