[dismiss]
| Welcome to SmashWiki! Log in or create an account and join the community, and don't forget to read this first! |
| Notices |
|---|
| The Skill parameter has been removed from Smasher infoboxes, and in its place are the new "Best historical ranking" and "Best tournament result" parameters. SmashWiki needs help adding these new parameters to Smasher infoboxes, refer to the guidelines here for what should be included in these new parameters. |
| When adding results to Smasher pages, include each tournament's entrant number in addition to the player's placement, and use the {{Trn}} template with the matching game specified. Please also fix old results on Smasher pages that do not abide to this standard. Refer to our Smasher article guidelines to see how results tables should be formatted. |
| Check out our project page for ongoing projects that SmashWiki needs help with. |
Get N or Get Out: Difference between revisions
From SmashWiki, the Super Smash Bros. wiki
Jump to navigationJump to search
m (→Trivia: Rewording) |
mNo edit summary |
||
| (26 intermediate revisions by 14 users not shown) | |||
| Line 1: | Line 1: | ||
{{ArticleIcons|ssbu=y}} | {{ArticleIcons|ssbu=y}} | ||
[[File:Get N or Get Out.jpg|thumb|300px|Banner]] | [[File:Get N or Get Out.jpg|thumb|300px|Banner]] | ||
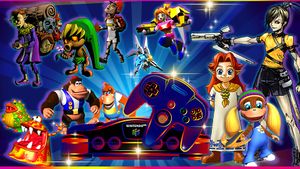
'''Get N or Get Out''' was a [[Spirit Board]] [[List of Spirit Board events|event]] focused on | '''Get N or Get Out''' was a [[Spirit Board]] [[List of Spirit Board events|event]] focused on [[spirit]]s from the Nintendo 64 era. It ran from 6 a.m. on June 5, 2020 to 6 a.m. on June 8 2020 ({{iw|wikipedia|UTC}}), and was repeated on the following dates: | ||
*6 a.m. on June 17, 2022 to 6 a.m. on June 20, 2022 (UTC) | |||
*6 a.m. on June 16, 2023 to 6 a.m. on June 19, 2023 (UTC) | |||
*6 a.m. on June 14, 2024 to 6 a.m. on June 17, 2024 (UTC) | |||
During the event, defeating spirits on the Spirit Board which were part of the event awarded 6.4 times EXP than usual. | |||
==Description== | ==Description== | ||
| Line 18: | Line 23: | ||
==Periodically appearing spirits== | ==Periodically appearing spirits== | ||
{|class="wikitable sortable" | {|class="wikitable sortable" | ||
! No. | ! No. | ||
! Image | ! Image | ||
| Line 27: | Line 31: | ||
|- | |- | ||
|1,164 | |1,164 | ||
|[[File:Saki Amamiya.png|center|108x108px]] | |[[File:SSBU spirit Saki Amamiya.png|center|108x108px]] | ||
| | |{{h2|List of spirits (Others)|Saki Amamiya}} | ||
| | |{{SpiritType|Attack}} | ||
|★★★ | |★★★ | ||
|06:00, 18:00 | |06:00, 18:00 | ||
|- | |- | ||
|316 | |316 | ||
|[[File:Don Bongo.png|center|108x108px]] | |[[File:SSBU spirit Don Bongo.png|center|108x108px]] | ||
| | |{{h2|List of spirits (Yoshi series)|Don Bongo}} | ||
| | |{{SpiritType|Shield}} | ||
|★★ | |★★ | ||
|07:00, 19:00 | |07:00, 19:00 | ||
|- | |- | ||
|147 | |147 | ||
|[[File:Lanky Kong | |[[File:SSBU spirit Lanky Kong.png|center|108x108px]] | ||
| | |{{h2|List of spirits (Donkey Kong series)|Lanky Kong}} | ||
| | |{{SpiritType|Grab}} | ||
|★★ | |★★ | ||
|04:00, 16:00 | |04:00, 16:00 | ||
|- | |- | ||
|212 | |212 | ||
|[[File: | |[[File:SSBU spirit Happy Mask Salesman.png|center|108x108px]] | ||
| | |{{h2|List of spirits (The Legend of Zelda series)|Happy Mask Salesman}} | ||
| | |{{SpiritType|Support}} | ||
|★★ | |★★ | ||
|05:00, 17:00 | |05:00, 17:00 | ||
|- | |- | ||
|195 | |195 | ||
|[[File:Malon | |[[File:SSBU spirit Malon.png|center|108x108px]] | ||
| | |{{h2|List of spirits (The Legend of Zelda series)|Malon}} | ||
| | |{{SpiritType|Support}} | ||
|★★ | |★★ | ||
|08:00, 20:00 | |08:00, 20:00 | ||
|- | |- | ||
|149 | |149 | ||
|[[File:Chunky Kong | |[[File:SSBU spirit Chunky Kong.png|center|108x108px]] | ||
| | |{{h2|List of spirits (Donkey Kong series)|Chunky Kong}} | ||
| | |{{SpiritType|Attack}} | ||
|★★ | |★★ | ||
|09:00, 21:00 | |09:00, 21:00 | ||
|- | |- | ||
|1,163 | |1,163 | ||
|[[File:Bayonette.png|center|108x108px]] | |[[File:SSBU spirit Bayonette.png|center|108x108px]] | ||
| | |{{h2|List of spirits (Others)|Bayonette}} | ||
| | |{{SpiritType|Support}} | ||
|★ | |★ | ||
|10:00, 22:00 | |10:00, 22:00 | ||
|- | |- | ||
|207 | |207 | ||
|[[File:Deku Link.png|center|108x108px]] | |[[File:SSBU spirit Deku Link.png|center|108x108px]] | ||
| | |{{h2|List of spirits (The Legend of Zelda series)|Deku Link}} | ||
| | |{{SpiritType|Grab}} | ||
|★★ | |★★ | ||
|11:00, 23:00 | |11:00, 23:00 | ||
|- | |- | ||
|148 | |148 | ||
|[[File:Tiny Kong.png|center|108x108px]] | |[[File:SSBU spirit Tiny Kong.png|center|108x108px]] | ||
| | |{{h2|List of spirits (Donkey Kong series)|Tiny Kong}} | ||
| | |{{SpiritType|Support}} | ||
|★★★ | |★★★ | ||
|00:00, 12:00 | |00:00, 12:00 | ||
|- | |- | ||
|315 | |315 | ||
|[[File:Blargg | |[[File:SSBU spirit Blargg.png|center|108x108px]] | ||
| | |{{h2|List of spirits (Yoshi series)|Blargg}} | ||
| | |{{SpiritType|Support}} | ||
|★★ | |★★ | ||
|01:00, 13:00 | |01:00, 13:00 | ||
|- | |- | ||
|214 | |214 | ||
|[[File:Postman.png|center|108x108px]] | |[[File:SSBU spirit Postman.png|center|108x108px]] | ||
| | |{{h2|List of spirits (The Legend of Zelda series)|Postman}} | ||
| | |{{SpiritType|Support}} | ||
|★ | |★ | ||
|02:00, 14:00 | |02:00, 14:00 | ||
|- | |- | ||
|1,162 | |1,162 | ||
|[[File:Flare.png|center|108x108px]] | |[[File:SSBU spirit Flare.png|center|108x108px]] | ||
| | |{{h2|List of spirits (Others)|Flare}} | ||
| | |{{SpiritType|Neutral}} | ||
|★ | |★ | ||
|03:00, 15:00 | |03:00, 15:00 | ||
| Line 113: | Line 117: | ||
==Spirit battles== | ==Spirit battles== | ||
{|class="wikitable sortable" style="width:100%;" | {|class="wikitable sortable" style="width:100%;" | ||
! colspan=4|Spirit | ! colspan=4|Spirit | ||
! colspan=7|Battle parameters | ! colspan=7|Battle parameters | ||
| Line 130: | Line 133: | ||
|- | |- | ||
|1,164 | |1,164 | ||
| | |{{SpiritTableName|Saki Amamiya|link=y|size=64}} | ||
|''Sin & Punishment'' Series | |||
|''Sin & Punishment'' | |||
|•{{SSBU|Mii Gunner}} {{Head|Mii Gunner|g=SSBU|s=20px}} (Moveset [[Laser Blaze|2]][[Flame Pillar|1]][[Cannon Jump Kick|2]][[Echo Reflector|1]], Saki Amamiya Wig, Saki Amamiya Outfit, Normal Voice Type 1) | |•{{SSBU|Mii Gunner}} {{Head|Mii Gunner|g=SSBU|s=20px}} (Moveset [[Laser Blaze|2]][[Flame Pillar|1]][[Cannon Jump Kick|2]][[Echo Reflector|1]], Saki Amamiya Wig, Saki Amamiya Outfit, Normal Voice Type 1) | ||
| | |{{SpiritType|Attack}} | ||
|9,200 | |9,200 | ||
|[[Moray Towers]] ([[Battlefield form]]) | |[[Moray Towers]] ([[Battlefield form]]) | ||
| Line 142: | Line 144: | ||
|- | |- | ||
|316 | |316 | ||
| | |{{SpiritTableName|Don Bongo|size=64}} | ||
| | |''Yoshi'' Series | ||
|''Yoshi'' | |||
|•Giant {{SSBU|King Dedede}} {{Head|King Dedede|g=SSBU|s=20px|cl=Green}} | |•Giant {{SSBU|King Dedede}} {{Head|King Dedede|g=SSBU|s=20px|cl=Green}} | ||
| | |{{SpiritType|Shield}} | ||
|3,900 | |3,900 | ||
|[[Yoshi's Story]] | |[[Yoshi's Story]] | ||
|•Move Speed ↑<br>•Move Speed ↓ | |•Move Speed ↑<br>•Move Speed ↓ | ||
|•The enemy has increased move speed after a while<br>•The enemy is giant<br>•The enemy has reduced move speed | |•The enemy has increased move speed after a little while<br>•The enemy is giant<br>•The enemy has reduced move speed | ||
|{{SSBUMusicLink|Yoshi|Yoshi's Story (Melee)}} | |{{SSBUMusicLink|Yoshi|Yoshi's Story (Melee)}} | ||
|- | |- | ||
|147 | |147 | ||
| | |{{SpiritTableName|Lanky Kong|size=64}} | ||
|''Donkey Kong'' Series | |||
|''Donkey Kong'' | |•{{SSBU|Diddy Kong}} Team {{Head|Diddy Kong|g=SSBU|s=20px|cl=Blue}}×6 | ||
|•{{SSBU|Diddy Kong}} Team {{Head|Diddy Kong|g=SSBU|s=20px|cl=Blue}} | |{{SpiritType|Grab}} | ||
| | |||
|3,900 | |3,900 | ||
|[[Kongo Falls]] | |[[Kongo Falls]] | ||
| Line 166: | Line 166: | ||
|- | |- | ||
|212 | |212 | ||
| | |{{SpiritTableName|Happy Mask Salesman|size=64}} | ||
|Happy Mask Salesman | |''The Legend of Zelda'' Series | ||
|''The Legend of Zelda'' | |||
|•{{SSBU|Young Link}} {{Head|Young Link|g=SSBU|s=20px|cl=Black}} | |•{{SSBU|Young Link}} {{Head|Young Link|g=SSBU|s=20px|cl=Black}} | ||
| | |{{SpiritType|Shield}} | ||
|4,300 | |4,300 | ||
|[[Umbra Clock Tower]] | |[[Umbra Clock Tower]] | ||
|•Attack Power ↑<br>•Move Speed ↑<br>•Jump Power ↑ | |•Attack Power ↑<br>•Move Speed ↑<br>•Jump Power ↑ | ||
|•Timed battle<br>•All fighters have increased jump power<br>•All fighters have increased move speed after a little while | |•Timed battle (1:30)<br>•All fighters have increased jump power<br>•All fighters have increased move speed after a little while | ||
|{{SSBUMusicLink|The Legend of Zelda|Song of Storms}} | |{{SSBUMusicLink|The Legend of Zelda|Song of Storms}} | ||
|- | |- | ||
|195 | |195 | ||
| | |{{SpiritTableName|Malon|size=64}} | ||
|''The Legend of Zelda'' Series | |||
|''The Legend of Zelda'' | |||
|•{{SSBU|Zelda}} {{Head|Zelda|g=SSBU|s=20px|cl=White}} | |•{{SSBU|Zelda}} {{Head|Zelda|g=SSBU|s=20px|cl=White}} | ||
| | |{{SpiritType|Shield}} | ||
|3,600 | |3,600 | ||
|[[Smashville]] | |[[Smashville]] | ||
| Line 190: | Line 188: | ||
|- | |- | ||
|149 | |149 | ||
| | |{{SpiritTableName|Chunky Kong|size=64}} | ||
| | |''Donkey Kong'' Series | ||
|''Donkey Kong'' | |||
|•{{SSBU|Donkey Kong}} {{Head|Donkey Kong|g=SSBU|s=20px|cl=Yellow}} | |•{{SSBU|Donkey Kong}} {{Head|Donkey Kong|g=SSBU|s=20px|cl=Yellow}} | ||
| | |{{SpiritType|Attack}} | ||
|3,800 | |3,800 | ||
|[[Jungle Japes]] | |[[Jungle Japes]] | ||
| Line 202: | Line 199: | ||
|- | |- | ||
|1,163 | |1,163 | ||
| | |{{SpiritTableName|Bayonette|size=64}} | ||
|''Custom Robo'' Series | |||
|''Custom Robo'' | |•{{SSBU|Dark Samus}} {{Head|Dark Samus|g=SSBU|s=20px|cl=Yellow}} (70 HP)<br>•{{SSBU|Samus}} {{Head|Samus|g=SSBU|s=20px|cl=Blue}} (70 HP) | ||
|•{{SSBU|Dark Samus}} {{Head|Dark Samus|g=SSBU|s=20px|cl=Yellow}}<br>•{{SSBU|Samus}} {{Head|Samus|g=SSBU|s=20px|cl=Blue}} | |{{SpiritType|Attack}} | ||
| | |||
|1,900 | |1,900 | ||
|[[Mushroomy Kingdom]] ([[Battlefield form]]) | |[[Mushroomy Kingdom]] ([[Battlefield form]]) | ||
|N/A | |N/A | ||
|•The enemy's side special has increased power<br>•[[Stamina battle]]<br>•The enemy favors side specials | |•The enemy's side special has increased power<br>•[[Stamina battle]]<br>•The enemy favors side specials | ||
|{{SSBUMusicLink| | |{{SSBUMusicLink|Other|Marionation Gear}} | ||
|- | |- | ||
|207 | |207 | ||
| | |{{SpiritTableName|Deku Link|size=64}} | ||
| | |''The Legend of Zelda'' Series | ||
|''The Legend of Zelda'' | |||
|•{{SSBU|Diddy Kong}} {{Head|Diddy Kong|g=SSBU|s=20px|cl=Green}} | |•{{SSBU|Diddy Kong}} {{Head|Diddy Kong|g=SSBU|s=20px|cl=Green}} | ||
| | |{{SpiritType|Grab}} | ||
|3,700 | |3,700 | ||
|[[Distant Planet]] ([[Battlefield form]]) | |[[Distant Planet]] ([[Battlefield form]]) | ||
| Line 226: | Line 221: | ||
|- | |- | ||
|148 | |148 | ||
| | |{{SpiritTableName|Tiny Kong|size=64}} | ||
| | |''Donkey Kong'' Series | ||
|''Donkey Kong'' | |||
|•{{SSBU|Diddy Kong}} {{Head|Diddy Kong|g=SSBU|s=20px|cl=Blue}} | |•{{SSBU|Diddy Kong}} {{Head|Diddy Kong|g=SSBU|s=20px|cl=Blue}} | ||
| | |{{SpiritType|Grab}} | ||
|9,500 | |9,500 | ||
|[[Jungle Japes]] | |[[Jungle Japes]] | ||
|•Tiny<br>•Hazard: Low Gravity<br>•Hazard: Heavy Wind | |•Tiny<br>•Hazard: Low Gravity<br>•Hazard: Heavy Wind | ||
|•Dangerously high winds are in effect<br>•Timed battle<br>•Gravity is reduced | |•Dangerously high winds are in effect<br>•Timed battle (1:00)<br>•Gravity is reduced | ||
|{{SSBUMusicLink|Donkey Kong|DK Rap}} | |{{SSBUMusicLink|Donkey Kong|DK Rap}} | ||
|- | |- | ||
|315 | |315 | ||
| | |{{SpiritTableName|Blargg|size=64}} | ||
|''Yoshi'' Series | |||
|''Yoshi'' | |||
|•Curry {{SSBU|Bowser}} {{Head|Bowser|g=SSBU|s=20px|cl=Red}} | |•Curry {{SSBU|Bowser}} {{Head|Bowser|g=SSBU|s=20px|cl=Red}} | ||
| | |{{SpiritType|Attack}} | ||
|3,900 | |3,900 | ||
|[[Castle Siege]] (Underground Cavern) | |[[Castle Siege]] (Underground Cavern) | ||
| Line 250: | Line 243: | ||
|- | |- | ||
|214 | |214 | ||
| | |{{SpiritTableName|Postman|size=64}} | ||
|''The Legend of Zelda'' Series | |||
|''The Legend of Zelda'' | |•{{SSBU|Wii Fit Trainer}} {{Head|Wii Fit Trainer|g=SSBU|s=20px|cl=MaleRed}} (120 HP) | ||
|•{{SSBU|Wii Fit Trainer}} {{Head|Wii Fit Trainer|g=SSBU|s=20px|cl=MaleRed}} | |{{SpiritType|Grab}} | ||
| | |||
|2,600 | |2,600 | ||
|[[Temple]] | |[[Temple]] | ||
|N/A | |N/A | ||
|•Timed [[stamina battle]]<br>•The enemy tends to avoid conflict | |•Timed [[stamina battle]] (2:00)<br>•The enemy tends to avoid conflict | ||
|{{SSBUMusicLink|The Legend of Zelda|Termina Field}} | |{{SSBUMusicLink|The Legend of Zelda|Termina Field}} | ||
|- | |- | ||
|1,162 | |1,162 | ||
| | |{{SpiritTableName|Flare|size=64}} | ||
|''Custom Robo'' Series | |||
|''Custom Robo'' | |•{{SSBU|Samus}} {{Head|Samus|g=SSBU|s=20px|cl=Pink}} (120 HP) | ||
|•{{SSBU|Samus}} {{Head|Samus|g=SSBU|s=20px|cl=Pink}} | |{{SpiritType|Neutral}} | ||
| | |||
|1,800 | |1,800 | ||
|[[Pokémon Stadium]] | |[[Pokémon Stadium]] | ||
|N/A | |N/A | ||
|•[[Stamina battle]]<br>•The enemy starts the battle with a [[Ray Gun]]<br>•The enemy starts the battle with a [[Rocket Belt]] | |•[[Stamina battle]]<br>•The enemy starts the battle with a [[Ray Gun]]<br>•The enemy starts the battle with a [[Rocket Belt]] | ||
|{{SSBUMusicLink| | |{{SSBUMusicLink|Other|Marionation Gear}} | ||
|} | |} | ||
== | ==Names in other languages== | ||
{{Langtable | {{Langtable | ||
|ja={{ja|スティックぐりぐり! ロクヨンスピリッツ|Sutikku Guriguri! Rokuyon Supirittsu}} | |ja={{ja|スティックぐりぐり! ロクヨンスピリッツ|Sutikku Guriguri! Rokuyon Supirittsu}} | ||
|jaM= | |jaM=Stick around! Nintendo 64 Spirits | ||
|fr_fr=Classe 64 | |fr_fr=Classe 64 | ||
|fr_frM=Class of 64 | |||
|fr_ca=Héros de 64 | |fr_ca=Héros de 64 | ||
|fr_caM=Heroes of 64 | |||
|de=Nintendo 64-Helden | |de=Nintendo 64-Helden | ||
|deM=Nintendo 64 Heroes | |||
|it=Incontri nostalgici | |it=Incontri nostalgici | ||
|itM=Nostalgic encounters | |||
|es_es=Entra en juego | |es_es=Entra en juego | ||
|es_esM=Come to play | |||
|es_la=¡Combate Ultra! | |es_la=¡Combate Ultra! | ||
|zh_cn=操控摇杆骨碌碌!64命魂上阵 | |es_laM=Ultra combat! | ||
|zh_tw=操控搖桿骨碌碌!64命魂上陣 | |zh_cn={{rollover|操控摇杆骨碌碌!64命魂上阵|Cāokòng Yáogān Gūlulù! 64 Mìnghún Shàngzhèn|?}} | ||
|ko=스틱을 빙글빙글! 64 스피릿 | |zh_cnM=Stick around! Nintendo 64 Spirits | ||
|zh_tw={{rollover|操控搖桿骨碌碌!64命魂上陣|Cāokòng Yáogǎn Gūlulù! 64 Mìnghún Shàngzhèn|?}} | |||
|zh_twM=Stick around! Nintendo 64 Spirits | |||
|ko={{rollover|스틱을 빙글빙글! 64 스피릿|Seutigeul Binggeulbinggeul! 64 Seupirit|?}} | |||
|koM=Stick around! Nintendo 64 Spirits | |||
|nl=N64-helden | |nl=N64-helden | ||
|ru=64 или ничего! | |nlM=N64 heroes | ||
|ru={{rollover|64 или ничего!|64 ili nichego!|?}} | |||
|ruM=64 or nothing! | |||
}} | }} | ||
==Trivia== | ==Trivia== | ||
*The banner resembles the Japanese box art for the Nintendo 64. | *The banner resembles the Japanese box art for the Nintendo 64. | ||
*The spirits in the event use artwork that comes from the Nintendo 64, rather than the spirit originating from | *The spirits in the event use artwork that comes from the Nintendo 64, rather than the spirit originating from an N64 game. For example, Blargg originated on the SNES. | ||
**Blargg is also the only spirit in the event to not originate from a Nintendo 64 game, with it making its debut in ''[[Super Mario World]]''. | |||
*The title of the event references the original tagline of the Nintendo 64, which was seen in many commercials, including the one for the first ''[[Super Smash Bros.]]'' | |||
*The Japanese, Chinese, and Korean names for this event reference the analog control stick, a heavily promoted feature of the Nintendo 64. | |||
*The Latin American name for this event references the Nintendo Ultra 64, the official name of the console during development before dropping the "Ultra" title before release. | |||
==References== | ==References== | ||
{{Reflist}} | {{Reflist}} | ||
{{SpiritBoardEvents}} | |||
Latest revision as of 20:57, January 24, 2025
Get N or Get Out was a Spirit Board event focused on spirits from the Nintendo 64 era. It ran from 6 a.m. on June 5, 2020 to 6 a.m. on June 8 2020 (UTC), and was repeated on the following dates:
- 6 a.m. on June 17, 2022 to 6 a.m. on June 20, 2022 (UTC)
- 6 a.m. on June 16, 2023 to 6 a.m. on June 19, 2023 (UTC)
- 6 a.m. on June 14, 2024 to 6 a.m. on June 17, 2024 (UTC)
During the event, defeating spirits on the Spirit Board which were part of the event awarded 6.4 times EXP than usual.
Description[edit]
North America[edit]
- Veterans of the Nintendo 64 era will be appearing for a limited time on the Spirit Board!
- During this event, you'll earn 6.4 times the usual experience after battle![1]
PAL regions[edit]
- Characters that featured on Nintendo 64 will be appearing for a limited time on the Spirit Board!
- During this event, you'll earn 6.4 times the usual experience after battle![2]
Periodically appearing spirits[edit]
| No. | Image | Name | Type | Class | Appearance times (UTC) |
|---|---|---|---|---|---|
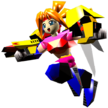
| 1,164 | Saki Amamiya | ★★★ | 06:00, 18:00 | ||
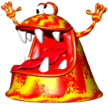
| 316 | Don Bongo | ★★ | 07:00, 19:00 | ||
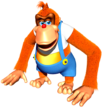
| 147 | Lanky Kong | ★★ | 04:00, 16:00 | ||
| 212 | Happy Mask Salesman | ★★ | 05:00, 17:00 | ||
| 195 | Malon | ★★ | 08:00, 20:00 | ||
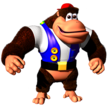
| 149 | Chunky Kong | ★★ | 09:00, 21:00 | ||
| 1,163 | Bayonette | ★ | 10:00, 22:00 | ||
| 207 | Deku Link | ★★ | 11:00, 23:00 | ||
| 148 | Tiny Kong | ★★★ | 00:00, 12:00 | ||
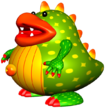
| 315 | Blargg | ★★ | 01:00, 13:00 | ||
| 214 | Postman | ★ | 02:00, 14:00 | ||
| 1,162 | Flare | ★ | 03:00, 15:00 |
Spirit battles[edit]
| Spirit | Battle parameters | |||||||||
|---|---|---|---|---|---|---|---|---|---|---|
| No. | Image | Name | Series | Enemy Fighter(s) | Type | Power | Stage | Rules | Conditions | Music |
| 1,164 | Saki Amamiya | Sin & Punishment Series | •Mii Gunner |
9,200 | Moray Towers (Battlefield form) | N/A | •The enemy's ranged weapons have increased power | Opening Stage | ||
| 316 | Don Bongo | Yoshi Series | •Giant King Dedede |
3,900 | Yoshi's Story | •Move Speed ↑ •Move Speed ↓ |
•The enemy has increased move speed after a little while •The enemy is giant •The enemy has reduced move speed |
Yoshi's Story (Melee) | ||
| 147 | Lanky Kong | Donkey Kong Series | •Diddy Kong Team |
3,900 | Kongo Falls | •Item: Bananas | •The enemy is easily distracted by items •Defeat an army of fighters |
DK Rap | ||
| 212 | Happy Mask Salesman | The Legend of Zelda Series | •Young Link |
4,300 | Umbra Clock Tower | •Attack Power ↑ •Move Speed ↑ •Jump Power ↑ |
•Timed battle (1:30) •All fighters have increased jump power •All fighters have increased move speed after a little while |
Song of Storms | ||
| 195 | Malon | The Legend of Zelda Series | •Zelda |
3,600 | Smashville | •Item Tidal Wave •Item: Cucco |
•The enemy becomes more powerful after eating •Certain items will appear in large numbers |
Ocarina of Time Medley | ||
| 149 | Chunky Kong | Donkey Kong Series | •Donkey Kong |
3,800 | Jungle Japes | N/A | •The enemy's punches and elbow strikes have increased power | DK Rap | ||
| 1,163 | Bayonette | Custom Robo Series | •Dark Samus •Samus |
1,900 | Mushroomy Kingdom (Battlefield form) | N/A | •The enemy's side special has increased power •Stamina battle •The enemy favors side specials |
Marionation Gear | ||
| 207 | Deku Link | The Legend of Zelda Series | •Diddy Kong |
3,700 | Distant Planet (Battlefield form) | •Item Tidal Wave •Item: Lip's Stick |
•The enemy favors neutral specials •Certain items will appear in large numbers after a little while •The enemy is easily distracted by items |
Saria's Theme | ||
| 148 | Tiny Kong | Donkey Kong Series | •Diddy Kong |
9,500 | Jungle Japes | •Tiny •Hazard: Low Gravity •Hazard: Heavy Wind |
•Dangerously high winds are in effect •Timed battle (1:00) •Gravity is reduced |
DK Rap | ||
| 315 | Blargg | Yoshi Series | •Curry Bowser |
3,900 | Castle Siege (Underground Cavern) | N/A | •The enemy breathes fire | Melty Monster | ||
| 214 | Postman | The Legend of Zelda Series | •Wii Fit Trainer |
2,600 | Temple | N/A | •Timed stamina battle (2:00) •The enemy tends to avoid conflict |
Termina Field | ||
| 1,162 | Flare | Custom Robo Series | •Samus |
1,800 | Pokémon Stadium | N/A | •Stamina battle •The enemy starts the battle with a Ray Gun •The enemy starts the battle with a Rocket Belt |
Marionation Gear | ||
Names in other languages[edit]
Trivia[edit]
- The banner resembles the Japanese box art for the Nintendo 64.
- The spirits in the event use artwork that comes from the Nintendo 64, rather than the spirit originating from an N64 game. For example, Blargg originated on the SNES.
- Blargg is also the only spirit in the event to not originate from a Nintendo 64 game, with it making its debut in Super Mario World.
- The title of the event references the original tagline of the Nintendo 64, which was seen in many commercials, including the one for the first Super Smash Bros.
- The Japanese, Chinese, and Korean names for this event reference the analog control stick, a heavily promoted feature of the Nintendo 64.
- The Latin American name for this event references the Nintendo Ultra 64, the official name of the console during development before dropping the "Ultra" title before release.
References[edit]
