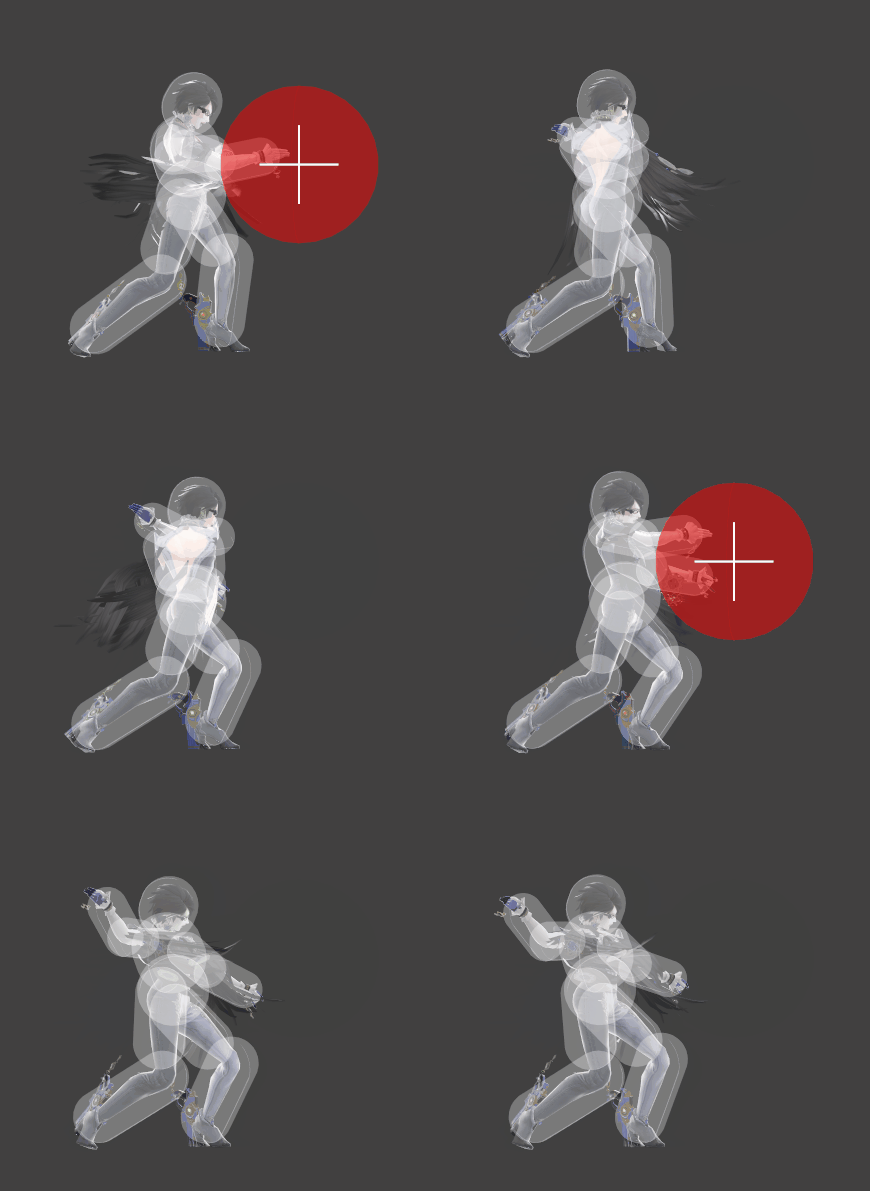
Bayonetta (SSBU)/Pummel: Difference between revisions
From SmashWiki, the Super Smash Bros. wiki
Jump to navigationJump to search
m (Removed protection from "Bayonetta (SSBU)/Pummel": Bot: Unprotecting a list of files) |
No edit summary |
||
| (One intermediate revision by one other user not shown) | |||
| Line 1: | Line 1: | ||
{{ArticleIcons|ssbu=y}} | {{ArticleIcons|ssbu=y}} | ||
[[File:BayonettaPummelSSBU.gif|thumb|500px|Hitbox visualization showing Bayonetta's pummel.]] | [[File:BayonettaPummelSSBU.gif|thumb|500px|Hitbox visualization showing Bayonetta's pummel.]] | ||
==Overview== | ==Overview== | ||
The '''Slap Punish Attack'''. It has average speed, but is unique in that it consists of two hits per input. As a result, it is possible for the opponent to break free in the middle of the pummel, and thus miss the second hit entirely. | |||
==Hitboxes== | ==Hitboxes== | ||
{{UltimateHitboxTableHeader}} | {{UltimateHitboxTableHeader}} | ||
{{HitboxTableTitle|Hit 1| | {{HitboxTableTitle|Hit 1|42}} | ||
{{UltimateHitboxTableRow | {{UltimateHitboxTableRow | ||
|id=0 | |id=0 | ||
|damage=0.6% | |damage=0.6% | ||
|angle=361 | |angle=361 | ||
|af=3 | |||
|bk=0 | |bk=0 | ||
|ks=100 | |ks=100 | ||
| Line 26: | Line 28: | ||
|rebound=f | |rebound=f | ||
}} | }} | ||
{{HitboxTableTitle|Hit 2| | {{HitboxTableTitle|Hit 2|42}} | ||
{{UltimateHitboxTableRow | {{UltimateHitboxTableRow | ||
|id=0 | |id=0 | ||
|damage=0.7% | |damage=0.7% | ||
|angle=361 | |angle=361 | ||
|af=3 | |||
|bk=0 | |bk=0 | ||
|ks=100 | |ks=100 | ||
| Line 48: | Line 51: | ||
}} | }} | ||
|} | |} | ||
==Timing== | ==Timing== | ||
{|class="wikitable" | {|class="wikitable" | ||
! | !Hits 1-2 | ||
|1, 4 | |1, 4 | ||
|- | |- | ||
Latest revision as of 18:06, August 3, 2022
Overview[edit]
The Slap Punish Attack. It has average speed, but is unique in that it consists of two hits per input. As a result, it is possible for the opponent to break free in the middle of the pummel, and thus miss the second hit entirely.
Hitboxes[edit]
Timing[edit]
| Hits 1-2 | 1, 4 |
|---|---|
| Interruptible | 7 |
| Animation length | 27 |
Lag time |
Hitbox |
Interruptible |
|
