Welcome to SmashWiki! Log in or create an account and join the community, and don't forget to read this first!
Notices
The Skill parameter has been removed from Smasher infoboxes, and in its place are the new "Best historical ranking" and "Best tournament result" parameters. SmashWiki needs help adding these new parameters to Smasher infoboxes, refer to the guidelines here for what should be included in these new parameters.
When adding results to Smasher pages, include each tournament's entrant number in addition to the player's placement, and use the {{Trn}} template with the matching game specified. Please also fix old results on Smasher pages that do not abide to this standard. Refer to our Smasher article guidelines to see how results tables should be formatted.
Check out our project page for ongoing projects that SmashWiki needs help with.
Super Smash Bros. Brawl

Wario (SSBB)/Hitboxes: Difference between revisions

From SmashWiki, the Super Smash Bros. wiki
Jump to navigationJump to search
No edit summary
 
(12 intermediate revisions by 7 users not shown)
Line 1: Line 1:
{{ArticleIcons|ssbb=y}}
{| class="messagebox" style="background:#ffffff;border:solid #7f7f7f 2px;text-align:center;"
{{incomplete|not everything is yet animated; missing hitboxes for final smash activation & Wario-Man's side special.}}
 
==Hitboxes==
===Normal moveset===
{|class="wikitable sortable"
!Move
!Name
!Hitbox
|-
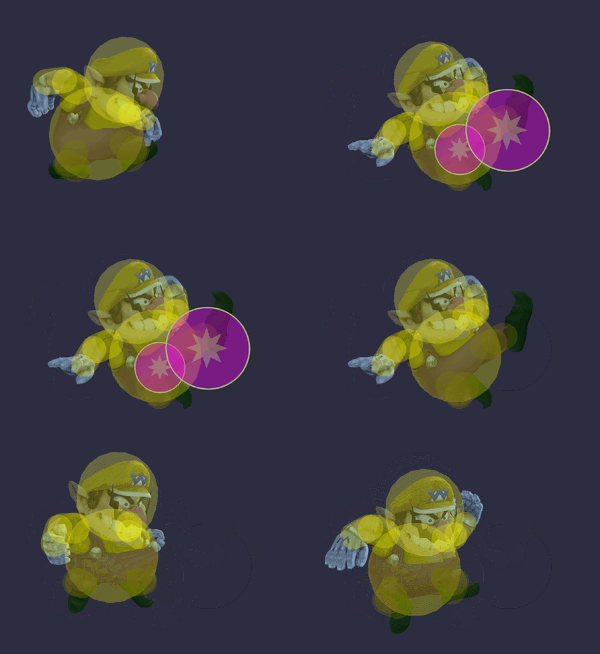
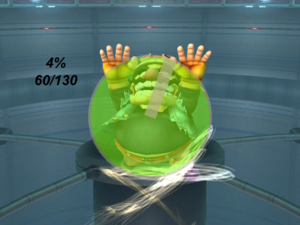
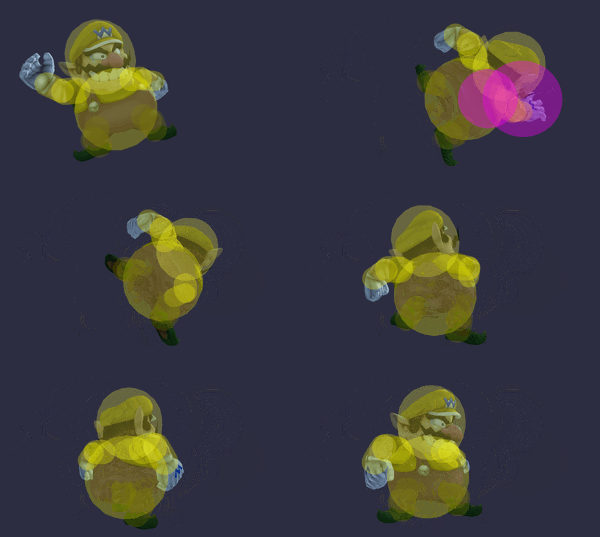
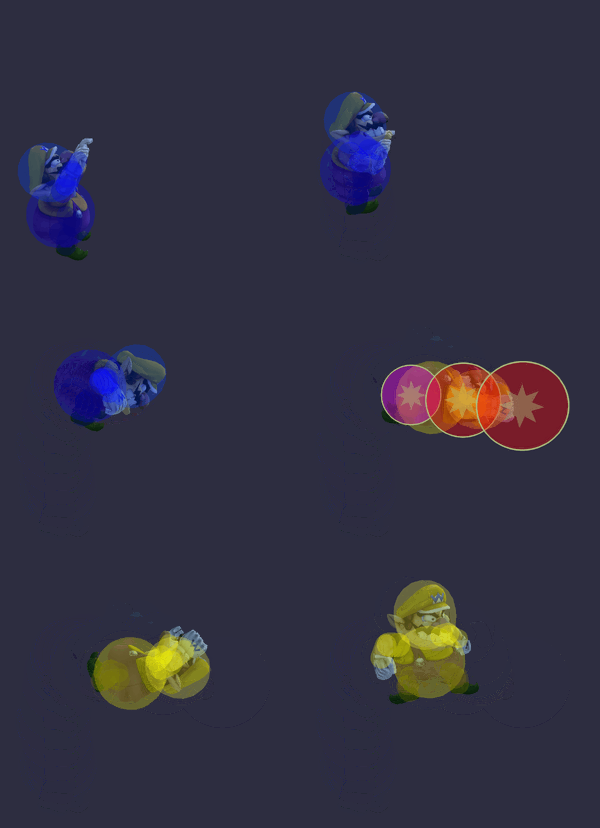
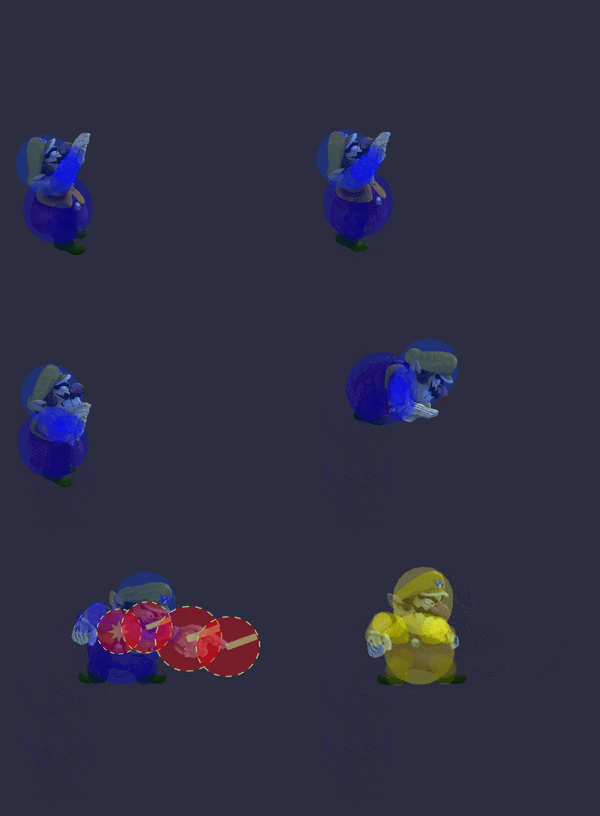
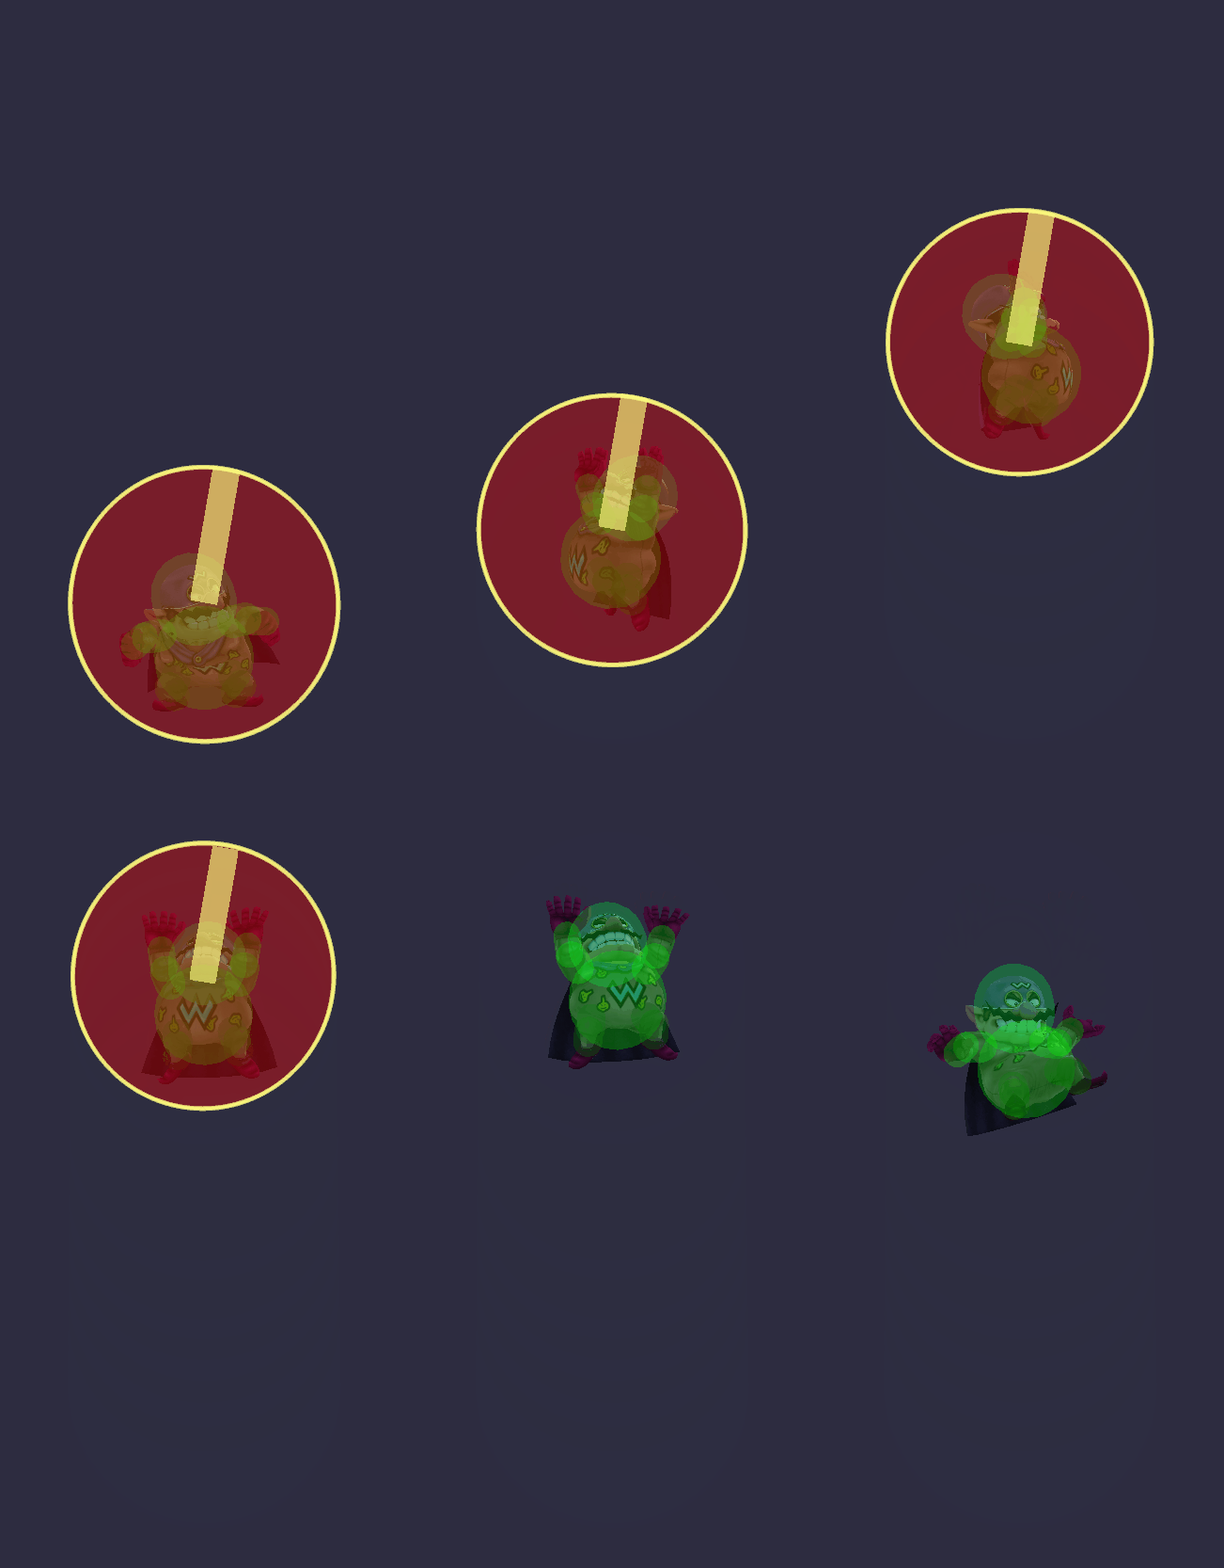
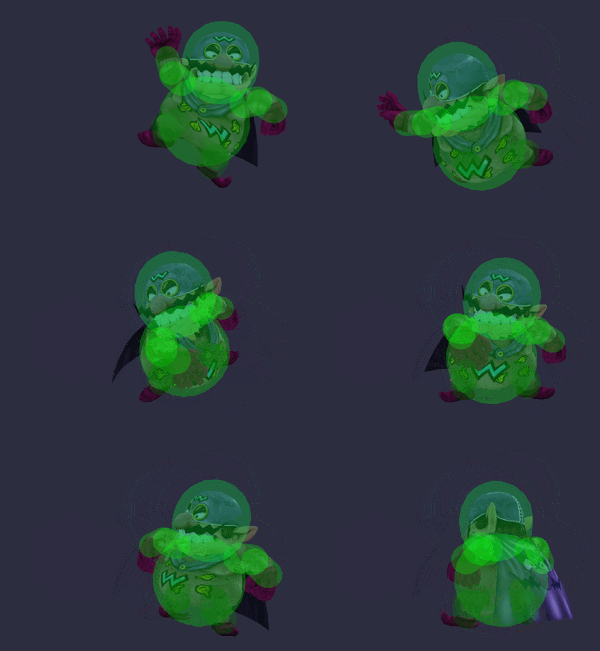
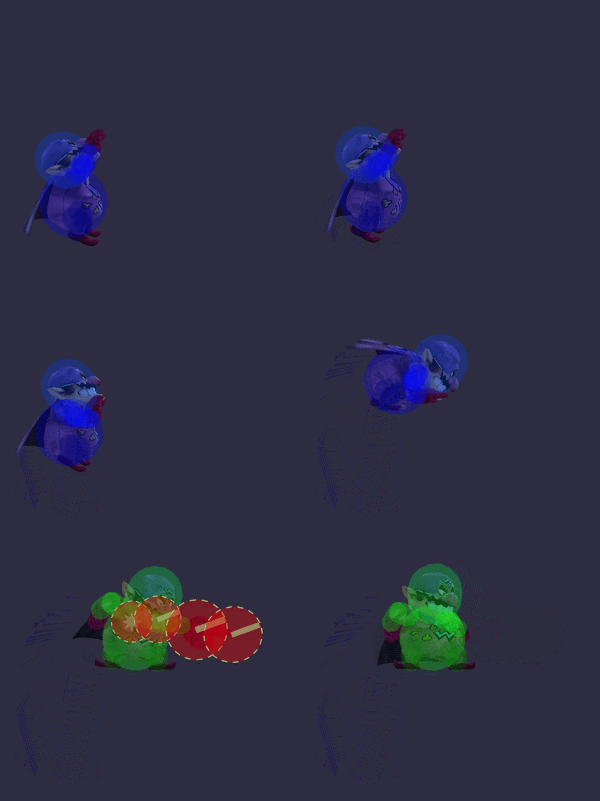
|Neutral attack 1||Fist||[[File:WarioJab1SSBB.gif|300px]]
|-
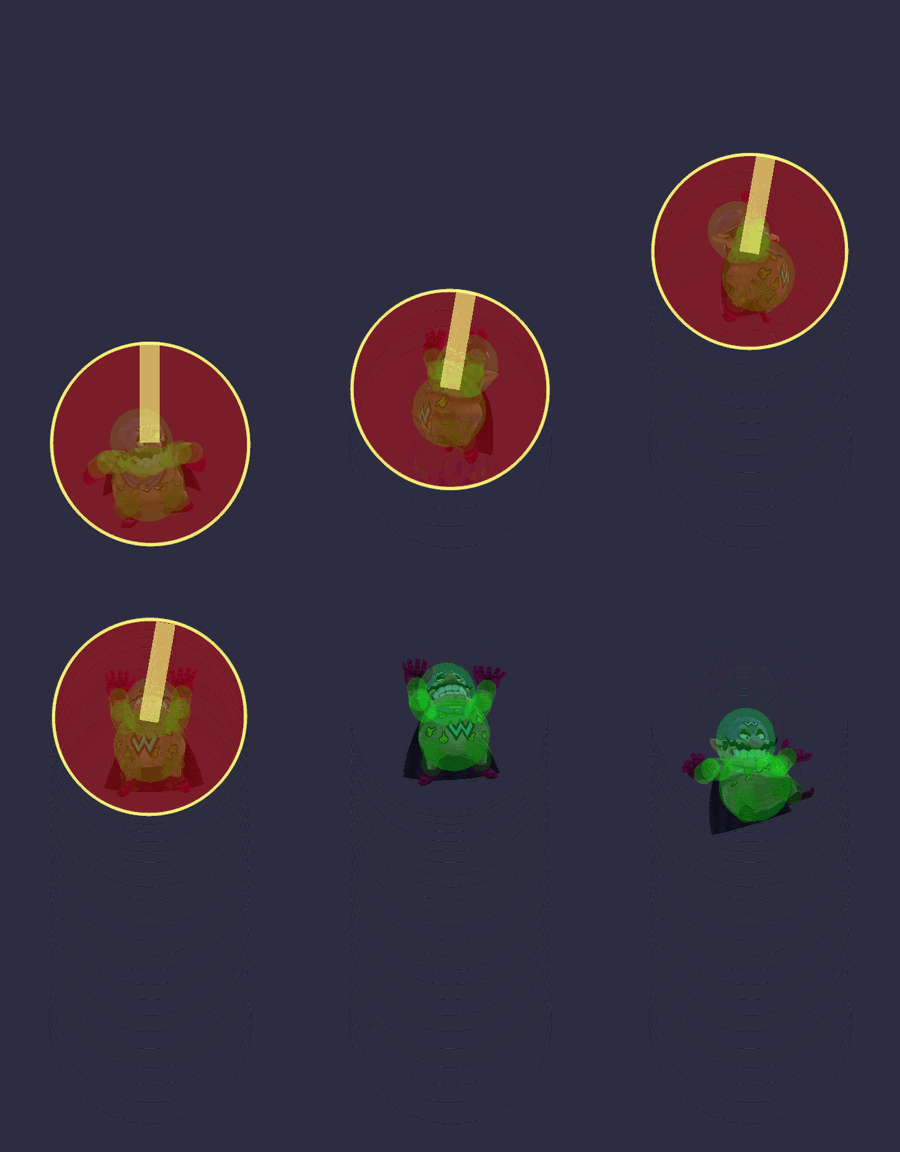
|Neutral attack 2||Jaw Smash||[[File:WarioJab2SSBB.gif|300px]]
|-
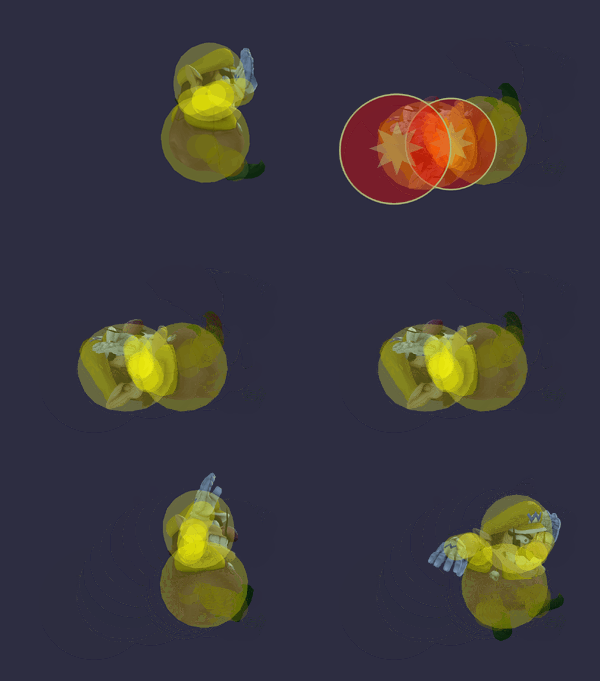
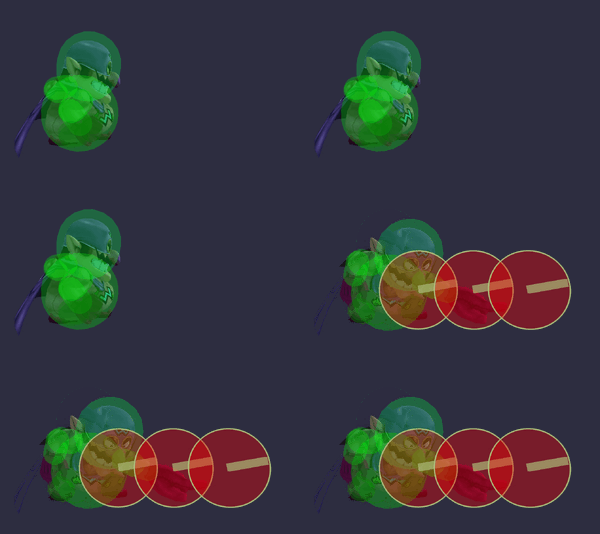
|Forward tilt||Wind-Up Punch||[[File:WarioFTiltSSBB.gif|300px]]
|-
|Forward tilt (angled up)||Wind-Up Punch||[[File:WarioFTiltUpSSBB.gif|300px]]
|-
|Forward tilt (angled down)||Wind-Up Punch||[[File:WarioFTiltDownSSBB.gif|300px]]
|-
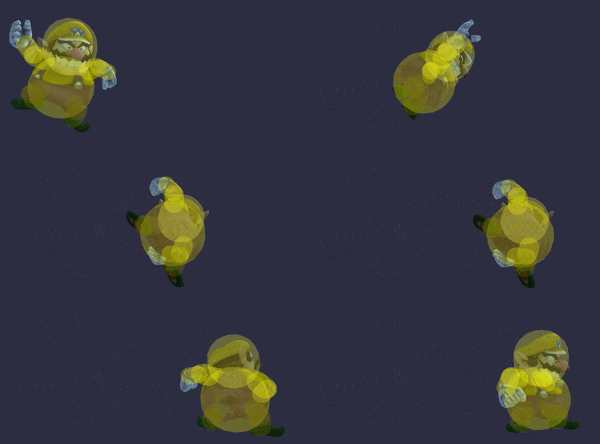
|Up tilt||Banzai Hit||[[File:WarioUTiltSSBB.gif|300px]]
|-
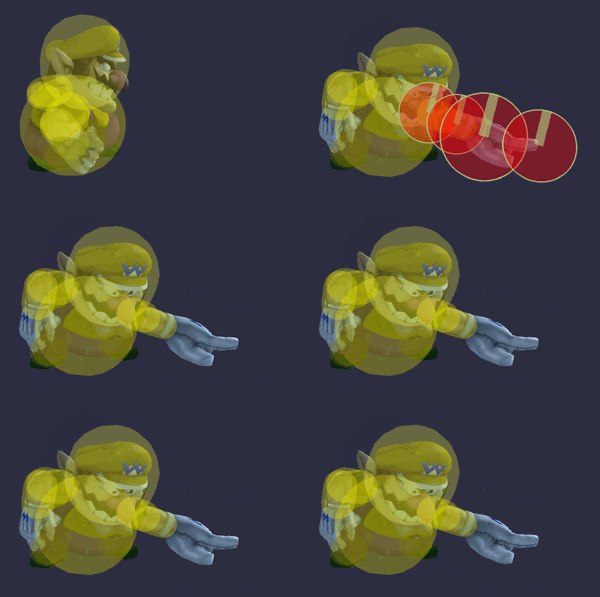
|Down tilt||Cockroach Crusher||[[File:WarioDTiltSSBB.gif|300px]]
|-
|Dash attack||Head Sliding||[[File:WarioDashAttackSSBB.gif|300px]]
|-
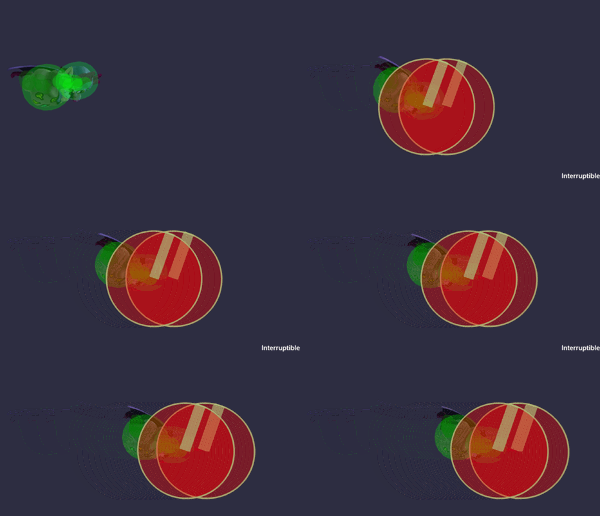
|Forward smash||Shoulder Tackle||[[File:WarioFSmashSSBB.gif|300px]]
|-
|Up smash||Wind-Up Headbutt||[[File:WarioUSmashSSBB.gif|300px]]
|-
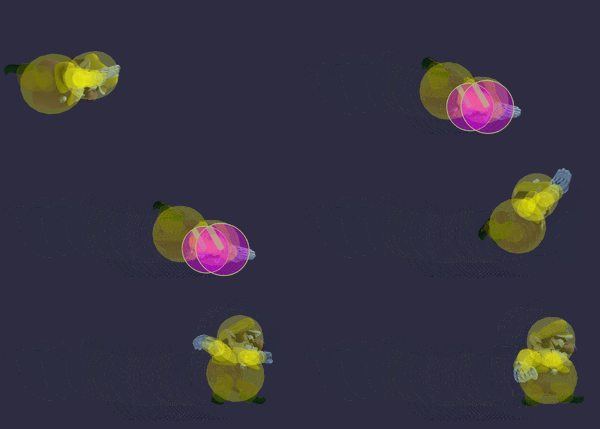
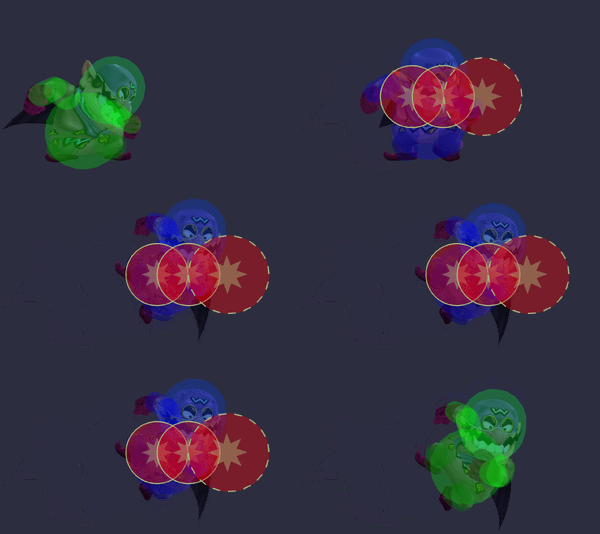
|Down smash||Wario Spin||[[File:WarioDSmashSSBB.gif|300px]]
|-
|Neutral aerial||Overweight Body||[[File:WarioNAirSSBB.gif|300px]]
|-
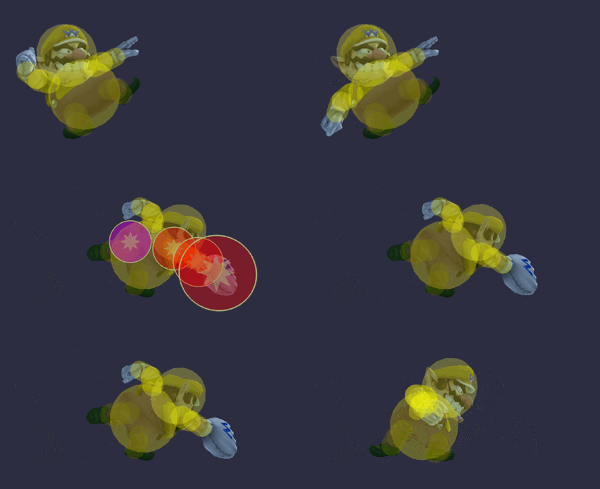
|Forward aerial||Pig's Foot Kick||[[File:WarioFAirSSBB.gif|300px]]
|-
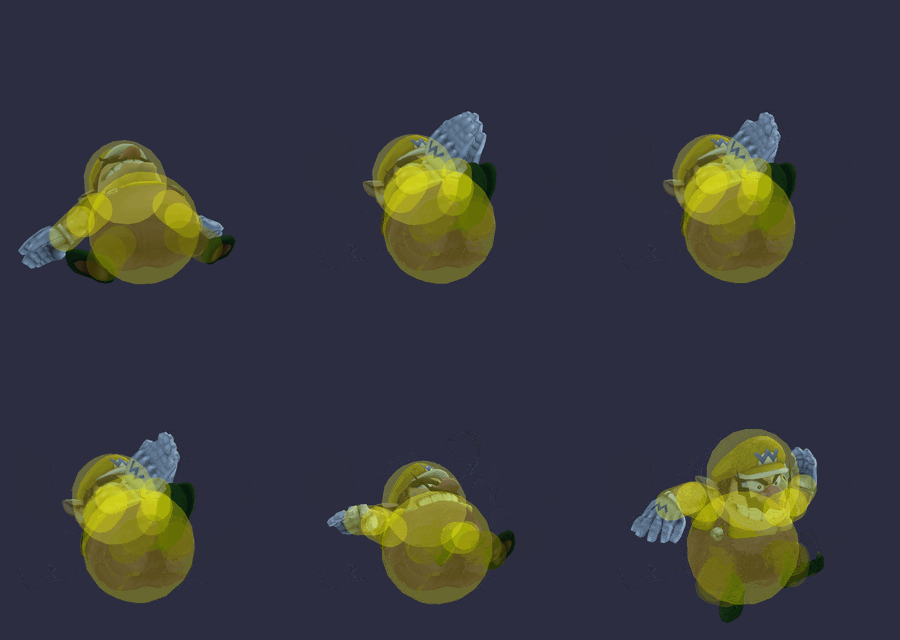
|Back aerial||Falling Headbutt||[[File:WarioBAirSSBB.gif|300px]]
|-
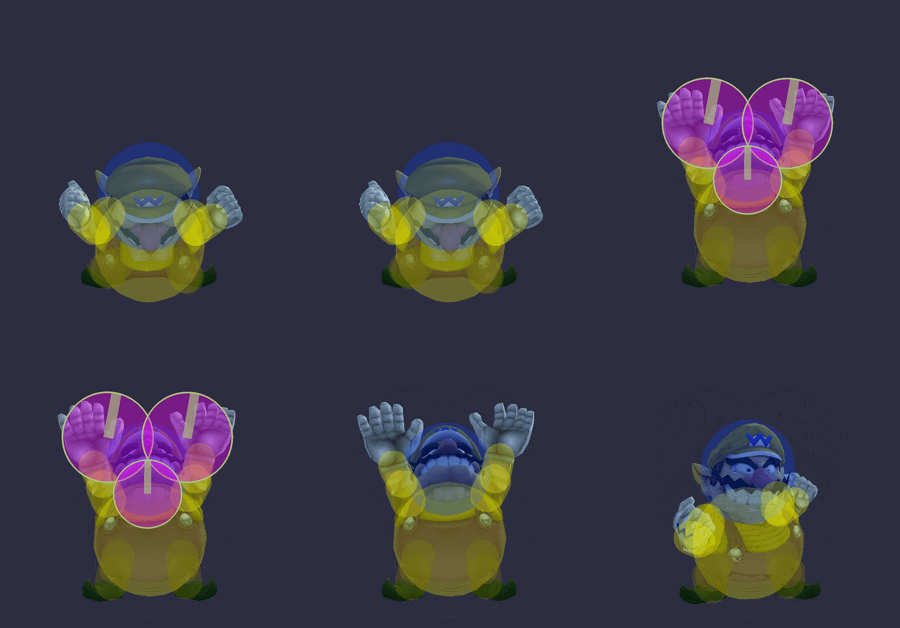
|Up aerial||Hand Slap||[[File:WarioUAirSSBB.gif|300px]]
|-
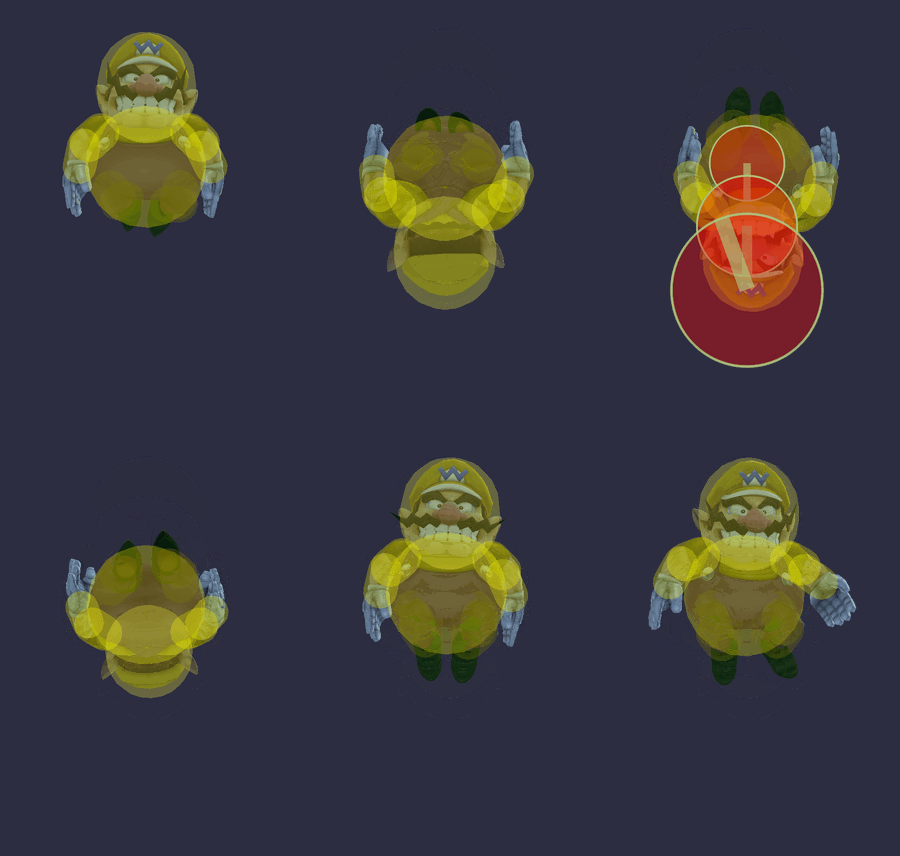
|Down aerial||Upside-Down Headbutt||[[File:WarioDAirSSBB.gif|300px]]
|-
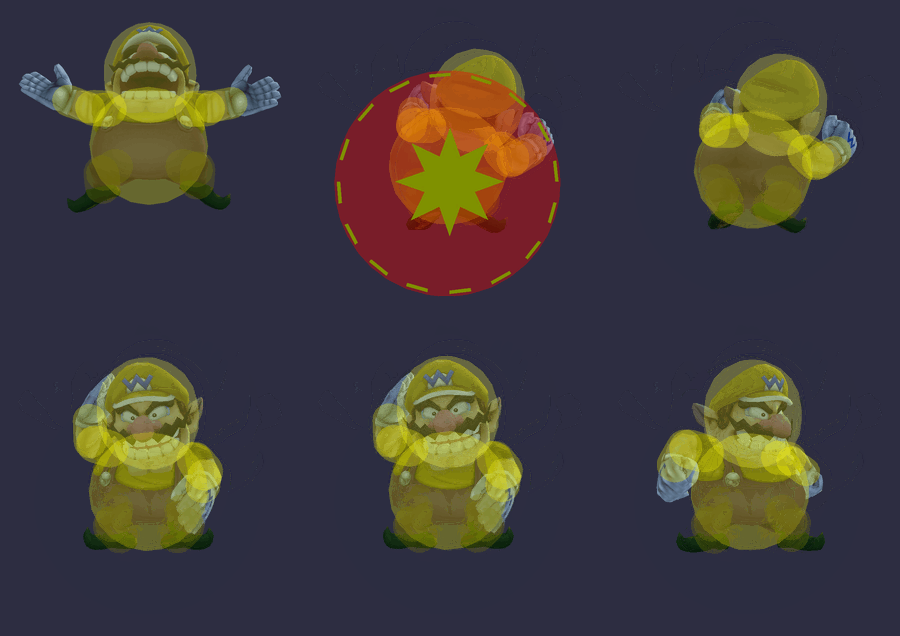
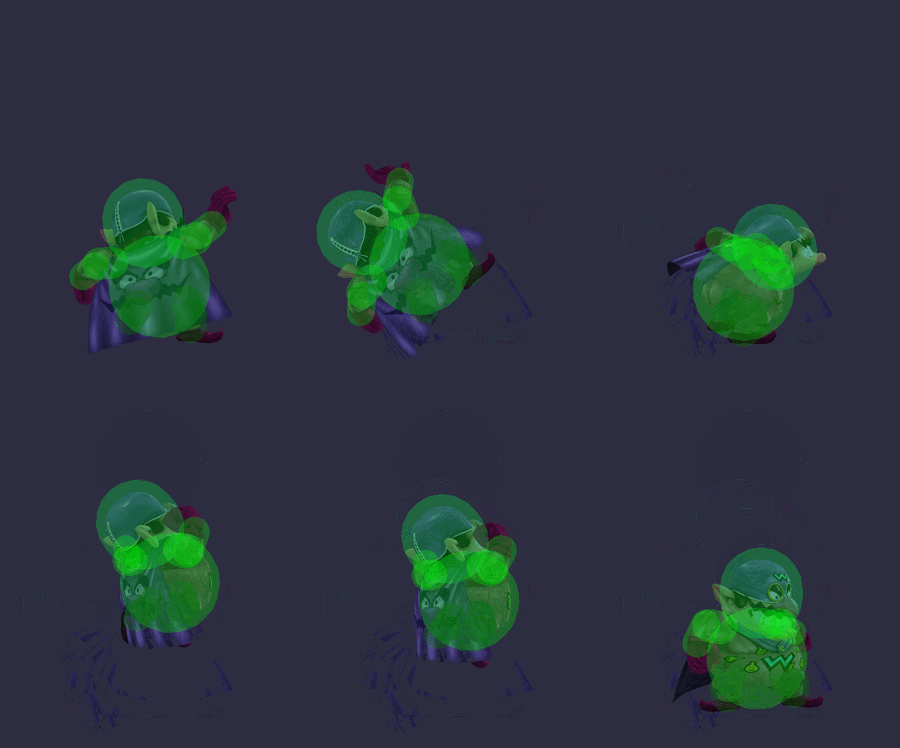
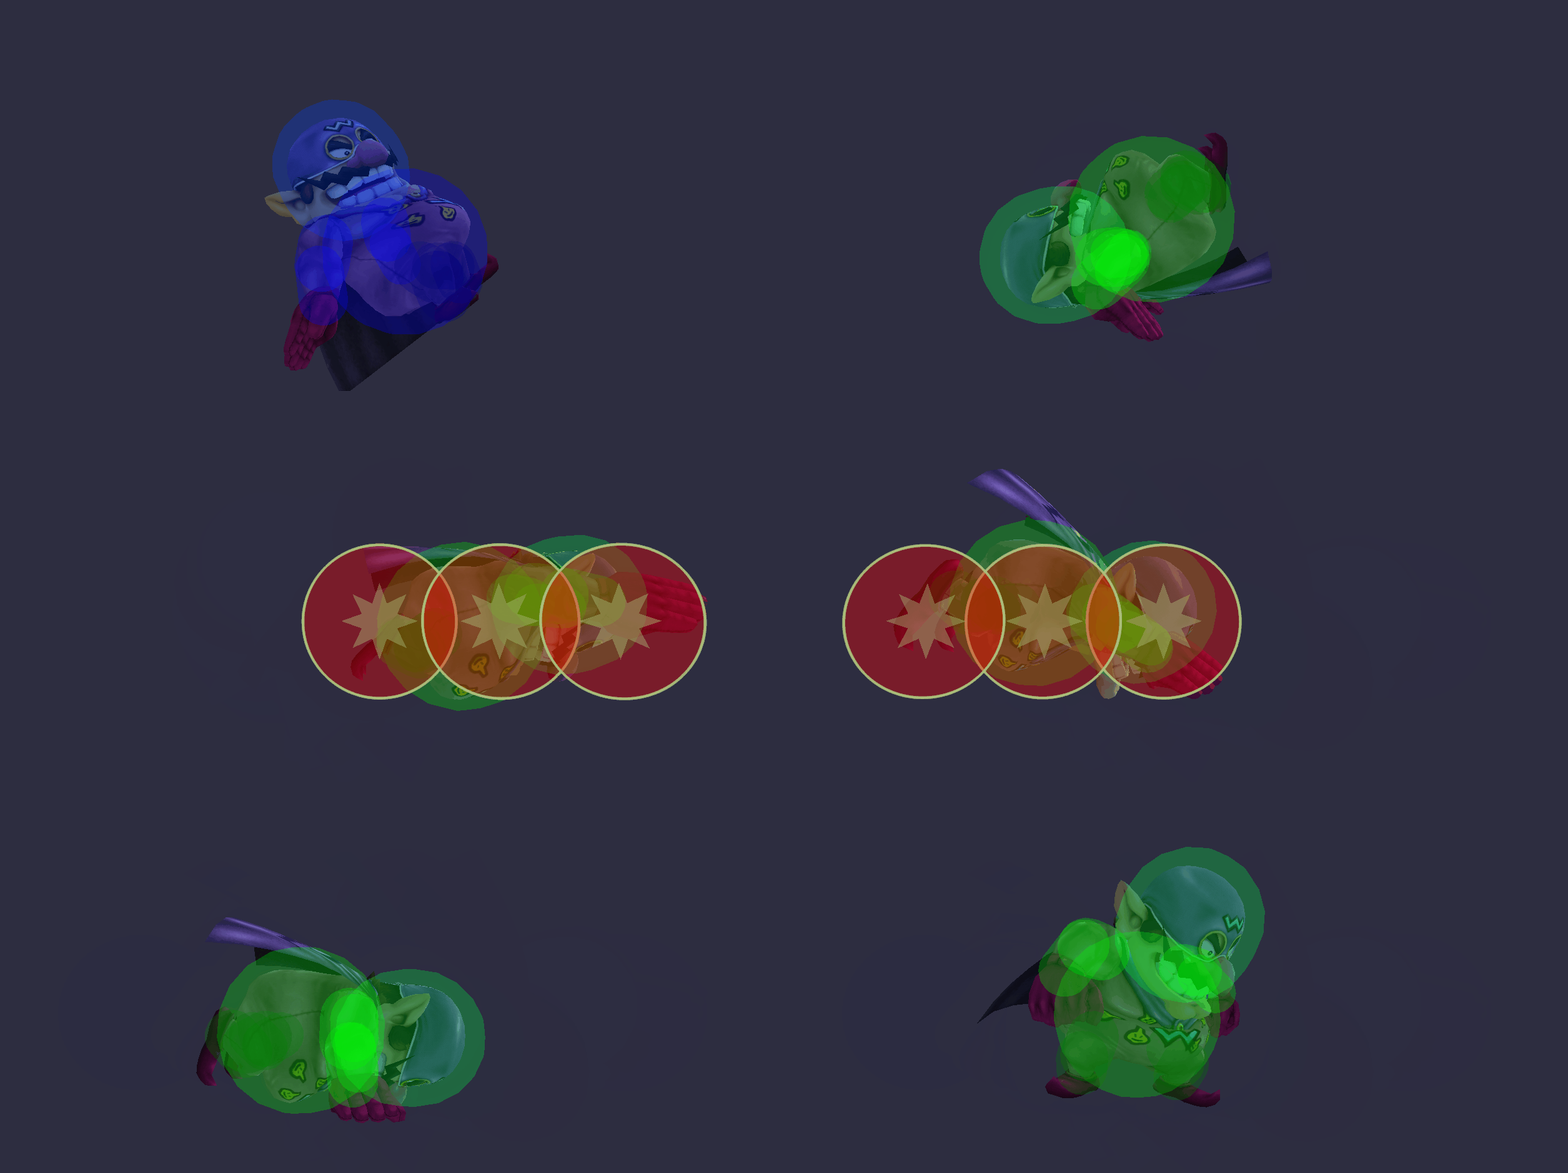
|Neutral special||Chomp||[[File:WarioSSBBNS(grab).png|300px]]<br>[[File:WarioSSBBNS(itemzone).png|300px]]<br>[[File:WarioSSBBNS(chomp).png|300px]]<br>[[File:WarioSSBBNS(bite).png|300px]]<br>[[File:WarioSSBBNS(throw).png|300px]]<br>[[File:WarioSSBBNS(explosion).png|300px]]
|-
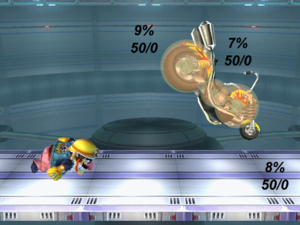
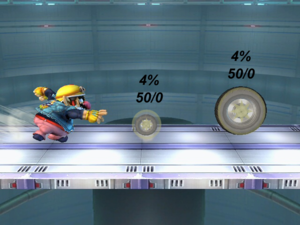
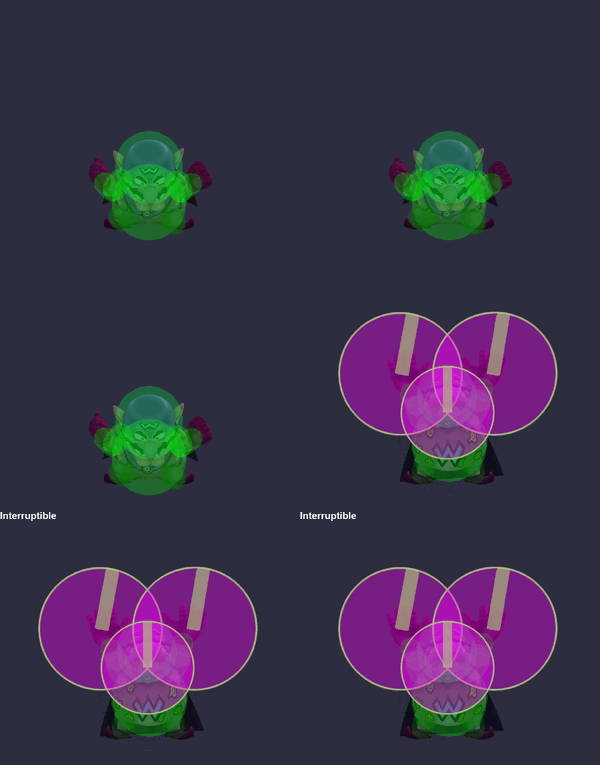
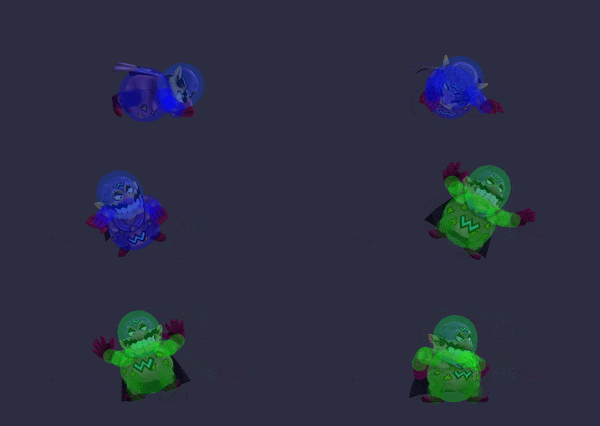
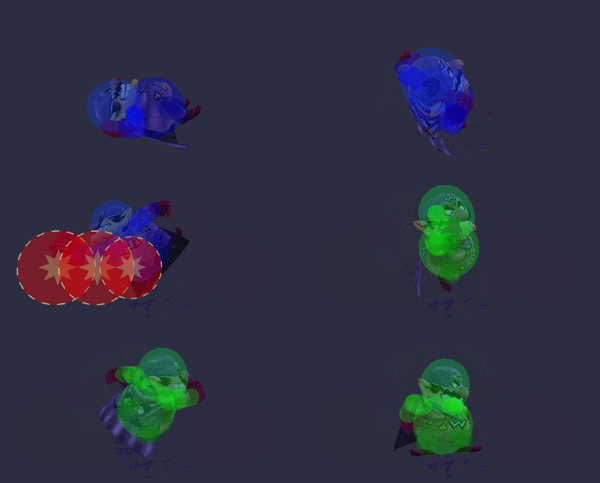
|Side special||Wario Bike||[[File:WarioSSBBSS(drive).png|300px]]<br>[[File:WarioSSBBSS(wheelie).png|300px]]<br>[[File:WarioSSBBSS(thrown).png|300px]]<br>[[File:WarioSSBBSS(tires).png|300px]]
|-
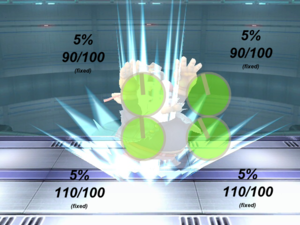
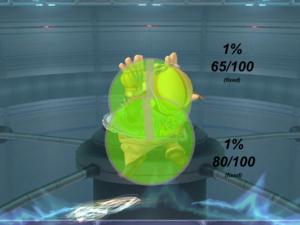
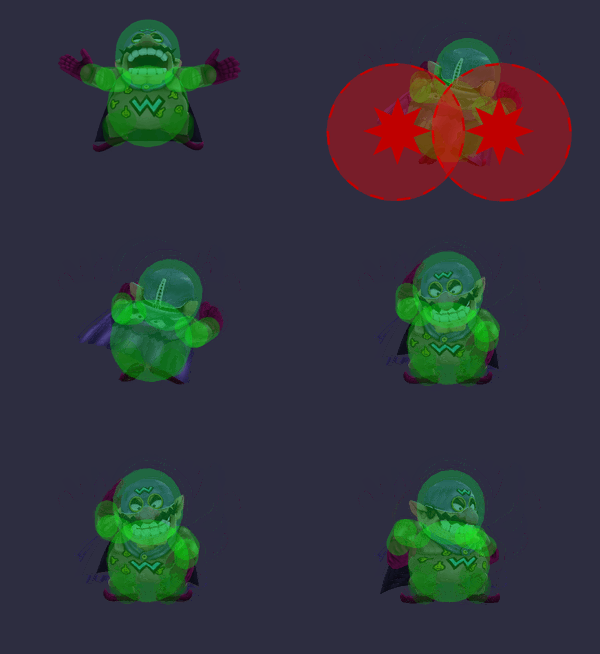
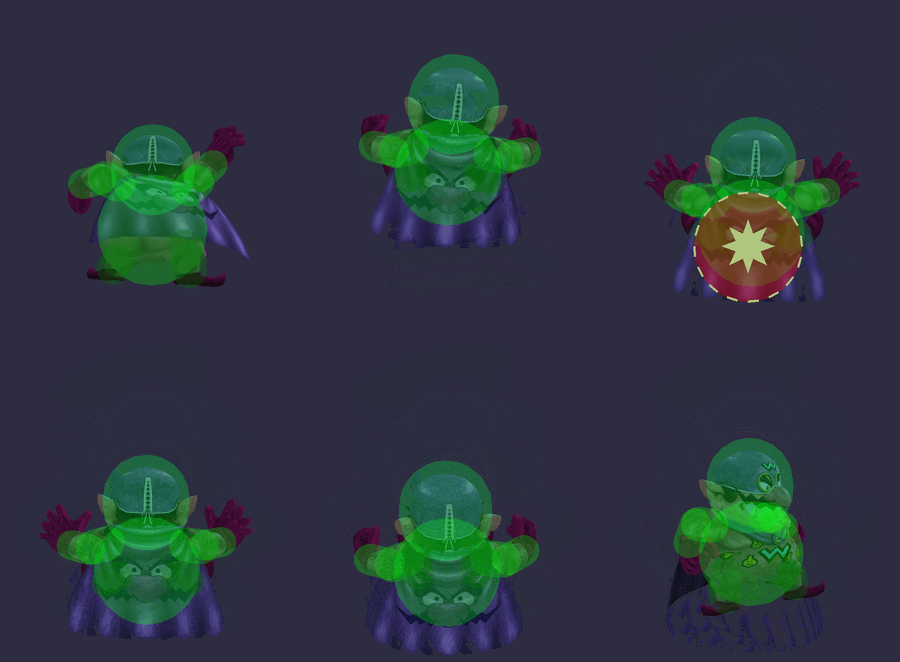
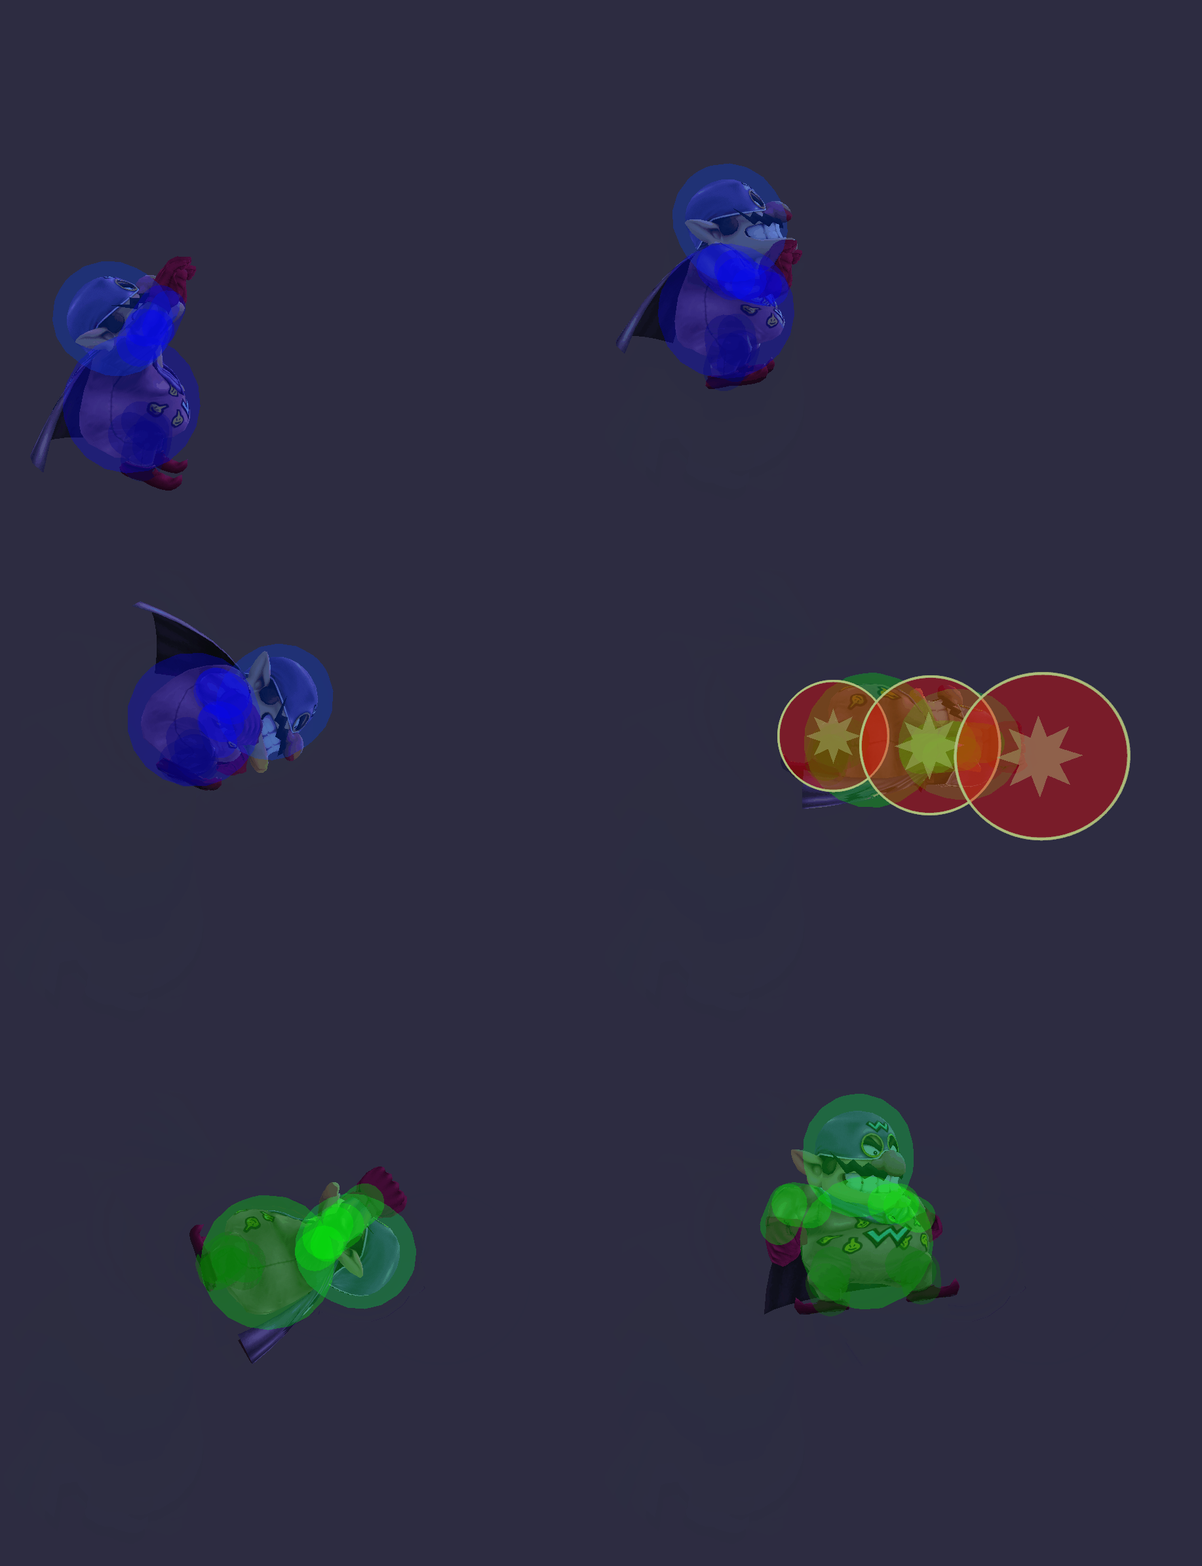
|Up special||Corkscrew||[[File:WarioSSBBUS(hit1).png|300px]]<br>[[File:WarioSSBBUS(hits2-11).png|300px]]<br>[[File:WarioSSBBUS(hit12).png|300px]]
|-
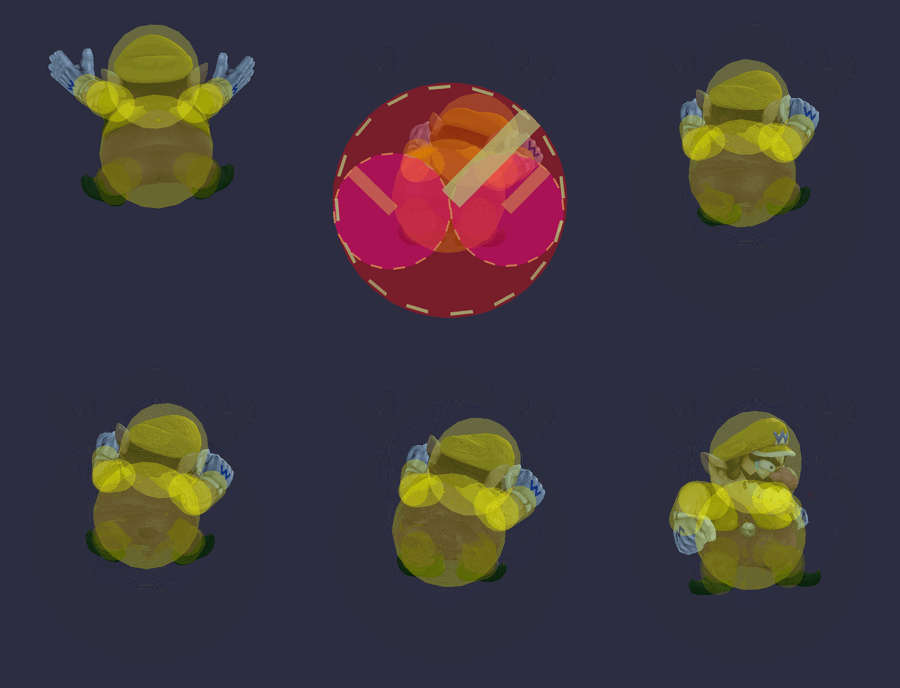
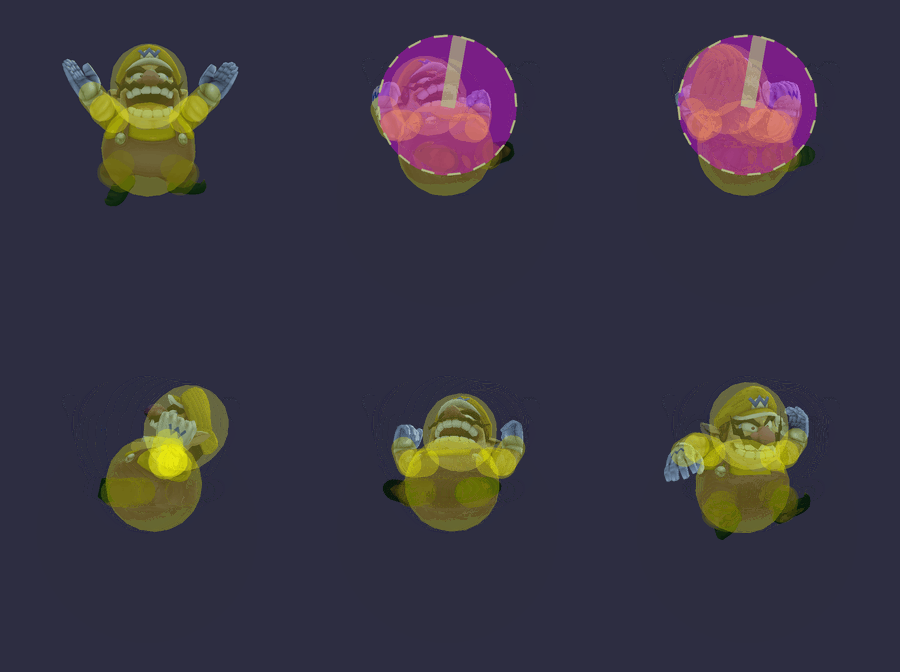
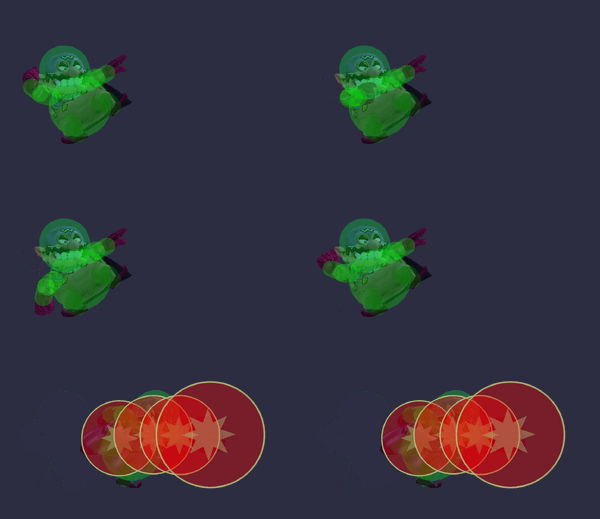
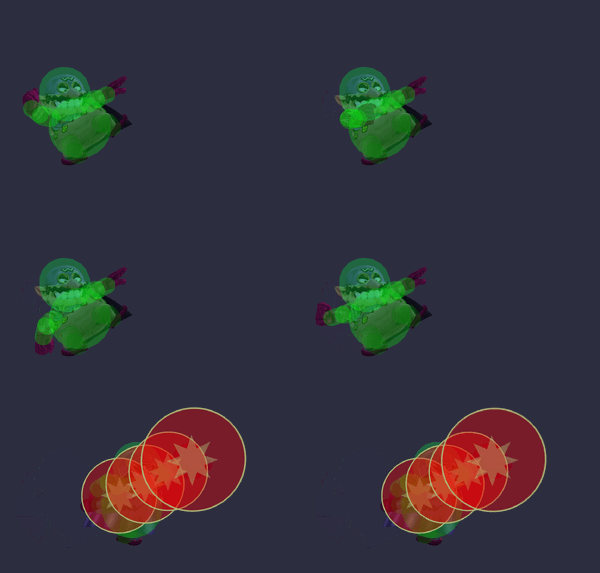
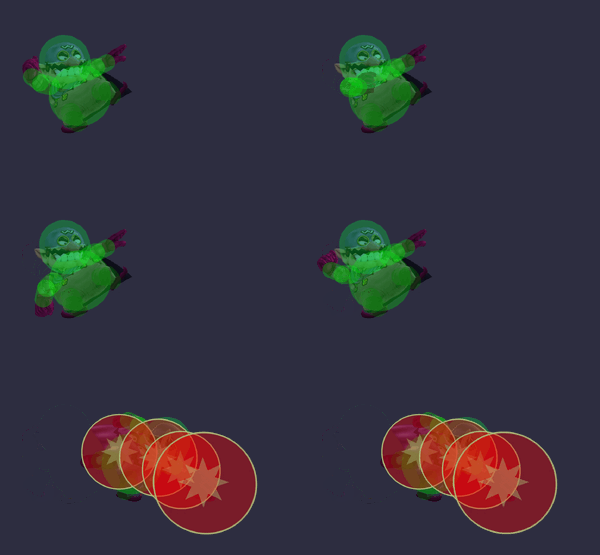
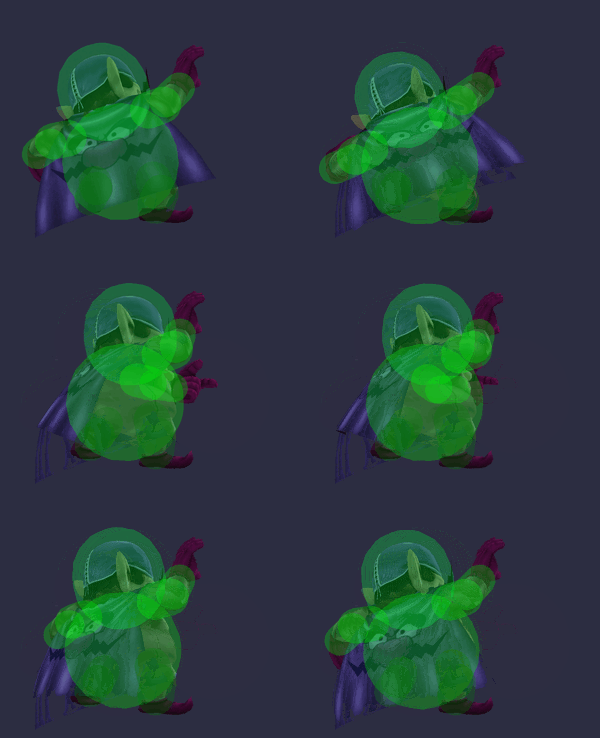
|Down special||Wario Waft (no charge)||[[File:WarioWarioWaft1SSBB.gif|300px]]
|-
|Down special||Wario Waft (slight charge)||[[File:WarioWarioWaft2SSBB.gif|300px]]
|-
|Down special||Wario Waft (moderate charge)||[[File:WarioWarioWaft3SSBB.gif|300px]]
|-
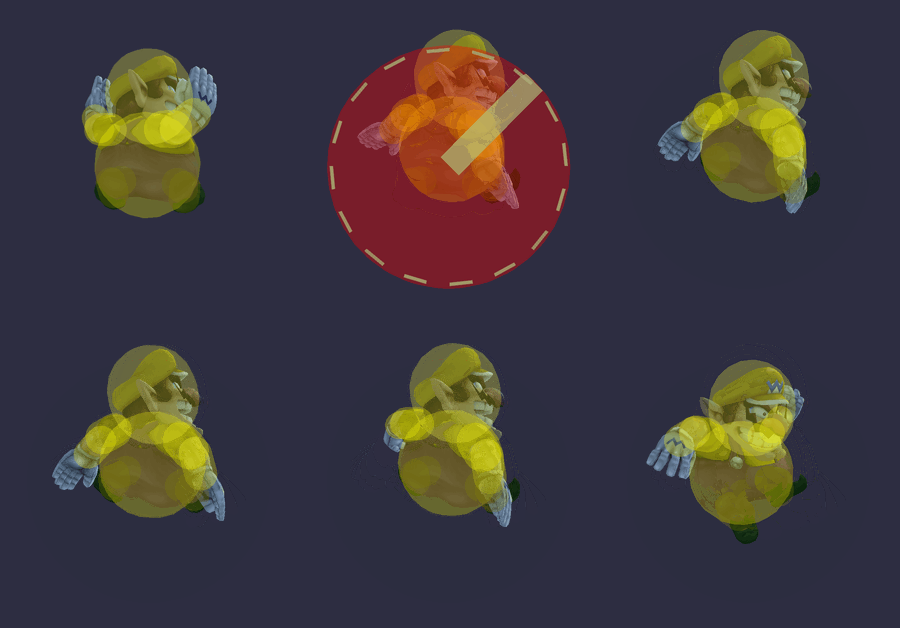
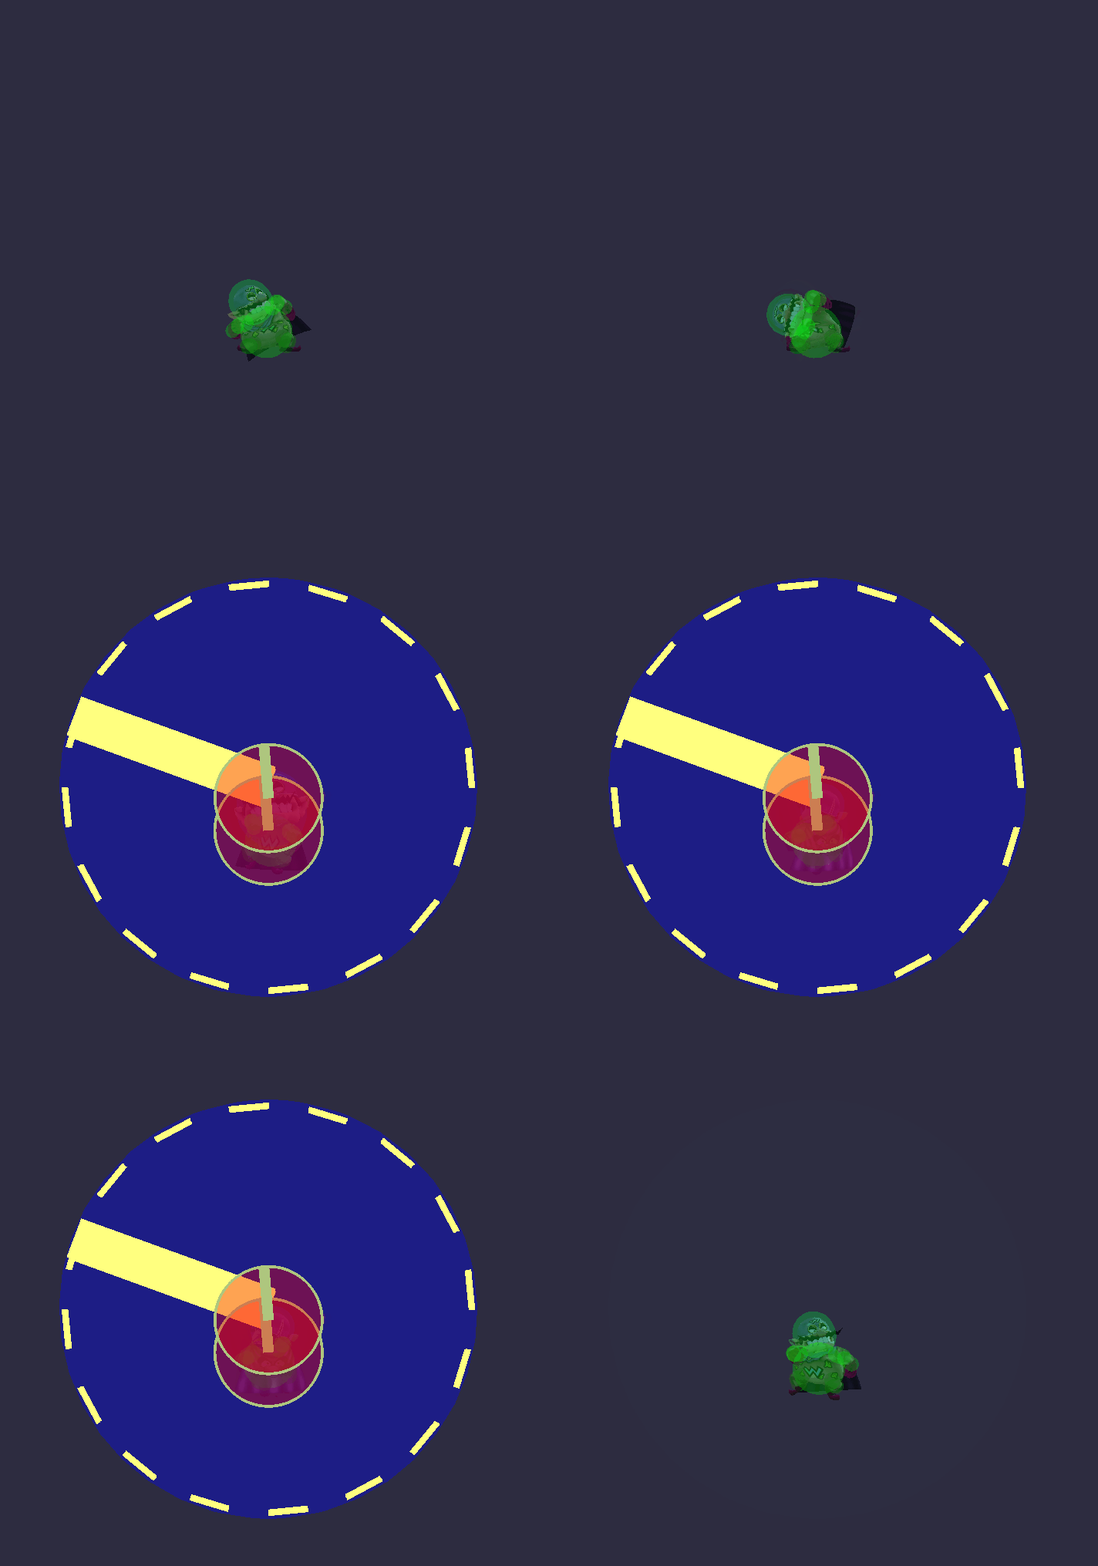
|Down special||Wario Waft (max charge)||[[File:WarioWarioWaft4SSBB.gif|300px]]
|-
|Final Smash||Wario-Man||n/a
|-
|Grab|| ||[[File:WarioGrabSSBB.gif|300px]]
|-
|Dash grab|| ||[[File:WarioDashGrabSSBB.gif|300px]]
|-
|Pivot grab|| ||[[File:WarioPivotGrabSSBB.gif|300px]]
|-
|Pummel||Grab Poke-Poke||[[File:WarioPummelSSBB.gif|300px]]
|-
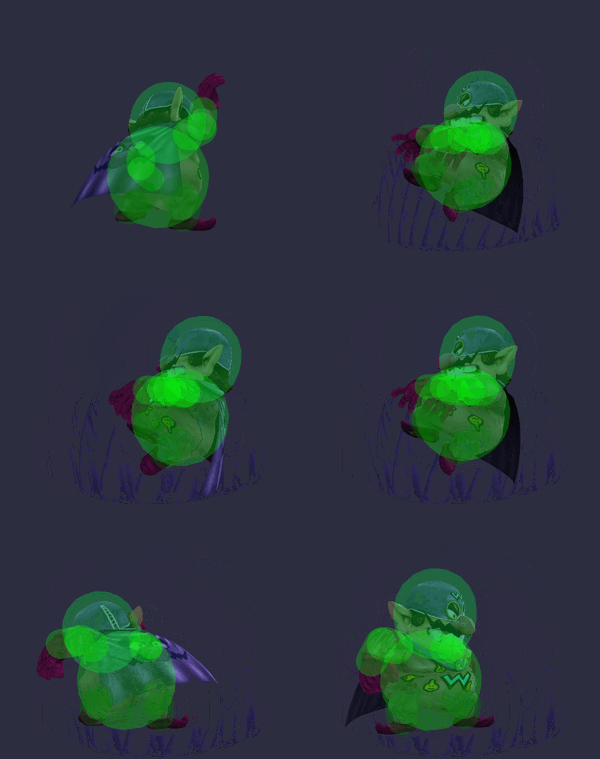
|Forward Throw||Giant Swing||[[File:WarioFThrowSSBB.gif|300px]]
|-
|Back Throw||Heavy Buttocks||[[File:WarioBThrowSSBB.gif|300px]]
|-
|Up Throw||Power Lifting||[[File:WarioUThrowSSBB.gif|300px]]
|-
|Down Throw||Butt Press||[[File:WarioDThrowSSBB.gif|300px]]
|-
|Floor attack (front)|| ||[[File:WarioFloorAttackDownSSBB.gif|300px]]
|-
|Floor attack (back)|| ||[[File:WarioFloorAttackUpSSBB.gif|300px]]
|-
|-
|width="50px"|[[Image:Hitbox Article.png|50px]]
|Floor attack (trip)|| ||[[File:WarioTripAttackSSBB.gif|300px]]
|'''This is a hitbox repository.'''
|width="50px"|[[Image:Hitbox Article.png|50px]]
|-
|-
|colspan="3"|Click on any image to view full size.
|Edge attack (fast)|| ||[[File:WarioEdgeAttackFastSSBB.gif|300px]]
|}
 
{|class="wikitable" style="margin:1em auto 1em auto; text-align:center"
!colspan="2"|Hurtboxes
|-
|-
|[[Image:WarioSSBBHurtboxes.png|200px]]
|Edge attack (slow)|| ||[[File:WarioEdgeAttackSlowSSBB.gif|300px]]
|[[Image:WarioSSBBSS(hurtboxes).png|200px]]
|}
|}


{|class="wikitable collapsible collapsed" style="margin:1em auto 1em auto; text-align:center"
===Wario-Man's moveset===
!colspan="14"|Color Legend
All of Wario-Man's moves have the same name as their ''Wario'' counterparts.
{|class="wikitable sortable"
!Move
!Name
!Hitbox
|-
|-
!colspan="11"|Types!!colspan="3"|Effects
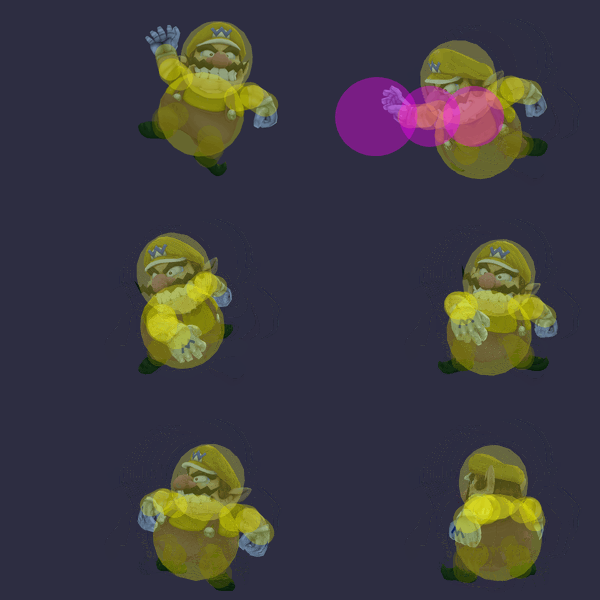
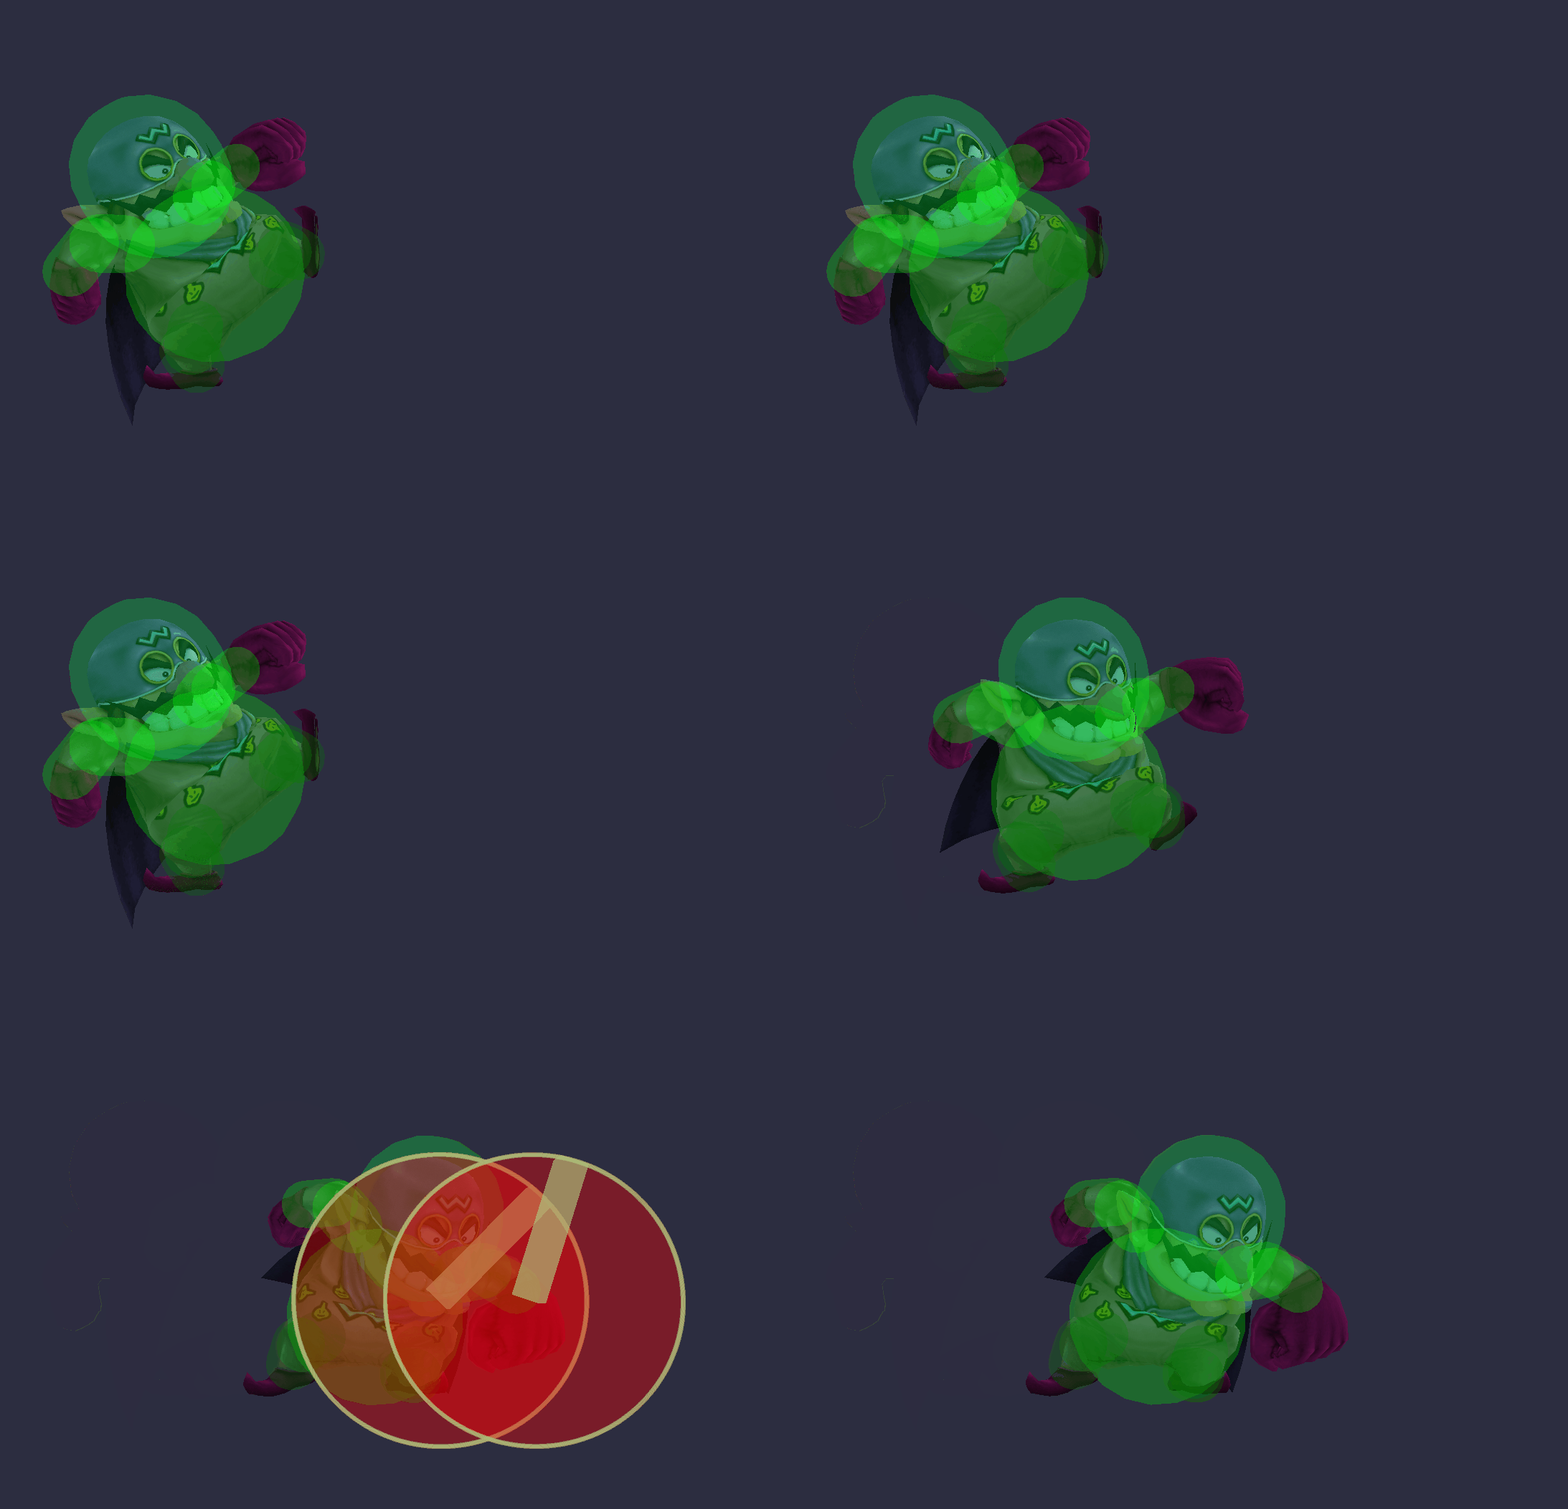
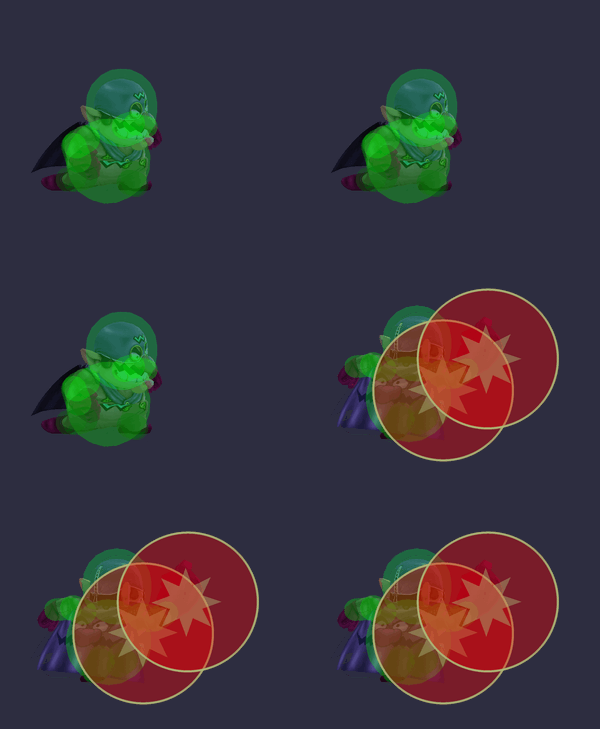
|Neutral attack 1|| ||[[File:Wario-ManJab1SSBB.gif|300px]]
|-
|-
|style="background:#cfcfcf"|{{AttackType|type=Typeless}}
|Neutral attack 2|| ||[[File:Wario-ManJab2SSBB.gif|300px]]
|style="background:#ff7f7f"|{{AttackType|type=Head}}
|style="background:#df9f7f"|{{AttackType|type=Body}}
|style="background:#dfaf7f"|{{AttackType|type=Butt}}
|style="background:#ffff7f"|{{AttackType|type=Hand}}
|style="background:#ffbf7f"|{{AttackType|type=Foot}}
|style="background:#ff7fff"|{{AttackType|type=Throwing}}
|style="background:#ffdfbf"|{{AttackType|type=Weapon}}
|style="background:#dfbf7f"|{{AttackType|type=Explosive}}
|style="background:#bfff7f"|{{AttackType|type=Spin}}
|style="background:#7fffbf"|{{AttackType|type=Bite}}
|style="background:#d7d7bf"|{{AttackType|effect=Normal}}
|style="background:#efefef"|{{AttackType|effect=Slash}}
|style="background:#bfbf7f"|{{AttackType|effect=Slip}}
|-
|-
|style="background:#9f9f9f"|Typeless
|Forward tilt|| ||[[File:Wario-ManFTiltSSBB.gif|300px]]
|style="background:#ff0000"|Head
|style="background:#bf3f00"|Body
|style="background:#bf5f00"|Butt
|style="background:#ffff00"|Hand
|style="background:#ff7f00"|Foot
|style="background:#ff00ff"|Throwing
|style="background:#ffbf7f"|Weapon
|style="background:#bf7f00"|Explosive
|style="background:#7fff00"|Spin
|style="background:#00ff7f"|Bite
|style="background:#afaf7f"|Normal
|style="background:#dfdfdf"|Slash
|style="background:#7f7f00"|Slip
|}
 
{|class="wikitable" style="margin:1em auto 1em auto; text-align:center"
|-
|-
!colspan="7"|Wario's Hitboxes
|Forward tilt (angled up)|| ||[[File:Wario-ManFTiltUpSSBB.gif|300px]]
|-
|-
|Neutral<br>(Double Punch)||colspan="3"|[[Image:WarioSSBBNeutral(hit1).png|200px]]<br>Hit 1||colspan="3"|[[Image:WarioSSBBNeutral(hit2).png|200px]]<br>Hit 2
|Forward tilt (angled down)|| ||[[File:Wario-ManFTiltDownSSBB.gif|300px]]
|-
|-
|F-Tilt<br>(Power Punch)||colspan="2"|[[Image:WarioSSBBFTilt(angup).png|200px]]<br>Angled Up||colspan="2"|[[Image:WarioSSBBFTilt(angside).png|200px]]<br>Angled Side||colspan="2"|[[Image:WarioSSBBFTilt(angdown).png|200px]]<br>Angled Down
|Up tilt|| ||[[File:Wario-ManUTiltSSBB.gif|300px]]
|-
|-
|U-Tilt<br>(Palm Push)||colspan="3"|[[Image:WarioSSBBUTilt(clean).png|200px]]<br>Clean||colspan="3"|[[Image:WarioSSBBUTilt(late).png|200px]]<br>Late
|Down tilt|| ||[[File:Wario-ManDTiltSSBB.gif|300px]]
|-
|-
|D-Tilt<br>(Ground Stroke)||colspan="6"|[[Image:WarioSSBBDTilt.png|200px]]
|Dash attack|| ||[[File:Wario-ManDashAttackSSBB.gif|300px]]
|-
|-
|Dash<br>(Dive)||colspan="2"|[[Image:WarioSSBBDash(clean).png|200px]]<br>Clean||colspan="2"|[[Image:WarioSSBBDash(lategrounded).png|200px]]<br>Late (on grounded opponents)||colspan="2"|[[Image:WarioSSBBDash(lateaerial).png|200px]]<br>Late (on aerial opponents)
|Forward smash|| ||[[File:Wario-ManFSmashSSBB.gif|300px]]
|-
|-
|rowspan="2"|U-Smash<br>(Head Swirl)||colspan="2"|[[Image:WarioSSBBUSmash(hit1).png|200px]]<br>Hit 1||colspan="2"|[[Image:WarioSSBBUSmash(hit2).png|200px]]<br>Hit 2||colspan="2"|[[Image:WarioSSBBUSmash(hit3).png|200px]]<br>Hit 3
|Up smash|| ||[[File:Wario-ManUSmashSSBB.gif|300px]]
|-
|-
|colspan="2"|[[Image:WarioSSBBUSmash(hit4).png|200px]]<br>Hit 4||colspan="2"|[[Image:WarioSSBBUSmash(hit5).png|200px]]<br>Hit 5||colspan="2"|[[Image:WarioSSBBUSmash(hit6).png|200px]]<br>Hit 6
|Down smash|| ||[[File:Wario-ManDSmashSSBB.gif|300px]]
|-
|-
|rowspan="2"|D-Smash<br>(Body Spin)||colspan="2"|[[Image:WarioSSBBDSmash(cleanstart).png|200px]]<br>Clean||colspan="2"|[[Image:WarioSSBBDSmash(cleanend).png|200px]]<br>Clean||colspan="2"|[[Image:WarioSSBBDSmash(midstart).png|200px]]<br>Mid
|Neutral aerial|| ||[[File:Wario-ManNAirSSBB.gif|300px]]
|-
|-
|colspan="2"|[[Image:WarioSSBBDSmash(midend).png|200px]]<br>Mid||colspan="2"|[[Image:WarioSSBBDSmash(latestart).png|200px]]<br>Late||colspan="2"|[[Image:WarioSSBBDSmash(lateend).png|200px]]<br>Late
|Forward aerial|| ||[[File:Wario-ManFAirSSBB.gif|300px]]
|-
|-
|F-Smash<br>(Shoulder Ram)||colspan="2"|[[Image:WarioSSBBFSmash(start).png|200px]]||colspan="2"|[[Image:WarioSSBBFSmash(mid).png|200px]]||colspan="2"|[[Image:WarioSSBBFSmash(end).png|200px]]
|Back aerial|| ||[[File:Wario-ManBAirSSBB.gif|300px]]
|-
|-
|Nair<br>(Wonky Spin)||colspan="3"|[[Image:WarioSSBBNair(clean).png|200px]]<br>Clean||colspan="3"|[[Image:WarioSSBBNair(late).png|200px]]<br>Late
|Up aerial|| ||[[File:Wario-ManUAirSSBB.gif|300px]]
|-
|-
|Fair<br>(Drop Kick)||colspan="3"|[[Image:WarioSSBBFair(clean).png|200px]]<br>Clean||colspan="3"|[[Image:WarioSSBBFair(late).png|200px]]<br>Late
|Down aerial|| ||[[File:Wario-ManDAirSSBB.gif|300px]]
|-
|-
|Bair<br>(Head Poke)||colspan="3"|[[Image:WarioSSBBBair(start).png|200px]]||colspan="3"|[[Image:WarioSSBBBair(late).png|200px]]
|Down aerial (landing)|| ||[[File:Wario-ManDAirLandingSSBB.gif|300px]]
|-
|-
|Uair<br>(High Clap)||colspan="6"|[[Image:WarioSSBBUair.png|200px]]
|Neutral special|| ||[[File:Wario-ManChompSSBB.gif|300px]]
|-
|-
|Dair<br>(Body Drill)||colspan="3"|[[Image:WarioSSBBDair(hits1-6).png|200px]]<br>Hits 1-6||colspan="3"|[[Image:WarioSSBBDair(hit7).png|200px]]<br>Hit 7
|Side special|| ||
|-
|-
|Shield||colspan="6"|[[Image:WarioSSBBShield.png|200px]]
|Up special|| ||[[File:Wario-ManCorkscrewGSSBB.gif|300px]]
|-
|-
|Grab||colspan="2"|[[Image:WarioSSBBGrab(standing).png|200px]]<br>Standing||colspan="2"|[[Image:WarioSSBBGrab(running).png|200px]]<br>Running||colspan="2"|[[Image:WarioSSBBGrab(pivot).png|200px]]<br>Pivot
|Up special|| ||[[File:Wario-ManCorkscrewASSBB.gif|300px]]
|-
|-
|Pummel<br>(Poke)||colspan="6"|[[Image:WarioSSBBPummel.png|200px]]
|Down special|| ||[[File:Wario-ManWarioWaft1SSBB.gif|300px]]
|-
|-
|F-Throw<br>(Swing-A-Ding)||colspan="6"|[[Image:WarioSSBBFThrow.png|200px]]
|Down special|| ||[[File:Wario-ManWarioWaft2SSBB.gif|300px]]
|-
|-
|B-Throw<br>(Butt Blast)||colspan="3"|[[Image:WarioSSBBBThrow(hit1).png|200px]]<br>Hit 1||colspan="3"|[[Image:WarioSSBBBThrow(throw).png|200px]]<br>Throw
|Down special|| ||[[File:Wario-ManWarioWaft3SSBB.gif|300px]]
|-
|-
|U-Throw<br>(Vertical Chuck)||colspan="3"|[[Image:WarioSSBBUThrow(hit1).png|200px]]<br>Hit 1||colspan="3"|[[Image:WarioSSBBUThrow(throw).png|200px]]<br>Throw
|Down special|| ||[[File:Wario-ManWarioWaft4SSBB.gif|300px]]
|-
|-
|D-Throw<br>(Gravity Pound)||colspan="3"|[[Image:WarioSSBBDThrow(hit1).png|200px]]<br>Hit 1||colspan="3"|[[Image:WarioSSBBDThrow(throw).png|200px]]<br>Throw
|Grab|| ||[[File:Wario-ManGrabSSBB.gif|300px]]
|-
|-
|Floor (back)<br>(Spin Punch)||colspan="3"|[[Image:WarioSSBBFloor(backhit1).png|200px]]<br>Hit 1||colspan="3"|[[Image:WarioSSBBFloor(backhit2).png|200px]]<br>Hit 2
|Dash grab|| ||[[File:Wario-ManDashGrabSSBB.gif|300px]]
|-
|-
|Floor (front)<br>(Double Poke)||colspan="3"|[[Image:WarioSSBBFloor(fronthit1).png|200px]]<br>Hit 1||colspan="3"|[[Image:WarioSSBBFloor(fronthit2).png|200px]]<br>Hit 2
|Pivot grab|| ||[[File:Wario-ManPivotGrabSSBB.gif|300px]]
|-
|-
|Floor (trip)<br>(Clap Kick)||colspan="3"|[[Image:WarioSSBBFloor(triphit1).png|200px]]<br>Hit 1||colspan="3"|[[Image:WarioSSBBFloor(triphit2).png|200px]]<br>Hit 2
|Pummel|| ||[[File:Wario-ManPummelSSBB.gif|300px]]
|-
|-
|Edge (fast)<br>(Thrust Punch)||colspan="6"|[[Image:WarioSSBBEdge(fast).png|200px]]
|Forward Throw|| ||[[File:Wario-ManFThrowSSBB.gif|300px]]
|-
|-
|Edge (slow)<br>(Climb Poke)||colspan="6"|[[Image:WarioSSBBEdge(slow).png|200px]]
|Back Throw|| ||[[File:Wario-ManBThrowSSBB.gif|300px]]
|-
|-
|rowspan="2"|[[Neutral special]]<br>(Chomp)||colspan="2"|[[Image:WarioSSBBNS(grab).png|200px]]<br>Grab||colspan="2"|[[Image:WarioSSBBNS(itemzone).png|200px]]<br>[[Item swallowing]] zone||colspan="2"|[[Image:WarioSSBBNS(chomp).png|200px]]<br>Chomp (SSE)
|Up Throw|| ||[[File:Wario-ManUThrowSSBB.gif|300px]]
|-
|-
|colspan="2"|[[Image:WarioSSBBNS(bite).png|200px]]<br>Bite||colspan="2"|[[Image:WarioSSBBNS(throw).png|200px]]<br>Release||colspan="2"|[[Image:WarioSSBBNS(explosion).png|200px]]<br>Explosion
|Down Throw|| ||[[File:Wario-ManDThrowSSBB.gif|300px]]
|-
|-
|rowspan="2"|[[Side special]]<br>(Wario Bike)||colspan="3"|[[Image:WarioSSBBSS(drive).png|200px]]<br>Drive||colspan="3"|[[Image:WarioSSBBSS(wheelie).png|200px]]<br>Wheelie
|Floor attack (front)|| ||[[File:Wario-ManFloorAttackDownSSBB.gif|300px]]
|-
|-
|colspan="3"|[[Image:WarioSSBBSS(thrown).png|200px]]<br>Throw||colspan="3"|[[Image:WarioSSBBSS(tires).png|200px]]<br>Tires
|Floor attack (back)|| ||[[File:Wario-ManFloorAttackUpSSBB.gif|300px]]
|-
|-
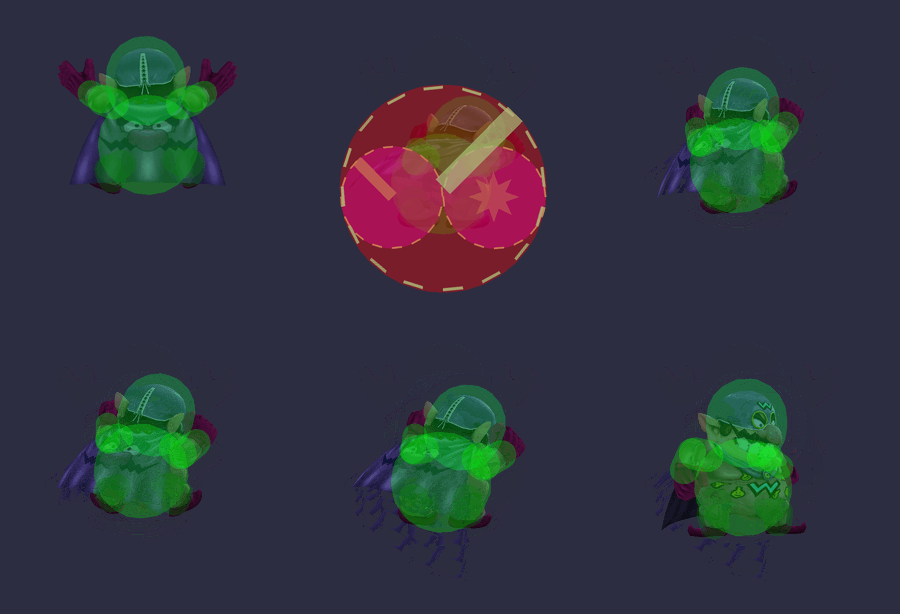
|[[Up special]]<br>(Corkscrew)||colspan="2"|[[Image:WarioSSBBUS(hit1).png|200px]]<br>Hit 1||colspan="2"|[[Image:WarioSSBBUS(hits2-11).png|200px]]<br>Hits 2-11||colspan="2"|[[Image:WarioSSBBUS(hit12).png|200px]]<br>Hit 12
|Trip attack|| ||[[File:Wario-ManTripAttackSSBB.gif|300px]]
|-
|-
|rowspan="2"|[[Down special]]<br>(Wario Waft)||colspan="2"|[[Image:WarioSSBBDS(uncharged).png|200px]]<br>Uncharged||colspan="2"|[[Image:WarioSSBBDS(partlycharged).png|200px]]<br>Partly charged||colspan="2"|[[Image:WarioSSBBDS(mostlycharged).png|200px]]<br>Mostly charged
|Edge attack (fast)|| ||[[File:Wario-ManEdgeAttackFastSSBB.gif|300px]]
|-
|-
|colspan="3"|[[Image:WarioSSBBDS(fullychargedclean).png|200px]]<br>Fully charged (clean)||colspan="3"|[[Image:WarioSSBBDS(fullychargedlate).png|200px]]<br>Fully charged (late)
|Edge attack (slow)|| ||[[File:Wario-ManEdgeAttackSlowSSBB.gif|300px]]
|}
|}
===Notes===
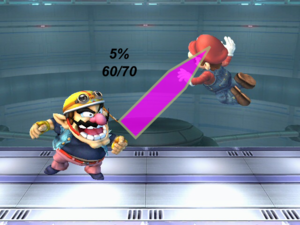
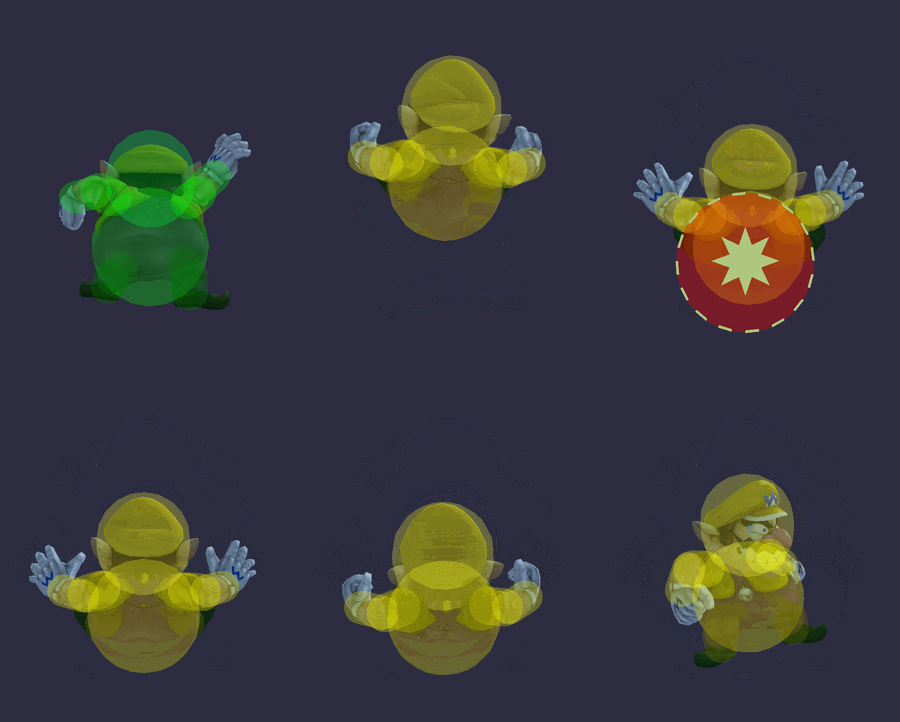
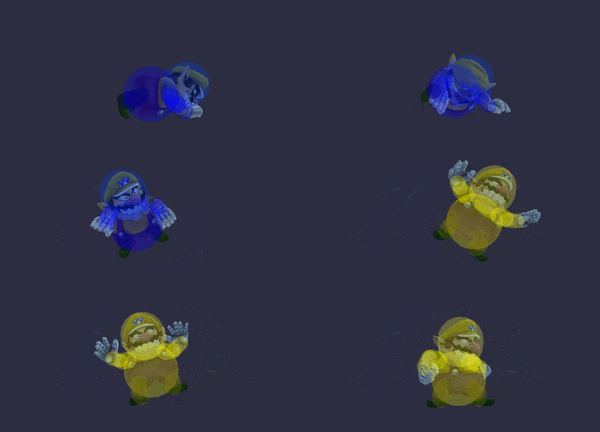
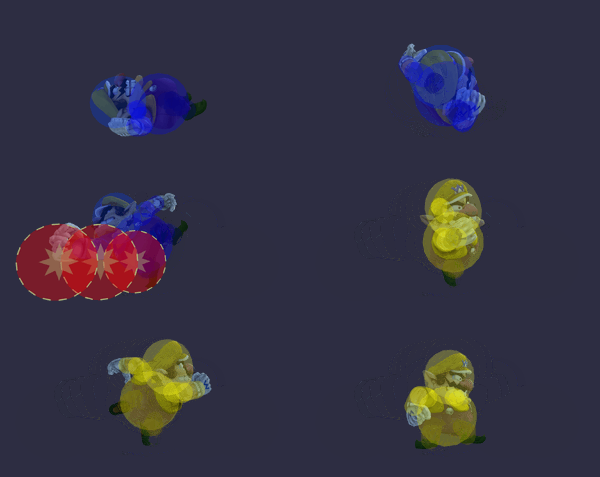
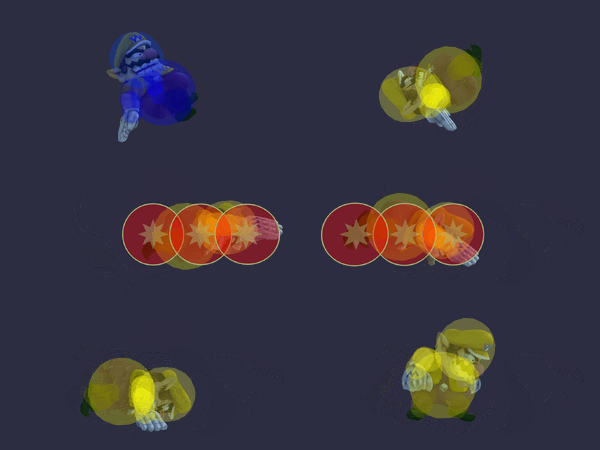
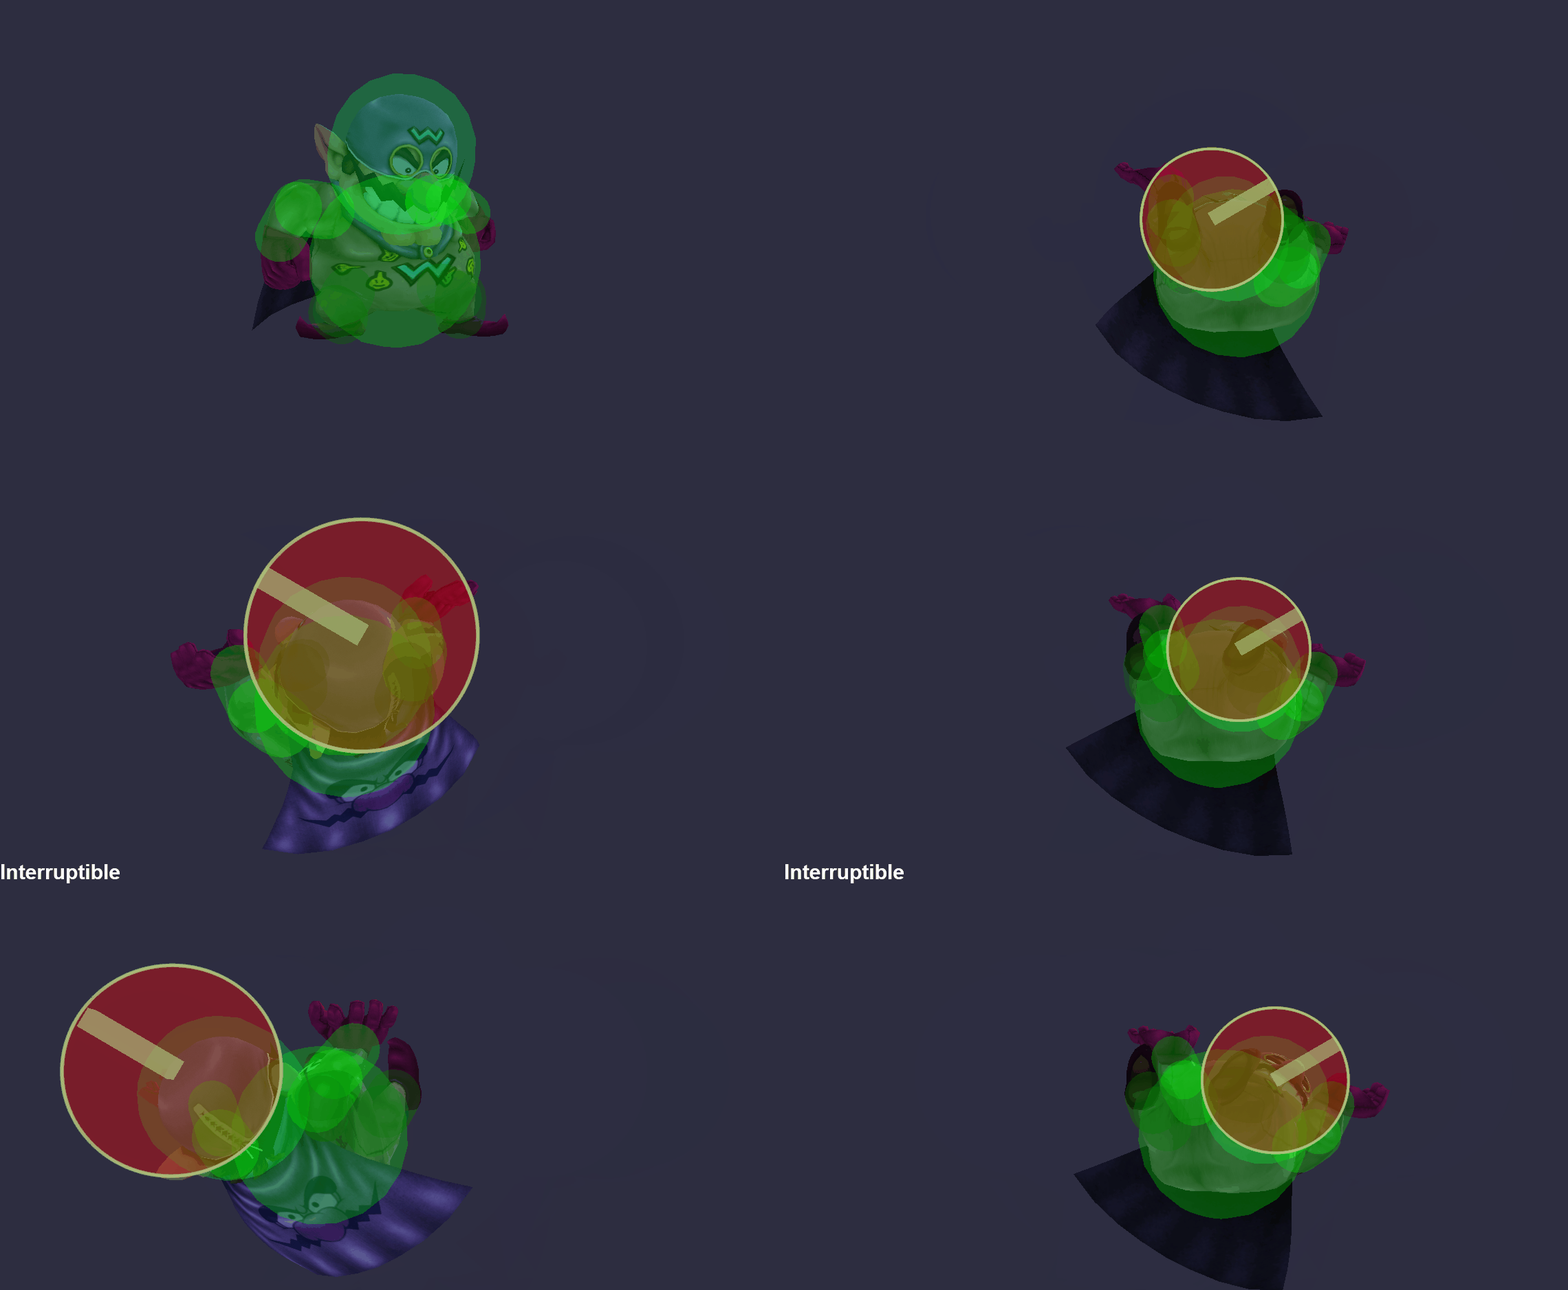
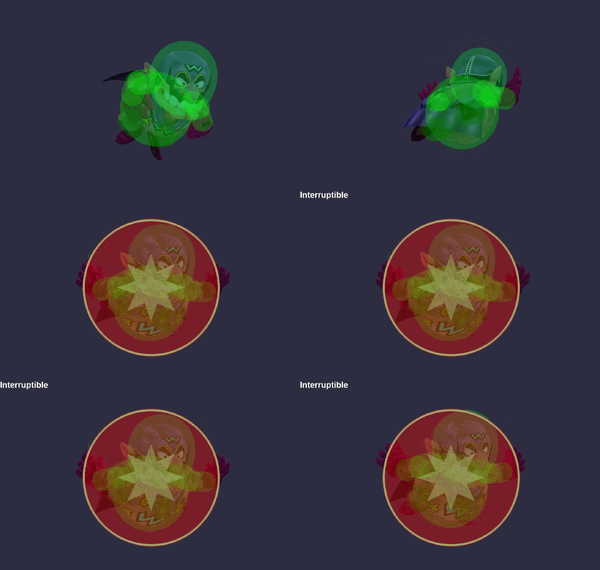
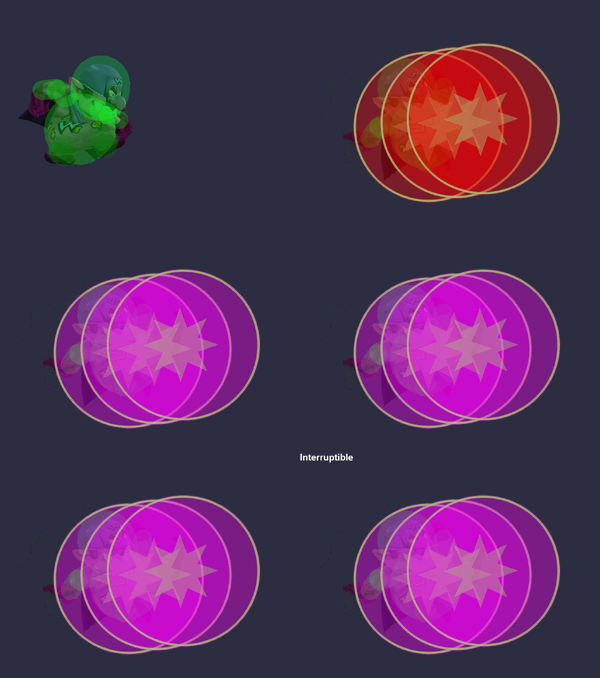
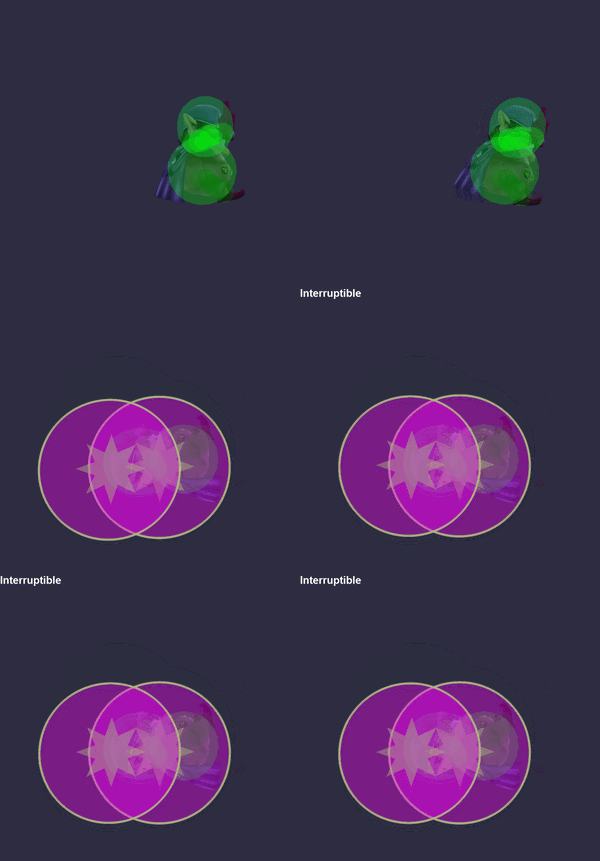
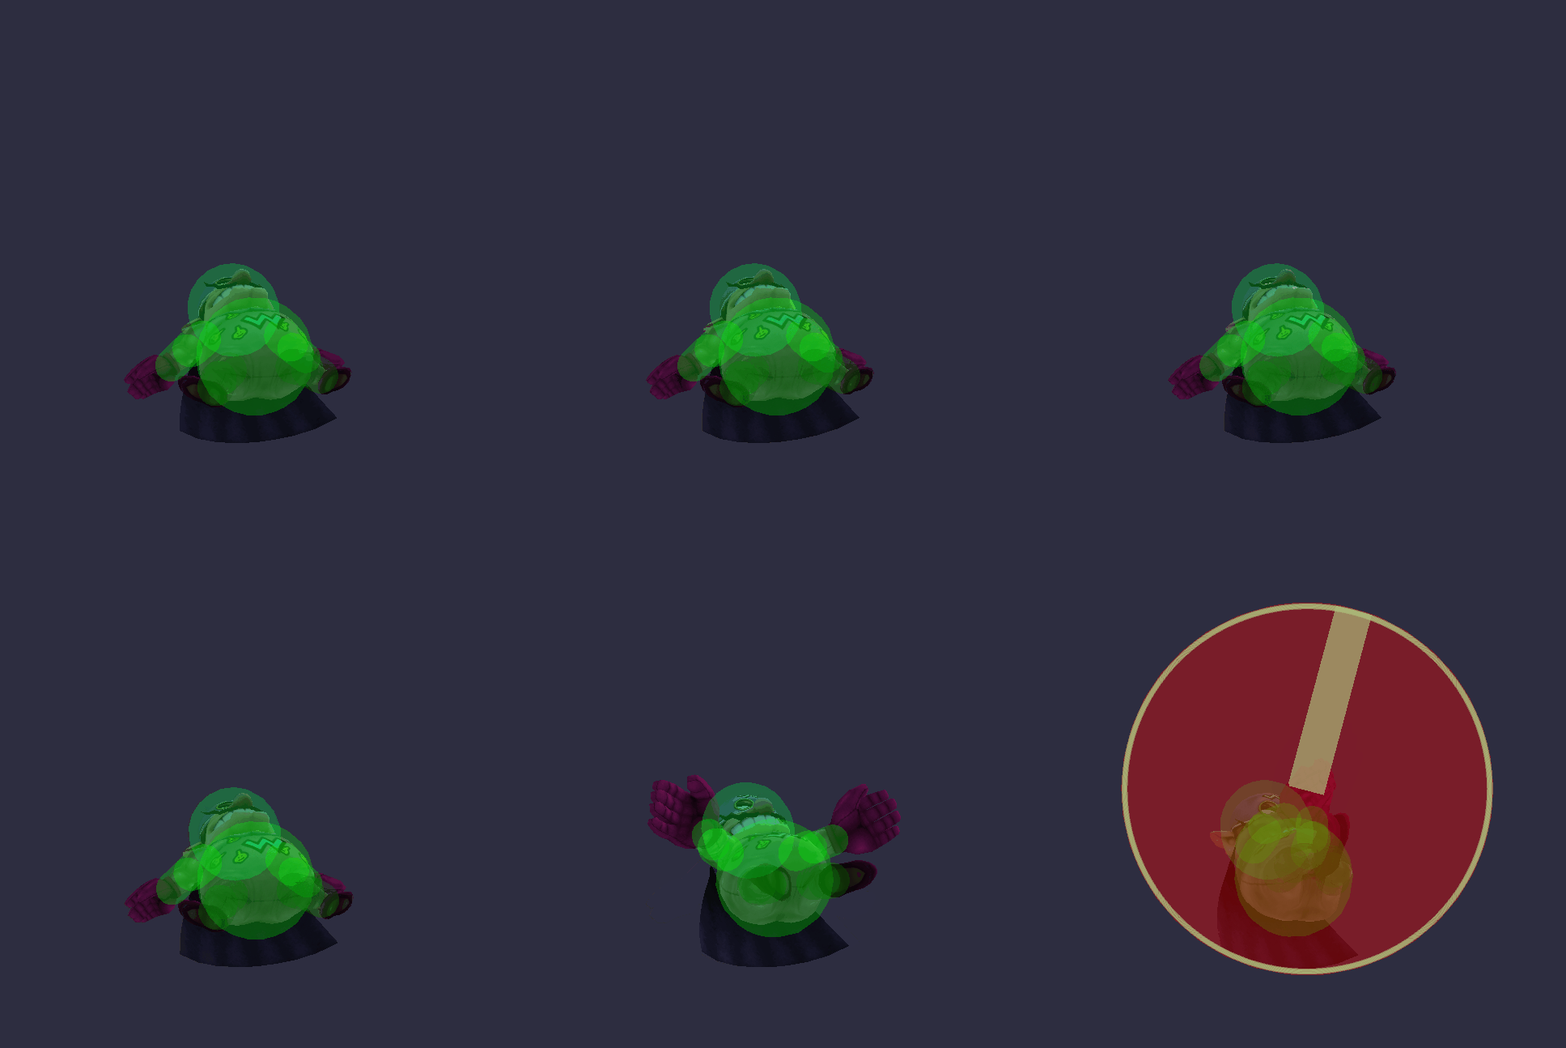
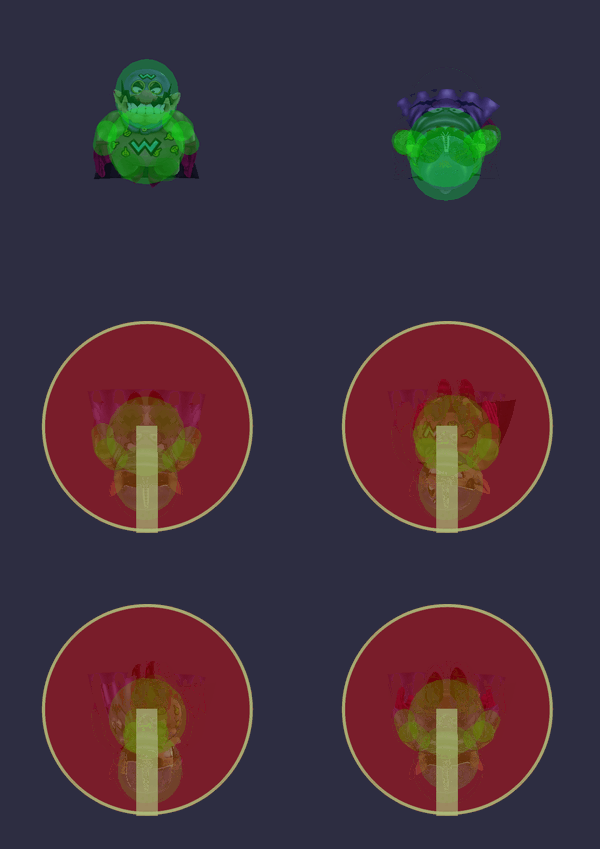
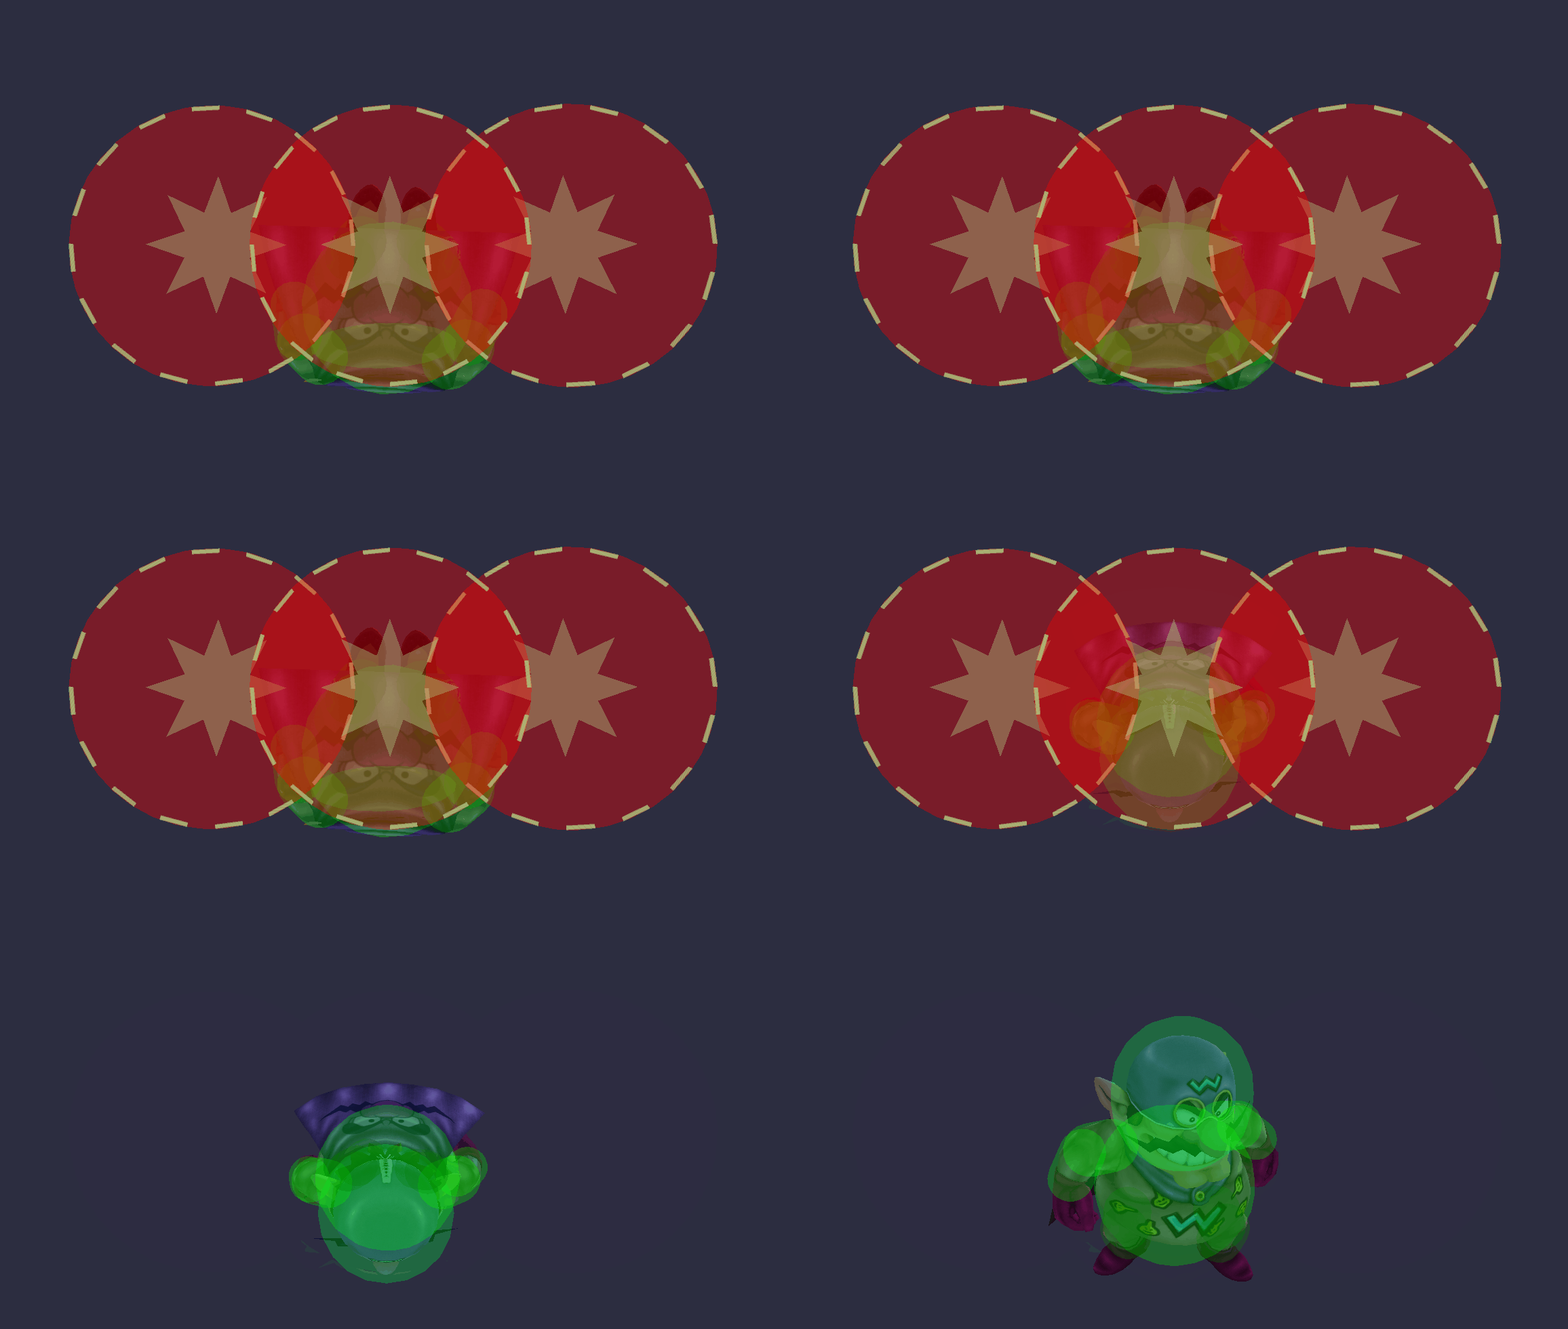
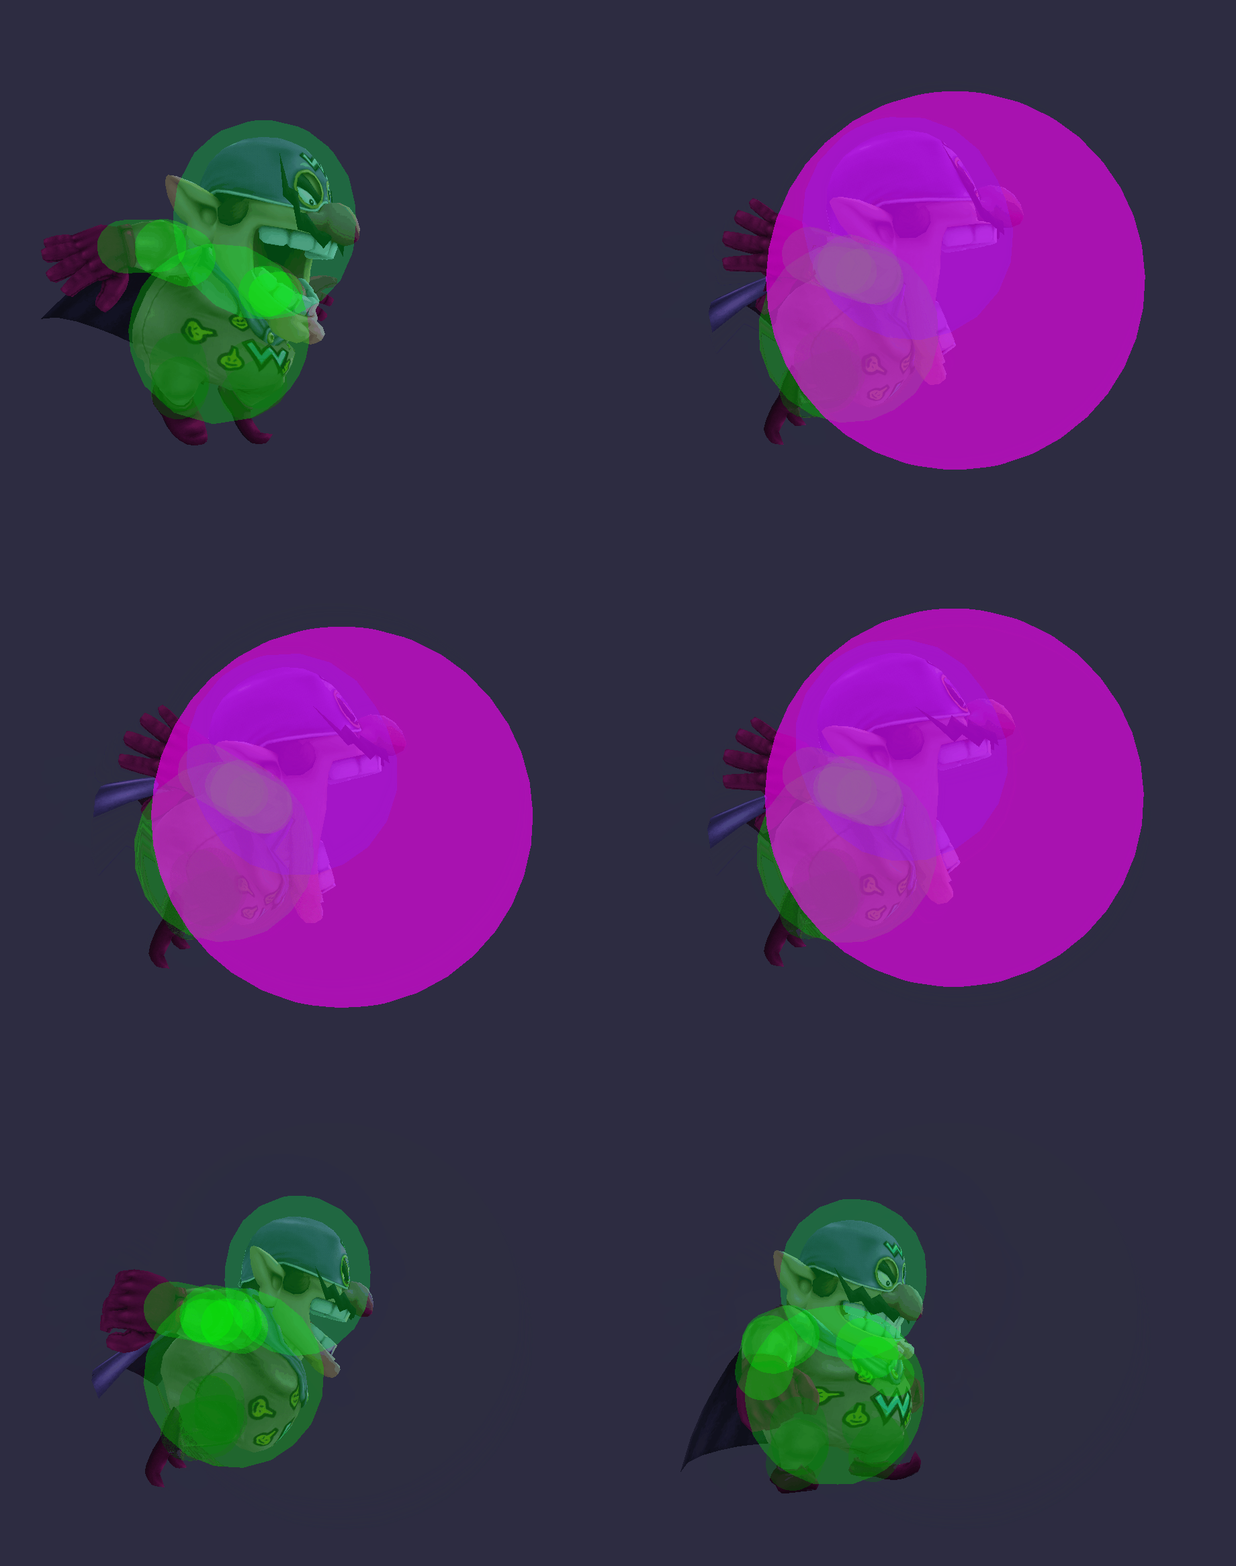
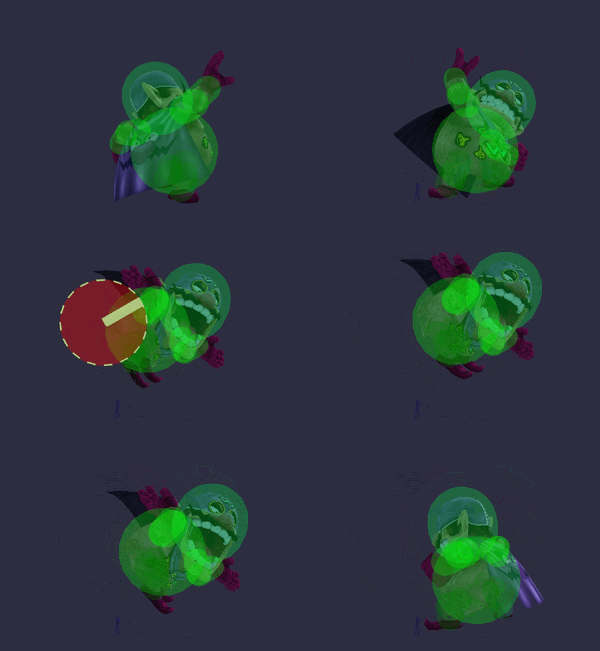
*The angle of a hitbox is displayed as a line. Note that all angles are based on what side of the attacker the target is on - if the target is on the opposite side of the attacker, they will fly in the opposite direction (but at the same angle). Most presented angles assume the target is on the right of the attacker, unless the attack is obviously on the attacker's left.
**An angle indicated with a star (*) is the [[Sakurai angle]].
**An angle indicated with a dash (-) is the [[autolink angle]].
*A hitbox that cannot clang is denoted by a dashed border.
*The colour of a hitbox is its type; the colour of its angle indicator and border is its effect.
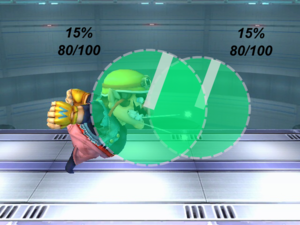
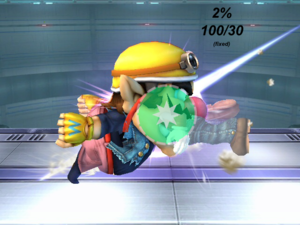
*The numbers represent each hitbox's damage and knockback (base knockback/knockback scaling), as well as whether the knockback is fixed.


[[Category:Hitbox repositories]]
[[Category:Hitbox repositories]]
[[Category:Wario (SSBB)]]
[[Category:Wario-Man (SSBB)]]
[[Category:Hitboxes (SSBB)]]

Latest revision as of 21:40, November 30, 2024

An icon for denoting incomplete things.

Hitboxes[edit]

Normal moveset[edit]

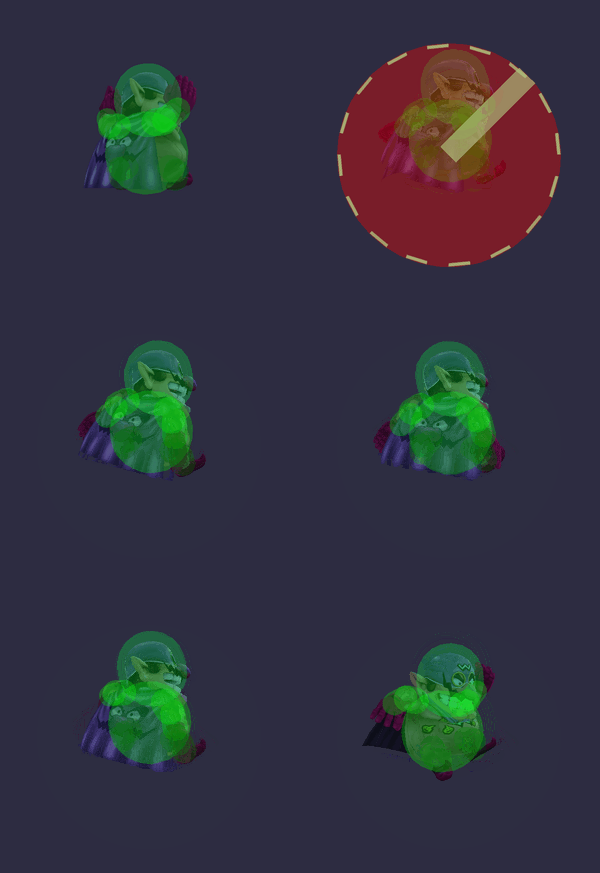
Move Name Hitbox
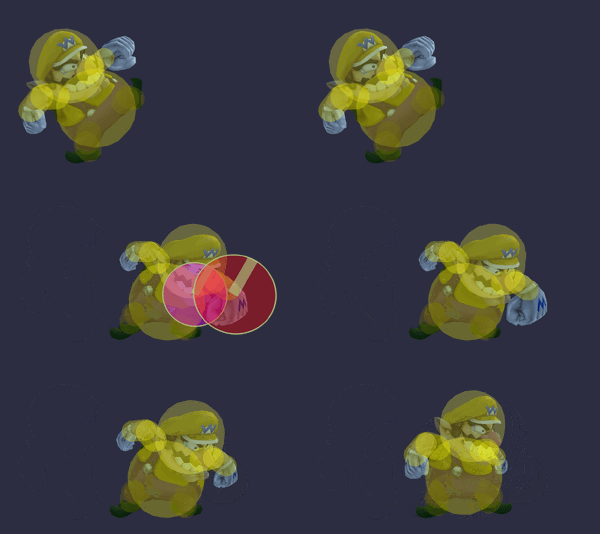
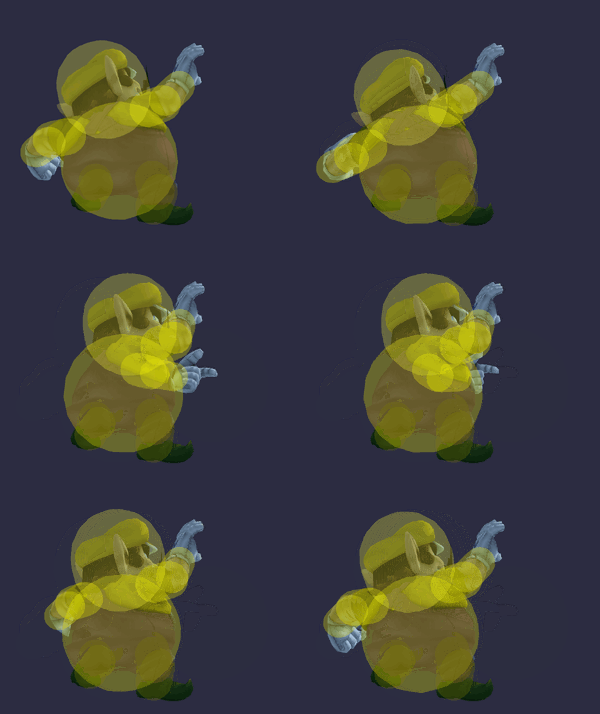
Neutral attack 1 Fist WarioJab1SSBB.gif
Neutral attack 2 Jaw Smash WarioJab2SSBB.gif
Forward tilt Wind-Up Punch WarioFTiltSSBB.gif
Forward tilt (angled up) Wind-Up Punch WarioFTiltUpSSBB.gif
Forward tilt (angled down) Wind-Up Punch WarioFTiltDownSSBB.gif
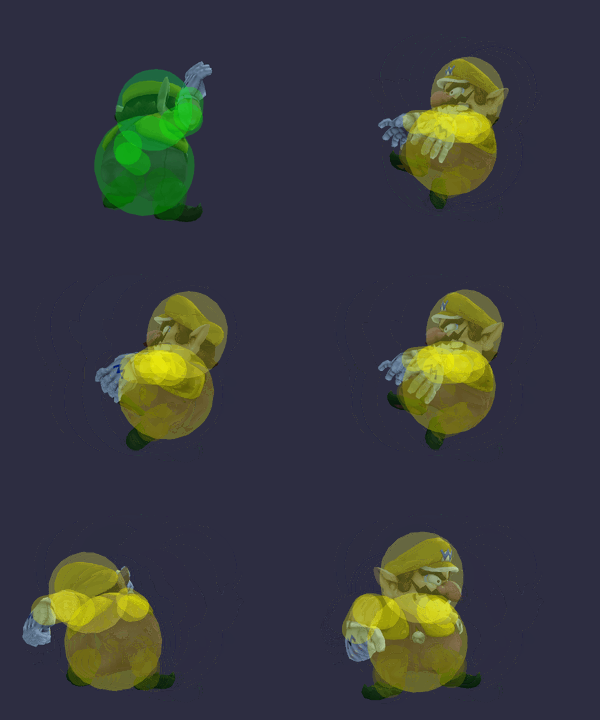
Up tilt Banzai Hit WarioUTiltSSBB.gif
Down tilt Cockroach Crusher WarioDTiltSSBB.gif
Dash attack Head Sliding WarioDashAttackSSBB.gif
Forward smash Shoulder Tackle WarioFSmashSSBB.gif
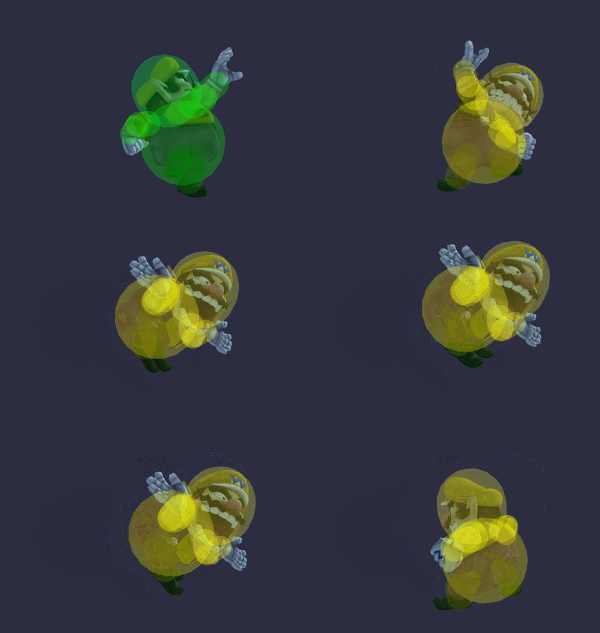
Up smash Wind-Up Headbutt WarioUSmashSSBB.gif
Down smash Wario Spin WarioDSmashSSBB.gif
Neutral aerial Overweight Body WarioNAirSSBB.gif
Forward aerial Pig's Foot Kick WarioFAirSSBB.gif
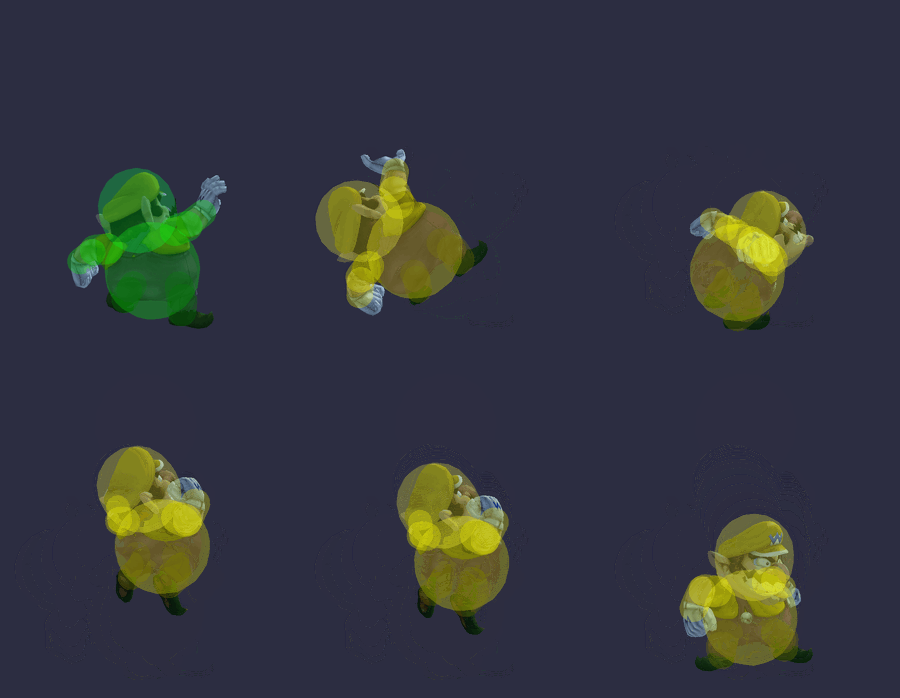
Back aerial Falling Headbutt WarioBAirSSBB.gif
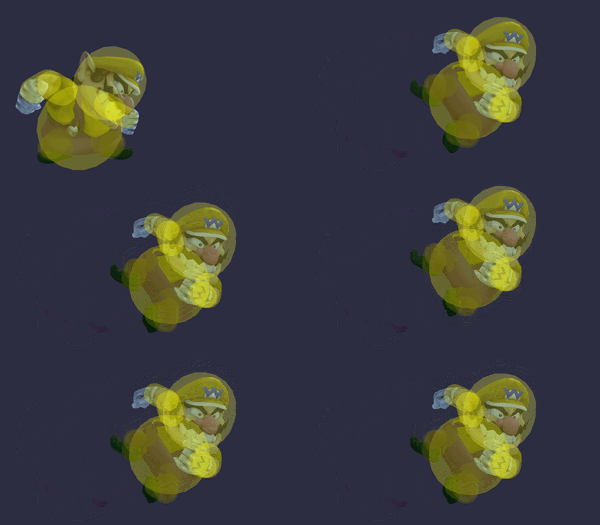
Up aerial Hand Slap WarioUAirSSBB.gif
Down aerial Upside-Down Headbutt WarioDAirSSBB.gif
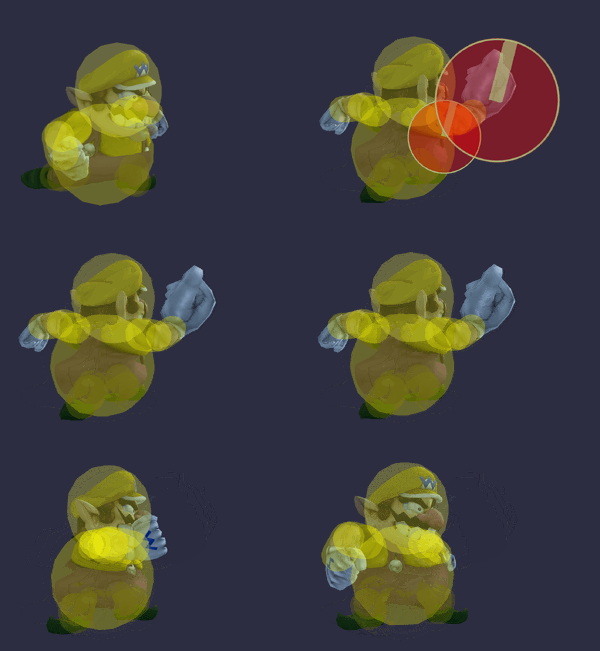
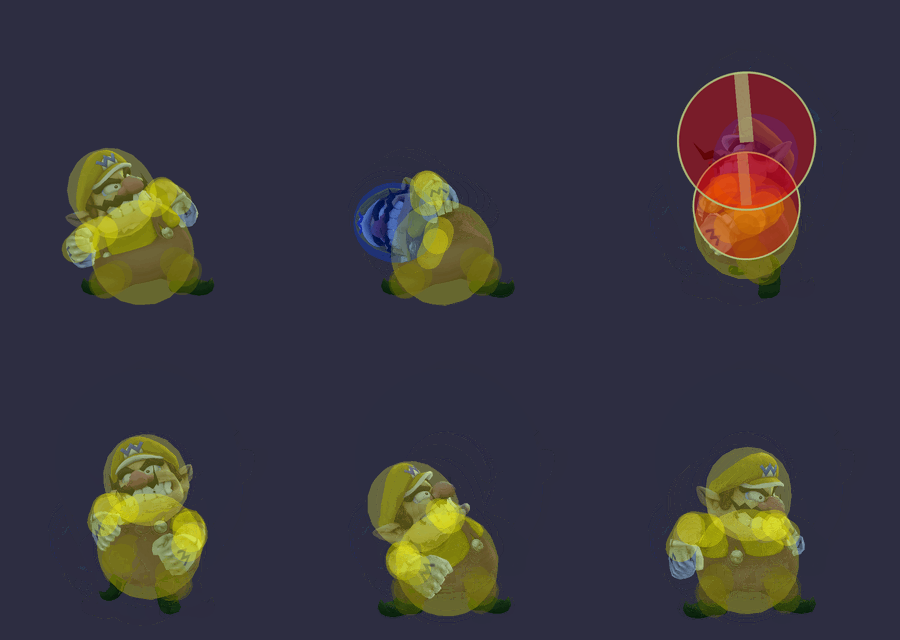
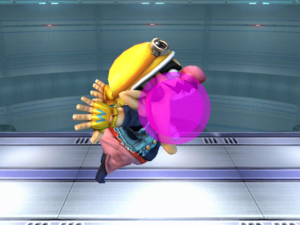
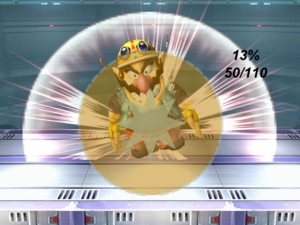
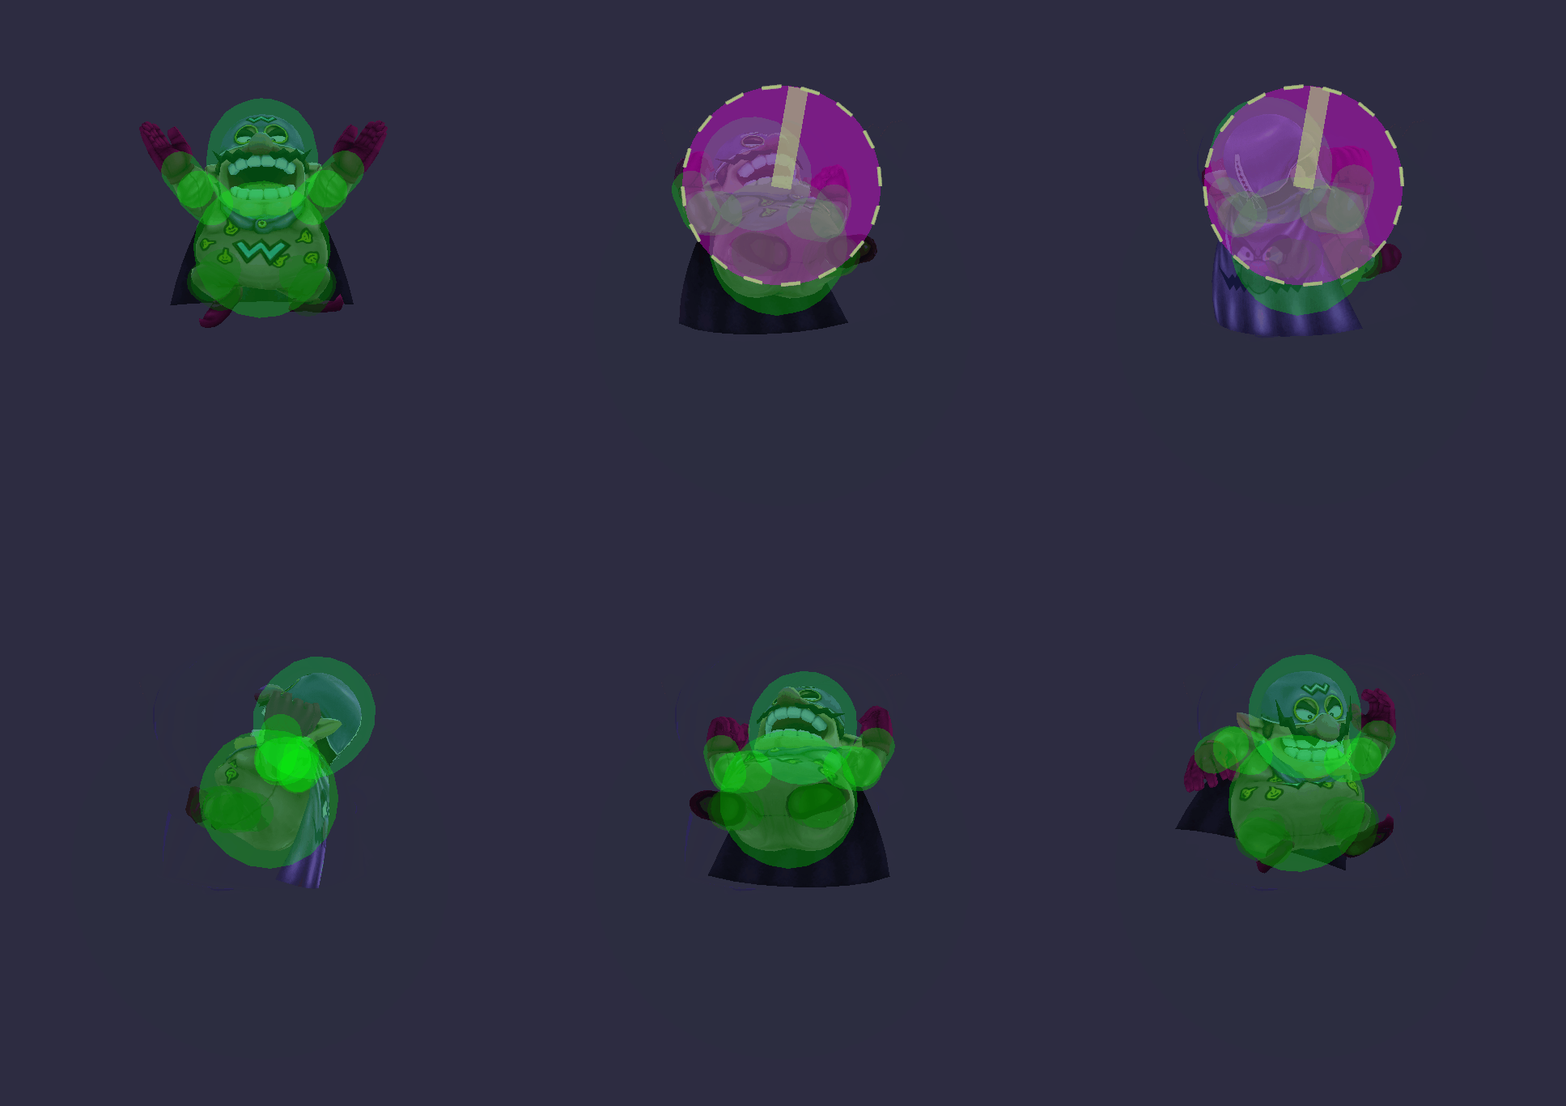
Neutral special Chomp WarioSSBBNS(grab).png
WarioSSBBNS(itemzone).png
WarioSSBBNS(chomp).png
WarioSSBBNS(bite).png
WarioSSBBNS(throw).png
WarioSSBBNS(explosion).png
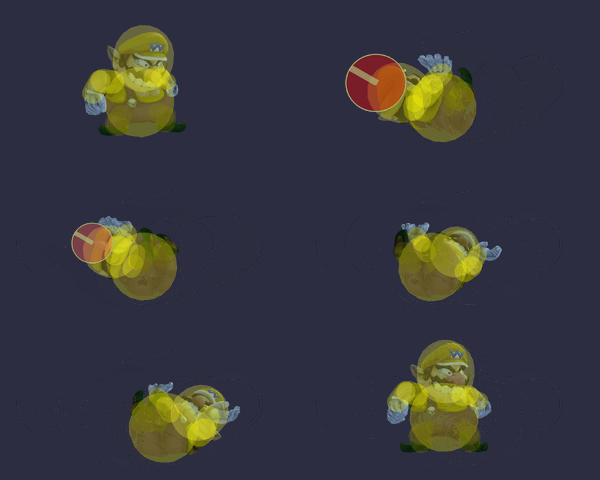
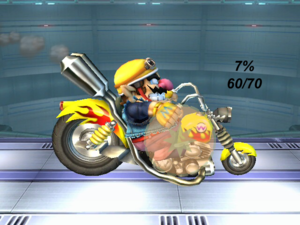
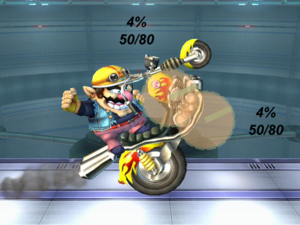
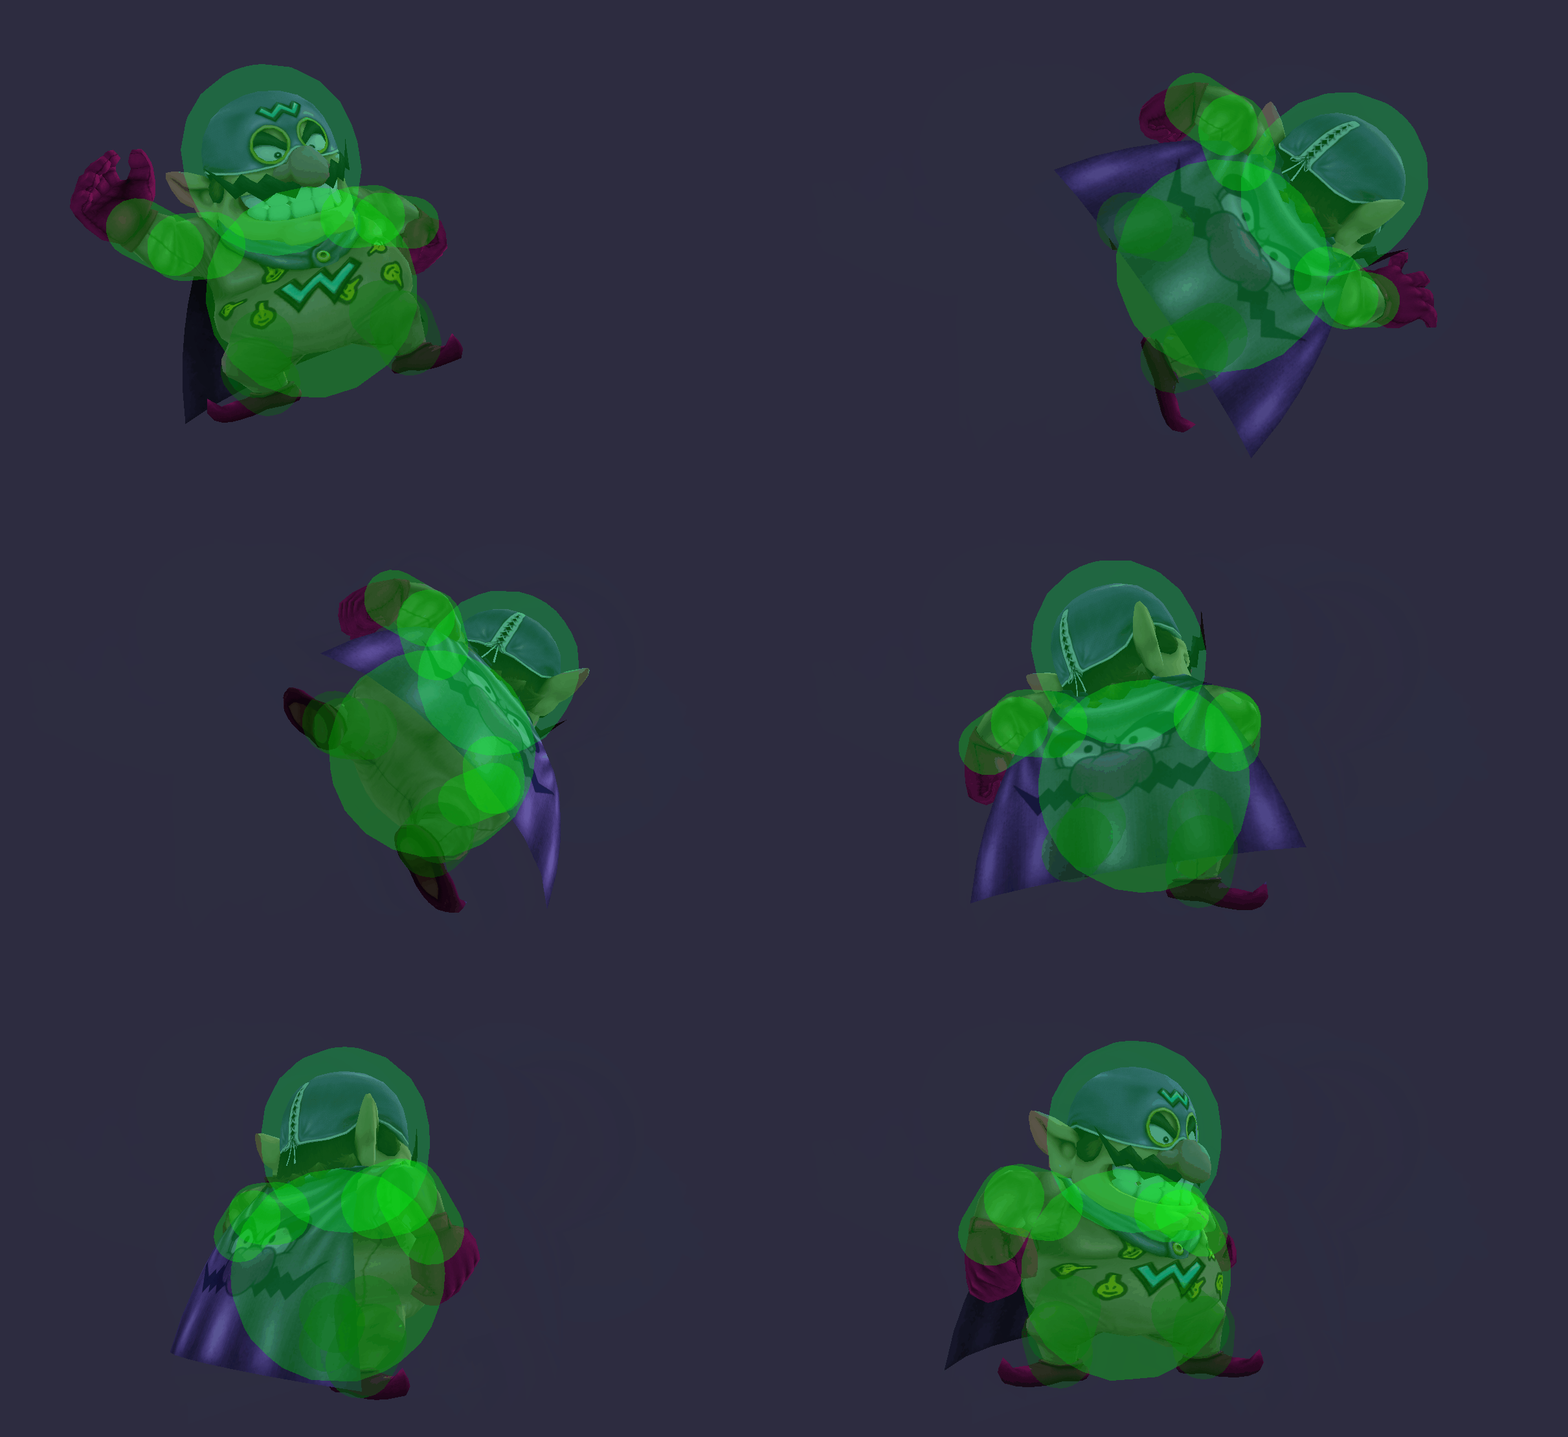
Side special Wario Bike WarioSSBBSS(drive).png
WarioSSBBSS(wheelie).png
WarioSSBBSS(thrown).png
WarioSSBBSS(tires).png
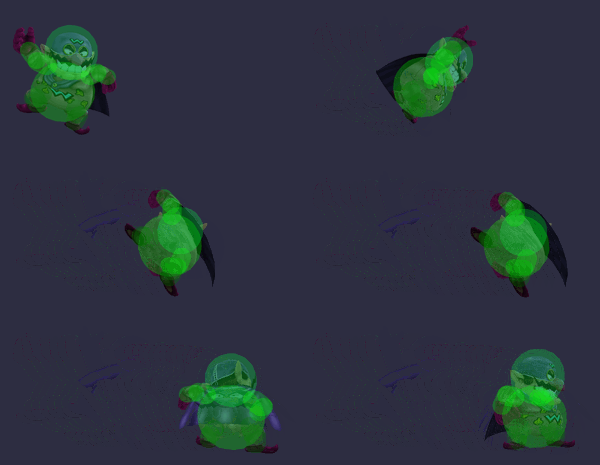
Up special Corkscrew WarioSSBBUS(hit1).png
WarioSSBBUS(hits2-11).png
WarioSSBBUS(hit12).png
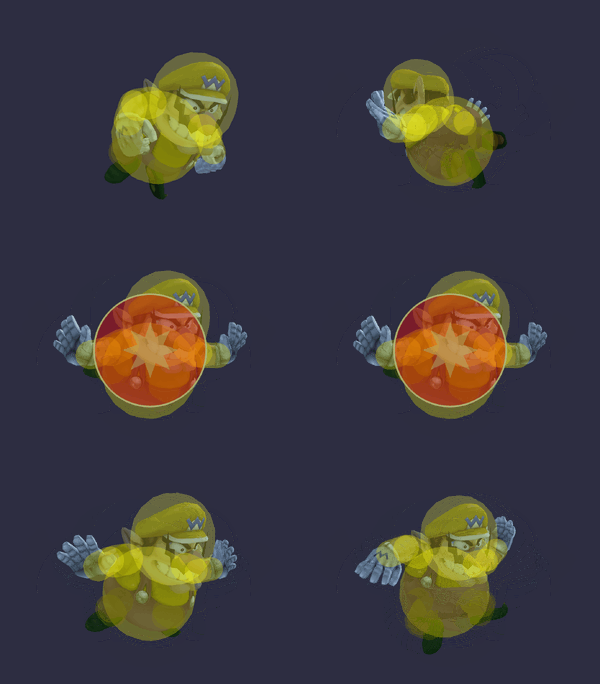
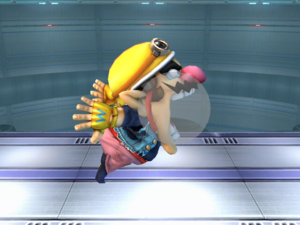
Down special Wario Waft (no charge) WarioWarioWaft1SSBB.gif
Down special Wario Waft (slight charge) WarioWarioWaft2SSBB.gif
Down special Wario Waft (moderate charge) WarioWarioWaft3SSBB.gif
Down special Wario Waft (max charge) WarioWarioWaft4SSBB.gif
Final Smash Wario-Man n/a
Grab WarioGrabSSBB.gif
Dash grab WarioDashGrabSSBB.gif
Pivot grab WarioPivotGrabSSBB.gif
Pummel Grab Poke-Poke WarioPummelSSBB.gif
Forward Throw Giant Swing WarioFThrowSSBB.gif
Back Throw Heavy Buttocks WarioBThrowSSBB.gif
Up Throw Power Lifting WarioUThrowSSBB.gif
Down Throw Butt Press WarioDThrowSSBB.gif
Floor attack (front) WarioFloorAttackDownSSBB.gif
Floor attack (back) WarioFloorAttackUpSSBB.gif
Floor attack (trip) WarioTripAttackSSBB.gif
Edge attack (fast) WarioEdgeAttackFastSSBB.gif
Edge attack (slow) WarioEdgeAttackSlowSSBB.gif

Wario-Man's moveset[edit]

All of Wario-Man's moves have the same name as their Wario counterparts.

Move Name Hitbox
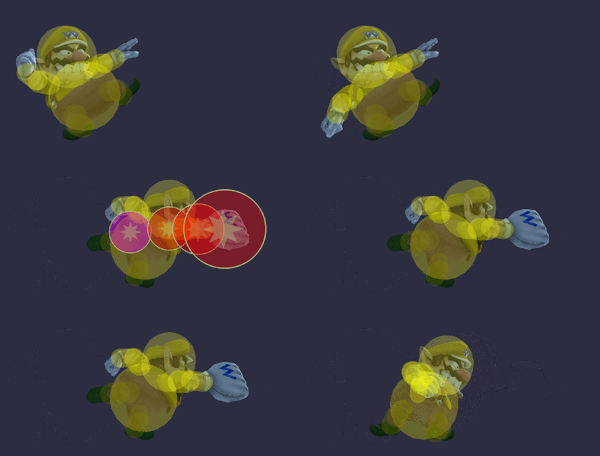
Neutral attack 1 Wario-ManJab1SSBB.gif
Neutral attack 2 Wario-ManJab2SSBB.gif
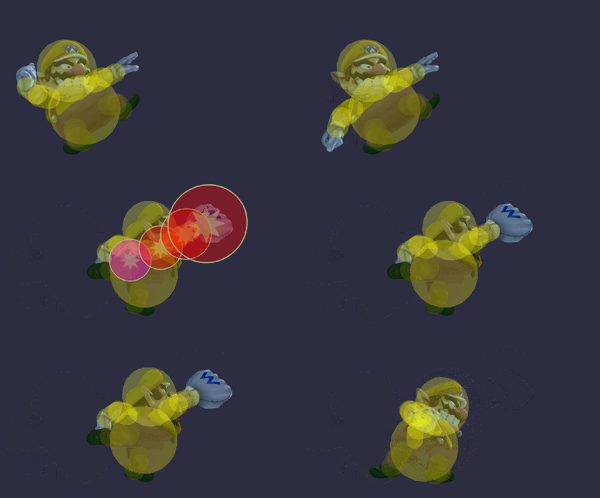
Forward tilt Wario-ManFTiltSSBB.gif
Forward tilt (angled up) Wario-ManFTiltUpSSBB.gif
Forward tilt (angled down) Wario-ManFTiltDownSSBB.gif
Up tilt Wario-ManUTiltSSBB.gif
Down tilt Wario-ManDTiltSSBB.gif
Dash attack Wario-ManDashAttackSSBB.gif
Forward smash Wario-ManFSmashSSBB.gif
Up smash Wario-ManUSmashSSBB.gif
Down smash Wario-ManDSmashSSBB.gif
Neutral aerial Wario-ManNAirSSBB.gif
Forward aerial Wario-ManFAirSSBB.gif
Back aerial Wario-ManBAirSSBB.gif
Up aerial Wario-ManUAirSSBB.gif
Down aerial Wario-ManDAirSSBB.gif
Down aerial (landing) Wario-ManDAirLandingSSBB.gif
Neutral special Wario-ManChompSSBB.gif
Side special
Up special Wario-ManCorkscrewGSSBB.gif
Up special Wario-ManCorkscrewASSBB.gif
Down special Wario-ManWarioWaft1SSBB.gif
Down special Wario-ManWarioWaft2SSBB.gif
Down special Wario-ManWarioWaft3SSBB.gif
Down special Wario-ManWarioWaft4SSBB.gif
Grab Wario-ManGrabSSBB.gif
Dash grab Wario-ManDashGrabSSBB.gif
Pivot grab Wario-ManPivotGrabSSBB.gif
Pummel Wario-ManPummelSSBB.gif
Forward Throw Wario-ManFThrowSSBB.gif
Back Throw Wario-ManBThrowSSBB.gif
Up Throw Wario-ManUThrowSSBB.gif
Down Throw Wario-ManDThrowSSBB.gif
Floor attack (front) Wario-ManFloorAttackDownSSBB.gif
Floor attack (back) Wario-ManFloorAttackUpSSBB.gif
Trip attack Wario-ManTripAttackSSBB.gif
Edge attack (fast) Wario-ManEdgeAttackFastSSBB.gif
Edge attack (slow) Wario-ManEdgeAttackSlowSSBB.gif