Falco (SSBB)/Down tilt: Difference between revisions
From SmashWiki, the Super Smash Bros. wiki
Jump to navigationJump to search
(New Page: {{ArticleIcons|ssbb=y}} ==Overview== {{competitive expertise}} ==Hitboxes== {{technical data}} ==Timing== {|class="wikitable" !Hitboxes |7-9 |- !Interruptible |28 |- !Animation length...) |
No edit summary |
||
| (2 intermediate revisions by 2 users not shown) | |||
| Line 1: | Line 1: | ||
{{ArticleIcons|ssbb=y}} | {{ArticleIcons|ssbb=y}} | ||
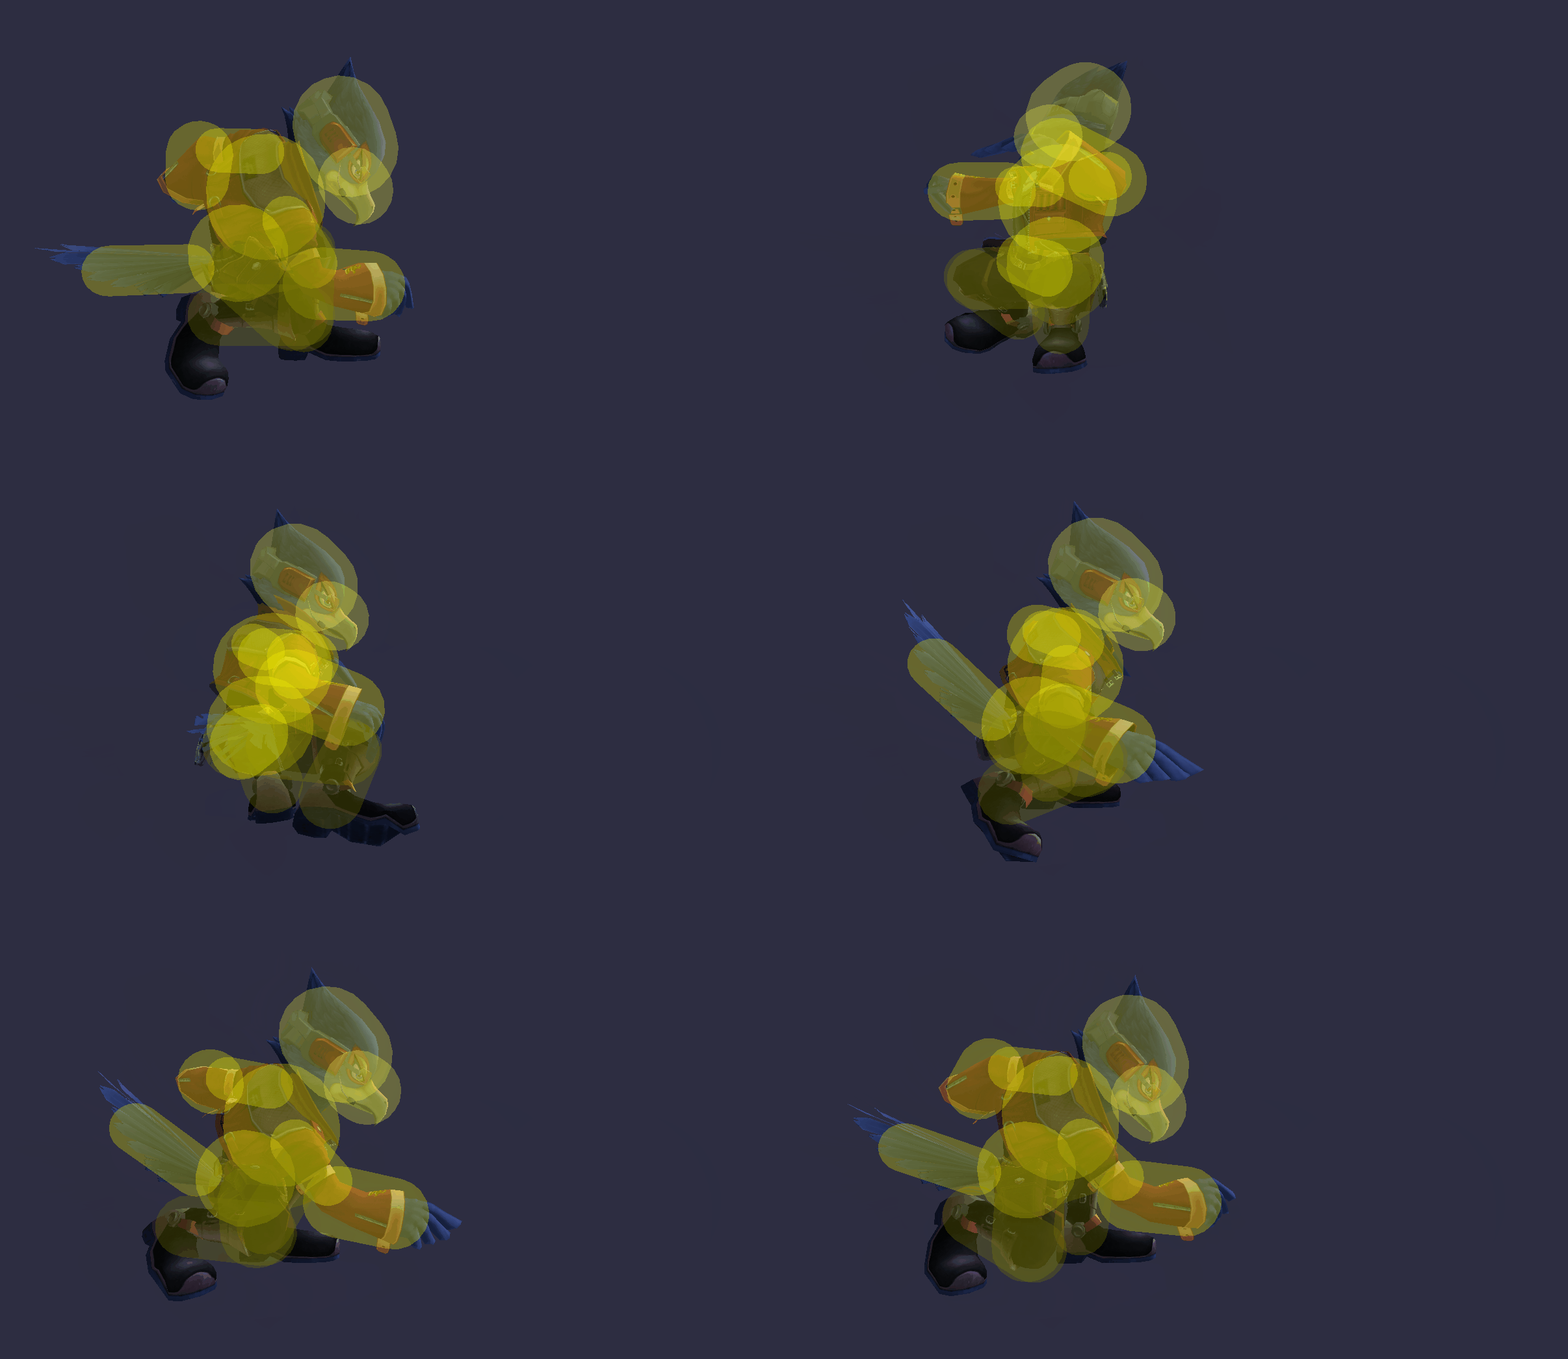
[[File:FalcoDTiltSSBB.gif|thumb|400px|Hitbox visualization showing Falco's down tilt.]] | |||
==Overview== | ==Overview== | ||
{{competitive expertise}} | {{competitive expertise}} | ||
A tail swipe. Deals 9% on the tip of the tail, and 12% up close. It comes out on frame 7 and is -16 on shield. While it can be effective for poking an opponent’s shield, due to its minuscule hitbox and weak knockback (though it can KO at very high percentages), in most scenarios, there are better options to choose from. | |||
==Hitboxes== | ==Hitboxes== | ||
{{ | {{BrawlHitboxTableHeader}} | ||
{{BrawlHitboxTableRow | |||
|bn=19 | |||
|id=0 | |||
|damage=12% | |||
|angle=75 | |||
|fkv=0 | |||
|ks=90 | |||
|sd=0 | |||
|bk=25 | |||
|r=144000 | |||
|xpos=0 | |||
|ypos=0 | |||
|zpos=0 | |||
|trip=24000 | |||
|ff=60000 | |||
|sdi=60000 | |||
|rawflags=00111110000000110000011010000010 | |||
}} | |||
{{BrawlHitboxTableRow | |||
|bn=19 | |||
|id=1 | |||
|damage=12% | |||
|angle=75 | |||
|fkv=0 | |||
|ks=90 | |||
|sd=0 | |||
|bk=25 | |||
|r=210000 | |||
|xpos=360000 | |||
|ypos=0 | |||
|zpos=0 | |||
|trip=24000 | |||
|ff=60000 | |||
|sdi=60000 | |||
|rawflags=00111110000000110000011010000010 | |||
}} | |||
{{BrawlHitboxTableRow | |||
|bn=19 | |||
|id=2 | |||
|damage=9% | |||
|angle=75 | |||
|fkv=0 | |||
|ks=90 | |||
|sd=0 | |||
|bk=25 | |||
|r=198000 | |||
|xpos=720000 | |||
|ypos=0 | |||
|zpos=0 | |||
|trip=24000 | |||
|ff=60000 | |||
|sdi=60000 | |||
|rawflags=00111110000000110000011010000010 | |||
}} | |||
|} | |||
==Timing== | ==Timing== | ||
{|class="wikitable" | {|class="wikitable" | ||
Latest revision as of 22:13, May 27, 2024
Overview[edit]
A tail swipe. Deals 9% on the tip of the tail, and 12% up close. It comes out on frame 7 and is -16 on shield. While it can be effective for poking an opponent’s shield, due to its minuscule hitbox and weak knockback (though it can KO at very high percentages), in most scenarios, there are better options to choose from.
Hitboxes[edit]
Timing[edit]
| Hitboxes | 7-9 |
|---|---|
| Interruptible | 28 |
| Animation length | 29 |
Lag time |
Hitbox |
Interruptible |

