Ice Climbers (SSBU)/Floor attack (back): Difference between revisions
From SmashWiki, the Super Smash Bros. wiki
Jump to navigationJump to search
mNo edit summary |
mNo edit summary |
||
| (5 intermediate revisions by 5 users not shown) | |||
| Line 1: | Line 1: | ||
{{ArticleIcons|ssbu=y}} | {{ArticleIcons|ssbu=y}} | ||
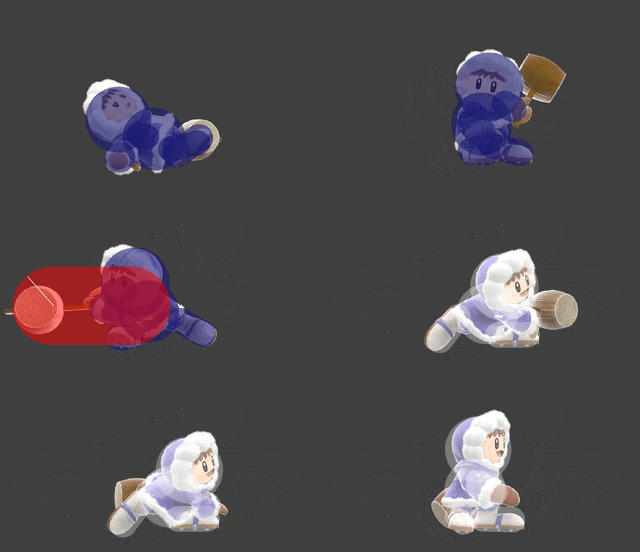
[[File:PopoGetupAttackBackSSBU.gif|thumb| | [[File:PopoGetupAttackBackSSBU.gif|thumb|320px|Hitbox visualization showing Popo's getup attack when laying on his back.]] | ||
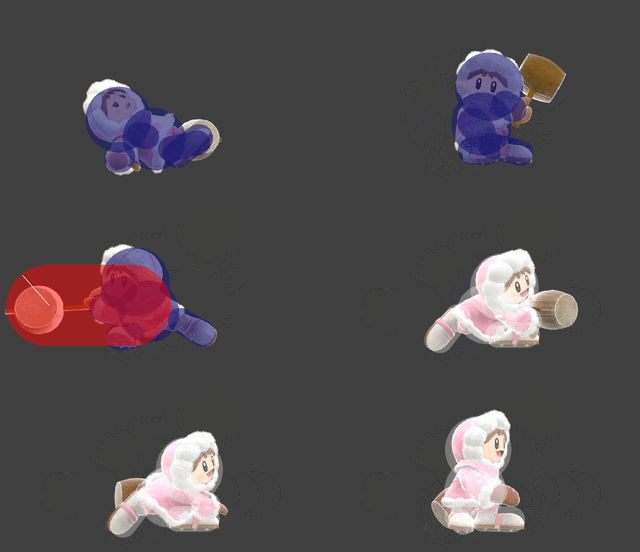
[[File:NanaGetupAttackBackSSBU.gif|thumb| | [[File:NanaGetupAttackBackSSBU.gif|thumb|320px|Hitbox visualization showing Nana's getup attack when laying on her back.]] | ||
==Overview== | ==Overview== | ||
Each of the duo gets up and swings their mallet side to side. With the help of a partner, it can hit several times for high damage and even break shields. | |||
With good timing, the climbers can be [[Desynching|desynced]] while prone, allowing them to pick two different getup options and making them difficult to [[Tech-chasing|tech chase]]. It largely invalidates moves such as [[Ganondorf (SSBU)/Side special|Flame Choke]] and [[Snake (SSBU)/Down throw|Silent Takedown]] because the climber made prone can use their getup attack while counting on their teammate to cover for them with a variety of other moves. | |||
Without a partner, it seems to be your average back floor attack. | |||
==Hitboxes== | ==Hitboxes== | ||
===Leader=== | ===Leader=== | ||
{{UltimateHitboxTableHeader}} | {{UltimateHitboxTableHeader}} | ||
{{HitboxTableTitle|Hit 1| | {{HitboxTableTitle|Hit 1|50}} | ||
{{UltimateHitboxTableRow | {{UltimateHitboxTableRow | ||
|id=0 | |id=0 | ||
| Line 30: | Line 35: | ||
|rebound=f | |rebound=f | ||
}} | }} | ||
{{HitboxTableTitle|Hit 2| | {{HitboxTableTitle|Hit 2|50}} | ||
{{UltimateHitboxTableRow | {{UltimateHitboxTableRow | ||
|id=0 | |id=0 | ||
| Line 54: | Line 59: | ||
|} | |} | ||
===Partner=== | ===Partner=== | ||
The hitboxes have two possible X offsets depending on whether the partner is facing right or left (respectively), preventing issues with the Z-axis. | |||
{{UltimateHitboxTableHeader}} | {{UltimateHitboxTableHeader}} | ||
{{HitboxTableTitle|Hit 1| | {{HitboxTableTitle|Hit 1|50}} | ||
{{UltimateHitboxTableRow | {{UltimateHitboxTableRow | ||
|id=0 | |id=0 | ||
| Line 77: | Line 83: | ||
|rebound=f | |rebound=f | ||
}} | }} | ||
{{HitboxTableTitle|Hit 2| | {{HitboxTableTitle|Hit 2|50}} | ||
{{UltimateHitboxTableRow | {{UltimateHitboxTableRow | ||
|id=0 | |id=0 | ||
| Line 124: | Line 130: | ||
{{FrameStripEnd}} | {{FrameStripEnd}} | ||
{{FrameIconLegend|lag | {{FrameIconLegend|lag=y|hitbox=y|intangible=y|vulnerable=y|interruptible=y}} | ||
{{MvSubNavIceClimbers|g=SSBU}} | {{MvSubNavIceClimbers|g=SSBU}} | ||
[[Category:Ice Climbers (SSBU)]] | [[Category:Ice Climbers (SSBU)]] | ||
[[Category:Floor attacks (SSBU)]] | [[Category:Floor attacks (SSBU)]] | ||
Latest revision as of 14:06, May 23, 2024
Overview[edit]
Each of the duo gets up and swings their mallet side to side. With the help of a partner, it can hit several times for high damage and even break shields.
With good timing, the climbers can be desynced while prone, allowing them to pick two different getup options and making them difficult to tech chase. It largely invalidates moves such as Flame Choke and Silent Takedown because the climber made prone can use their getup attack while counting on their teammate to cover for them with a variety of other moves.
Without a partner, it seems to be your average back floor attack.
Hitboxes[edit]
Leader[edit]
Partner[edit]
The hitboxes have two possible X offsets depending on whether the partner is facing right or left (respectively), preventing issues with the Z-axis.
Timing[edit]
| Intangibility | 1-25 |
|---|---|
| Hit 1 | 19-20 |
| Hit 2 | 24-25 |
| Interruptible | 46 |
| Animation length | 54 |
Lag time |
Hitbox |
Vulnerable |
Intangible |
Interruptible |
|

