Piranha Plant (SSBU)/Forward throw: Difference between revisions
From SmashWiki, the Super Smash Bros. wiki
Jump to navigationJump to search
(New Page: {{ArticleIcons|ssbu=y}} {{competitive expertise}} {|class="wikitable" style="float:right; margin:4pt;" !colspan=5|Piranha Plant Forward throw hurtbox and hitbox visualization |- |File...) |
|||
| (3 intermediate revisions by 2 users not shown) | |||
| Line 1: | Line 1: | ||
{{ArticleIcons|ssbu=y}} | {{ArticleIcons|ssbu=y}} | ||
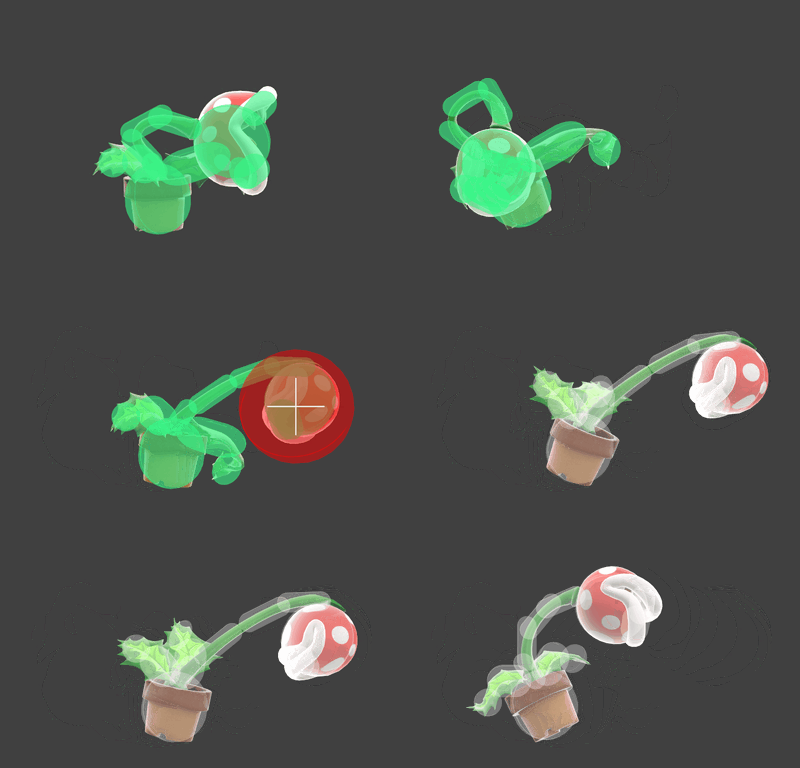
[[File:PiranhaPlantFThrow.gif|thumb|400px|Hitbox visualization showing Piranha Plant's forward throw.]] | |||
==Overview== | ==Overview== | ||
Piranha Plant headbutts the opponent away quickly. It does decent damage being the same 11% that back throw does (although consisting of the throw hitbox and throw itself instead), however cannot kill until very high percents. Its most notable use is in setting up edgeguards and ledgetraps, and usage in doubles or against Luma or Nana, utilizing the collateral hitbox. | |||
==Throw and Hitbox Data== | ==Throw and Hitbox Data== | ||
{{UltimateHitboxTableHeader}} | {{UltimateHitboxTableHeader}} | ||
{{HitboxTableTitle|Hitbox| | {{HitboxTableTitle|Hitbox|50}} | ||
{{UltimateHitboxTableRow | {{UltimateHitboxTableRow | ||
|id=0 | |id=0 | ||
|damage=3.0% | |damage=3.0% | ||
|angle=361 | |angle=361 | ||
|af=3 | |||
|bk=50 | |bk=50 | ||
|ks=100 | |ks=100 | ||
| Line 44: | Line 40: | ||
|fkv=0 | |fkv=0 | ||
|ff=0.0 | |ff=0.0 | ||
|effect=Normal | |||
|sfx=None | |||
|slvl=S | |||
}} | |||
{{UltimateThrowTableRow | |||
|kind=1 | |||
|id=0 | |||
|type=Throwing | |||
|damage=3.0% | |||
|angle=361 | |||
|bk=60 | |||
|ks=100 | |||
|fkv=0 | |||
|effect=Normal | |effect=Normal | ||
|sfx=None | |sfx=None | ||
| Line 78: | Line 87: | ||
[[Category:Piranha Plant (SSBU)]] | [[Category:Piranha Plant (SSBU)]] | ||
[[Category: | [[Category:Forward throws (SSBU)]] | ||
Latest revision as of 12:30, August 9, 2022
Overview[edit]
Piranha Plant headbutts the opponent away quickly. It does decent damage being the same 11% that back throw does (although consisting of the throw hitbox and throw itself instead), however cannot kill until very high percents. Its most notable use is in setting up edgeguards and ledgetraps, and usage in doubles or against Luma or Nana, utilizing the collateral hitbox.
Throw and Hitbox Data[edit]
| Kind | ID | Damage | Angle | Angle type | BK | KS | FKV | H× | Effect | Type | Sound | ||||||||||||
|---|---|---|---|---|---|---|---|---|---|---|---|---|---|---|---|---|---|---|---|---|---|---|---|
| Throw | |||||||||||||||||||||||
| Throw | 0 | 8.0% | Forward | 60 | 65 | 0 | 0.0× | ||||||||||||||||
| Break | 0 | 3.0% | Forward | 60 | 100 | 0 | 0.0× | ||||||||||||||||
Timing[edit]
| Invincibility | 1-14 |
|---|---|
| Hitbox | 13 |
| Throw Release | 14 |
| Interruptible | 32 |
| Animation length | 49 |
Lag time |
Hitbox |
Vulnerable |
Invincible |
Throw point |
Interruptible |
|
