King K. Rool (SSBU)/Down tilt: Difference between revisions
No edit summary |
|||
| (11 intermediate revisions by 5 users not shown) | |||
| Line 2: | Line 2: | ||
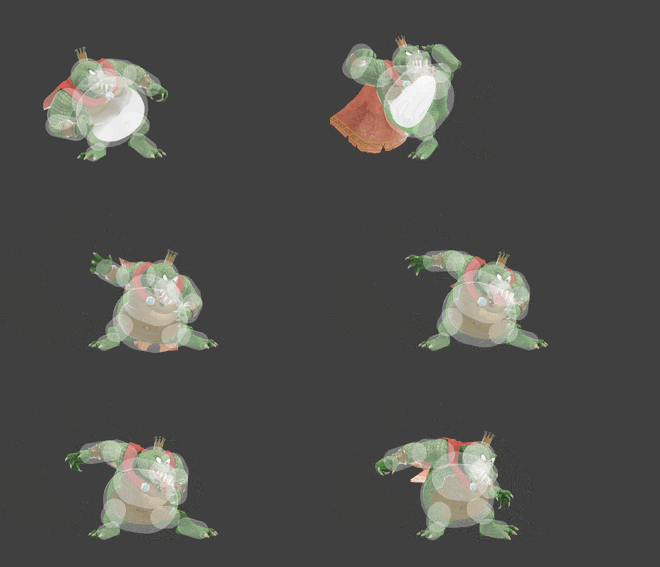
[[File:KingKRoolDTiltSSBU.gif|thumb|330px|Hitbox visualization showing King K. Rool's down tilt.]] | [[File:KingKRoolDTiltSSBU.gif|thumb|330px|Hitbox visualization showing King K. Rool's down tilt.]] | ||
==Overview== | ==Overview== | ||
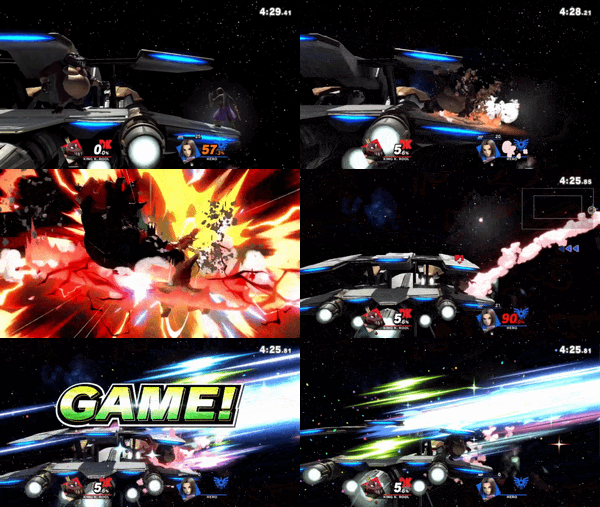
King K. Rool's down tilt is among | [[File:RoolNAirDTiltApproach.gif|thumb|300px|King K. Rool using down tilt to punish {{SSBU|Hero}}'s [[Frizz]] thanks to {{mvsub|King K. Rool|SSBU|neutral aerial}}. This is a common projectile punishing tool.]] | ||
King K. Rool's [[down tilt]] is among the larger commitments in his kit, being a frame 13 tilt. However, it is arguably his most punishing. Down tilt has 4 unique hitboxes, all with different purposes, including a [[bury]]. The reward for hitting a down tilt bury is usually a KO thanks to the options that it opens up for the K. Rool player, with little chance for the [[buried]] opponent to fight back. | |||
Down tilt features a bury hitbox once the foot comes down for grounded opponents, which has a minor disjoint as well. Being a generic bury, down tilt's bury is affected by [[rage]] and [[stock]] differences<ref>https://docs.google.com/spreadsheets/d/13xNgYfbRISGsIVrdnE45jUwqNIYvlvqDwuF3jghJEEs/edit#gid=956452666</ref>. This can all be exploited by King K. Rool to a potentially frightening extent, allowing for down tilt to be a quick stock taker should the player be losing. Overall, it's very easy for K. Rool to score a comeback KO in stylish fashion when considering these 3 factors. | |||
The first hitbox is an aerial-only stomp hitbox on frame 13. This hitbox is extremely strong, often ending stocks as low as 90% at the edge. This can occasionally connect out of [[../Down throw|down throw]] when trying to do bury storage with the bury hitbox as the opponent mashes out, creating a trap. The stomp hitbox also goes down and transitions into another hitbox especially for hitting the ledge and 2-framing opponents, which is almost as powerful as the first. | |||
Should the bury hitbox not connect, there is also an earthquake that goes out, known colloquially as "quake" by the K. Rool playerbase. This doesn't have any reliable hit advantage at lower percentages (+8 on hit at 0, tested on Mario, which isn't enough for followups at all<ref>https://docs.google.com/spreadsheets/d/1B9B2xJuxK2Mat4BbUBbU07wKj0RV6pL44aPCfDEofhw/edit?usp=sharing</ref>), but is very good for resetting neutral. It also has very favorable situations for followups, exploiting reaction time and poor panic options. | Down tilt's bury is quite strong, allowing for combos even at lower percentages, such as through knockback storage with [[../Neutral attack|neutral attack]] into instant [[../Dash attack|dash attack]] or a grab. This is a big benefit to the move's success, providing basic high damage combos with a wide range of other, more complex routes to take. There's also the possibility of [[KO]] setups using neutral attack storage at the ledge, causing [[edge slipping]] and subsequent near-unreactable down aerial or back aerial [[meteor smash]] for the stock. | ||
Down tilt's bury is one of the most reliable [[../Down aerial|down aerial]] [[meteor smash]] knockback storage enablers at 40-50%, due to the strength of the bury providing enough hit advantage for it to work with high levels of consistency. This gives opportunities for [[../Forward smash|forward smash]], or even a second down aerial for [[../Up smash|up smash]], though this can be [[tech]]ed. Forward smash is also a strong general confirm even without this for its kill power. Forward smash out of down tilt alone can KO as low as 75%. | |||
Should the bury hitbox not connect, there is also an earthquake that goes out, known colloquially as "quake" by the K. Rool playerbase. This doesn't have any reliable hit advantage at lower percentages (+8 on hit at 0, tested on Mario, which isn't enough for followups at all even as it accumulates<ref>https://docs.google.com/spreadsheets/d/1B9B2xJuxK2Mat4BbUBbU07wKj0RV6pL44aPCfDEofhw/edit?usp=sharing</ref>), but is very good for resetting neutral. It also has very favorable situations for followups, exploiting reaction time and poor panic options. | |||
==Hitboxes== | ==Hitboxes== | ||
{{UltimateHitboxTableHeader}} | {{UltimateHitboxTableHeader}} | ||
{{HitboxTableTitle| | {{HitboxTableTitle|Clean stomp (aerial only)|42}} | ||
{{UltimateHitboxTableRow | {{UltimateHitboxTableRow | ||
|id=0 | |id=0 | ||
|damage=13% | |damage=13.0% | ||
|angle=361 | |angle=361 | ||
|bk=40 | |bk=40 | ||
| Line 23: | Line 28: | ||
|bn=kneel | |bn=kneel | ||
|xpos=2.5 | |xpos=2.5 | ||
|ypos=- | |ypos=-1.5 | ||
|zpos=0.0 | |zpos=0.0 | ||
|ff=1.0 | |ff=1.0 | ||
|g=no | |g=no | ||
|type=Foot | |||
|sfx=Kick | |sfx=Kick | ||
|slvl=L | |slvl=L | ||
}} | }} | ||
{{HitboxTableTitle| | {{HitboxTableTitle|Late stomp, bury, and quake|42}} | ||
{{UltimateHitboxTableRow | {{UltimateHitboxTableRow | ||
|id=0 | |id=0 | ||
| Line 45: | Line 51: | ||
|ff=1.0 | |ff=1.0 | ||
|g=no | |g=no | ||
|type=Foot | |||
|sfx=Kick | |sfx=Kick | ||
|slvl=L | |slvl=L | ||
| Line 64: | Line 71: | ||
|sfx=Kick | |sfx=Kick | ||
|slvl=L | |slvl=L | ||
|type=Foot | |||
|a=f | |a=f | ||
|noprone=1 | |||
}} | }} | ||
{{UltimateHitboxTableRow | {{UltimateHitboxTableRow | ||
| Line 76: | Line 85: | ||
|bn=top | |bn=top | ||
|xpos=0.0 | |xpos=0.0 | ||
|type=Foot | |||
|ypos=5.5 | |ypos=5.5 | ||
|zpos=13.0 to 23.0 | |zpos=13.0 to 23.0 | ||
| Line 87: | Line 97: | ||
{|class="wikitable" | {|class="wikitable" | ||
|- | |- | ||
!Clean stomp (aerial only) | |||
! | |||
|13 | |13 | ||
|- | |- | ||
! | !Late stomp, bury, and quake | ||
|14-15 | |14-15 | ||
|- | |- | ||
| Line 100: | Line 109: | ||
|60 | |60 | ||
|} | |} | ||
{{FrameStripStart}} | {{FrameStripStart}} | ||
{{FrameStrip|t=Lag|c=12}}{{FrameStrip|t=Hitbox|c=1|e=HitboxChangeS}}{{FrameStrip|t=Hitbox|c=2|s=HitboxChangeE}}{{FrameStrip|t=Lag|c=27}}{{FrameStrip|t=Interruptible|c=18}} | |||
|- | |- | ||
{{FrameStripEnd}} | {{FrameStripEnd}} | ||
{{FrameIconLegend|lag=y|hitbox=y|hitboxchange=y|interruptible=y}} | {{FrameIconLegend|lag=y|hitbox=y|hitboxchange=y|interruptible=y}} | ||
| Line 110: | Line 119: | ||
[[Category:King K. Rool (SSBU)]] | [[Category:King K. Rool (SSBU)]] | ||
[[Category: | [[Category:Down tilts (SSBU)]] | ||
Latest revision as of 21:59, August 7, 2022
Overview[edit]

King K. Rool's down tilt is among the larger commitments in his kit, being a frame 13 tilt. However, it is arguably his most punishing. Down tilt has 4 unique hitboxes, all with different purposes, including a bury. The reward for hitting a down tilt bury is usually a KO thanks to the options that it opens up for the K. Rool player, with little chance for the buried opponent to fight back.
Down tilt features a bury hitbox once the foot comes down for grounded opponents, which has a minor disjoint as well. Being a generic bury, down tilt's bury is affected by rage and stock differences[1]. This can all be exploited by King K. Rool to a potentially frightening extent, allowing for down tilt to be a quick stock taker should the player be losing. Overall, it's very easy for K. Rool to score a comeback KO in stylish fashion when considering these 3 factors.
The first hitbox is an aerial-only stomp hitbox on frame 13. This hitbox is extremely strong, often ending stocks as low as 90% at the edge. This can occasionally connect out of down throw when trying to do bury storage with the bury hitbox as the opponent mashes out, creating a trap. The stomp hitbox also goes down and transitions into another hitbox especially for hitting the ledge and 2-framing opponents, which is almost as powerful as the first.
Down tilt's bury is quite strong, allowing for combos even at lower percentages, such as through knockback storage with neutral attack into instant dash attack or a grab. This is a big benefit to the move's success, providing basic high damage combos with a wide range of other, more complex routes to take. There's also the possibility of KO setups using neutral attack storage at the ledge, causing edge slipping and subsequent near-unreactable down aerial or back aerial meteor smash for the stock.
Down tilt's bury is one of the most reliable down aerial meteor smash knockback storage enablers at 40-50%, due to the strength of the bury providing enough hit advantage for it to work with high levels of consistency. This gives opportunities for forward smash, or even a second down aerial for up smash, though this can be teched. Forward smash is also a strong general confirm even without this for its kill power. Forward smash out of down tilt alone can KO as low as 75%.
Should the bury hitbox not connect, there is also an earthquake that goes out, known colloquially as "quake" by the K. Rool playerbase. This doesn't have any reliable hit advantage at lower percentages (+8 on hit at 0, tested on Mario, which isn't enough for followups at all even as it accumulates[2]), but is very good for resetting neutral. It also has very favorable situations for followups, exploiting reaction time and poor panic options.
Hitboxes[edit]
Timing[edit]
| Clean stomp (aerial only) | 13 |
|---|---|
| Late stomp, bury, and quake | 14-15 |
| Interruptible | 43 |
| Animation length | 60 |
Lag time |
Hitbox |
Hitbox change |
Interruptible |
|
