Samus (SSBU)/Up aerial: Difference between revisions
From SmashWiki, the Super Smash Bros. wiki
Jump to navigationJump to search
m (→Hitboxes) |
No edit summary |
||
| Line 1: | Line 1: | ||
{{ArticleIcons|ssbu=y}} | {{ArticleIcons|ssbu=y}} | ||
[[File:SamusUAirSSBU.gif|thumb| | [[File:SamusUAirSSBU.gif|thumb|300px|Hitbox visualization showing Samus's up aerial.]] | ||
{{competitive expertise}} | {{competitive expertise}} | ||
==Overview== | ==Overview== | ||
| Line 8: | Line 8: | ||
{{UltimateHitboxTableHeader}} | {{UltimateHitboxTableHeader}} | ||
! Hitstun | ! Hitstun | ||
{{HitboxTableTitle|Hit 1|50}} | |||
{{HitboxTableTitle|Hit 1| | |||
{{UltimateHitboxTableRow | {{UltimateHitboxTableRow | ||
|id=0 | |id=0 | ||
|damage=3.0% | |damage=3.0% | ||
|af=3 | |||
|angle=84 | |angle=84 | ||
|bk=0 | |bk=0 | ||
| Line 29: | Line 29: | ||
}} | }} | ||
|'''-10''' frames | |'''-10''' frames | ||
{{UltimateHitboxTableRow | {{UltimateHitboxTableRow | ||
|id=1 | |id=1 | ||
|damage=3.0% | |damage=3.0% | ||
|angle=367 | |angle=367 | ||
|af=3 | |||
|bk=0 | |bk=0 | ||
|ks=100 | |ks=100 | ||
| Line 49: | Line 49: | ||
}} | }} | ||
|— | |— | ||
{{HitboxTableTitle|Multihits|50}} | |||
{{HitboxTableTitle|Multihits| | |||
{{UltimateHitboxTableRow | {{UltimateHitboxTableRow | ||
|id=0 | |id=0 | ||
|rehit=3 | |||
|damage=1.3% | |damage=1.3% | ||
|angle=84 | |angle=84 | ||
|af=3 | |||
|bk=0 | |bk=0 | ||
|ks=100 | |ks=100 | ||
| Line 70: | Line 71: | ||
}} | }} | ||
|'''-10''' frames | |'''-10''' frames | ||
{{UltimateHitboxTableRow | {{UltimateHitboxTableRow | ||
|id=1 | |id=1 | ||
|rehit=3 | |||
|damage=1.3% | |damage=1.3% | ||
|angle=367 | |angle=367 | ||
|af=3 | |||
|bk=0 | |bk=0 | ||
|ks=100 | |ks=100 | ||
| Line 90: | Line 92: | ||
}} | }} | ||
|— | |— | ||
{{HitboxTableTitle|Final hit|26}} | {{HitboxTableTitle|Final hit|26}} | ||
{{UltimateHitboxTableRow | {{UltimateHitboxTableRow | ||
| Line 96: | Line 97: | ||
|damage=4.0% | |damage=4.0% | ||
|angle=70 | |angle=70 | ||
|af=3 | |||
|bk=40 | |bk=40 | ||
|ks=160 | |ks=160 | ||
| Line 111: | Line 113: | ||
}} | }} | ||
|— | |— | ||
{{UltimateHitboxTableRow | {{UltimateHitboxTableRow | ||
|id=1 | |id=1 | ||
|damage=4.0% | |damage=4.0% | ||
|angle=70 | |angle=70 | ||
|af=3 | |||
|bk=40 | |bk=40 | ||
|ks=160 | |ks=160 | ||
| Line 131: | Line 133: | ||
}} | }} | ||
|— | |— | ||
|} | |} | ||
Revision as of 01:44, January 22, 2022
Overview
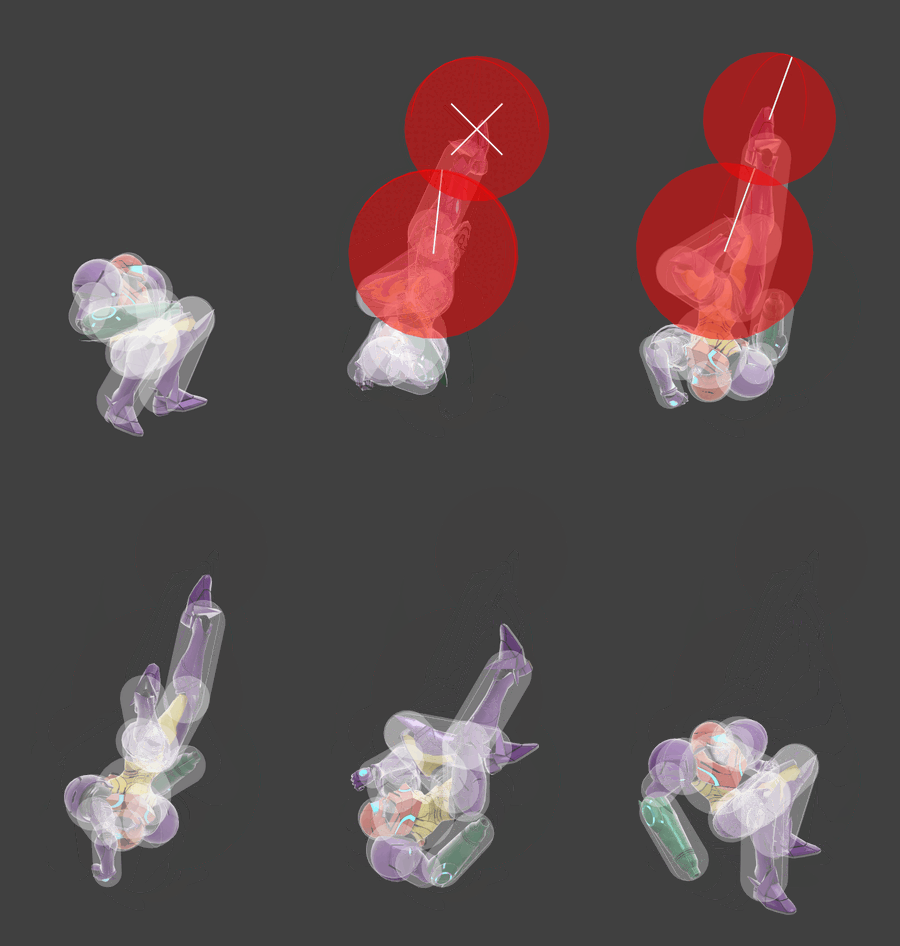
Samus drills above her with her right leg, hitting multiple times. She then thrusts upwards to launch her opponents.
Hitboxes
Timing
Attack
| Initial autocancel | 1-2 |
|---|---|
| Hit 1 | 5 |
| Multihits | 7-14 |
| Final hit | 16-17 |
| Ending autocancel | 34- |
| Interruptible | 40 |
| Animation length | 53 |
Landing lag
| Interruptible | 19 |
|---|---|
| Animation length | 42 |
Lag time |
Hitbox |
Autocancel |
Interruptible |
Trivia
- The hitbox with the ID of 1 of hit 1 and the multihits is coded as an extended hitbox despite not actually being extended. This prevents it from interpolating.
|

