Falco (SSB4)/Back throw: Difference between revisions
From SmashWiki, the Super Smash Bros. wiki
Jump to navigationJump to search
(added an overview for the move.) |
SuperSqank (talk | contribs) m (→Laser) |
||
| (3 intermediate revisions by 2 users not shown) | |||
| Line 1: | Line 1: | ||
{{ArticleIcons|ssb4=y}} | {{ArticleIcons|ssb4=y}} | ||
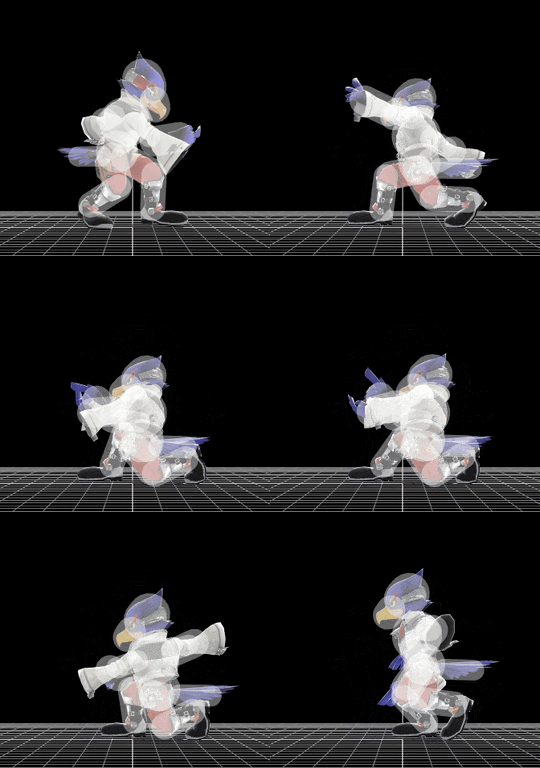
[[File:FalcoThrowBack.gif|thumb|270px|Hitbox visualization showing Falco's back throw.]] | [[File:FalcoThrowBack.gif|thumb|270px|Hitbox visualization showing Falco's back throw.]] | ||
==Overview== | |||
Throws the opponent back then fires a laser. At higher percents, the throw can be DI'd to the point where the laser is unable to hit the opponent, thus reducing damage and knockback. Without DI, it makes for a relatively weak kill throw. Mostly used to simply get an opponent offstage, as the throw itself still has decent knockback to put the opponent in a dangerous position offstage. | |||
==Throw and Hitbox Data== | |||
===Throw=== | ===Throw=== | ||
{{ | {{SSB4ThrowTableHeader}} | ||
{{SSB4ThrowTableRow | |||
|id=0 | |||
|damage=6% | |||
|af=3 | |||
|angle=35 | |||
|bk=80 | |||
|ks=60 | |||
|fkv=0 | |||
|bn=0 | |||
|noff=true | |||
|trip=0 | |||
|type=Throwing | |||
|effect=Normal | |||
|slvl=S | |||
|sfx=None | |||
}} | |||
{{SSB4ThrowTableRow | |||
|id=1 | |||
|damage=3% | |||
|af=3 | |||
|angle=361 | |||
|bk=60 | |||
|ks=100 | |||
|fkv=0 | |||
|bn=0 | |||
|noff=true | |||
|trip=0 | |||
|type=Throwing | |||
|effect=Normal | |||
|slvl=S | |||
|sfx=None | |||
}} | |||
|} | |||
===Laser=== | |||
{{SSB4HitboxTableHeader|special=y}} | |||
{{SSB4SpecialHitboxTableRow | |||
|bn=0 | |||
|id=0 | |||
|damage=3% | |||
|angle=50 | |||
|af=1 | |||
|ks=80 | |||
|bk=60 | |||
|fkv=0 | |||
|r=9.6 | |||
|xpos=0 | |||
|ypos=0 | |||
|zpos=4.0 | |||
|trip=0 | |||
|ff=0.25 | |||
|sdi=1.0 | |||
|type=Energy | |||
|effect=Blaster | |||
|sfx=Falco Blaster | |||
|slvl=M | |||
|clang=f | |||
|rebound=f | |||
|direct=f | |||
|reflectable=t | |||
|absorbable=t | |||
}} | |||
|} | |||
==Timing== | |||
{|class="wikitable" | |||
!Invincibility | |||
|1-18 | |||
|- | |||
!Throw Release | |||
|9 | |||
|- | |||
!Laser | |||
|18 | |||
|- | |||
!Interruptible | |||
|42 | |||
|- | |||
!Animation length | |||
|59 | |||
|} | |||
{{FrameStripStart}} | |||
{{FrameStrip|t=Lag|c=8|e=LagThrowS}}{{FrameStrip|t=Lag|c=9|s=LagThrowE|e=LagPropS}}{{FrameStrip|t=Lag|c=24|s=LagPropE}}{{FrameStrip|t=Interruptible|c=18}} | |||
|- | |||
{{FrameStrip|t=Invincible|c=18}}{{FrameStrip|t=Vulnerable|c=41}} | |||
{{FrameStripEnd}} | |||
{{FrameIconLegend|lag=y|throw=y|vulnerable=y|invincible=y|prop=y}} | |||
{{MvSubNavFalco|g=SSB4}} | {{MvSubNavFalco|g=SSB4}} | ||
[[Category:Falco (SSB4)]] | [[Category:Falco (SSB4)]] | ||
[[Category:Back throws (SSB4)]] | [[Category:Back throws (SSB4)]] | ||
Latest revision as of 09:40, April 4, 2021
Overview[edit]
Throws the opponent back then fires a laser. At higher percents, the throw can be DI'd to the point where the laser is unable to hit the opponent, thus reducing damage and knockback. Without DI, it makes for a relatively weak kill throw. Mostly used to simply get an opponent offstage, as the throw itself still has decent knockback to put the opponent in a dangerous position offstage.
Throw and Hitbox Data[edit]
Throw[edit]
| ID | Damage | Angle | BK | KS | FKV | Bone | FFx | Type | Effect | Sound | |
|---|---|---|---|---|---|---|---|---|---|---|---|
| 0 | 6% | Forwards | 80 | 60 | 0 | 0 | None | ||||
| 1 | 3% | Forwards | 60 | 100 | 0 | 0 | None | ||||
Laser[edit]
Timing[edit]
| Invincibility | 1-18 |
|---|---|
| Throw Release | 9 |
| Laser | 18 |
| Interruptible | 42 |
| Animation length | 59 |
Lag time |
Vulnerable |
Invincible |
Prop event |
Throw point |
|
