Fox (SSB)/Down smash: Difference between revisions
MHStarCraft (talk | contribs) (New Page: {{ArticleIcons|ssb=y}} ==Overview== thumb|Hitbox of Fox's down smash. Fox split his two legs to his front and back at the same time, doing 1...) |
SuperSqank (talk | contribs) |
||
| (6 intermediate revisions by 3 users not shown) | |||
| Line 3: | Line 3: | ||
==Overview== | ==Overview== | ||
[[File:Fox Down Smash Hitbox Smash 64.gif|thumb|Hitbox of Fox's down smash.]] | [[File:Fox Down Smash Hitbox Smash 64.gif|thumb|Hitbox of Fox's down smash.]] | ||
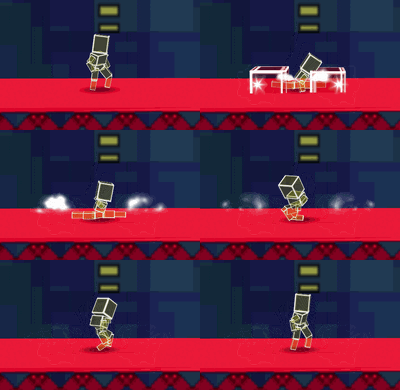
Fox split | Fox does a split kick, covering the front and back at the same time, doing 14% damage and decent horizontal knockback that also sends opponents on a favourable [[semi-spike]] trajectory. Its fast [[start-up]] makes it a pretty good finisher, as well as having some moderate [[range]], and low [[ending lag]]. Similar to his {{mvsub|Fox|SSB|down special}}, the shine, its said semi-spike trajectory makes his down smash a effective [[edge-guarding]] move. Fox also has some ways to [[combo]] into a down smash. Like his other two smashes, he can hit the opponent lightly with the first hit of his {{mvsub|Fox|SSB|neutral attack 1|alt=jab}} (at under around 90%; above will send the opponent too far up), or an up tilt (at very low percentages) to put them under [[hitstun]], then use his down smash as a finisher when near the [[edge]], or at least get them offstage. | ||
==Hitboxes== | |||
===NTSC-J=== | |||
{{SSB64HitboxTableHeader}} | |||
{{SSB64HitboxTableRow | |||
|id=0 | |||
|damage=14% | |||
|angle=70 | |||
|bk=30 | |||
|ks=100 | |||
|fkv=0 | |||
|r=130 | |||
|bn=25 | |||
|xpos=90 | |||
|effect=Normal | |||
|slvl=L | |||
|sfx=Kick | |||
}} | |||
{{SSB64HitboxTableRow | |||
|id=1 | |||
|damage=14% | |||
|angle=70 | |||
|bk=30 | |||
|ks=100 | |||
|fkv=0 | |||
|r=130 | |||
|bn=20 | |||
|xpos=90 | |||
|effect=Normal | |||
|slvl=L | |||
|sfx=Kick | |||
}} | |||
|} | |||
===NTSC-U/PAL=== | |||
{{SSB64HitboxTableHeader}} | |||
{{SSB64HitboxTableRow | |||
|id=0 | |||
|damage=14% | |||
|angle=25 | |||
|anglebg=buff | |||
|bk=35 | |||
|bkbg=buff | |||
|ks=80 | |||
|ksbg=nerf | |||
|fkv=0 | |||
|r=130 | |||
|bn=25 | |||
|xpos=90 | |||
|effect=Normal | |||
|slvl=L | |||
|sfx=Kick | |||
}} | |||
{{SSB64HitboxTableRow | |||
|id=1 | |||
|damage=14% | |||
|angle=25 | |||
|anglebg=buff | |||
|bk=35 | |||
|bkbg=buff | |||
|ks=80 | |||
|ksbg=nerf | |||
|fkv=0 | |||
|r=130 | |||
|bn=20 | |||
|xpos=90 | |||
|effect=Normal | |||
|slvl=L | |||
|sfx=Kick | |||
}} | |||
|} | |||
====Summary==== | |||
*{{buff|Angle (70° → 25°).}} | |||
*{{nerf|Knockback (30 (base), 100 (scaling) → 35/80).}} | |||
==Timing== | |||
{|class="wikitable" | |||
|- | |||
!Legs intangible | |||
|1-6 | |||
|- | |||
!Hitboxes | |||
|6-10 | |||
|- | |||
!Animation length | |||
|49 | |||
|} | |||
{{FrameStripStart}} | |||
|'''Hitboxes''' {{FrameStrip|t=Lag|c=5}}{{FrameStrip|t=Hitbox|c=5}}{{FrameStrip|t=Lag|c=39}} | |||
|- | |||
|'''Legs''' {{FrameStrip|t=Intangible|c=6}}{{FrameStrip|t=Vulnerable|c=43}} | |||
{{FrameStripEnd}} | |||
{{FrameIconLegend|lag=y|hitbox=y|vulnerable=y|intangible=y}} | |||
{{MvSubNavFox|g=SSB}} | |||
[[Category:Fox (SSB)]] | [[Category:Fox (SSB)]] | ||
[[Category:Down smashes]] | [[Category:Down smashes (SSB)]] | ||
[[Category:Normal attacks]] | [[Category:Normal attacks (SSB)]] | ||
[[Category:Semi-spikes (SSB)]] | |||
Latest revision as of 03:02, May 30, 2020
Overview[edit]
Fox does a split kick, covering the front and back at the same time, doing 14% damage and decent horizontal knockback that also sends opponents on a favourable semi-spike trajectory. Its fast start-up makes it a pretty good finisher, as well as having some moderate range, and low ending lag. Similar to his down special, the shine, its said semi-spike trajectory makes his down smash a effective edge-guarding move. Fox also has some ways to combo into a down smash. Like his other two smashes, he can hit the opponent lightly with the first hit of his jab (at under around 90%; above will send the opponent too far up), or an up tilt (at very low percentages) to put them under hitstun, then use his down smash as a finisher when near the edge, or at least get them offstage.
Hitboxes[edit]
NTSC-J[edit]
| ID | Part | Damage | SD | Angle | BK | KS | FKV | Radius | Bone | Offset | Clang | Effect | G | A | Sound | ||
|---|---|---|---|---|---|---|---|---|---|---|---|---|---|---|---|---|---|
| 0 | 0 | 14% | 0 | 30 | 100 | 0 | 130 | 25 | 90 | 0 | 0 | ||||||
| 1 | 0 | 14% | 0 | 30 | 100 | 0 | 130 | 20 | 90 | 0 | 0 | ||||||
NTSC-U/PAL[edit]
| ID | Part | Damage | SD | Angle | BK | KS | FKV | Radius | Bone | Offset | Clang | Effect | G | A | Sound | ||
|---|---|---|---|---|---|---|---|---|---|---|---|---|---|---|---|---|---|
| 0 | 0 | 14% | 0 | 35 | 80 | 0 | 130 | 25 | 90 | 0 | 0 | ||||||
| 1 | 0 | 14% | 0 | 35 | 80 | 0 | 130 | 20 | 90 | 0 | 0 | ||||||
Summary[edit]
 Angle (70° → 25°).
 Knockback (30 (base), 100 (scaling) → 35/80).
Timing[edit]
| Legs intangible | 1-6 |
|---|---|
| Hitboxes | 6-10 |
| Animation length | 49 |
| Hitboxes | |||||||||||||||||||||||||||||||||||||||||||||||||
| Legs |
Lag time |
Hitbox |
Vulnerable |
Intangible |
