Bowser (SSB4)/Up aerial: Difference between revisions
No edit summary |
(added information and corrected terminology.) |
||
| (One intermediate revision by the same user not shown) | |||
| Line 1: | Line 1: | ||
{{ArticleIcons|ssb4=y}} | {{ArticleIcons|ssb4=y}} | ||
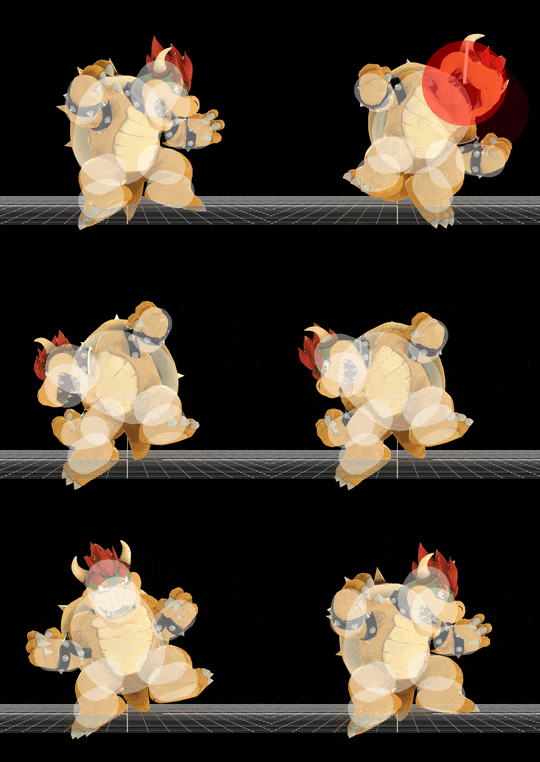
[[File:BowserUpAir.gif|thumb|270px|Hitbox visualization showing Bowser's up aerial.]] | [[File:BowserUpAir.gif|thumb|270px|Hitbox visualization showing Bowser's up aerial.]] | ||
==Overview== | |||
Bowser swings his head upwards in an arc, similar to {{SSB4|Donkey Kong}}. The move is a powerful aerial and can KO opponents at medium percents. However, the move lacks range and cannot [[auto-cancel]] from a short hop, making it relatively useless in neutral unless the opponent is above Bowser, in which he must full hop, but due to his slow jump squat, this action is telegraphed. Although it has its weaknesses, the move shines when used in tandem with Bowser's infamous [[up throw]], guaranteeing the powerful hit and securing kills when used at the correct percents. | |||
The move can KO at medium to high percents and even lower if Bowser has rage, making it a move opponents want to avoid at all costs, and due to Bowser's up throw to up aerial combo having a larger percent range threshold than Donkey Kong's similar cargo up throw to up aerial combo, meaning that the opponent, if at a high percent threshold, is always in the threat of a KO. | |||
==Hitboxes== | ==Hitboxes== | ||
{{SSB4HitboxTableHeader}} | {{SSB4HitboxTableHeader}} | ||
Latest revision as of 15:40, September 20, 2019
Overview[edit]
Bowser swings his head upwards in an arc, similar to Donkey Kong. The move is a powerful aerial and can KO opponents at medium percents. However, the move lacks range and cannot auto-cancel from a short hop, making it relatively useless in neutral unless the opponent is above Bowser, in which he must full hop, but due to his slow jump squat, this action is telegraphed. Although it has its weaknesses, the move shines when used in tandem with Bowser's infamous up throw, guaranteeing the powerful hit and securing kills when used at the correct percents. The move can KO at medium to high percents and even lower if Bowser has rage, making it a move opponents want to avoid at all costs, and due to Bowser's up throw to up aerial combo having a larger percent range threshold than Donkey Kong's similar cargo up throw to up aerial combo, meaning that the opponent, if at a high percent threshold, is always in the threat of a KO.
Hitboxes[edit]
| ID | Part | Damage | SD | Angle | BK | KS | FKV | Radius | Bone | Offset | SDIx | H× | T% | Clang | Rebound | Type | Effect | G | A | Sound | Direct | ||
|---|---|---|---|---|---|---|---|---|---|---|---|---|---|---|---|---|---|---|---|---|---|---|---|
| 0 | 0 | 15% | 0 | 35 | 85 | 0 | 6.0 | 19 | 2.4 | 0.0 | 0.0 | 1.0x | 1.0x | 0% | |||||||||
Timing[edit]
| Initial autocancel | 1-2 |
|---|---|
| Hitboxes | 9-13 |
| Head intangible | 3-13 |
| Ending autocancel | 40- |
| Interruptibility | 45 |
| Animation length | 46 |
| Hitboxes | ||||||||||||||||||||||||||||||||||||||||||||||
| Head | ||||||||||||||||||||||||||||||||||||||||||||||
| Autocancel |
Landing lag[edit]
| Animation length | 28 |
|---|
Lag time |
Hitbox |
Autocancel |
Intangible |
Interruptible |
|
