Ness (SSBM): Difference between revisions
SuperSqank (talk | contribs) |
|||
| Line 295: | Line 295: | ||
===[[Character matchups (SSBM)|Matchups]]=== | ===[[Character matchups (SSBM)|Matchups]]=== | ||
{{SSBMMatchupTable|ness=yes}} | {{SSBMMatchupTable|ness=yes}} | ||
In the most recent revision of the character matchup chart, Ness has a very poor matchup spread. He only soft counters three characters and has only one even matchup, against {{SSBM|Yoshi}}, while he is soft countered by six, countered by nine, and hard countered by six. His poor KOing power, range, approach, and recovery are all exploitable, leading to | In the most recent revision of the character matchup chart, Ness has a very poor matchup spread. He only soft counters three characters and has only one even matchup, against {{SSBM|Yoshi}}, while he is soft countered by six, countered by nine, and hard countered by six. His poor KOing power, range, approach, and recovery are all exploitable, leading to problematic matchups against characters who can abuse these weaknesses. {{SSBM|Sheik}} can chaingrab him to KO percents and finish him off with edgeguarding, {{SSBM|Jigglypuff}} can gimp Ness's recovery with low-risk aerials and easily carry him off-stage, and {{SSBM|Fox}} and {{SSBM|Captain Falcon}} simply run him over with their superior speed and offensive prowess. He only has favorable matchups against characters who have as poor range as he does or are too slow to take advantage of his lack of range. As a result of these shortcomings, Ness has one of the worst matchup spreads in all of ''Melee'', and this has not changed since the inception of the matchup chart. | ||
===Notable players=== | ===Notable players=== | ||
Revision as of 02:59, September 20, 2019
| Ness in Super Smash Bros. Melee | |
|---|---|
 
| |
| Universe | EarthBound |
| Other playable appearances | in SSB in Brawl in SSB4 in Ultimate |
| Availability | Starter |
| Tier | F (23) (North America) H (23) (Europe) |
| “ | A psychic boy with a distinct midair jump. | ” |
| —Description from Melee's manual. | ||
Ness (ネス, Ness) is a default character in Super Smash Bros. Melee. Announced at E3 2001, he was originally going to be replaced by Lucas from Mother 3; the ultimate cancellation of the game for the Nintendo 64, however, caused Masahiro Sakurai to retain Ness. As with the original Super Smash Bros., Ness is voiced by Makiko Ōmoto in Melee with new voice clips.
Ness is currently ranked 23rd out of 26 on the tier list, placing within the F tier. This is a slight fall from his already very low placement in Smash 64, where he was 10th out of 12 characters in the NTSC Version, and is a significant drop from his high tier placement in the Japanese version of Smash 64, where he was 5th out of 12, and his worst placement to date. While still having fantastic throws and a great aerial game thanks to his double jump cancel, Ness has a poor approach on the ground due to significant range issues in most of his attacks; his recovery is also easy to intercept and edgeguard against, and he also has significant trouble KOing opponents, due to his surprisingly weak KO power and due to his aforementioned poor range. As a result of these significant weaknesses, Ness has very poor matchups, with six nearly unwinnable, one even (against Yoshi), and only three slightly favorable (against Bowser, Kirby, and Pichu). In addition, Ness currently ranks one spot away from the bottom tier in Melee, making him almost non-viable in tournament play.
Attributes
Ness is an unusual blend of character archetypes; many of his attributes are unique in comparison to other characters, such as his projectiles, his recovery and his midair jump. Ness has above average traction and a moderately low falling speed, giving him an above-average wavedash that is relatively quick. Ness is a projectile-heavy character, as he has 3 projectiles: PK Flash, PK Fire and PK Thunder, while also having a healing move in his PSI Magnet.
Arguably Ness's greatest strength is his combo game. Despite a poor SHFFL due to his high short hop and low falling speed, Ness has many ways to pressure and combo in the air thanks to his double jump cancel (often abbreviated DJC). By cancelling out of his midair jump with an aerial, Ness can quickly and efficiently use his multiple aerial attacks; this is especially important considering the utility of his aerial attacks. His neutral aerial and forward aerial attacks acting as potential combo starters (especially the latter) and his back, up and down air attacks serve as good KO moves. Due to this, his air approach is considered to be much better than his ground approach.
Although Ness has a poor ground approach, he still boasts two effective options: his grab game and the Yo-yo glitch. Ness' throws all have excellent utility; his forward throw has extremely high base knockback, making it ideal for starting edgeguards. His down throw is a decent combo starter, having potential to lead into his DJC'd aerials. His up throw is a decent chain grab and can be used in conjunction with PK Thunder to rack up damage or play mindgames. Finally, his back throw is the strongest throw in the game, making it a deadly KOing option. As for the Yo-yo glitch, Ness is the only character to have access to this technique. It is initiated through his up smash, and can be used to attack or grab with near limitless range or attach certain single-hitbox attacks to Ness's body. This can significantly increase Ness' range and options when performed properly.
Ness' greatest flaw, however, is his significant range problems. All of his attacks (especially his tilts) have little range or small hitboxes, making hitting an opponent very difficult. Although wavedashing can help out this problem somewhat, Ness' ground based options have too little utility overall to benefit noticeably. When combined with his somewhat slow movement, Ness has significant trouble approaching opponents. Thus, his dash attack is considered to be his only reliable ground approach option, due to its decent range unlike most of his other attacks. Also, Ness's grab has the second shortest range in all of the game (only to Pikachu), thus making it difficult for him to take advantage of his versatile throws, while his dash grab is extremely laggy and barely improves its range. Finally, against opponents with particularly good spacing games, most notoriously Marth, Ness can be easily overwhelmed in his attempts to approach opponents in the air despite the power of his DJC.
Assuming he can approach his opponents, Ness suffers from noticeable KOing problems, largely due to his poor power and range. He possesses arguably the worst set of smash attacks in the game: his up and down smashes are the weakest of their kind and his forward smash needs to be sweetspotted at the tip of the bat to KO effectively. His back, up and down aerials are powerful, but their poor reach make them difficult to land, while his down aerial is rather slow. Finally, Ness' back throw is his most powerful finisher, but it is held back by his aforementioned poor grab range.
Ness' special moveset also has some problems: it is rather situational overall. PK Flash boasts extreme power when fully charged and is great for punishing poorly positioned opponents offstage, but it is limited to edgeguarding due to it being very slow and difficult to land. PK Fire can trap opponents and leave them open for follow-ups, and can even gimp fast-fallers. However, it has short reach for a projectile and is very easy to SDI out of, making it easy to punish. PK Thunder is Ness' most useful special move; it is unique for controlling a thunder ball which can be moved in any direction, allowing for mindgames, offstage gimps, and even a powerful KOing option in PK Thunder 2. However it has one critical flaw: the player loses control of Ness during the move, leaving him open to extremely powerful attacks if he can't hit the opponent quick enough. Finally, PSI Magnet can heal Ness and put him in a better position defensively, but it is rather slow and completely dependent on the opposing character, as it only absorbs energy-based projectiles.
Outside of his poor approach, Ness also suffers from an easily gimpable recovery. Ness's recovery has its merits; he has the second highest midair jump in the game (second to only Yoshi) and his midair jump has unusual properties in its trajectory; PK Thunder 2 also grants a rather long distance, with a moderately large sweetspot and a long period of invincibility frames. The move is also very risky to block due to possessing KO power that reliably KOs at 90%. Despite these benefits, however, Ness's recovery still is cited as arguably the worst in the game, in spite of its long length, due to possessing many notable flaws. If Ness uses an aerial to fend off edgeguarders, his double jump is cancelled and can prevent him from recovering if unable to act soon enough. PK Thunder's projectile instantly disappears upon hitting opponents, and this is very easily abusable by edgeguarders, further worsened by PK Thunder 2's slow startup. In the process of having to start PK Thunder 2, characters with good recoveries (such as Jigglypuff or Samus) can merely jump into the projectile and take minor knockback and damage, immediately sending Ness into a state of helplessness, though this is a risky strategy. Projectiles such as Link's Boomerangs and the Ice Climbers' Ice Shot can easily disrupt the projectile as well, and in these cases, damage is not even inflicted to the opponent. PK Thunder 2 also suffers from a number of problems. Notably, it is difficult to angle correctly, and it can easily curve under lips of stages, most notably on Battlefield. Its linear nature can also make it easy to read and edgeguard for many characters, despite the invincibility frames found within it, and attacks like Mario's Cape or Link's Spin Attack can easily intercept the attack as Ness charges to the stage. Finally, PK Thunder 2 has significant ending lag, and if Ness recovers directly onto the stage after using it, opponents can easily capitalise on this ending lag by landing a powerful hit on Ness that he cannot hope to counter.
Changes from Smash 64 to Melee
Ness received a mix of buffs and nerfs in his transition from Smash 64 to Melee. However, because his flaws were not properly addressed in the previous installment, he is considered to be nerfed overall.
Ness received a number of helpful buffs; his range was increased as a whole to help alleviate his main flaw from the previous game. His mobility has been drastically improved, possessing a much faster dashing speed and air speed, making it much easier for him to approach and chase opponents. His weight was also significantly increased, improving his on-stage endurance, while his slower falling speed makes him harder to combo. Ness also retains his powerful combo game in his DJC, despite being slightly weakened. However, he has new combo options as well; his forward aerial can now chain into itself and other aerials while his dash attack has many different follow-up options depending on where it hits, (while also having greatly increased range), and he now has an up and down throw, giving him two good setup and combo throws. The most notable buff that Ness received, however, was the addition of the Yo-yo glitch. When performed correctly, Ness has access to much greater range, as well as new mindgames.
However, Ness also received significant nerfs in other important areas. His down aerial, his most notable combo finisher, has drastically more startup and ending lag, and the addition of meteor cancelling makes it significantly easier to survive against. This removes most of its KO potential and completely removes its use in shield break combos and DJC combos in general, significantly hurting his damage racking ability. Despite being known for his poor recovery, PK Thunder is even more unreliable due to its much shorter distance and new angling issues, while retaining its previous issues from Smash 64; this makes Ness' recovery arguably the worst in the game. Ness also has much lower power, especially in his smash attacks, as his forward smash requires sweetspotting while his up and down smashes have lost all of their KO power. Finally, while the overall range in his attacks has increased, it is arguably even worse relative to the cast due to the larger competition, and thus can still be easily and quickly overwhelmed when approaching opponents.
Because of these nerfs, the buffs Ness received have almost been nullified by the aforementioned nerfs and remains at a disadvantage among the rest of the cast in Melee and as a result, he is one of the characters that have been clearly nerfed alongside Yoshi, Pikachu, and Kirby.
Aesthetics
 Ness's grounded jump is no longer psychokinetic.
 Ness has new voice samples.
 Ness's cap is turned right.
 Ness's backpack is two strapped.
 Ness now has a blue hue in his eyes.
 Ness's default costume have been slightly changed (red cap has blue instead of purple, beige and blue striped shirt and blue shorts instead of yellow/purple and purple, blue cap has purple instead of violet, tan and purple striped shirt and purple shorts instead of yellow/violet and violet, and orange and brown striped shirt and green shorts instead of light green/orange and orange like Mario's team battle costume.)
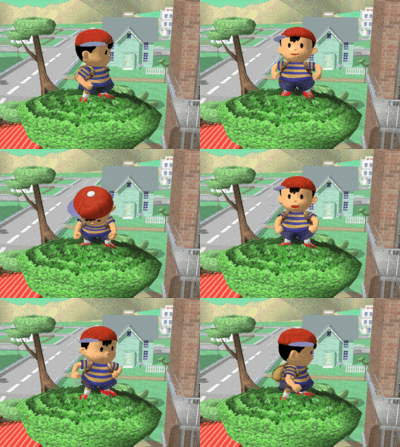
 Ness now faces the screen if he uses his taunt while facing left. It also has a new voice clip.
Attributes
 Ness' walking speed is slightly slower (0.28 → 0.84).
 Ness' dash speed is faster (40 → 1.4) no longest being the slowest.
 Ness is significantly heavier (81.818 → 94).
 This significantly improves his endurance.
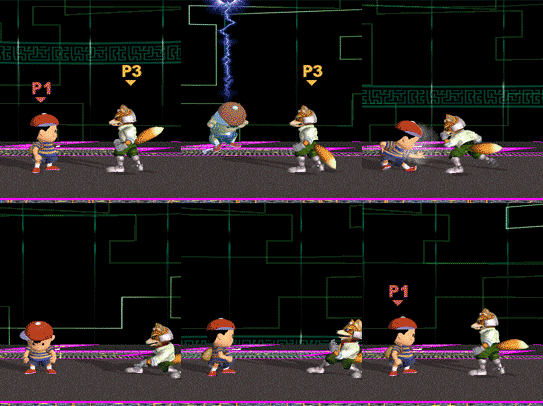
 However, this also makes him much more vulnerable to combos and makes him susceptible to Fox's waveshine combos.
 Ness' air speed is faster (28 → 0.93) going from the 11th highest out of 12 characters to the 11th highest out of 26.
 Ness' falling speed is higher (55 → 1.83), improving his vertical endurance, but making him more susceptible to combos.
 Ness' gravity is higher (2.7 → 0.09).
 Ness' fast falling speed is significantly lower (88.5 → 2.2).
Ground Attacks
- Neutral attack:
 Neutral attack's first hit deals more damage (2% → 3%).
 Neutral attack transitions sooner into the later hits (frame 10 → 5 (hit 1), frame 8 → 7 (hit 2)).
 The third hit has increased base knockback (10 → 16).
 All three hits of neutral attack have more startup lag with the second and third hits also having a shorter duration (frames 2-3 (hit 1)/3-5 (hit 2)/6-11 (hit 3) → 3-4/4-5/7-10).
 All three hits have more ending lag (FAF 18 (hit 1)/20 (hit 2)/ 25 (frame 3) → 20/21/31).
 Ness can no longer cancel the first hit into grab.
- Forward tilt:
 Forward tilt deals more damage (9%/10%/11% → 10%/11%/12%) and has increased base knockback (10 → 12).
- Up tilt:
 Up tilt has less ending lag (FAF 35 → 32).
 Up tilt's angle has been altered (100° → 96°).
 Up tilt deals more knockback (80 (base), 40 (scaling) → 42/126).
 Up tilt has a much shorter duration (frames 5-19 → 5-9) hindering its use as an anti air and giving it more cooldown.
 Ness' head has less intangibility (frames 5-19 → 5-6) further hindering up tilt's use as an anti-air.
- Down tilt:
 Down tilt has less startup lag (frame 4 → 3) and Ness can perform another down tilt sooner (frame 11 → 8).
 Down tilt deals more knockback (2 (base), 20 (scaling) → 4/50).
 This make it safer on hit and chain into itself more reliably at lower percents.
 However, this makes it chain into itself less reliably at higher percents.
 Down tilt has a shorter duration (frames 4-8 → 3-5).
- Dash attack:
 Dash attack is now a multi-hitting move where Ness produces three PSI rings in front of him.
 Dash attack deals slightly more damage if all hits connect (12% (clean)/9% (late) → 5% (hit 1)/4% (hits 2 & 3)/12.28% (total)) and has significantly more range and overall utility.
 The final hit of dash attack has higher base knockback (16 → 70) and launches opponents vertically (361° → 100°) improving its combo potential but hindering its KO and edgeguarding potential when combined with its lower damage.
 Dash attack has a shorter duration (frames 8-11 (clean)/12-25 (late) → 8/15/22) and each hit has high base knockback making it extremely difficult to connect properly.
 Dash attack has more ending lag (FAF 38 → 40).
- Forward smash:
 Forward smash has increased horizontal range.
 Forward smash has less startup lag (frame 18 → 16).
 Forward smash no longer deals consistent damage with the tipper of the bat being the strongest (18% → 18%/20%/22%/24%).
 Forward smash deals less knockback (70 (base), 65 (scaling) → 50/62) hindering the sourspots' KO potential.
 Forward smash has a shorter duration (frames 18-21 → 16-17).
- Up smash:
 Up smash has less startup lag with a longer duration (frames 13-25 → 12-31).
 Ness can use up smash to perform the Yo-yo glitch improving its utility.
 Up smash no longer has a mid hit.
 The late hit launches opponents at a slightly higher angle compared to the previous mid hit (78° → 80°).
 Up smash has less range.
 The clean hit has a shorter duration (frames 13-17 → 12-14).
 The clean hit no longer launches opponents towards Ness (110° → 70°).
 Up smash deals significantly less damage (17% → 9% (clean), 15%/13% → 6% (late)). The clean hit's knockback was not fully compensated (20 (base), 100 (scaling) → 80/80) while the late hit deals less knockback (0 (base), 100 (scaling) → 60/45).
 Up smash has more ending lag (FAF 40 → 50).
- Down smash:
 Down smash has less startup lag (frame 13 → 12).
 Down smash now launches opponents vertically (361° → 70°).
 Down smash has less range.
 Down smash has a much shorter duration (frames 13-52 → 12 (clean) 13-31 (late)) and now has a weaker late hit.
 Down smash deals drastically less damage (19% → 11%/7%) and its knockback was not fully compensated (0 (base), 100 (scaling) → 70/80 (clean), 70/60 (late)) siginificantly hindering its KO potential.
 Down smash has more ending lag (FAF 55 → 59).
Aerial Attacks
 All aerials except neutral aerial auto-cancel later (frame 26 → 30 (forward), frame 19 → 25 (back), frame 1 → 27 (up), frame 1 → 29 (down)).
 The weakening of L-canceling has hindered Ness' combo game with landing aerials as well as their safety with the worse auto-cancel windows on his aerials only further exacerbating this.
 This combined with the changes to shields has severely harmed Ness' shield pressuring potential making his aerials much less safe against shield and completely removing his ability to perform shield break combos.
- Neutral aerial:
 Ness has a new neutral aerial: a spin with his arms outward.
 Neutral aerial has less ending lag (FAF 40 → 36).
 Neutral aerial auto-cancels earlier (frame 33 → 27).
 Neutral aerial deals less damage (14% → 11% (clean), 11% → 8% (late)) hindering its KO potential.
 However this combined with Ness' superior aerial mobility improves its combo potential.
 Neutral aerial has a shorter duration (frames 5-39 → 5-23).
- Forward aerial:
 Forward aerial has been altered: Ness now produces four PSI rings in front of him with the move being a multi hit.
 Forward aerial has less startup (frame 10 → 8) and ending lag (FAF 42 → 40).
 Forward aerial deals more damage if all hits connect (12% (clean)/10% (late) → 4% (hits 1-4)/15.74% (total)).
 Forward aerial has considerably more range.
 Forward has much better combo potential due to its multi-hit properties as it can now chain into itself or other aerials.
 Forward aerial is less reliable due to being a multi-hit.
 The knockback on the final hit was not fully compensated (16 (base), 100 (scaling) → 24/135) hindering forward aerial's KO potential.
- Back aerial:
 Back aerial has less ending lag (FAF 40 → 36).
 The sweetspot has increased base knockback (10 → 16).
 Back aerial now has an electric effect giving it more hitlag (1x → 1.5x) and making it easier to DI.
- Up aerial:
 Up aerial has a bigger hitbox.
 Ness's head is no longer intangible while performing up aerial.
 Up aerial deals less damage (15% → 13%) and its knockback was not fully compensated (10 (base), 110 (scaling) → 13/109).
 Up aerial has a shorter duration (frames 8-16 → 8-11).
 Up aerial no longer auto-cancels for its entire duration now having 19 frames of landing lag (9 if L-cancelled).
- Down aerial:
 Down aerial has much higher base knockback (10/0 → 90), making it a deadly 0-death KO tool if not meteor cancelled.
 Ness's down aerial deals 3% less damage (15% → 12%), no longer deals extra shield damage and like most other meteor smashes, now has drastically increased start-up lag and a shorter duration (frames 4-20 → 20-28). It also has twice the amount of ending lag (FAF 30 → 60) no longer being possible to perform twice in a short hop or even out of a full height double jump and it no longer auto-cancels while the hitbox is out giving it more landing lag (4 frames → 28). The addition of meteor cancelling, when combined with its new angle allowing it to be meteor canceled (-90° → 280°) and its much lower knockback scaling (120 → 70), makes the attack much easier to survive at higher percents. This drastically worsens the move's utility and reliability, removing its use in combos while being much more unreliable as a finisher.
Throws/other attacks
 Grabs have more startup lag (frame 6 → 8 (standing), 10 (dash)) and ending lag (FAF 16 → 31 (standing), 41 (dash)).
 Forward and back throw deal 5% less damage (16% → 11%) hindering their KO potential. The former has increased base knockback (90 → 120) although it also has drastically lower knockback scaling (70 → 10) and cannot KO reliably until well beyond Sudden Death. The latter has much lower base knockback (90 → 15) and less KO potential although it has more knockback scaling (70 → 130) and it still remains one of the most potent throws in the game.
 Ness has been given an pummel, up throw, and a down throw, providing him with more options.
Special Moves
- PK Flash:
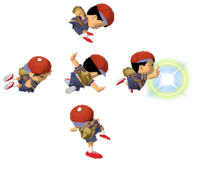
 Ness now has a new neutral special: PK Flash. A chargeable green ball of light that increases in power and moves downward the longer the button is held. Once it reaches full power, it explodes, dealing huge knockback.
 PK Flash grants Ness a new powerful (albeit slow) KO and edgeguarding option.
- PK Fire:
 PK Fire travels a smaller distance, deals 10% less damage, and it is now considerably easier to SDI out of.
 As a result of PK Flash now being Ness' neutral special, PK Fire is now Ness' side special.
- PK Thunder:
 Ness's PK Thunder travels faster and deals 2% more damage (6% → 8%).
 Ness's PK Thunder 2 travels a much shorter distance, deals less damage when hitting an opponent (30% → 25%), is significantly weaker (now KOing in the 75% range) as its knockback wasn't fully compensated (40 (base), 84 (scaling) → 60/70), now has a drastically weaker late hitbox which deals 5% less damage than the normal hitbox and can't KO until roughly 130%, and has a lot more ending and landing lag, now having around 60 frames (or 1 second) of lag if he uses PK Thunder 2 on the ground or if he lands while in the middle of the animation of PK Thunder 2. As such, Ness's recovery is considered to be much worse overall.
 The crowd no longer gasps when Ness hits himself with PK Thunder.
- PSI Magnet:
 PSI Magnet has less startup lag (frame 15 → 10).
 The color of PSI Magnet is now blue instead of green.
 The crowd no longer cheers when Ness absorbs a projectile with PSI Magnet.
 PSI Magnet has 10 frames extra frames of ending lag.
Moveset
For a gallery of Ness's hitboxes, see here.
| Name | Damage | Description | ||
|---|---|---|---|---|
| Neutral attack | 3% | Punches forward twice, then kicks. | ||
| 2% | ||||
| 4% | ||||
| Forward tilt | ↗ | 12% | Does a roundhouse kick forward. Can be angled up or down. | |
| → | 11% | |||
| ↘ | 10% | |||
| Up tilt | 7% | Thrusts both his hands upward. Ness's head is intangible during the early part of the animation. Can combo into itself and DJC'd up aerials. | ||
| Down tilt | 3% | Thrusts his leg downward, then pivots his foot to hit the opponent. Can combo into itself by mashing the A button after the move is executed, and is an infinite against a wall. | ||
| Dash attack | 5% (hit 1), 4% (hits 2-3) (≈12.28% total) | Throws his hands forward, sending three sparks PSI energy in front of himself. Good, disjointed range. 1st hit powerfully semi-spikes opponents, 2nd hit does very weak vertical knockback and the last hit deals powerful vertical knockback. | ||
| Forward smash | 18% (body), 20% (bat base), 22% (bat mid), 24% (bat tip) | Swings his bat forward. Has high knockback and damage at the tip of the bat, but has very weak knockback for a smash attack when untipped and has a little bit of start-up lag. The bat can reflect projectiles. | ||
| Up smash | 9% (startup), 4% (charging), 6% (attack) | Does a variation on the "around-the-world" yo-yo trick, swinging his yo-yo above his head. Has good range and speed. Used to perform the extremely powerful Yo-yo Glitch, but doesn't have any utility outside of it. Like his down smash, this attack is incapable of K.O.ing unless his opponent is over 200%, and the swinging part even has almost non-existent knockback not K.O.ing until at least 500%. The attack has a hitbox while charging. | ||
| Down smash | 11% (startup), 4% (charging), 7% (attack) | Sends his yo-yo backwards and "walks-the-dog" with it before pulling the yo-yo back. Has good range and speed, however, this attack is incapable of K.O.ing unless his opponent is over 180%. More powerful than the up smash in terms of knockback, but still extremely weak. The attack has a hitbox while charging. The swinging part of the attack has barely any base knockback and can't K.O. until the 430% range. | ||
| Neutral aerial | 11% (clean), 8% (late) | Spins around, arms stretched out. Has good knockback and is very fast with high combo potential. Poor range. | ||
| Forward aerial | 3% (hits 1-4), 5% (hit 5) (≈15.74% total) | Throws both his hands forward, sending multiple sparks PSI energy in front of himself. Is a fast, multi-hitting move, with good range and high knockback on the last hit K.O.ing under 130% off-stage. Generally used as a spacing move and can chain into itself several times at low to high percents. | ||
| Back aerial | 16% (clean), 10% (late) | Thrusts both his feet backwards. If sweetspotted, it electrifies the opponent, dealing massive damage. Is fast with very high knockback albeit somewhat poor range. Can shield poke if fastfall'd out of a DJC. The fourth most powerful back aerial in the game. | ||
| Up aerial | 13% | Headbutts upward. Has amazing juggling potential when DJC'd and a good KO move with very low lag, but poor range. Unlike in Smash 64, Ness`s head is no longer intangible. | ||
| Down aerial | 12% | Pulls his legs to his body before stomping downwards. Is a meteor smash, and has a decent amount of start-up lag. Great range, extremely high knockback at 0% (most powerful meteor smash at 0% in Melee), but it also has very low knockback scaling, being unable to KO grounded opponents at even 200%, and is relatively easy to meteor cancel. It also has no IASA frames (being interrupted on the same frame as Mario's forward aerial, but Mario's seem slower compared to Ness's). | ||
| Grab | — | |||
| Pummel | 3% | Headbutts the opponent. | ||
| Forward throw | 11% | Psychically throws the opponent forward. Very strong base knockback, but very low knockback scaling. | ||
| Back throw | 11% | Psychically throws the opponent behind him. Has extremely low base knockback but very high knockback scaling. This is Ness's strongest throw and the second strongest throw in the game (second to Mewtwo's up throw), KOing reliably at 130% and above. | ||
| Up throw | 10% | Psychically spins the opponent above his head and throws them upwards. Can chaingrab Fox, Falco and Captain Falcon at low % and has a decent amount of followups. Good knockback. | ||
| Down throw | 1% (hits 1-5), 4% (throw) | Slams the opponent to the ground and hits them with fire. Low knockback but allows a decent amount of followups, including being able to lead into an up aerial to KO. | ||
| Forward roll Back roll Spot dodge Air dodge |
— | — | ||
| Techs | — | — | ||
| Floor attack (front) Floor getups (front) |
6% | Punches on both sides whilst getting up. | ||
| Floor attack (back) Floor getups (back) |
6% | Gets up and does a sweep kick with both feet. | ||
| Edge attack (fast) Edge getups (fast) |
8% | Somersaults onto the stage, and kicks upwards with both feet. | ||
| Edge attack (slow) Edge getups (slow) |
10% | Slowly picks himself up and does a jump kick. | ||
| Neutral special | PK Flash | 11-36% | A sphere of green light appears above Ness. As the attack button is held, the sphere moves downwards and increases in power and size, until the attack button is released or until it is fully charged, it explodes. Has transcendent priority. | |
| Side special | PK Fire | 2% (lightning), 3% (pillar hit 1), 2% (pillar hits 2-7) | Fires a yellow, lightning-bolt shaped projectile that travels in a straight line until it hits an enemy or destructible portion of a stage, at which point it explodes into flames. The bolt has a hurtbox, which is what activates the pillar upon contact; the surrounding hitbox deals 2% and little vertical knockback, although only rarely does it ever actually hit. The spawned pillar also has a hurtbox which slowly shrinks in size. | |
| Up special | PK Thunder | 8% (thunder head), 1% (thunder tail), 25% (PK Thunder 2 clean), 20% (PK Thunder 2 late) | Creates a stream of lightning that can be aimed into opponents to deal damage with the head and stun with the tail. Aiming the head into Ness himself will launch him in a trajectory opposite to the side he was hit on, which is referred to as PK Thunder 2. PK Thunder 2 has intangibility frames during the first half of the move. PK Thunder has transcendent priority. | |
| Down special | PSI Magnet | 0%, heals 2.0x the damage of absorbed projectiles | Creates a blue energy field around him which allows him to absorb all energy-based projectiles. It can be held. | |
Taunt
- Turns to the screen and nods his head while saying "Okay".
|
Idle pose
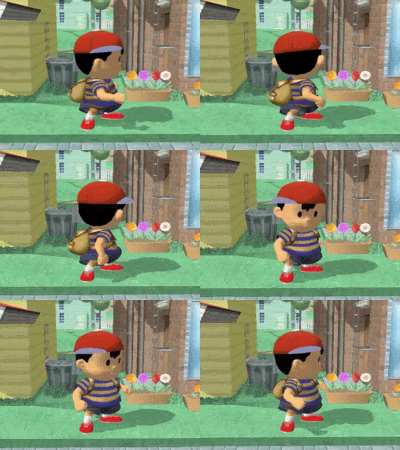
- Looks from side to side.
|
|---|
Crowd cheer
| English | Japanese | |
|---|---|---|
| Cheer | File:Ness Cheer NTSC Melee.ogg | |
| Description | Ness Ness Ness! | Ness Ness Ness! |
| Pitch | Group chant | Group chant |
Victory poses
- Looks to the left and right of him, then places an arm on the back of his head in a bashful manner.
- Swings around his bat four times, then poses with it.
- Jumps up and down twice, places arms on waist, and says "Okay!"
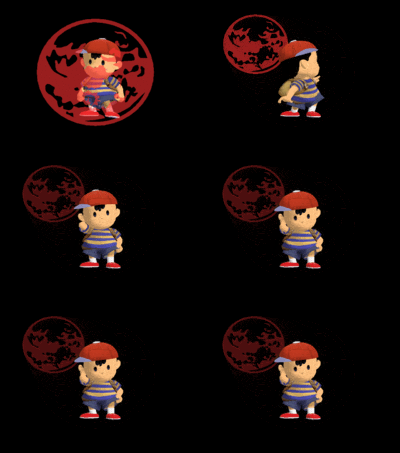 |
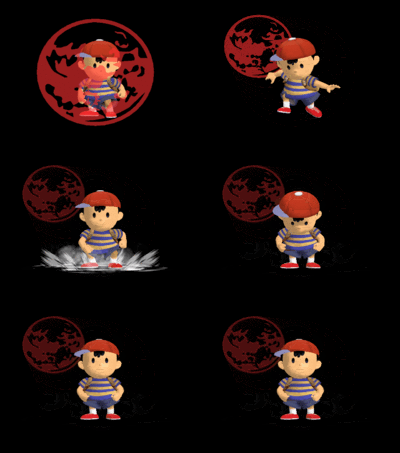 |
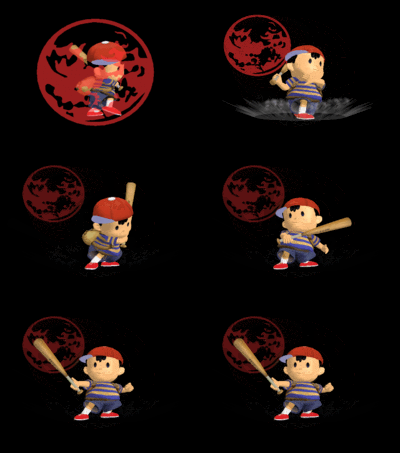
|
|---|
In Competitive play
Matchups
| Avg. | |||||||||||||||||||||||||||
In the most recent revision of the character matchup chart, Ness has a very poor matchup spread. He only soft counters three characters and has only one even matchup, against Yoshi, while he is soft countered by six, countered by nine, and hard countered by six. His poor KOing power, range, approach, and recovery are all exploitable, leading to problematic matchups against characters who can abuse these weaknesses. Sheik can chaingrab him to KO percents and finish him off with edgeguarding, Jigglypuff can gimp Ness's recovery with low-risk aerials and easily carry him off-stage, and Fox and Captain Falcon simply run him over with their superior speed and offensive prowess. He only has favorable matchups against characters who have as poor range as he does or are too slow to take advantage of his lack of range. As a result of these shortcomings, Ness has one of the worst matchup spreads in all of Melee, and this has not changed since the inception of the matchup chart.
Notable players
- See also: Category:Ness professionals (SSBM)
Active
Hungrybox - One of the Five Gods. Uses Ness as a secondary and/or sandbagging character. Using Ness, Hungrybox has taken games off of The Moon at Shuffle V and took a set off of HugS at Smash the Record 2016 and placed 9th. At Canada Cup 2016, a gauntlet exhibition was held in which Hungrybox's Ness was pitted against several attendees.
Jim Jam Flim Flam - Best Ness in Arizona.
Nihlus - Best Ness main in Texas.
Simna ibn Sind - Placed 13th at EVO 2007 and 17th at Super Champ Combo. Currently only attends EVO and GENESIS, funded by his Twitch Livestream donations. Simna ibn Sind is also known to be the person who discovered the Thunder Jacket.
Kalvar - Uses Ness as a secondary. Has won tournaments in Massachusetts using Ness and Marth.
Inactive
Mofo - One of the most influential Ness mains known for discovering many glitches such as the Star Jacket, Spike Jacket and the yoyo stack glitch. Considered the best Ness in the world from 2009 to 2014 before retiring, has taken a set off Gravy and Captain Smuckers.
Nessby - Best Ness in Japan prior to his retirement.
VRud - Best Ness in Canada before switching to Falco.
Tier placement and history
Ness was initially viewed as low-mid tier character in the metagame, with a peak of 15th place on the second tier list. Following this, however, Ness's standing on the tier list constantly fell down to the lower tiers, with most players noticing that his nerfs from Super Smash Bros. severely impaired his KO power and his already poor linear, predictable recovery; this was especially noted in the earlier Smash 64 metagame, as Ness was initially viewed as a top-tiered character.
On the current tier list, Ness places at 23rd, in the F tier, and he is considered non-viable for tournament play. Dedicated Ness players are rare in the current metagame, with most Ness players often using him as a situational counterpick; Hungrybox only used Ness once in all of Apex 2013, in an attempt to counter Armada's Young Link, and he mostly used Jigglypuff for the rest of the tournament. Other players of Ness are semi-active and generally do not place very well with him.
In 1-P Mode
Classic Mode
In Classic Mode, Ness can appear as an ordinary opponent, as an ally or opponent in the team battles, alongside Yoshi, Peach, or Mewtwo, as a member of a multi-character battle, or as a metal opponent. In Ness's appearance, he appears on either Onett or Fourside (if unlocked) as a regular opponent and on Battlefield as a metal opponent. When on a team with Yoshi, he appears on Yoshi's Island.
Adventure Mode
Ness's appearance in the Adventure Mode is in Stage 9: Onett. In the stage, the player must fight against three computer players, each one being Ness, on Onett; in the fight, the only item that appear is Mr. Saturn. The player must defeat all three opponents within five minutes to continue.
All-Star Mode
Ness and his allies are fought on Onett.
Event Matches
Ness is featured in the following event matches:
- Event 5: Spare Change: the player controls Ness and fights Captain Falcon in a coin battle on Onett. The player must collect 200 coins within 80 seconds in order to clear the event.
- Event 30: All-Star Match 3: Ness is the third opponent to be fought in this series of staged battles. The player battles him on Onett, which will transition to the next stage if Ness gets defeated. With a timer of four minutes, the player must defeat him along with Kirby, Pikachu and the Ice Climbers.
- Event 36: Space Travelers: As Ness, the player must defeat Samus, Kirby, Fox, Captain Falcon, and Falco. The player battles the first three characters on Fourside and battles the last two on Battlefield.
Ending images
Trophies
In addition to the normal trophy about Ness as a character, there are two trophies about him as a fighter, unlocked by completing both Adventure and All-Star modes respectively with Ness on any difficulty:
- Ness
- Ness is a young boy who's mastered the psychic power known as PSI. Ness was living a normal life in the suburbs of Onett until a meteor crashed into a nearby mountain and sent him on a wild adventure. Believing in the ultimate powers of wisdom, courage, and friendship, Ness proves that some heroes come in small packages.
- EarthBound 06/95
- Ness [Smash]
- The key to mastering Ness is controlling his unique midair jump, which makes up for what he lacks in speed. His PK Flash attack may seem weak at first glance, but it grows more powerful the longer you hold down the B Button. To do a lot of damage with PK Fire, try to burn your opponent as many times as possible.
- B: PK Flash
- Smash B: PK Fire
- Ness [Smash]
- Ness's mind is his best weapon. PK Thunder is a PSI missile weapon that can be guided using the Control Stick, and if Ness hits himself with it, he turns into a living missile capable of doing massive damage. This move can also be used for recovery. PSI Magnet turns energy missile attacks into health; try out certain Pokémon for stamina replenishment.
- Up & B: PK Thunder
- Down & B: PSI Magnet
Alternate costumes
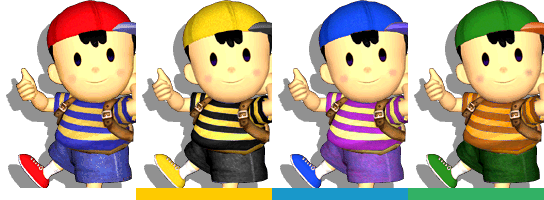
| |||
Gallery
Standing with Donkey Kong, Kirby, and Luigi on Great Bay
Posing with Kirby on Temple
Taunting with Kirby and Pikachu on Temple
Using PSI Magnet near Mewtwo on Final Destination
Trivia
- Ness is one of three characters whose neutral special changed during his jump to Melee, the others being Link and Jigglypuff. In the original Super Smash Bros., his neutral special was PK Fire; from Melee onward, he now uses PK Flash. As with the other two, his original neutral special remains in the game, having been transfered to the newly added side special move slot.
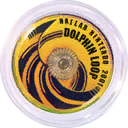
- If one looks closely at Ness's Yoyo, he or she can see the words DOLPHIN LOOP, with it being made by HALLAB NINTENDO in 2001 (Melee’s release year). Dolphin being a reference to the Gamecube's codename, and the "makers" a reference to the developer and publisher of Melee respectively. His bat reads NETT SPORTS.
- Hitting Ness as he's using PK Thunder can cause his body to constantly produce sparks afterward, though these sparks only provide a cosmetic effect. This glitch continues until he gets KOed, shields, or performs PK Thunder again.
- Ness's amiibo description on the North American amiibo website is based on his trophy description from Melee.
| Fighters in Super Smash Bros. Melee | |
|---|---|
| Veterans | Captain Falcon · Donkey Kong · Fox · Jigglypuff · Kirby · Link · Luigi · Mario · Ness · Pikachu · Samus · Yoshi |
| Newcomers | Bowser · Dr. Mario · Falco · Ganondorf · Ice Climbers · Marth · Mewtwo · Mr. Game & Watch · Peach · Pichu · Roy · Young Link · Zelda (Sheik) |
|
| |
|---|---|
| Fighters | Ness (SSB · SSBM · SSBB · SSB4 · SSBU) · Lucas (SSBB · SSB4 · SSBU) |
| Assist Trophies | Jeff · Starman |
| Bosses | Porky Statue · Porky |
| Stages | Onett · Fourside · New Pork City · Magicant |
| Items | Mr. Saturn · Franklin Badge · Ramblin' Evil Mushroom |
| Enemies | Devil Car · Starman |
| Other | Boney · Flying Man · Kumatora · Paula · Poo · Rope Snake · Ultimate Chimera |
| Trophies, Stickers and Spirits | Trophies (SSBM · SSBB · SSB4) · Stickers · Spirits |
| Music | Brawl · SSB4 · Ultimate |
| Masterpiece | EarthBound |


![[Smash]](https://ssb.wiki.gallery/images/thumb/3/37/Ness_Trophy_%28Smash%29.png/83px-Ness_Trophy_%28Smash%29.png)
![[Smash]](https://ssb.wiki.gallery/images/thumb/6/64/Ness_Trophy_%28Smash%29_2.png/78px-Ness_Trophy_%28Smash%29_2.png)


