Welcome to SmashWiki! Log in or create an account and join the community, and don't forget to read this first!
Notices
The Skill parameter has been removed from Smasher infoboxes, and in its place are the new "Best historical ranking" and "Best tournament result" parameters. SmashWiki needs help adding these new parameters to Smasher infoboxes, refer to the guidelines here for what should be included in these new parameters.
When adding results to Smasher pages, include each tournament's entrant number in addition to the player's placement, and use the {{Trn}} template with the matching game specified. Please also fix old results on Smasher pages that do not abide to this standard. Refer to our Smasher article guidelines to see how results tables should be formatted.
Check out our project page for ongoing projects that SmashWiki needs help with.
Super Smash Bros. Ultimate

Bayonetta (SSBU)/Up tilt: Difference between revisions

From SmashWiki, the Super Smash Bros. wiki
Jump to navigationJump to search
(New Page: {{ArticleIcons|ssbu=y}} thumb|450px|Hitbox visualization showing Bayonetta's up tilt. File:BayonettaUTiltBulletArtsSSBU.png|thumb|450px|Hitbox visualiz...)
 
(Overview by Ocho)
Line 2: Line 2:
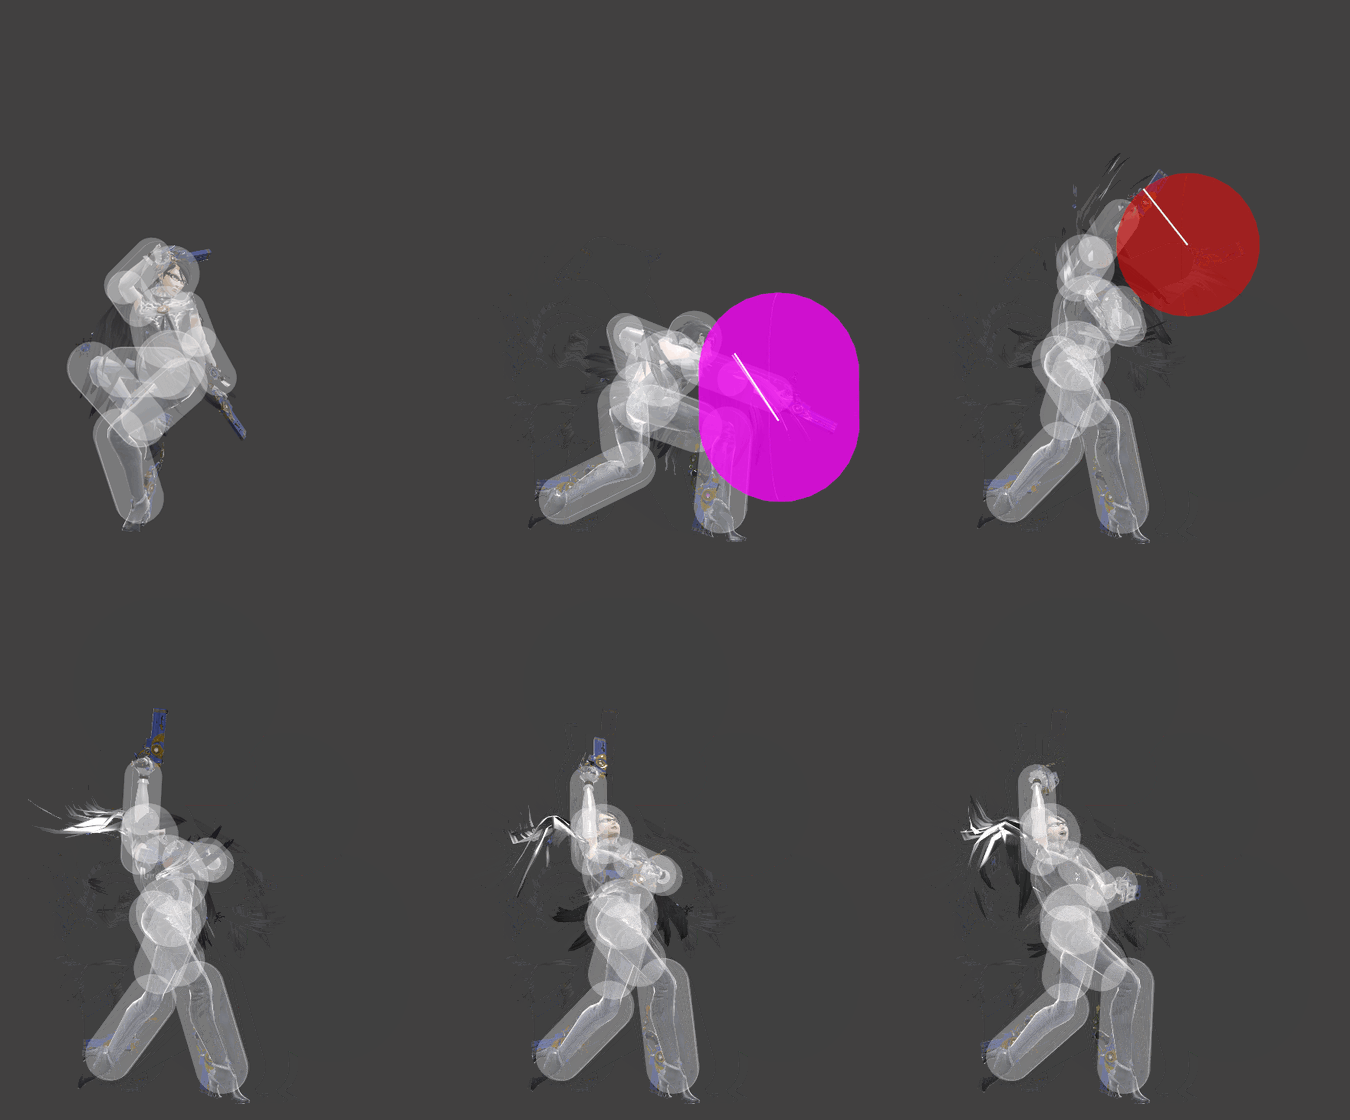
[[File:BayonettaUTiltSSBU.gif|thumb|450px|Hitbox visualization showing Bayonetta's up tilt.]]
[[File:BayonettaUTiltSSBU.gif|thumb|450px|Hitbox visualization showing Bayonetta's up tilt.]]
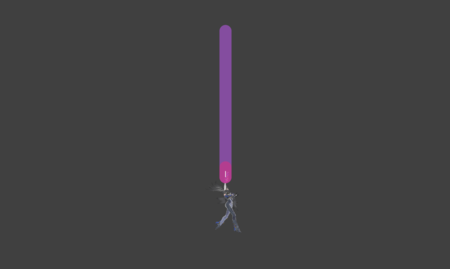
[[File:BayonettaUTiltBulletArtsSSBU.png|thumb|450px|Hitbox visualization showing Bayonetta's up tilt bullet arts.]]
[[File:BayonettaUTiltBulletArtsSSBU.png|thumb|450px|Hitbox visualization showing Bayonetta's up tilt bullet arts.]]
{{competitive expertise}}
 
==Overview==
==Overview==
Bayonetta performs an upwards pistol whip. Although it comes relatively slow at frame 9, it is a great anti-air that doubles as a combo starter, capable of leading into up aerial, neutral aerial, and Witch Twist at low to mid percents and even into itself against heavyweights at low percents. It can also hit below platforms and shield-pressure opponents from above, potentially starting a combo.
However at higher percents it loses all its combo potential, serving then exclusively as an anti-air, and its knockback growth is too low to score a KO until unreasonably high percents. It is also noteworthy that, at high percents and/or depending on positioning and hurtbox shifting, the first hit may fail to connect to the second hit against grounded opponents.
==Hitboxes==
==Hitboxes==
{{UltimateHitboxTableHeader}}

Revision as of 14:15, April 13, 2020

Hitbox visualization showing Bayonetta's up tilt.
Hitbox visualization showing Bayonetta's up tilt bullet arts.

Overview

Bayonetta performs an upwards pistol whip. Although it comes relatively slow at frame 9, it is a great anti-air that doubles as a combo starter, capable of leading into up aerial, neutral aerial, and Witch Twist at low to mid percents and even into itself against heavyweights at low percents. It can also hit below platforms and shield-pressure opponents from above, potentially starting a combo.

However at higher percents it loses all its combo potential, serving then exclusively as an anti-air, and its knockback growth is too low to score a KO until unreasonably high percents. It is also noteworthy that, at high percents and/or depending on positioning and hurtbox shifting, the first hit may fail to connect to the second hit against grounded opponents.

Hitboxes

ID Part Rehit rate Damage SD Angle Angle type BK KS FKV Set weight Radius Bone Offset SDI× T% Clang Rebound Effect Type G A Sound Direct Hit bits Hit part Blockable Reflectable Absorbable Flinchless No GFX Heedless
Early hit 1
0 0 0 1.5% 0 AngleIcon123.png Standard 100 10 0 HitboxTableIcon(False).png 5.0 top 0.0 7.0 to 10.0 9.5 0.8× 0.0× 0% HitboxTableIcon(Clang).png HitboxTableIcon(Rebound).png Normal (effect) Hand (type) HitboxTableIcon(GroundedTrue).png HitboxTableIcon(AerialFalse).png M Punch SpecialsDirect.png All All HitboxTableIcon(Blockable).png HitboxTableIcon(Unreflectable).png HitboxTableIcon(Unabsorbable).png HitboxTableIcon(False).png HitboxTableIcon(False).png HitboxTableIcon(False).png
1 0 0 1.5% 0 AngleIcon123.png Standard 90 10 0 HitboxTableIcon(False).png 5.0 top 0.0 7.0 to 10.0 9.5 0.8× 0.0× 0% HitboxTableIcon(Clang).png HitboxTableIcon(Rebound).png Normal (effect) Hand (type) HitboxTableIcon(GroundedFalse).png HitboxTableIcon(AerialTrue).png M Punch SpecialsDirect.png All All HitboxTableIcon(Blockable).png HitboxTableIcon(Unreflectable).png HitboxTableIcon(Unabsorbable).png HitboxTableIcon(False).png HitboxTableIcon(False).png HitboxTableIcon(False).png
Late hit 1
0 0 0 2.0% 0 AngleIcon128.png Standard 65 27 0 HitboxTableIcon(False).png 4.5 top 0.0 18.0 7.0 0.8× 0.0× 0% HitboxTableIcon(Clang).png HitboxTableIcon(Rebound).png Normal (effect) Hand (type) HitboxTableIcon(GroundedFalse).png HitboxTableIcon(AerialTrue).png M Punch SpecialsDirect.png All All HitboxTableIcon(Blockable).png HitboxTableIcon(Unreflectable).png HitboxTableIcon(Unabsorbable).png HitboxTableIcon(False).png HitboxTableIcon(False).png HitboxTableIcon(False).png
Hit 2
0 1 0 6.0% 0 AngleIcon93.png Standard 55 60 0 HitboxTableIcon(False).png 5.5 top 0.0 25.5 -1.0 to 1.0 1.5× 1.0× 0% HitboxTableIcon(Clang).png HitboxTableIcon(Rebound).png Normal (effect) Hand (type) HitboxTableIcon(GroundedTrue).png HitboxTableIcon(AerialTrue).png L Punch SpecialsDirect.png All All HitboxTableIcon(Blockable).png HitboxTableIcon(Unreflectable).png HitboxTableIcon(Unabsorbable).png HitboxTableIcon(False).png HitboxTableIcon(False).png HitboxTableIcon(False).png

Timing

Hit 1 (early, late) 9-11, 12-14
Hit 2 15
Interruptible 32
Animation length 51
FrameIcon(Lag).png FrameIcon(Lag).png FrameIcon(Lag).png FrameIcon(Lag).png FrameIcon(Lag).png FrameIcon(Lag).png FrameIcon(Lag).png FrameIcon(Lag).png FrameIcon(Hitbox).png FrameIcon(Hitbox).png FrameIcon(HitboxChangeS).png FrameIcon(HitboxChangeE).png FrameIcon(Hitbox).png FrameIcon(HitboxChangeS).png FrameIcon(HitboxChangeE).png FrameIcon(Lag).png FrameIcon(Lag).png FrameIcon(Lag).png FrameIcon(Lag).png FrameIcon(Lag).png FrameIcon(Lag).png FrameIcon(Lag).png FrameIcon(Lag).png FrameIcon(Lag).png FrameIcon(Lag).png FrameIcon(Lag).png FrameIcon(Lag).png FrameIcon(Lag).png FrameIcon(Lag).png FrameIcon(Lag).png FrameIcon(Lag).png FrameIcon(Interruptible).png FrameIcon(Interruptible).png FrameIcon(Interruptible).png FrameIcon(Interruptible).png FrameIcon(Interruptible).png FrameIcon(Interruptible).png FrameIcon(Interruptible).png FrameIcon(Interruptible).png FrameIcon(Interruptible).png FrameIcon(Interruptible).png FrameIcon(Interruptible).png FrameIcon(Interruptible).png FrameIcon(Interruptible).png FrameIcon(Interruptible).png FrameIcon(Interruptible).png FrameIcon(Interruptible).png FrameIcon(Interruptible).png FrameIcon(Interruptible).png FrameIcon(Interruptible).png FrameIcon(Interruptible).png
Legend (1 square = 1 frame)
Lag
Lag time
Hitbox
Hitbox
FrameIcon(HitboxChangeS).pngFrameIcon(HitboxChangeE).png
Hitbox change
Interruptibility
Interruptible