Super Smash Bros.

Luigi (SSB)/Back throw

From SmashWiki, the Super Smash Bros. wiki
< Luigi (SSB)
Revision as of 20:51, April 18, 2024 by Juju1995 (talk | contribs) (→‎Timing)
(diff) ← Older revision | Latest revision (diff) | Newer revision → (diff)
Jump to navigationJump to search
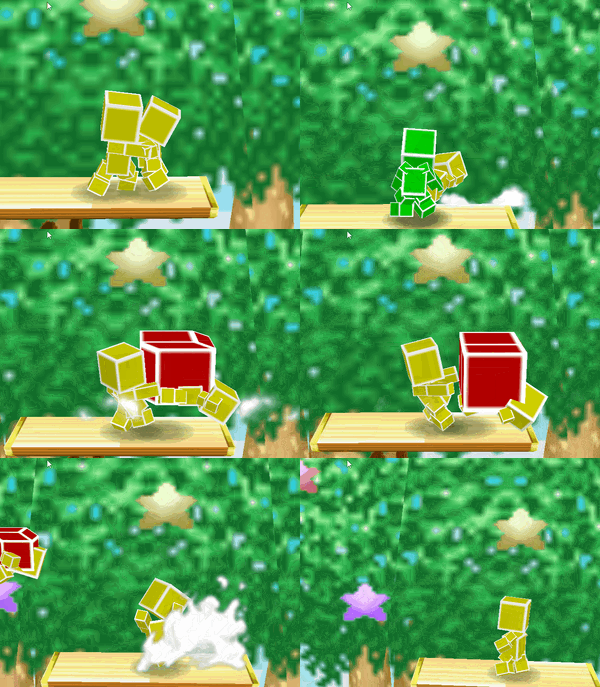
Hitbox visualization of Luigi's back throw.

Overview[edit]

Luigi grabs the opponent by the legs, swings them multiple times, and then throws them back. It is one of the weakest back throws in the game, only dealing 12% and having below average knockback for a back throw. It cannot KO Mario at the center of Dream Land until he is at 153% and at 110% when used at the ledge. The throw is rather slow, although it has a collateral hitbox while Luigi is swinging his opponent, which deals 10% to bystanders. This hitbox is not particularly powerful although it does grant Luigi some protection while performing the throw. Overall, Luigi's back throw is one of the least effective back throws in the game although it is still a solid option to set up edgeguards and to score KOes in some situations. Luigi is usually better off using his forward throw, although if he is at the ledge, facing away from it, back throw would still be his preferred option.

In the Japanese version, Luigi's back throw was identical to Mario's back throw, dealing 16% and much higher knockback. This naturally made Luigi's back throw much more useful, although the power from his original back throw has been transferred into his forward throw to compensate.

Throw and Hitbox Data[edit]

ID Part Damage SD Angle BK KS FKV Radius Bone Offset Clang Effect G A Sound
Hitbox
0 0 10% 0 Sakurai angle 30 80 0 150 10 120 0 0 HitboxTableIcon(NoClang).png Normal (effect) HitboxTableIcon(GroundedTrue).png HitboxTableIcon(AerialTrue).png L Punch

NTSC-J[edit]

Bone Damage Angle BK KS FKV Effect
Throw
Throw bn! 16% AngleIcon45.png 70 70 0 Normal (effect)
Release bn! 6% Sakurai angle 10 100 0 Normal (effect)

NTSC-U/PAL[edit]

Bone Damage Angle BK KS FKV Effect
Throw
Throw bn! 12% AngleIcon45.png 80 70 0 Normal (effect)
Release bn! 6% Sakurai angle 10 100 0 Normal (effect)

Summary[edit]

  • Nerf Damage (16% → 12%).
  • Buff Base knockback (70 → 80).

Timing[edit]

Invincibility 4-17
Hitbox 18-45
Turnaround 46
Throw release 46
Animation length 66
FrameIcon(Lag).png FrameIcon(Lag).png FrameIcon(Lag).png FrameIcon(Lag).png FrameIcon(Lag).png FrameIcon(Lag).png FrameIcon(Lag).png FrameIcon(Lag).png FrameIcon(Lag).png FrameIcon(Lag).png FrameIcon(Lag).png FrameIcon(Lag).png FrameIcon(Lag).png FrameIcon(Lag).png FrameIcon(Lag).png FrameIcon(Lag).png FrameIcon(Lag).png FrameIcon(Hitbox).png FrameIcon(Hitbox).png FrameIcon(Hitbox).png FrameIcon(Hitbox).png FrameIcon(Hitbox).png FrameIcon(Hitbox).png FrameIcon(Hitbox).png FrameIcon(Hitbox).png FrameIcon(Hitbox).png FrameIcon(Hitbox).png FrameIcon(Hitbox).png FrameIcon(Hitbox).png FrameIcon(Hitbox).png FrameIcon(Hitbox).png FrameIcon(Hitbox).png FrameIcon(Hitbox).png FrameIcon(Hitbox).png FrameIcon(Hitbox).png FrameIcon(Hitbox).png FrameIcon(Hitbox).png FrameIcon(Hitbox).png FrameIcon(Hitbox).png FrameIcon(Hitbox).png FrameIcon(Hitbox).png FrameIcon(Hitbox).png FrameIcon(Hitbox).png FrameIcon(Hitbox).png FrameIcon(HitboxThrowS).png FrameIcon(LagThrowE).png FrameIcon(Lag).png FrameIcon(Lag).png FrameIcon(Lag).png FrameIcon(Lag).png FrameIcon(Lag).png FrameIcon(Lag).png FrameIcon(Lag).png FrameIcon(Lag).png FrameIcon(Lag).png FrameIcon(Lag).png FrameIcon(Lag).png FrameIcon(Lag).png FrameIcon(Lag).png FrameIcon(Lag).png FrameIcon(Lag).png FrameIcon(Lag).png FrameIcon(Lag).png FrameIcon(Lag).png FrameIcon(Lag).png FrameIcon(Lag).png
FrameIcon(Vulnerable).png FrameIcon(Vulnerable).png FrameIcon(Vulnerable).png FrameIcon(Invincible).png FrameIcon(Invincible).png FrameIcon(Invincible).png FrameIcon(Invincible).png FrameIcon(Invincible).png FrameIcon(Invincible).png FrameIcon(Invincible).png FrameIcon(Invincible).png FrameIcon(Invincible).png FrameIcon(Invincible).png FrameIcon(Invincible).png FrameIcon(Invincible).png FrameIcon(Invincible).png FrameIcon(Invincible).png FrameIcon(Vulnerable).png FrameIcon(Vulnerable).png FrameIcon(Vulnerable).png FrameIcon(Vulnerable).png FrameIcon(Vulnerable).png FrameIcon(Vulnerable).png FrameIcon(Vulnerable).png FrameIcon(Vulnerable).png FrameIcon(Vulnerable).png FrameIcon(Vulnerable).png FrameIcon(Vulnerable).png FrameIcon(Vulnerable).png FrameIcon(Vulnerable).png FrameIcon(Vulnerable).png FrameIcon(Vulnerable).png FrameIcon(Vulnerable).png FrameIcon(Vulnerable).png FrameIcon(Vulnerable).png FrameIcon(Vulnerable).png FrameIcon(Vulnerable).png FrameIcon(Vulnerable).png FrameIcon(Vulnerable).png FrameIcon(Vulnerable).png FrameIcon(Vulnerable).png FrameIcon(Vulnerable).png FrameIcon(Vulnerable).png FrameIcon(Vulnerable).png FrameIcon(VulnerableStateS).png FrameIcon(VulnerableStateE).png FrameIcon(Vulnerable).png FrameIcon(Vulnerable).png FrameIcon(Vulnerable).png FrameIcon(Vulnerable).png FrameIcon(Vulnerable).png FrameIcon(Vulnerable).png FrameIcon(Vulnerable).png FrameIcon(Vulnerable).png FrameIcon(Vulnerable).png FrameIcon(Vulnerable).png FrameIcon(Vulnerable).png FrameIcon(Vulnerable).png FrameIcon(Vulnerable).png FrameIcon(Vulnerable).png FrameIcon(Vulnerable).png FrameIcon(Vulnerable).png FrameIcon(Vulnerable).png FrameIcon(Vulnerable).png FrameIcon(Vulnerable).png FrameIcon(Vulnerable).png
Legend (1 square = 1 frame)
Lag
Lag time
FrameIcon(Vulnerable).png
Vulnerable
Invincibility
Invincible
FrameIcon(BlankStateS).pngFrameIcon(BlankStateE).png
State change
ThrowThrow
Throw point

Trivia[edit]

  • This is a throw taken directly from Super Mario 64, where during the Bowser battles, Mario must throw Bowser into one of the explosive spiked pillars surrounding the arena.

Similar moves[edit]