List of SSBB trophies

From SmashWiki, the Super Smash Bros. wiki
Revision as of 10:40, July 6, 2008 by 71.184.137.196 (talk)
Jump to navigationJump to search
An icon for use on pages that need cleanup. This article or section may require a cleanup.
The editor who added this tag believes this page should be cleaned up for the following reason: All info should be in table form.
You can discuss this issue on the talk page or edit this page to improve it.


Most trophies ("figures" in Japan) in Super Smash Bros. Brawl can be obtained through coin launcher or playing certain stages in The Subspace Emissary. Some trophies, particularly the enemies of The Subspace Emissary, can only be obtained by using a trophy stand ("smash plates" in the Japan) on a foe while its health is low. Other trophies, particularly those of playable characters and their Final Smashes, can be obtained by playing Classic Mode and All-Star Mode respectively. Trophies can also be obtained by completing several challenges. There are 544 trophies in all in Brawl, some which tend to be rarer than others.


Trophies

Super Smash Bros. Series

Name How to Unlock Picture Description
Smash Ball Random N/A A mighty item. Each character has a unique secret technique known as a Final Smash that can only be used when that character acquires a Smash Ball. Use it well, and you'll be one huge step closer to victory. It can turn the battle's tide, help you put the finishing touches on a complete thrashing, or even provide a chaotic finish that's sure to leave you laughing until you cry.
Assist Trophy Random N/A A capsule that contains characters who will help you out in battle. You won't know who's in the capsule until you open it. It may be someone everyone knows or someone who's a bit of a mystery. The majority of these characters are invulnerable, so attacking them is not an option. You know what that means, right? RUN!
Stickers Collect All Stickers N/A In The Subspace Emissary, you can place stickers on trophy stands to augment

the offensive and defensive abilities of your characters. But stickers must be applied neatly-- they must be fully on the stand and must not overlap. Sticker power generally corresponds to sticker size--bigger is better. But big stickers take up more room, so you must strike a balance.

CDs Random N/A Each stage in Super Smash Bros. Brawl has several songs prepared for it. You can set the percentage chances for which songs appear in My Music. It's fun to choose songs according to your tastes. Each CD contains one song to increase your music library. Be sure to grab them when you see them. Once you've got all the music that's in the game, CDs will stop appearing.
Rolling Crates Random N/A Special crates that look like normal ones but have four wheels attached to the undersides. Try to destroy these and they will go rolling along, smashing everyone in their path. When a rolling crate is destroyed, it will reveal the same sorts of items found in normal crates. You can also jump on a rolling crate for a fun ride.
Blast Box Complete Target Smash Lvl 2 with every character. N/A An explosive-filled box that will detonate when the box is broken. The box can be smashed with normal attacks and will also catch fire and blow up if it's exposed to any flame. Unlike ordinary crates, blast boxes do not change their appearance from stage to stage. There's one fundamental rule when dealing with these items: be out of range when they blow.
Sandbag In HRC Complete it with every character N/A An item that appears in the Home-Run Contest, where the goal is to do lots of damage to Sandbag, then send it flying as far as you can. It also appears in the regular game. If you smash it, a storm of confetti and items will burst out. Sandbag doesn't feel pain, though; in fact, it's happy to be of service.
Food Random N/A Treats that decrease your damage. The nutritional value of each food, and how much damage it heals, is carefully measured. What's better for you, sushi or a donut? Party Balls contain a lot of food, so if you eat it all yourself, you can really lower your damage. There may be times when you laugh and walk away from food, and times when you watch someone else eating and cry.
Timer Play Brawl for 30 Hours N/A An item that slows down time and your enemies' movements. Only the player who gets the item will move at normal speed. You should enjoy a huge advantage in both attacking enemies and snagging items that appear. If an enemy manages to get to a powerful item first, you'll be able to shield and dodge and keep any damage you take to a minimum.
Beam Sword Random N/A A sword with a blade of glowing energy. The length of the blade changes depending on the fighting spirit of the wielder. It has four attacks: a standard attack, a strong side attack, a side smash attack, and a dash attack. When doing a side smash attack, the beam sword's blade grows to three times its normal length--that's the best reach of all battering weapons.
Home-Run Bat Hit Sanbag 1,500 feet N/A A battering item. Smash a foe with this and be rewarded with the distinctive "KREEEEENG!" sound of a home run as your foe goes flying. The sound echoes with what's surely the timbre of supreme bliss. For the character being hit, though, it must be one of the scariest sounds ever. But it's not easy to use-- it swings slowly and has a limited range. High risk, high reward.
Fan Random N/A An item made by taking thick paper, folding it accordion-style, taping one end, and fanning out the other. It's mainly used as a comedic prop by comedians from Osaka and the Kansai region of Japan. Why it's in Smash Bros. is a mystery. Grab this unique item and whack foes to turn them in the opposite direction. Throw a fan at a foe, and that character will fly straight up.
Ray Gun Random N/A A gun that shoots rays of light, as the name suggests. Its fat shape is not very realistic--in fact, it looks more like a toy than anything else. Its beams aren't very strong; they're fast and hard to dodge. In addition, they juggle whomever they hit in midair, making it possible to hit with one beam after another. By the way, it only holds 16 shots. When it's empty, you can throw it.
Cracker Launcher Have 1,000 KOs in Brawls N/A A portable launcher you can carry under your arm. Fire it to launch HUGE missiles... Well, OK, actually it just launches flashy fireworks. You can adjust the barrel angle to change your shot trajectories to blast those in front of you and even above you. It's a great item to have around. Be warned--the recoil pushes you in the opposite direction in which you're firing.
Motion Sensor Bomb Random N/A An item that, when placed, will detonate when someone gets too close. It can be stuck on ceilings, walls, and floors. It doesn't matter who places this thing--it'll explode regardless of who passes by. Its explosive power is high, and it launches players with ease. It's small and lies almost flat on surfaces, so it can be very difficult to see.
Gooey Bomb Random N/A A bomb encased in a blob of goo. This material is highly adhesive, so you can throw it at and stick it to opponents. Once it's attached to someone, this nefarious device will explode after a set amount of time. Be wary, though--if you come into contact with the character carrying the bomb, it may stick to you. This truly is a high-risk item.
Smoke Ball Random N/A An item that activates when tossed and fills the area with clouds of obscuring smoke. The smoke slowly changes color over time, from white to yellow, orange, red, purple, and finally blue before restarting the cycle. The smoke hangs around quite a while before dispersing. You can pick up an active smoke ball and hurl it again. Be careful not to lose track of yourself, though.
Bumper Hit a total of 15,000 feet in HRC N/A An item that originally appeared in Super Smash Bros. on the Nintendo 64. After many years, it now makes its triumphant return. Bumpers are used in pinball to send balls flying, and they perform the same role in Smash Bros. They react to anything that touches them, including the people who set them. As they can also be set in midair, using them requires good tactics.
Team Healer Random N/A A healing item. Hit a teammate with this item in Team Battle to reduce your ally's accumulated damage. You can throw it at an enemy, but the damage inflicted will be minimal, so you're better off using it to help your friends. This item will not react if attacked. Oh, and one more thing--you can't reduce your own damage by tossing the item up and letting it hit you. Sorry.
Crates Random N/A Item holders. You can destroy these to get at the items they contain, but be careful, because they will sometimes explode when broken. In Super Smash Bros. Melee, crates were uniform in design, but this time around, their appearance will change to match the stages. They'll sometimes look futuristic--other times, they'll look like presents with fancy ribbons
Barrels Random N/A Item holders similar to crates-- their appearance will also change to fit the area. When you throw a barrel, it won't shatter, but rather roll across the stage. When a rolling barrel hits a character, that character gets sent sailing. Barrels are heavy, so you'll need two hands to pick them up, and your foot speed will decrease too.
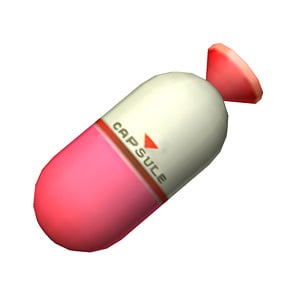
Capsule Random Capsule.jpg A small item filled with...items. Break it open to get what's inside. However, there's a 12.5 percent chance that a capsule will contain explosives, so it's important to think about where you're throwing the capsule to break it open. You won't find crates or barrels in capsules, but you may find capsules within barrels and crates.
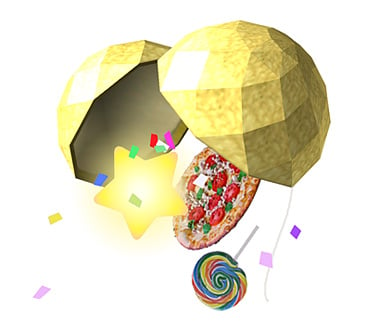
Party Ball Random px 70 A giant ball stuffed to bursting with items and food. Throw it or attack it, and after a few seconds, it will burst open with fanfare, spilling items all around. The fluttering confetti adds to the celebratory atmosphere. Some Party Balls are filled with nothing but bombs, though, so handle with care. Perhaps if you just pulled the string...Naw, that doesn't work.
Smash Coins Play 5 coin brawls N/A Items that appear each time you smack an opponent in a Coin Battle. The person who has the most coins when the game ends is the winner. There are gold, silver, and bronze coins, which are worth five, three, and one point respectively. Attacks that cause the most damage also produce the most valuable coins. You don't lose coins when you take damage.
Red Alloy Defeat 5 enemies in Cruel Brawl N/A A member of the Fighting Alloys. This one's sporting a red body. Built like an everyday hero, he fights like one too. Typically, when groups are divided into colors, red tends to serve a leadership role. Although this does not necessarily apply to the Alloys, the Red Alloy somehow feels the need to step it up.
Blue Alloy Beat 100-man Brawl with all characters. N/A A beautiful, cobalt blue member of the Alloys. This dainty female-form Alloy relies on a less rough-and-tumble style of fighting. The core at the center of her body provides power for the whole group of Alloys and plays a key role in holding body parts together. However, this is not necessarily a weak point, and attacking this core will not result in greater damage.
Yellow Alloy KO 100 opponents in Endless Brawl. N/A A member of the Alloys who stands out from the bunch with a sharp yellow body and horns. He moves like Mario but is bigger and has a longer reach. He can't, however, use items or special moves. Also remember that he is not controlled by a human player, so this is your big chance--show him who's boss!
Green Alloy Complete 15-minute Brawl N/A The guy who clearly has the biggest head of all the Alloys. In fact, he's all head! When you face him in the 100-Man Brawl, he'll come at you in a group with other Alloys. While kicking around herds of these bad boys can be good fun, the highest-difficulty Brawl challenge is brutal--the Green Alloys will come at you like merciless demons!

The Subspace Emissary

Name How to Unlock (#=throw a Trophy Stand at it in the Subspace Emissary) Picture Description
Primid # N/A The common soldier of the Subspace Army. It seems pretty harmless, but alas, it's stuffed with Shadow Bugs that leak from its forms. This Primid has no weapons--it will challenge you man-to-man. There are six different Primid types, but all of them are based on this basic form. There are also several different face types.
Sword Primid # N/A A Primid with a sword, as the name suggests. A Sword Primid will generally attack with slashes, but that's not all! It'll also make charging stabs at you, so watch out even when you're a good distance away. It might just be because of the way its sword lights up, but doesn't it remind you of a tarmac worker at an airport?
Boom Primid # N/A A Primid with a boomerang--hence the name. This Primid will use the boomerang to attack from afar (which is pretty much what you'd expect) and adds to its arsenal with close-quarter combat strikes. These two attack patterns may lead you to believe that it has no fun with boomerangs, but no! Boom Primids are just a little on the shy side.
Scope Primid # N/A A bazooka-wielding Primid. A Scope Primid uses weak, three-shot attacks and powerful, single-shot surge cannons. Due to its ability to also fire at targets above its position, you can't play it safe when a Scope Primid is down below you. Probably because of the weight of its weapon, it won't use its bazooka for direct strikes.
Big Primid # N/A The biggest Primid of all. Its attacks are the same in form and function, but considerably more powerful than a normal Primid's. Watch out for its smash attack--it will launch you far. It also has jump and roll attacks. The bigger size means an increase in Shadow Bugs--does that mean it takes more Shadow Bugs to move bigger Primids?
Metal Primid # N/A A Primid covered from head to toe in metallic plating. It cannot be knocked around with conventional attacks due to its hard and heavy nature--we're talking ALL metal, including the frilly feather on its head. On the flip side, the weight of the metal inhibits this Primid's movements. Like a normal Primid, a Metal Primid will also rely on hand-to-hand combat.
Fire Primid # N/A A specialized, fire-breathing Primid with two flamethrowing attacks. Primids with weapons are just normal, armed Primids, but Fire Primids are a whole new species with a whole new color. Although no more special than the others, they may feel slightly more superior with their red-hot color. Dealing with these guys in a group can be especially tricky.
Glire # N/A An enemy shaped like a tire. It's protected by three black shells, but they're not so hard as to be impenetrable. The outermost shell is covered in mucus that lets it stick to surfaces as it rolls along walls and ceilings. The eye in its center is creepy. When it spots the player, it stops, sheds its outer layers, and spouts fire from its inner recesses.

Errors

  • On the Lyn trophy, it says that she is 15-years old. In the english Fire Emblem, she's 18-years old, and in the japanese version, she's 15.
  • On the Aryll trophy, the description says she has a "Turtle marked Telescope." Her telescope is actually seagull-marked.
  • On the Black Knight trophy, the description says that he is the "wielder of the blessed sword Ettard," when he only wielded this blade in the Japanese version of his origin-game; in America, Ettard was called Alondite.
  • On the Piplup trophy, it states that the player receives Piplup before they "depart from the Sinnoh region". However, Sinnoh is the only region to be explored in Diamond and Pearl (much like Hoenn in Ruby and Sapphire), so the player receives Piplup before departing for the Sinnoh region.
  • On the Dark Samus trophy, the description says, "There are many theories on the origin of Dark Samus, but none are proven." This is not true, because the secret cutscene in Metroid Prime reveals that Dark Samus came from a fusion of Samus' Phazon suit and Metroid Prime's remains.
  • On the Samus (Dark Suit) trophy, the description says "after defeating Amorbis in the Dark Torvus Temple," when it is actually the Dark Agon Temple, in Metroid Prime 2.
  • The Crazy Hand trophy is listed under The Subspace Emissary, despite the fact that his only appearances in Brawl are in Boss Battles Mode and Classic Mode, though for him to appear in the latter the player must reach the final stage in nine minutes or less with the difficulty level set to Hard or above.
  • Yoshi's saddle is missing in the Super Dragon trophy.
  • On Shadow's trophy, it says he first appeared in Sonic Heroes when it was really Sonic Adventure 2
  • Many Final Smash trophies, with the exception of Sonic, credit their origin to Super Smash Bros. Brawl, when in fact, many came from their respective games.
  • The Pit Trophy states that he only appeared in Kid Icarus. He actually appeared in another Kid Icarus game: Kid Icarus: Of Myths and Monsters.
  • The Mew trophy lists its most recent appearance in Pokemon Diamond and Pearl when it's last appearance was in Pokemon Emerald. However, it is possible to transfer an Emerald Mew to Diamond and Pearl.
  • The Giant Goomba originated in Super Mario Bros 3, but it's trophy stated Super Mario 64.
  • The Pokémon Trainer's trophy says that he's latest appearance was in Pokémon Diamond/Pearl for Nintendo DS, when the Pokémon Trainer in Brawl's latest appearance was in Pokémon FireRed/LeafGreen for Game Boy Advance.
  • The Helirin's trophy states that Kuru Kuru Kururin was released in Japan only, whereas it was also released in Europe. It also states that Kuru Kuru Kururin is the only game that it appeard in, when it also appeard in Kururin Paradise an Kururin Squash!.

External links