User:DevinWash97/The Final Battle: Difference between revisions
From SmashWiki, the Super Smash Bros. wiki
Jump to navigationJump to search
DevinWash97 (talk | contribs) (New Page: ==Spirit battles== ==Captured Fighters== {|class="wikitable sortable" style="width:100%;" |- ! style="width:5%;"|No. ! style="width:5%;"|Image ! Name ! Type ! Power ! Stage ! Music |-...) |
DevinWash97 (talk | contribs) No edit summary |
||
| Line 1: | Line 1: | ||
==Spirit battles== | ==Spirit battles== | ||
===Light=== | |||
{|class="wikitable sortable" style="width:100%;" | |||
|- | |||
! colspan=4|Spirit | |||
! colspan=7|Battle parameters | |||
|- | |||
! style="width:5%;"|No. | |||
! style="width:5%;"|Image | |||
! Name | |||
! Universe | |||
! Enemy Fighter(s) | |||
! style="width:5%;"|Type | |||
! style="width:5%;"|Power | |||
! Stage | |||
! Rules | |||
! Conditions | |||
! Music | |||
|- | |||
|246 | |||
|[[File:Tetra.png|center|64x64px]] | |||
|[[Tetra]] | |||
|{{uv|The Legend of Zelda}} | |||
|•{{SSBU|Toon Link}} {{Head|Toon Link|g=SSBU|s=20px|cl=Blue}} | |||
|[[File:SpiritTypeShield.png|20px|center|Shield]] | |||
|9,800 | |||
|[[Pirate Ship]] | |||
|•Item: [[Bullet Bill]]<br>•Hazard: Heavy Wind | |||
|•Dangerously high winds are in effect<br>•The enemy is easily distracted by items | |||
|''{{SSBUMusicLink|The Legend of Zelda|The Great Sea / Menu Select}}'' | |||
|- | |||
|1,017 | |||
|[[File:BalderSpirit.png|center|64x64px]] | |||
|Balder | |||
|{{uv|Bayonetta}} | |||
|•Giant {{SSBU|Robin}} {{Head|Robin|g=SSBU|s=20px|cl=White}} | |||
|[[File:SpiritTypeShield.png|20px|center|Shield]] | |||
|4,200 | |||
|[[Umbra Clock Tower]] (hazards off) | |||
|N/A | |||
|•The enemy's special moves have increased power<br>•Stamina battle<br>•The enemy's FS Meter charges quickly | |||
|''{{SSBUMusicLink|Bayonetta|The Legend Of Aesir}}'' | |||
|} | |||
===Dark=== | |||
{|class="wikitable sortable" style="width:100%;" | |||
|- | |||
! colspan=4|Spirit | |||
! colspan=7|Battle parameters | |||
|- | |||
! style="width:5%;"|No. | |||
! style="width:5%;"|Image | |||
! Name | |||
! Universe | |||
! Enemy Fighter(s) | |||
! style="width:5%;"|Type | |||
! style="width:5%;"|Power | |||
! Stage | |||
! Rules | |||
! Conditions | |||
! Music | |||
|- | |||
|222 | |||
|[[File:Midna.png|center|64x64px]] | |||
|[[Midna]] | |||
|{{uv|The Legend of Zelda}} | |||
|•{{SSBU|Bayonetta}} {{Head|Bayonetta|g=SSBU|s=20px|cl=Green}} | |||
|[[File:SpiritTypeGrab.png|20px|center|Grab]] | |||
|9,200 | |||
|[[Bridge of Eldin]] (hazards off) | |||
|•Assist Trophy Enemies ([[Midna]])<br>•Item: Transforming Types | |||
|•Hostile assist trophies will appear | |||
|''{{SSBUMusicLink|The Legend of Zelda|Midna's Lament}}'' | |||
|- | |||
|289 | |||
|[[File:SSBU Spirits Little Birdie.png|center|64x64px]] | |||
|Little Birdie | |||
|{{uv|Metroid}} | |||
|•Tiny {{SSBU|Ridley}} {{Head|Ridley|g=SSBU|s=20px|cl=Yellow}} | |||
|[[File:SpiritTypeShield.png|20px|center|Shield]] | |||
|3,700 | |||
|[[Distant Planet]] | |||
|•Defense ↑<br>•Attack Power ↑<br>•Giant | |||
|•The enemy is giant after a little while<br>•The enemy has increased attack power after a little while<br>•The enemy has increased defense after a little while | |||
|''{{SSBUMusicLink|Metroid|Vs. Ridley}}'' | |||
|} | |||
==Boss== | |||
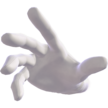
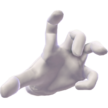
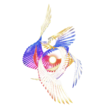
Both [[Master Hand (SSBU)|Master Hand]] and [[Crazy Hand (SSBU)|Crazy Hand]] are fought twice here. Defeating them for the second time will grant the player their spirits. If Galeem and Dharkon are fought at the same time, the song, ''{{SSBUMusicLink|Super Smash Bros.|Galeem/Dharkon}}'' will be played instead. Defeating one of them will give the player one of the bad endings. Defeating both of them will give the player the true ending and grants them their spirits. | |||
{|class="wikitable sortable" | |||
|- | |||
! style="width:5%;"|No. | |||
! style="width:5%;"|Image | |||
! Name | |||
! style="width:5%;"|Type | |||
! style="width:5%;"|Power | |||
! Stage | |||
! Music | |||
|- | |||
| 1,095 | |||
| [[File:Master Hand SSBU.png|center|108x108px]] | |||
| [[Master Hand (SSBU)|Master Hand]] | |||
| ??? | |||
| ??? | |||
| [[Final Destination (SSBU)|Final Destination]] | |||
| ''{{SSBUMusicLink|Super Smash Bros.|Master Hand}}'' | |||
|- | |||
| 1,096 | |||
| [[File:Crazy Hand SSBU.png|center|108x108px]] | |||
| [[Crazy Hand (SSBU)|Crazy Hand]] | |||
| ??? | |||
| ??? | |||
| [[Final Destination (SSBU)|Final Destination]] | |||
| ''{{SSBUMusicLink|Super Smash Bros.|Crazy Hand}}'' | |||
|- | |||
| 1,105 | |||
| [[File:Galeem SSBU.png|center|108x108px]] | |||
| [[Galeem]] | |||
| ??? | |||
| ??? | |||
| ??? | |||
| ''{{SSBUMusicLink|Super Smash Bros.|Galeem}}'' | |||
|- | |||
| 1,106 | |||
| [[File:DharkonSpirit.png|center|108x108px]] | |||
| [[Dharkon]] | |||
| ??? | |||
| ??? | |||
| ??? | |||
| ''{{SSBUMusicLink|Super Smash Bros.|Dharkon}}'' | |||
|} | |||
==Captured Fighters== | ==Captured Fighters== | ||
Four fighters are found in this realm. However, {{SSBU|Palutena}} will appear after {{SSBU|Dark Samus}} is awakened and [[Crazy Hand (SSBU)|Crazy Hand]] is beaten, while {{SSBU|Bayonetta}} will appear after {{SSBU|Roy}} is awakened and [[Master Hand (SSBU)|Master Hand]] is beaten. | |||
{|class="wikitable sortable" style="width:100%;" | {|class="wikitable sortable" style="width:100%;" | ||
|- | |- | ||
Revision as of 16:28, May 27, 2019
Spirit battles
Light
| Spirit | Battle parameters | |||||||||
|---|---|---|---|---|---|---|---|---|---|---|
| No. | Image | Name | Universe | Enemy Fighter(s) | Type | Power | Stage | Rules | Conditions | Music |
| 246 | Tetra | The Legend of Zelda | •Toon Link |
9,800 | Pirate Ship | •Item: Bullet Bill •Hazard: Heavy Wind |
•Dangerously high winds are in effect •The enemy is easily distracted by items |
The Great Sea / Menu Select | ||
| 1,017 | Balder | Bayonetta | •Giant Robin |
4,200 | Umbra Clock Tower (hazards off) | N/A | •The enemy's special moves have increased power •Stamina battle •The enemy's FS Meter charges quickly |
The Legend Of Aesir | ||
Dark
| Spirit | Battle parameters | |||||||||
|---|---|---|---|---|---|---|---|---|---|---|
| No. | Image | Name | Universe | Enemy Fighter(s) | Type | Power | Stage | Rules | Conditions | Music |
| 222 | Midna | The Legend of Zelda | •Bayonetta |
9,200 | Bridge of Eldin (hazards off) | •Assist Trophy Enemies (Midna) •Item: Transforming Types |
•Hostile assist trophies will appear | Midna's Lament | ||
| 289 | Little Birdie | Metroid | •Tiny Ridley |
3,700 | Distant Planet | •Defense ↑ •Attack Power ↑ •Giant |
•The enemy is giant after a little while •The enemy has increased attack power after a little while •The enemy has increased defense after a little while |
Vs. Ridley | ||
Boss
Both Master Hand and Crazy Hand are fought twice here. Defeating them for the second time will grant the player their spirits. If Galeem and Dharkon are fought at the same time, the song, Galeem/Dharkon will be played instead. Defeating one of them will give the player one of the bad endings. Defeating both of them will give the player the true ending and grants them their spirits.
| No. | Image | Name | Type | Power | Stage | Music |
|---|---|---|---|---|---|---|
| 1,095 | Master Hand | ??? | ??? | Final Destination | Master Hand | |
| 1,096 | Crazy Hand | ??? | ??? | Final Destination | Crazy Hand | |
| 1,105 | Galeem | ??? | ??? | ??? | Galeem | |
| 1,106 | Dharkon | ??? | ??? | ??? | Dharkon |
Captured Fighters
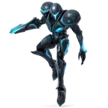
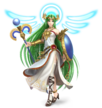
Four fighters are found in this realm. However, Palutena will appear after Dark Samus is awakened and Crazy Hand is beaten, while Bayonetta will appear after Roy is awakened and Master Hand is beaten.
| No. | Image | Name | Type | Power | Stage | Music |
|---|---|---|---|---|---|---|
| 25 | Roy | 12,500 | Castle Siege Ω | Beyond Distant Skies - Roy's Departure | ||
| 04ε | Dark Samus | 12,500 | Frigate Orpheon Ω | Multiplayer - Metroid Prime 2: Echoes | ||
| 54 | Palutena | 12,500 | Palutena's Temple Ω | Destroyed Skyworld | ||
| 63 | Bayonetta | 12,500 | Umbra Clock Tower Ω | Let's Hit The Climax! |
