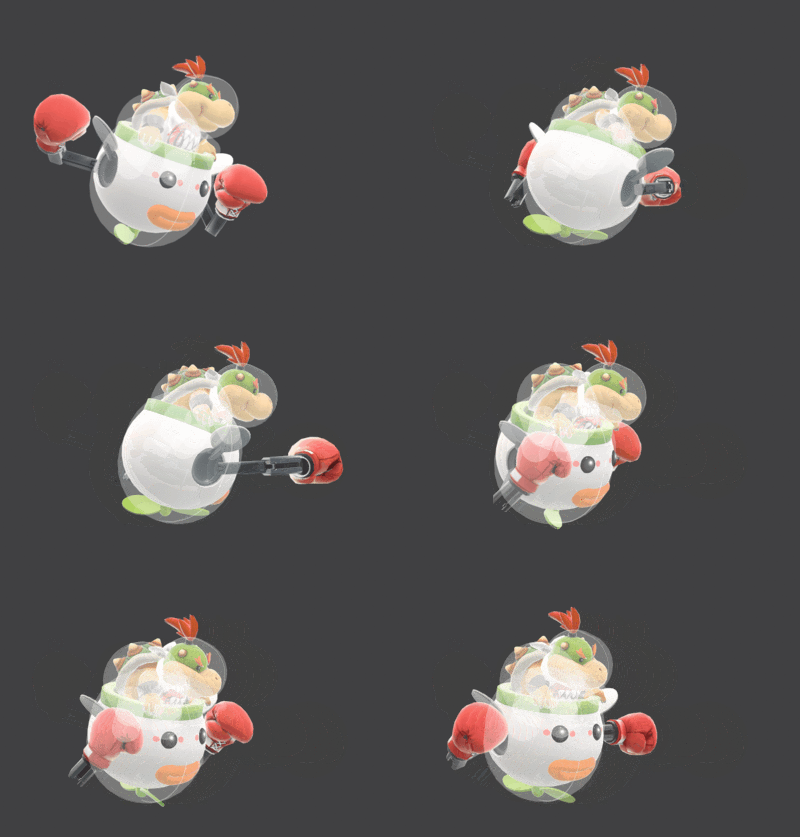
Bowser Jr. (SSBU)/Neutral attack/Hit 2: Difference between revisions
From SmashWiki, the Super Smash Bros. wiki
Jump to navigationJump to search
(New Page: {{ArticleIcons|ssbu=y}} thumb|400px|Hitbox visualization showing Bowser Jr.'s second jab. {{competitive expertise}} ==Overview== ==Hitboxes== {{UltimateHit...) |
Raul Retana (talk | contribs) m (Added hitstun and update history) |
||
| Line 3: | Line 3: | ||
{{competitive expertise}} | {{competitive expertise}} | ||
==Overview== | ==Overview== | ||
==Update History== | |||
'''{{GameIcon|ssbu}} {{SSBU|3.0.0}}''' | |||
*{{buff|Neutral attack 2 deals more hitstun, allowing it to connect into the rapid jab more reliably.}} | |||
==Hitboxes== | ==Hitboxes== | ||
{{UltimateHitboxTableHeader}} | {{UltimateHitboxTableHeader}} | ||
! Hitstun | |||
{{UltimateHitboxTableRow | {{UltimateHitboxTableRow | ||
|id=0 | |id=0 | ||
| Line 23: | Line 27: | ||
|slvl=S | |slvl=S | ||
}} | }} | ||
|'''+3''' frames | |||
{{UltimateHitboxTableRow | {{UltimateHitboxTableRow | ||
|id=1 | |id=1 | ||
| Line 41: | Line 46: | ||
|slvl=S | |slvl=S | ||
}} | }} | ||
|'''+3''' frames | |||
{{UltimateHitboxTableRow | {{UltimateHitboxTableRow | ||
|id=0 | |id=0 | ||
| Line 59: | Line 65: | ||
|slvl=S | |slvl=S | ||
}} | }} | ||
|'''+3''' frames | |||
|} | |} | ||
==Timing== | ==Timing== | ||
Revision as of 11:38, July 8, 2020
Overview
Update History
 Neutral attack 2 deals more hitstun, allowing it to connect into the rapid jab more reliably.
Hitboxes
Timing
| Hitboxes | 4-5 |
|---|---|
| Earliest continuable | 6 |
| Interruptible | 30 |
| Animation length | 47 |
Lag time |
Hitbox |
Earliest continuable point |
Interruptible |
|

