Super Smash Bros. 4

Mario (SSB4)/Neutral attack/Hit 2: Difference between revisions

From SmashWiki, the Super Smash Bros. wiki
Jump to navigationJump to search
No edit summary
Line 1: Line 1:
{{ArticleIcons|ssb4=y}}
{{technical data|Missing timing values, also a check for accuracy}}
{{competitive expertise}}
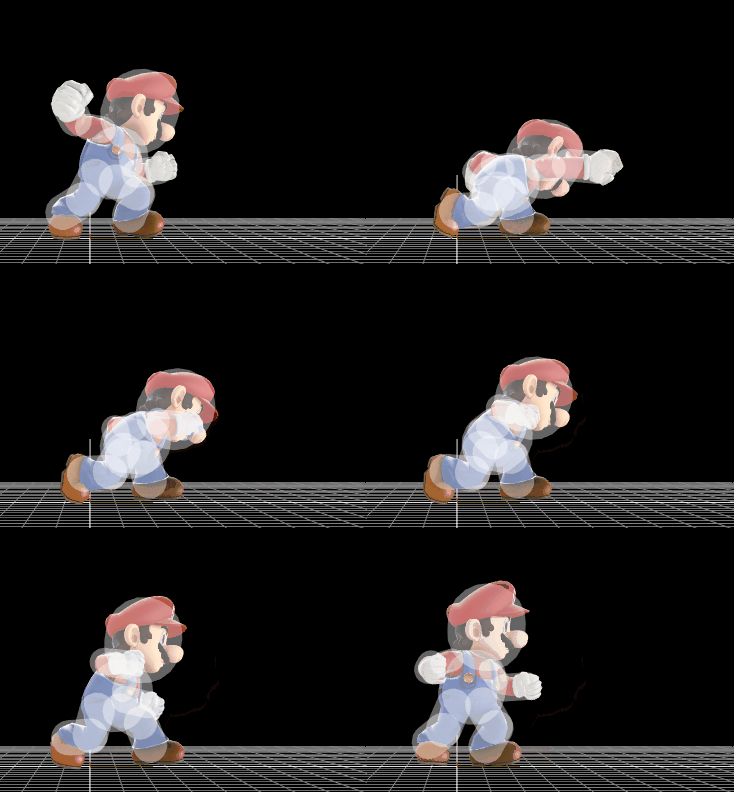
[[File:MarioJab2.gif|270px|thumb|Hitbox visualization of Mario's second jab.]]
[[File:MarioJab2.gif|270px|thumb|Hitbox visualization of Mario's second jab.]]

Revision as of 20:31, January 9, 2018

Competitive.png This article or section may require competitive expertise.
You can discuss this issue on the talk page or edit this page to improve it.
Hitbox visualization of Mario's second jab.

Overview

The second hit of Mario's neutral attack is a simple punch using the arm closer to the camera. In terms of its properties, it is quite similar to the first hit, but it has slightly more weight-based knockback, and only does 1.5% damage.

Hitbox Properties

ID Part Damage SD Angle BK KS FKV Radius Bone Offset SDIx T% Clang Rebound Type Effect G A Sound Direct
0 0 1.5% 0 Sakurai angle 0 100 0 3.0 21 1.4 0.0 0.0 1.0x 1.0x 0% HitboxTableIcon(Clang).png HitboxTableIcon(Rebound).png Hand (type) Normal (effect) HitboxTableIcon(GroundedTrue).png HitboxTableIcon(AerialTrue).png S Punch SpecialsDirect.png
1 0 1.5% 0 Sakurai angle 0 100 0 1.5 13 0.0 0.0 0.0 1.0x 1.0x 0% HitboxTableIcon(Clang).png HitboxTableIcon(Rebound).png Hand (type) Normal (effect) HitboxTableIcon(GroundedTrue).png HitboxTableIcon(AerialTrue).png S Punch SpecialsDirect.png
2 0 1.5% 0 AngleIcon80.png 0 80 0 4 22 4.2 0.0 0.0 1.0x 1.0x 0% HitboxTableIcon(Clang).png HitboxTableIcon(Rebound).png Hand (type) Normal (effect) HitboxTableIcon(GroundedTrue).png HitboxTableIcon(AerialTrue).png S Punch SpecialsDirect.png

Timing

Hitbox 2-3
Earliest continuable frame 6
Interruptible 22
Animation length 26
FrameIcon(Lag).png FrameIcon(Hitbox).png FrameIcon(Hitbox).png FrameIcon(Lag).png FrameIcon(Lag).png FrameIcon(LagContinuableS).png FrameIcon(LagContinuableE).png FrameIcon(Lag).png FrameIcon(Lag).png FrameIcon(Lag).png FrameIcon(Lag).png FrameIcon(Lag).png FrameIcon(Lag).png FrameIcon(Lag).png FrameIcon(Lag).png FrameIcon(Lag).png FrameIcon(Lag).png FrameIcon(Lag).png FrameIcon(Lag).png FrameIcon(Lag).png FrameIcon(Lag).png FrameIcon(Interruptible).png FrameIcon(Interruptible).png FrameIcon(Interruptible).png FrameIcon(Interruptible).png FrameIcon(Interruptible).png
Legend (1 square = 1 frame)
Lag
Lag time
Hitbox
Hitbox
FrameIcon(Continuable).png
Continuable
Interruptibility
Interruptible

References

Master Core Alpha