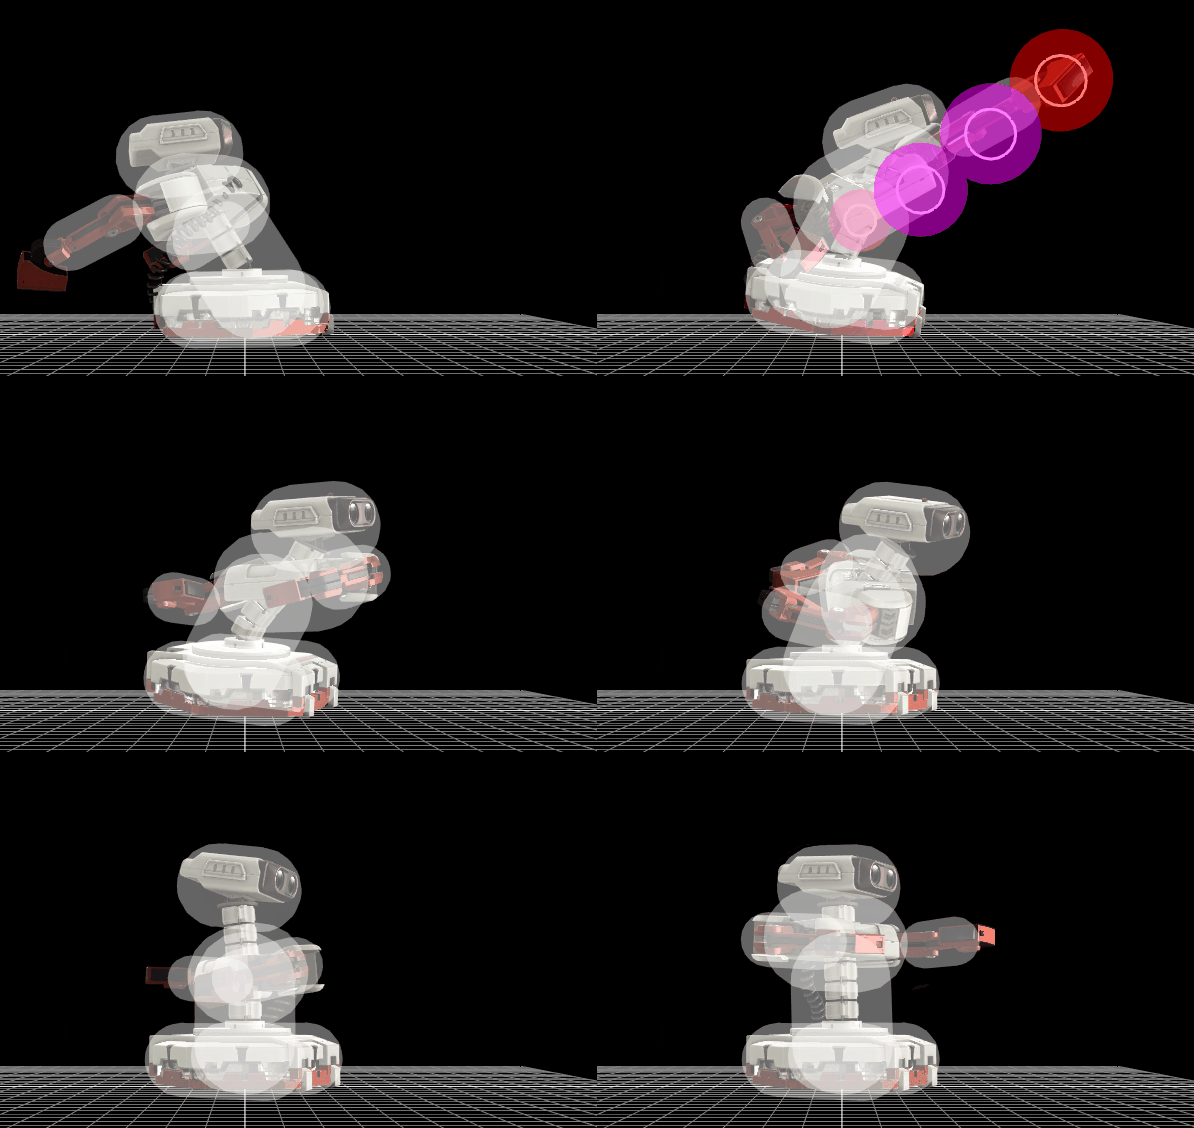
R.O.B. (SSB4)/Forward tilt: Difference between revisions
From SmashWiki, the Super Smash Bros. wiki
Jump to navigationJump to search
(New Page: {{ArticleIcons|ssb4=y}} {{competitive expertise}} {{technical data}} ==Hitboxes== This move can be angled, but all three angles have the same properties. {{SSB4HitboxTableHeader}} {{...) |
m (Text replacement - "== ([^=])" to "== $1") |
||
| (4 intermediate revisions by 2 users not shown) | |||
| Line 1: | Line 1: | ||
{{ArticleIcons|ssb4=y}} | {{ArticleIcons|ssb4=y}} | ||
{|class="wikitable" style="float:right; margin:4pt;" | |||
!colspan=2|R.O.B. forward tilt hitbox visualization | |||
|- | |||
!↗ | |||
|[[File:ROBFTiltUp.gif|270px]] | |||
|- | |||
!→ | |||
|[[File:ROBFTilt.gif|270px]] | |||
|- | |||
!↘ | |||
|[[File:ROBFTiltDown.gif|270px]] | |||
|} | |||
==Overview== | |||
{{competitive expertise}} | {{competitive expertise}} | ||
==Hitboxes== | ==Hitboxes== | ||
This move can be angled, but all three angles have the same properties. | This move can be angled, but all three angles have the same properties. | ||
| Line 85: | Line 97: | ||
}} | }} | ||
|} | |} | ||
==Timing== | |||
{|class="wikitable" | |||
!Hitboxes | |||
|7-9 | |||
|- | |||
!Interruptible | |||
|34 | |||
|- | |||
!Animation length | |||
|37 | |||
|} | |||
{{FrameStripStart}} | |||
{{FrameStrip|t=Lag|c=6}}{{FrameStrip|t=Hitbox|c=3}}{{FrameStrip|t=Lag|c=24}}{{FrameStrip|t=Interruptible|c=4}} | |||
{{FrameStripEnd}} | |||
{{FrameIconLegend|lag=y|hitbox=y|interruptible=y}} | |||
{{MvSubNavROB|g=SSB4}} | {{MvSubNavROB|g=SSB4}} | ||
[[Category:R.O.B. (SSB4)]] | [[Category:R.O.B. (SSB4)]] | ||
[[Category:Forward tilts (SSB4)]] | [[Category:Forward tilts (SSB4)]] | ||
Latest revision as of 02:20, April 13, 2022
| R.O.B. forward tilt hitbox visualization | |
|---|---|
| ↗ | 
|
| → | 
|
| ↘ | 
|
Overview[edit]
Hitboxes[edit]
This move can be angled, but all three angles have the same properties.
Timing[edit]
| Hitboxes | 7-9 |
|---|---|
| Interruptible | 34 |
| Animation length | 37 |
Lag time |
Hitbox |
Interruptible |
|
