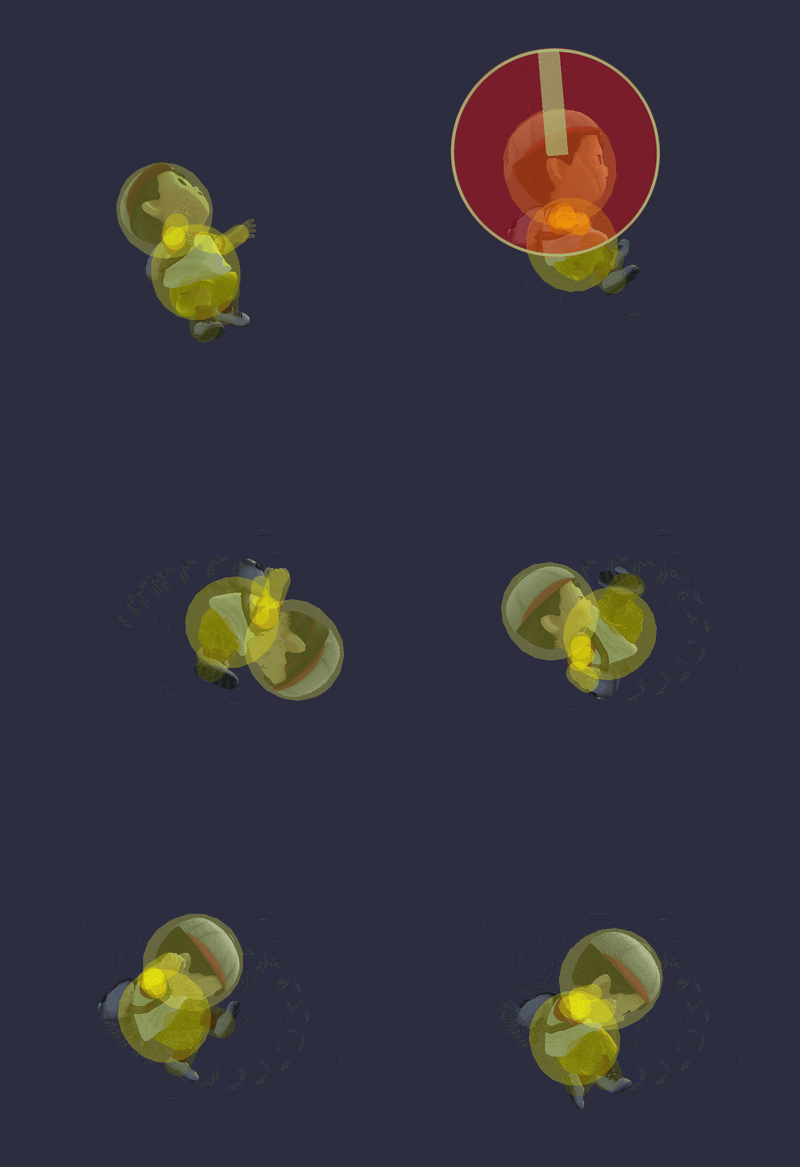
Ness (SSBB)/Up aerial: Difference between revisions
From SmashWiki, the Super Smash Bros. wiki
Jump to navigationJump to search
MHStarCraft (talk | contribs) (Ok it's pretty developed enough but your edit summary says nothing about why it doesn't need to be further expanded (it's my personal opinion but meh, it looks fine enough)) |
No edit summary |
||
| (9 intermediate revisions by 7 users not shown) | |||
| Line 1: | Line 1: | ||
{{ArticleIcons|ssbb=y}} | {{ArticleIcons|ssbb=y}} | ||
[[File:NessUAirSSBB.gif|thumb|400px|Hitbox visualization showing Ness's up aerial.]] | |||
==Overview== | ==Overview== | ||
Ness spins around vertically, damaging those who come in contact with his head. Does 13% damage and bolsters Ness' already reliable aerial game. Its low [[knockback]] gives it good combo ability, which, combined with its high [[damage]] output, can rack up damage quickly. This attack also has high knockback scaling, which gives it [[KO]] potential under 150%, and even lower if used higher up in the air. It gives the furthest directional boost when used in tandem with his double jump, giving him a slightly larger recovery. Can be used as a follow-up to an {{mvsub|Ness|SSBB|up throw}} at low percentages and leads into many [[PK Thunder]] tricks. It can also be used as a finisher to [[PK Fire]] combos. Overall, one of Ness' better attacks, and a staple in his metagame. | Ness spins around vertically, damaging those who come in contact with his head. Does 13% damage and bolsters Ness' already reliable aerial game. Its low [[knockback]] gives it good combo ability, which, combined with its high [[damage]] output, can rack up damage quickly. This attack also has high knockback scaling, which gives it [[KO]] potential under 150%, and even lower if used higher up in the air. It gives the furthest directional boost when used in tandem with his double jump, giving him a slightly larger recovery. Can be used as a follow-up to an {{mvsub|Ness|SSBB|up throw}} at low percentages and leads into many [[PK Thunder]] tricks. It can also be used as a finisher to [[PK Fire]] combos. Overall, one of Ness' better attacks, and a staple in his metagame. | ||
{{ | ==Hitboxes== | ||
{{BrawlHitboxTableHeader}} | |||
{{BrawlHitboxTableRow | |||
|id=0 | |||
|part=0 | |||
|damage=13% | |||
|angle=85 | |||
|bk=13 | |||
|ks=109 | |||
|fkv=0 | |||
|r=432000 | |||
|bn=42 | |||
|ypos=204480 | |||
|rawflags=XX11100001XXXX11XX00001X10X00000 | |||
}} | |||
|} | |||
==Timing== | |||
===Attack=== | |||
{|class="wikitable" | |||
!Initial autocancel | |||
|1-7 | |||
|- | |||
!Hitboxes | |||
|8-11 | |||
|- | |||
!Ending autocancel | |||
|27- | |||
|- | |||
!Interruptible | |||
|42 | |||
|- | |||
!Animation length | |||
|49 | |||
|} | |||
{{FrameStripStart}} | |||
{{FrameStrip|t=Lag|c=7}}{{FrameStrip|t=Hitbox|c=4}}{{FrameStrip|t=Lag|c=30}}{{FrameStrip|t=Interruptible|c=8}} | |||
|- | |||
{{FrameStrip|t=Autocancel|c=7}}{{FrameStrip|t=Blank|c=19}}{{FrameStrip|t=Autocancel|c=23}} | |||
{{FrameStripEnd}} | |||
===[[Landing lag]]=== | |||
{|class="wikitable" | |||
!Animation length | |||
|12 | |||
|} | |||
{{FrameStripStart}} | |||
{{FrameStrip|t=Lag|c=12}} | |||
{{FrameStripEnd}} | |||
{{FrameIconLegend|lag=y|hitbox=y|autocancel=y|interruptible=y}} | |||
{{MvSubNavNess}} | {{MvSubNavNess|g=SSBB}} | ||
[[Category:Ness (SSBB)]] | [[Category:Ness (SSBB)]] | ||
[[Category:Up aerials (SSBB)]] | [[Category:Up aerials (SSBB)]] | ||
Latest revision as of 22:42, May 21, 2024
Overview[edit]
Ness spins around vertically, damaging those who come in contact with his head. Does 13% damage and bolsters Ness' already reliable aerial game. Its low knockback gives it good combo ability, which, combined with its high damage output, can rack up damage quickly. This attack also has high knockback scaling, which gives it KO potential under 150%, and even lower if used higher up in the air. It gives the furthest directional boost when used in tandem with his double jump, giving him a slightly larger recovery. Can be used as a follow-up to an up throw at low percentages and leads into many PK Thunder tricks. It can also be used as a finisher to PK Fire combos. Overall, one of Ness' better attacks, and a staple in his metagame.
Hitboxes[edit]
| ID | Part | Damage | SD | Angle | BK | KS | FKV | Radius | Bone | Offset | SDIx | H× | T% | Clang | Rebound | Type | Effect | G | A | Sound | Direct | ||
|---|---|---|---|---|---|---|---|---|---|---|---|---|---|---|---|---|---|---|---|---|---|---|---|
| 0 | 0 | 13% | 0 | 13 | 109 | 0 | 7.2 | 42 | 0.0 | 3.408 | 0.0 | 1.0x | 1.0x | 0% | |||||||||
Timing[edit]
Attack[edit]
| Initial autocancel | 1-7 |
|---|---|
| Hitboxes | 8-11 |
| Ending autocancel | 27- |
| Interruptible | 42 |
| Animation length | 49 |
Landing lag[edit]
| Animation length | 12 |
|---|
Lag time |
Hitbox |
Autocancel |
Interruptible |
