Princess / Swordsman spike: Difference between revisions
mNo edit summary Tag: Mobile edit |
(Seems to line up with our tech consolidation practices) |
||
| (25 intermediate revisions by 8 users not shown) | |||
| Line 1: | Line 1: | ||
The Princess/Swordsman spike is a Peach, Roy, and Marth | {{ArticleIcons|ssbm=y|unofficial=y}} | ||
{{image|Image for Peach}} | |||
{{merge|Ceiling glitch|Has a "Uses" section already, and this is a direct use-case for it.}} | |||
[[File:Swordsman spike.gif|thumb|{{SSBM|Roy}} using the Swordsman spike]] | |||
The '''Princess/Swordsman spike''' is a specific technique in ''[[Super Smash Bros. Melee]]'' which can only be performed by {{SSBM|Peach}}, {{SSBM|Roy}}, and {{SSBM|Marth}}, as well as {{SSBM|Kirby}} after inhaling Peach. It is done by activating the [[invisible ceiling glitch]] with their respective [[counterattack]]s, causing the opponent to be knocked back at a different trajectory than usual. | |||
==How to perform== | ==How to perform== | ||
To setup the ceiling glitch, | [[File:Swordsman spike 2.gif|thumb|{{SSBM|Marth}} using the Swordsman spike on {{SSBM|Fox}}]] | ||
To setup the invisible ceiling glitch, first [[shield]] with the [[L button]] or [[R button]], and then release shield (letting go of the L/R button, [[jump]]ing, [[roll]]ing, or [[grab]]bing all work). To activate the glitch, use a [[counterattack]] move against a grounded attacker. | |||
If done correctly, the opponent will be knocked back but take only horizontal knockback and no vertical knockback while incurring the full [[hitstun]] of the move. It should be noted that the spike is more useful on the left side of the stage, as the invisible ceiling glitch is active until the opponent touches the ground, while the glitch is only active for a few frames on the right side. This turns any follow-up attacks on the left side into pseudo-spikes. A strong follow up move will deal full horizontal knockback and hitstun while the character falls due to [[gravity]]. | |||
==How it works== | ==How it works== | ||
This likely | The invisible ceiling glitch is notoriously easy to activate with these three attacks specifically. This is likely because Peach's Toad [[hitbox]] and Marth and Roy's counter hitbox are very similar to the hitbox of a shield and are color-coded as the same type of hitbox as shields in debug mode. A standard invisible ceiling glitch is triggered by going airborne while still sliding back after a grounded attack hits an opponents shield, which can happen by either getting hit out of their attack on shield or for certain characters by walking or dropping through a platform after hitting an opponents shield with a specific attack. In most other cases, a player's counterattack would normally not cause any of the shield push back required to trigger an invisible ceiling glitch. However, once the player has used their shield earlier on that stock when the player's opponent gets countered, they will receive the same push back as they would have if they attacked the shield the player were previously holding up. The player's counterattack will still be able to trigger the Princess/Swordsman spike until the player releases their shield when it is incredibly small or the next time the player dies. Also, moving around or using the counter does not undo the setup. | ||
The player's shield effects how soon after the invisible ceiling glitch triggers, as it effects the amount of pushback the opponent receives. Firstly, if a shield is too light, the glitch activates later and may not trigger at all due to the opponent losing their vertical momentum too quickly. The strongest shield possible is recommended to use for the afformentioned reasons. However, the game may register the strong shield as a light shield if the player releases too slowly, so timing and reflexes are key if the player does not want to use an [[out of shield]] option. Also, if the player makes their shield too small, they may not have any backwards momentum when the counter hits, which means it will not trigger the invisible ceiling. As a final prerequisite, the stronger the move that hits the player counter is, the longer it takes for the player's counter to trigger the invisible ceiling and the lighter the player can hold their shield while still triggering the glitch. | |||
=== | ===Video demonstration=== | ||
{{#widget:YouTube|id=VJAKp_ODeUY}} | |||
[[Category:Super Smash Bros. Melee]] | [[Category:Super Smash Bros. Melee]] | ||
[[Category:Advanced techniques]] | [[Category:Advanced techniques]] | ||
Latest revision as of 12:49, March 2, 2024

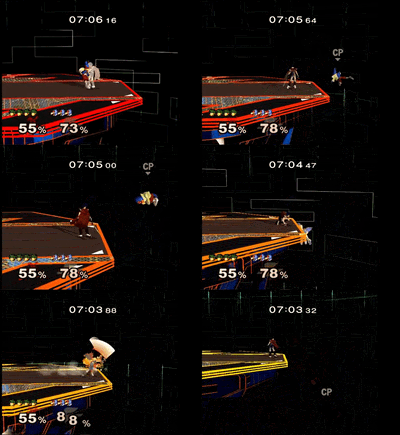
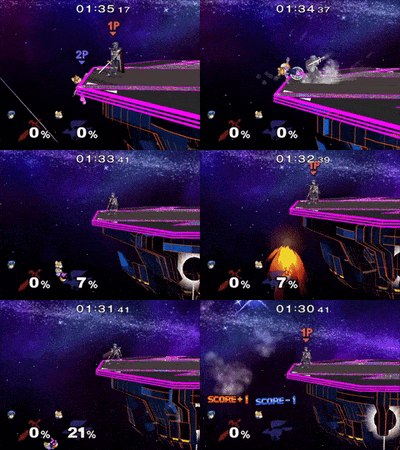
The Princess/Swordsman spike is a specific technique in Super Smash Bros. Melee which can only be performed by Peach, Roy, and Marth, as well as Kirby after inhaling Peach. It is done by activating the invisible ceiling glitch with their respective counterattacks, causing the opponent to be knocked back at a different trajectory than usual.
How to perform[edit]
To setup the invisible ceiling glitch, first shield with the L button or R button, and then release shield (letting go of the L/R button, jumping, rolling, or grabbing all work). To activate the glitch, use a counterattack move against a grounded attacker.
If done correctly, the opponent will be knocked back but take only horizontal knockback and no vertical knockback while incurring the full hitstun of the move. It should be noted that the spike is more useful on the left side of the stage, as the invisible ceiling glitch is active until the opponent touches the ground, while the glitch is only active for a few frames on the right side. This turns any follow-up attacks on the left side into pseudo-spikes. A strong follow up move will deal full horizontal knockback and hitstun while the character falls due to gravity.
How it works[edit]
The invisible ceiling glitch is notoriously easy to activate with these three attacks specifically. This is likely because Peach's Toad hitbox and Marth and Roy's counter hitbox are very similar to the hitbox of a shield and are color-coded as the same type of hitbox as shields in debug mode. A standard invisible ceiling glitch is triggered by going airborne while still sliding back after a grounded attack hits an opponents shield, which can happen by either getting hit out of their attack on shield or for certain characters by walking or dropping through a platform after hitting an opponents shield with a specific attack. In most other cases, a player's counterattack would normally not cause any of the shield push back required to trigger an invisible ceiling glitch. However, once the player has used their shield earlier on that stock when the player's opponent gets countered, they will receive the same push back as they would have if they attacked the shield the player were previously holding up. The player's counterattack will still be able to trigger the Princess/Swordsman spike until the player releases their shield when it is incredibly small or the next time the player dies. Also, moving around or using the counter does not undo the setup.
The player's shield effects how soon after the invisible ceiling glitch triggers, as it effects the amount of pushback the opponent receives. Firstly, if a shield is too light, the glitch activates later and may not trigger at all due to the opponent losing their vertical momentum too quickly. The strongest shield possible is recommended to use for the afformentioned reasons. However, the game may register the strong shield as a light shield if the player releases too slowly, so timing and reflexes are key if the player does not want to use an out of shield option. Also, if the player makes their shield too small, they may not have any backwards momentum when the counter hits, which means it will not trigger the invisible ceiling. As a final prerequisite, the stronger the move that hits the player counter is, the longer it takes for the player's counter to trigger the invisible ceiling and the lighter the player can hold their shield while still triggering the glitch.


