Super Smash Bros. 4

Bayonetta (SSB4)/Down smash: Difference between revisions

From SmashWiki, the Super Smash Bros. wiki
Jump to navigationJump to search
(Description already added.)
Tag: Mobile edit
 
(3 intermediate revisions by 3 users not shown)
Line 1: Line 1:
{{ArticleIcons|ssb4=y}}
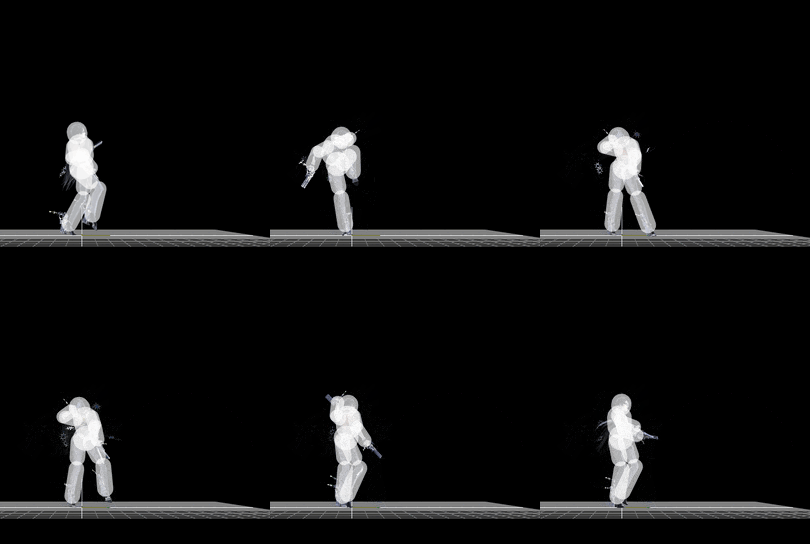
[[File:BayonettaDSmashSSB4.gif|thumb|270px|Hitbox visualization showing Bayonetta's down smash.]]


==Overview==
==Overview==
{{competitive expertise}}
Uses her Wicked Weaves to summon [[Madama Butterfly|Madama Butterfly's]] foot, appearing from a portal just in front of her and stomping onto the ground. Also a brief [[hitbox]] on Bayonetta's leading foot. Most famous for being a [[Meteor smash|meteor]] smash attack, firing hit opponents straight to the lower blast line when used facing the edge. Holding the attack button after release activates [[Bullet Arts]], but because only her heel guns fire anything, the ground gets in the way of any real value to this.
==Hitboxes==
==Hitboxes==
{{SSB4HitboxTableHeader}}
Line 28: Line 29:
{{SSB4HitboxTableRow
|id=0
|id=0
|damage={{ChargedSmashDmgSSBU|16.0}}
|damage={{ChargedSmashDmgSSB4|16.0}}
|angle=72
|angle=72
|bk=10
|bk=10
Line 67: Line 68:
{{SSB4HitboxTableRow
|id=0
|id=0
|damage={{ChargedSmashDmgSSBU|15}}
|damage={{ChargedSmashDmgSSB4|15}}
|angle=72
|angle=72
|bk=10
|bk=10
Line 86: Line 87:
{{SSB4HitboxTableRow
|id=1
|id=1
|damage={{ChargedSmashDmgSSBU|15}}
|damage={{ChargedSmashDmgSSB4|15}}
|angle=270
|angle=270
|bk=10
|bk=10

Latest revision as of 11:13, January 13, 2021

Hitbox visualization showing Bayonetta's down smash.

Overview[edit]

Uses her Wicked Weaves to summon Madama Butterfly's foot, appearing from a portal just in front of her and stomping onto the ground. Also a brief hitbox on Bayonetta's leading foot. Most famous for being a meteor smash attack, firing hit opponents straight to the lower blast line when used facing the edge. Holding the attack button after release activates Bullet Arts, but because only her heel guns fire anything, the ground gets in the way of any real value to this.

Hitboxes[edit]

ID Part Damage SD Angle BK KS FKV Radius Bone Offset SDIx T% Clang Rebound Type Effect G A Sound Direct
Bayonetta
0 0 5% 0 AngleIcon0.png 0 100 20 4.0 0 0.0 3.0 7.0 1.0x 0.3x 0% HitboxTableIcon(Clang).png HitboxTableIcon(Rebound).png Foot (type) Normal (effect) HitboxTableIcon(GroundedTrue).png HitboxTableIcon(AerialFalse).png M Kick SpecialsDirect.png
Giant foot (early)
0 0 16.0% 0 AngleIcon72.png 10 90 0 9.0 0 0.0 28.0 16.0 1.0x 1.2x 0% HitboxTableIcon(Clang).png HitboxTableIcon(Rebound).png Foot (type) Normal (effect) HitboxTableIcon(GroundedTrue).png HitboxTableIcon(AerialFalse).png L Kick SpecialsDirect.png
1 0 16% 0 AngleIcon270.png 10 80 0 9.0 0 0.0 28.0 16.0 1.0x 1.2x 0% HitboxTableIcon(Clang).png HitboxTableIcon(Rebound).png Foot (type) Normal (effect) HitboxTableIcon(GroundedFalse).png HitboxTableIcon(AerialTrue).png L Kick SpecialsDirect.png
Giant foot (late)
0 0 15% 0 AngleIcon72.png 10 90 0 12.0 0 0.0 8.0 18.0 1.0x 1.2x 0% HitboxTableIcon(Clang).png HitboxTableIcon(Rebound).png Foot (type) Normal (effect) HitboxTableIcon(GroundedTrue).png HitboxTableIcon(AerialFalse).png L Kick SpecialsDirect.png
1 0 15% 0 AngleIcon270.png 10 90 0 12.0 0 0.0 8.0 18.0 1.0x 1.2x 0% HitboxTableIcon(Clang).png HitboxTableIcon(Rebound).png Foot (type) Normal (effect) HitboxTableIcon(GroundedFalse).png HitboxTableIcon(AerialTrue).png L Kick SpecialsDirect.png

Timing[edit]

Charges between 8-9
Bayonetta 20-21
Giant foot (early, late) 25, 26-27
Interruptible 69
Animation length 82
FrameIcon(Lag).png FrameIcon(Lag).png FrameIcon(Lag).png FrameIcon(Lag).png FrameIcon(Lag).png FrameIcon(Lag).png FrameIcon(Lag).png FrameIcon(LagChargeS).png FrameIcon(LagChargeE).png FrameIcon(Lag).png FrameIcon(Lag).png FrameIcon(Lag).png FrameIcon(Lag).png FrameIcon(Lag).png FrameIcon(Lag).png FrameIcon(Lag).png FrameIcon(Lag).png FrameIcon(Lag).png FrameIcon(Lag).png FrameIcon(Hitbox).png FrameIcon(Hitbox).png FrameIcon(Lag).png FrameIcon(Lag).png FrameIcon(Lag).png FrameIcon(HitboxChangeS).png FrameIcon(HitboxChangeE).png FrameIcon(Hitbox).png FrameIcon(Lag).png FrameIcon(Lag).png FrameIcon(Lag).png FrameIcon(Lag).png FrameIcon(Lag).png FrameIcon(Lag).png FrameIcon(Lag).png FrameIcon(Lag).png FrameIcon(Lag).png FrameIcon(Lag).png FrameIcon(Lag).png FrameIcon(Lag).png FrameIcon(Lag).png FrameIcon(Lag).png FrameIcon(Lag).png FrameIcon(Lag).png FrameIcon(Lag).png FrameIcon(Lag).png FrameIcon(Lag).png FrameIcon(Lag).png FrameIcon(Lag).png FrameIcon(Lag).png FrameIcon(Lag).png FrameIcon(Lag).png FrameIcon(Lag).png FrameIcon(Lag).png FrameIcon(Lag).png FrameIcon(Lag).png FrameIcon(Lag).png FrameIcon(Lag).png FrameIcon(Lag).png FrameIcon(Lag).png FrameIcon(Lag).png FrameIcon(Lag).png FrameIcon(Lag).png FrameIcon(Lag).png FrameIcon(Lag).png FrameIcon(Lag).png FrameIcon(Lag).png FrameIcon(Lag).png FrameIcon(Lag).png FrameIcon(Interruptible).png FrameIcon(Interruptible).png FrameIcon(Interruptible).png FrameIcon(Interruptible).png FrameIcon(Interruptible).png FrameIcon(Interruptible).png FrameIcon(Interruptible).png FrameIcon(Interruptible).png FrameIcon(Interruptible).png FrameIcon(Interruptible).png FrameIcon(Interruptible).png FrameIcon(Interruptible).png FrameIcon(Interruptible).png FrameIcon(Interruptible).png
Legend (1 square = 1 frame)
Lag
Lag time
Hitbox
Hitbox
Interruptibility
Interruptible