Bayonetta (SSB4)/Forward tilt/Hit 3: Difference between revisions
From SmashWiki, the Super Smash Bros. wiki
Jump to navigationJump to search
(Created page with "{{ArticleIcons|ssb4=y}} ==Overview== {{competitive expertise}} ==Hitboxes== {{SSB4HitboxTableHeader}} {{SSB4HitboxTableRow |id=0 |damage=8.5% |angle=81 |bk=70 |ks=60 |fkv=0 |...") |
(Description added.) Tag: Mobile edit |
||
| (One intermediate revision by one other user not shown) | |||
| Line 1: | Line 1: | ||
{{ArticleIcons|ssb4=y}} | {{ArticleIcons|ssb4=y}} | ||
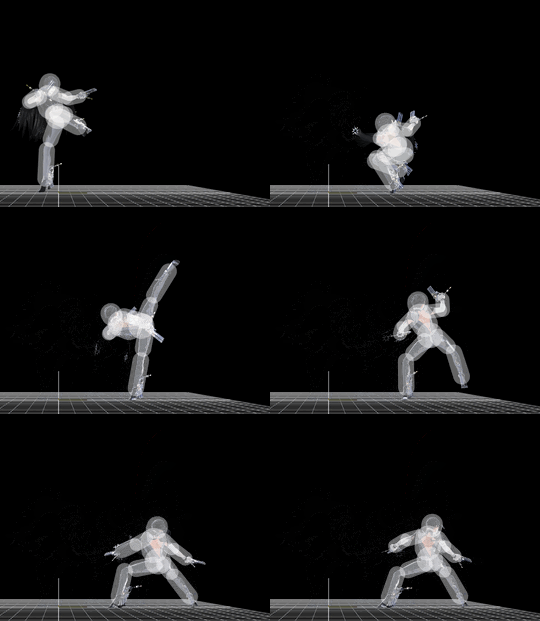
[[File:BayonettaFTilt3SSB4.gif|thumb|270px|Hitbox visualization showing Bayonetta's forward tilt 3.]] | |||
==Overview== | ==Overview== | ||
After her [[Bayonetta (SSB4)/Forward tilt/Hit 1|first]] and [[Bayonetta (SSB4)/Forward tilt/Hit 2|second]] hit, she performs a higher kick that’s angled upwards. The last hit launches opponents diagonally upward. | |||
==Hitboxes== | ==Hitboxes== | ||
{{SSB4HitboxTableHeader}} | {{SSB4HitboxTableHeader}} | ||
Latest revision as of 16:32, January 14, 2021
Overview[edit]
After her first and second hit, she performs a higher kick that’s angled upwards. The last hit launches opponents diagonally upward.
Hitboxes[edit]
Timing[edit]
| Hitboxes | 14-15 |
|---|---|
| Interruptible | 43 |
| Animation length | 79 |
Lag time |
Hitbox |
Interruptible |
|
