Luigi (SSB)/Up special: Difference between revisions
m (→Hitboxes: Tag added.) |
(→Hitboxes: Added the NTSC-J hitbox table.) |
||
| (2 intermediate revisions by 2 users not shown) | |||
| Line 1: | Line 1: | ||
{{ArticleIcons|ssb=y}} | {{ArticleIcons|ssb=y}} | ||
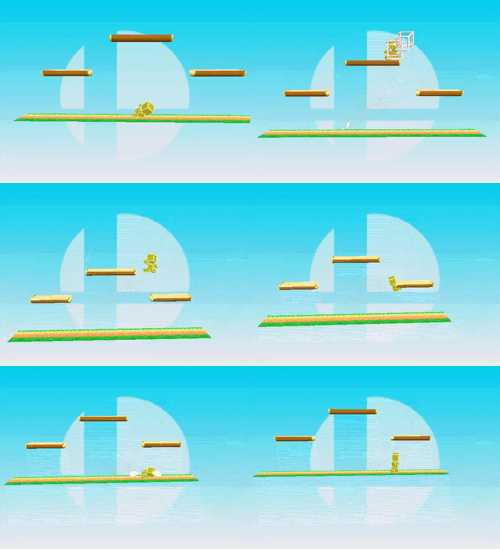
[[File:Luigi Up Special (SSB64).gif|thumb|250px|The hitbox of Luigi's up special.]] | |||
[[File:LuigiUSpecialSweetspotSSB.png|thumb|250px|The sweetspot of Luigi's up special.]] | |||
==Overview== | ==Overview== | ||
Luigi's [[up special move]] in ''[[Super Smash Bros.]]'' is the '''[[Super Jump Punch]]''', in which Luigi does a uppercut jump, similar to how he used to jump in the original ''Mario'' games. The move works in a similar way to Mario's Super Jump Punch, with the controls being exactly the same. However, the properties of Luigi's Super Jump Punch are significantly different. The move has a [[sweetspot]] that turns the move into the [[Fire Jump Punch]], dealing around 25% and very high knockback. The grounded version KOs Mario on Dream Land at 45% at ground level while the aerial version KOs him at 54%. This move can KO certain characters rather early, and is one of Luigi's primary KO moves. It is also often used at the end of aerial strings. However, the Fire Jump Punch has a rather small hitbox and it only lasts for one frame, meaning players must be precise to land it. The rest of the move is a [[sourspot]] that deals only 1% damage, barely making the opponent flinch. Whiffing the move can leave Luigi rather vulnerable. The move also has [[intangibility]] while the sweetspot is active. | Luigi's [[up special move]] in ''[[Super Smash Bros.]]'' is the '''[[Super Jump Punch]]''', in which Luigi does a uppercut jump, similar to how he used to jump in the original ''Mario'' games. The move works in a similar way to Mario's Super Jump Punch, with the controls being exactly the same. However, the properties of Luigi's Super Jump Punch are significantly different. The move has a [[sweetspot]] that turns the move into the [[Fire Jump Punch]], dealing around 25% and very high knockback. The grounded version KOs Mario on Dream Land at 45% at ground level while the aerial version KOs him at 54%. This move can KO certain characters rather early, and is one of Luigi's primary KO moves. It is also often used at the end of aerial strings. However, the Fire Jump Punch has a rather small hitbox and it only lasts for one frame, meaning players must be precise to land it. The rest of the move is a [[sourspot]] that deals only 1% damage, barely making the opponent flinch. Whiffing the move can leave Luigi rather vulnerable. The move also has [[intangibility]] while the sweetspot is active. | ||
| Line 9: | Line 10: | ||
==Hitboxes== | ==Hitboxes== | ||
===NTSC-J=== | |||
{{SSB64HitboxTableHeader}} | {{SSB64HitboxTableHeader}} | ||
{{HitboxTableTitle| | {{HitboxTableTitle|Grounded clean hit|42}} | ||
{{SSB64HitboxTableRow | |||
|id=0 | |||
|part=0 | |||
|damage=25% | |||
|angle=80 | |||
|bk=100 | |||
|ks=78 | |||
|fkv=0 | |||
|r=140 | |||
|bn=12 | |||
|effect=Flame | |||
|sfx=Kick | |||
|slvl=L | |||
}} | |||
{{SSB64HitboxTableRow | |||
|id=1 | |||
|part=0 | |||
|damage=25% | |||
|angle=80 | |||
|bk=100 | |||
|ks=78 | |||
|fkv=0 | |||
|r=60 | |||
|bn=15 | |||
|xpos=160 | |||
|effect=Flame | |||
|sfx=Kick | |||
|slvl=L | |||
}} | |||
{{HitboxTableTitle|Aerial clean hit|42}} | |||
{{SSB64HitboxTableRow | |||
|id=0 | |||
|part=0 | |||
|damage=24% | |||
|angle=80 | |||
|bk=80 | |||
|ks=78 | |||
|fkv=0 | |||
|r=140 | |||
|bn=12 | |||
|effect=Flame | |||
|sfx=Kick | |||
|slvl=L | |||
}} | |||
{{SSB64HitboxTableRow | |||
|id=1 | |||
|part=0 | |||
|damage=24% | |||
|angle=80 | |||
|bk=80 | |||
|ks=78 | |||
|fkv=0 | |||
|r=60 | |||
|bn=15 | |||
|xpos=160 | |||
|effect=Flame | |||
|sfx=Kick | |||
|slvl=L | |||
}} | |||
{{HitboxTableTitle|Late hit|42}} | |||
{{SSB64HitboxTableRow | |||
|id=0 | |||
|part=0 | |||
|damage=2% | |||
|angle=361 | |||
|bk=0 | |||
|ks=100 | |||
|fkv=10 | |||
|r=155 | |||
|bn=12 | |||
|zpos=60 | |||
|type=Hand | |||
|effect=Coin | |||
|sfx=Coin | |||
|slvl=M | |||
}} | |||
{{SSB64HitboxTableRow | |||
|id=1 | |||
|part=0 | |||
|damage=2% | |||
|angle=361 | |||
|bk=0 | |||
|ks=100 | |||
|fkv=10 | |||
|r=130 | |||
|bn=15 | |||
|xpos=150 | |||
|zpos=60 | |||
|type=Hand | |||
|effect=Coin | |||
|sfx=Coin | |||
|slvl=M | |||
}} | |||
|} | |||
===NTSC-U/PAL=== | |||
{{SSB64HitboxTableHeader}} | |||
{{HitboxTableTitle|Grounded clean hit|42}} | |||
{{SSB64HitboxTableRow | {{SSB64HitboxTableRow | ||
|id=0 | |id=0 | ||
| Line 17: | Line 116: | ||
|damage=25% | |damage=25% | ||
|angle=90 | |angle=90 | ||
|anglebg=buff | |||
|bk=90 | |bk=90 | ||
|bkbg=nerf | |||
|ks=80 | |ks=80 | ||
|ksbg=buff | |||
|fkv=0 | |fkv=0 | ||
|r=140 | |r=140 | ||
|bn=12 | |bn=12 | ||
|effect=Flame | |effect=Flame | ||
|sfx=Bat | |sfx=Bat | ||
|slvl=L | |slvl=L | ||
|sbg=change | |||
}} | }} | ||
{{SSB64HitboxTableRow | {{SSB64HitboxTableRow | ||
| Line 32: | Line 134: | ||
|damage=25% | |damage=25% | ||
|angle=90 | |angle=90 | ||
|anglebg=buff | |||
|bk=90 | |bk=90 | ||
|bkbg=nerf | |||
|ks=80 | |ks=80 | ||
|ksbg=buff | |||
|fkv=0 | |fkv=0 | ||
|r=60 | |r=60 | ||
|bn=15 | |bn=15 | ||
|xpos=160 | |xpos=160 | ||
|effect=Flame | |effect=Flame | ||
|sfx=Bat | |sfx=Bat | ||
|slvl=L | |slvl=L | ||
|sbg=change | |||
}} | }} | ||
{{HitboxTableTitle|Aerial | {{HitboxTableTitle|Aerial clean hit|42}} | ||
{{SSB64HitboxTableRow | {{SSB64HitboxTableRow | ||
|id=0 | |id=0 | ||
|part=0 | |part=0 | ||
|damage=25% | |damage=25% | ||
|damagebg=buff | |||
|angle=80 | |angle=80 | ||
|bk=80 | |bk=80 | ||
|ks=80 | |ks=80 | ||
|ksbg=buff | |||
|fkv=0 | |fkv=0 | ||
|r=140 | |r=140 | ||
|bn=12 | |bn=12 | ||
|effect=Flame | |effect=Flame | ||
|sfx=Bat | |sfx=Bat | ||
|slvl=L | |slvl=L | ||
|sbg=change | |||
}} | }} | ||
{{SSB64HitboxTableRow | {{SSB64HitboxTableRow | ||
| Line 63: | Line 170: | ||
|part=0 | |part=0 | ||
|damage=25% | |damage=25% | ||
|damagebg=buff | |||
|angle=80 | |angle=80 | ||
|bk=80 | |bk=80 | ||
|ks=80 | |ks=80 | ||
|ksbg=buff | |||
|fkv=0 | |fkv=0 | ||
|r=60 | |r=60 | ||
|bn=15 | |bn=15 | ||
|xpos=160 | |xpos=160 | ||
|effect=Flame | |effect=Flame | ||
|sfx=Bat | |sfx=Bat | ||
|sbg=change | |||
|slvl=L | |slvl=L | ||
}} | }} | ||
{{HitboxTableTitle|Late|42}} | {{HitboxTableTitle|Late hit|42}} | ||
{{SSB64HitboxTableRow | {{SSB64HitboxTableRow | ||
|id=0 | |id=0 | ||
|part=0 | |part=0 | ||
|damage=1% | |damage=1% | ||
|damagebg=nerf | |||
|angle=361 | |angle=361 | ||
|bk=0 | |bk=0 | ||
| Line 87: | Line 197: | ||
|bn=12 | |bn=12 | ||
|zpos=60 | |zpos=60 | ||
|effect=Coin | |effect=Coin | ||
|sfx=Coin | |sfx=Coin | ||
| Line 96: | Line 205: | ||
|part=0 | |part=0 | ||
|damage=1% | |damage=1% | ||
|damagebg=nerf | |||
|angle=361 | |angle=361 | ||
|bk=0 | |bk=0 | ||
| Line 104: | Line 214: | ||
|xpos=150 | |xpos=150 | ||
|zpos=60 | |zpos=60 | ||
|effect=Coin | |effect=Coin | ||
|sfx=Coin | |sfx=Coin | ||
| Line 110: | Line 219: | ||
}} | }} | ||
|} | |} | ||
====Summary==== | |||
*{{buff|Grounded sweetspot angle (80° → 90°).}} | |||
*{{nerf|Grounded sweetspot knockback (100 (base), 78 (scaling) → 90/80).}} | |||
*{{buff|Aerial sweetspot damage (24% → 25%).}} | |||
*{{buff|Aerial sweetspot knockback scaling (78 → 80).}} | |||
*{{change|The sweetspot SFX changed from a heavy kick to a [[ping]] sound.}} | |||
*{{nerf|Sourspot damage (2% → 1%).}} | |||
==Timing== | ==Timing== | ||
| Line 147: | Line 264: | ||
==Gallery== | ==Gallery== | ||
<gallery> | <gallery> | ||
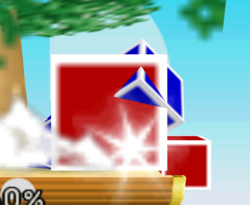
LuigiUpSpecial64.png|Luigi performing the move. | |||
</gallery> | </gallery> | ||
Latest revision as of 13:01, April 14, 2022
Overview[edit]
Luigi's up special move in Super Smash Bros. is the Super Jump Punch, in which Luigi does a uppercut jump, similar to how he used to jump in the original Mario games. The move works in a similar way to Mario's Super Jump Punch, with the controls being exactly the same. However, the properties of Luigi's Super Jump Punch are significantly different. The move has a sweetspot that turns the move into the Fire Jump Punch, dealing around 25% and very high knockback. The grounded version KOs Mario on Dream Land at 45% at ground level while the aerial version KOs him at 54%. This move can KO certain characters rather early, and is one of Luigi's primary KO moves. It is also often used at the end of aerial strings. However, the Fire Jump Punch has a rather small hitbox and it only lasts for one frame, meaning players must be precise to land it. The rest of the move is a sourspot that deals only 1% damage, barely making the opponent flinch. Whiffing the move can leave Luigi rather vulnerable. The move also has intangibility while the sweetspot is active.
Like Mario's Super Jump Punch, the move is also a great recovery move, granting Luigi a high amount of vertical distance and a decent amount of horizontal distance if angled. It can also be used in certain situations to escape combos from opponents, though doing this is harder than with Mario's due to it having less intangibility. The move's vertical distance also allows it to land on platforms easily; for example, on Dream Land, Luigi can reach the top platform from the ground using just this move, leaving him significantly less punishable.
In the Japanese version, the grounded version of the move is stronger, being able to KO Mario on Dream Land at 41% at ground level although the aerial version deals less damage and knockback; not KOing him on Dream Land until 62% at ground level making his aerial strings KO later in the Japanese version.
Hitboxes[edit]
NTSC-J[edit]
NTSC-U/PAL[edit]
Summary[edit]
 Grounded sweetspot angle (80° → 90°).
 Grounded sweetspot knockback (100 (base), 78 (scaling) → 90/80).
 Aerial sweetspot damage (24% → 25%).
 Aerial sweetspot knockback scaling (78 → 80).
 The sweetspot SFX changed from a heavy kick to a ping sound.
 Sourspot damage (2% → 1%).
Timing[edit]
| Clean hit | 2 |
|---|---|
| Late hit | 3-24 |
| Intangible | 2 |
| Animation length | 39 |
Landing lag[edit]
| Animation length | 25 |
|---|
Lag time |
Hitbox |
Hitbox change |
Vulnerable |
Intangible |
Gallery[edit]


