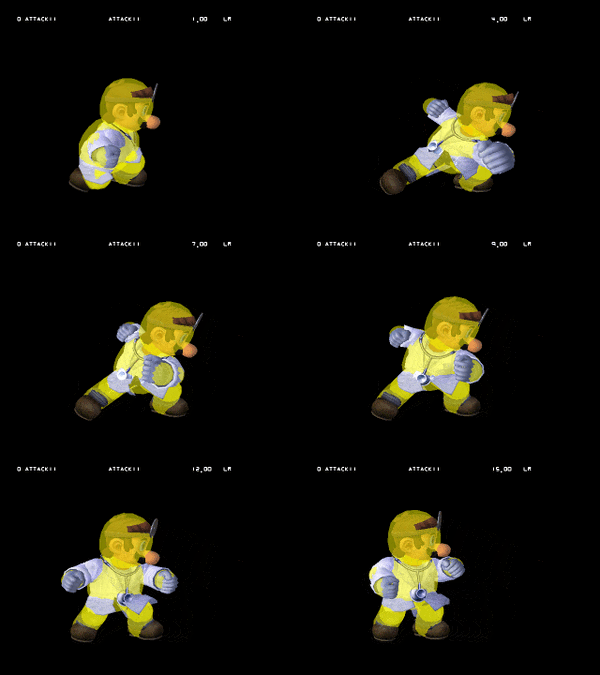
Dr. Mario (SSBM)/Neutral attack/Hit 1: Difference between revisions
From SmashWiki, the Super Smash Bros. wiki
Jump to navigationJump to search
(New Page: {{ArticleIcons|ssbm=y}} {{competitive expertise}} ==Overview== ==Hitboxes== {{MeleeHitboxTableHeader}} {{MeleeHitboxTableRow |id=0 |damage=4% |angle=83 |bk=0 |ks=100 |fkv=134 |r=900 |bn...) |
No edit summary |
||
| (One intermediate revision by one other user not shown) | |||
| Line 1: | Line 1: | ||
{{ArticleIcons|ssbm=y}} | {{ArticleIcons|ssbm=y}} | ||
[[File:DrMarioJab1SSBM.gif|thumb|300px|Hitbox visualization showing Dr. Mario's first jab.]] | |||
==Overview== | |||
{{competitive expertise}} | {{competitive expertise}} | ||
==Hitboxes== | ==Hitboxes== | ||
{{MeleeHitboxTableHeader}} | {{MeleeHitboxTableHeader}} | ||
| Line 10: | Line 11: | ||
|bk=0 | |bk=0 | ||
|ks=100 | |ks=100 | ||
|fkv= | |fkv=30 | ||
|r=900 | |r=900 | ||
|bn=9 | |bn=9 | ||
| Line 24: | Line 25: | ||
|bk=0 | |bk=0 | ||
|ks=100 | |ks=100 | ||
|fkv= | |fkv=30 | ||
|r=600 | |r=600 | ||
|bn=8 | |bn=8 | ||
| Line 38: | Line 39: | ||
|bk=0 | |bk=0 | ||
|ks=100 | |ks=100 | ||
|fkv= | |fkv=30 | ||
|r=700 | |r=700 | ||
|bn=31 | |bn=31 | ||
| Line 46: | Line 47: | ||
}} | }} | ||
|} | |} | ||
==Timing== | ==Timing== | ||
{|class="wikitable" | {|class="wikitable" | ||
Latest revision as of 21:45, August 18, 2024
Overview[edit]
Hitboxes[edit]
Timing[edit]
| Hitboxes | 2-3 |
|---|---|
| Earliest continuable | 14 |
| Animation length | 15 |
Lag time |
Hitbox |
Earliest continuable point |
|

