Back throw: Difference between revisions
m (→Notable back throws: Grammar.) |
|||
| (49 intermediate revisions by 32 users not shown) | |||
| Line 1: | Line 1: | ||
{{ArticleIcons|series=y}} | {{ArticleIcons|series=y}} | ||
[[File:Meta Knight Back Throw Brawl.gif|thumb|300px|Meta Knight's back throw in ''[[Super Smash Bros. Brawl]]''.]] | |||
[[File: | A '''back throw''' ({{ja|後投げ|Ato nage}}, ''Rear/back throw''; commonly abbreviated as '''b-throw''' or '''Bthrow''', and referred to as '''ThrowB''' internally) is a [[throw]] performed by tilting the [[control stick]] opposite to the direction the character is facing after having [[grab]]bed the opponent. | ||
A '''back throw''' ({{ja|後投げ|Ato nage}}, ''Rear/back throw'') is a [[throw]] performed by | |||
Back throws rarely lead to combos, but typically have good [[knockback]] (often more than [[forward throw]]s) and thus can be used to set up [[edgeguard]]s or KO opponents near the edges of stages. In ''[[Smash 64]]'', all back throws have very high [[knockback]] and are viable [[KO]] moves, a trait that carries over to many back throws in future games. | |||
{{clr}} | |||
==List of back throws | ==List of back throws== | ||
Back throws with hitboxes consist of two or more hits on the grabbed opponent (the hitbox, then the throw), and can affect other opponents near the thrower. Additionally, some back throws may possess a '''collateral hitbox''', which affects nearby opponents but not the victim of the throw. Unless stated otherwise, all back throws have the attacker put the opponent behind themselves in some way. | |||
{| class="wikitable" | |||
{|class="wikitable | |||
|- | |- | ||
! Character !! Description !! Hitbox | |||
|- | |- | ||
| | |[[Banjo]] & [[Kazooie]]||Banjo spins the opponent around three times with both arms, then tosses them backward.||{{y|16}} <small>(collateral)</small> | ||
|- | |- | ||
| | |[[Bayonetta]]||Launches the opponent with a vertical roundhouse kick.||{{y|16}} | ||
|- | |- | ||
| | |[[Bowser]]||Tosses the opponent backward.||{{n|16}} | ||
|- | |- | ||
| | |[[Bowser Jr.]]||Spins around once and tosses the opponent with the [[Koopa Clown Car]]'s claw.||{{n|16}} | ||
|- | |- | ||
| | |[[Byleth]]||Spins the opponent around once before tossing them.||{{y|16}} <small>(collateral)</small> | ||
|- | |- | ||
| | |[[Captain Falcon]]||Launches the opponent with a high back kick.||{{y|16}} | ||
|- | |- | ||
| | |[[Charizard]]||Leans forward, then tosses the opponent backward with its mouth.||{{n|16}} | ||
|- | |- | ||
| | |[[Chrom]]||Lifts one leg and tosses the opponent over it.||{{n|16}} | ||
|- | |- | ||
| | |[[Cloud]]||Kicks the opponent away.||{{y|16}} | ||
|- | |- | ||
| | |[[Corrin]]||Transforms his free arm into a Dragon Fang spear and stabs the opponent with it.||{{y|16}} | ||
|- | |- | ||
| | |[[Daisy]]||Launches the opponent with a hip thrust.||{{y|16}} | ||
|- | |- | ||
| | |[[Dark Pit]]||Spins around once and slams the opponent onto the ground.||{{n|16}} | ||
|- | |- | ||
| | |[[Dark Samus]]||Tosses the opponent with a turnaround whip of the Grapple Beam.||{{n|16}} | ||
|- | |- | ||
| | |[[Diddy Kong]]||Tosses the opponent backward with both hands.||{{n|16}} | ||
|- | |- | ||
|{{SSBB| | |[[Donkey Kong]]||{{GameIcon|SSB}} Tosses the opponent backward with both hands.<br/>{{GameIcon|SSBM}}{{GameIcon|SSBB}}{{GameIcon|SSB4}}{{GameIcon|SSBU}} Tosses the opponent backward with one hand.||{{n|16}} | ||
|- | |- | ||
|{{ | |[[Dr. Mario]]||{{GameIcon|SSBM}}{{GameIcon|SSB4}} Spins the opponent around three times with both arms, then tosses them backward.<br/>{{GameIcon|SSBU}} Lifts the opponent, then tosses them backward after an exaggerated delay.||{{GameIcon|SSBM}}{{GameIcon|SSB4}} {{y|16}} <small>(collateral)</small><br/>{{GameIcon|SSBU}} {{n|16}} | ||
|- | |- | ||
|{{ | |[[Duck Hunt]]||The dog swings his head backward and tosses the opponent.||{{n|16}} | ||
|- | |- | ||
|{{ | |[[Falco]]||{{GameIcon|SSBM}}{{GameIcon|SSBB}} Tosses the opponent at a diagonal angle backward and fires three rapid shots from his Blaster.<br/>{{GameIcon|SSB4}}{{GameIcon|SSBU}} Tosses the opponent at a diagonal angle backward and fires one shot from his Blaster.||{{y|16}} | ||
|- | |- | ||
|{{SSBB| | |[[Fox]]||{{GameIcon|SSB}} Performs the {{s|wikipedia|tomoe nage}}, a judo throw.<br/>{{GameIcon|SSBM}}{{GameIcon|SSBB}}{{GameIcon|SSB4}}{{GameIcon|SSBU}} Tosses the opponent at a diagonal angle backward and fires three rapid shots from his Blaster.||{{GameIcon|SSB}} {{y|16}} <small>(collateral)</small><br/>{{GameIcon|SSBM}}{{GameIcon|SSBB}}{{GameIcon|SSB4}}{{GameIcon|SSBU}} {{y|16}} | ||
|- | |- | ||
| | |[[Ganondorf]]||Launches the opponent with a high back kick.||{{y|16}} | ||
|- | |- | ||
| | |[[Greninja]]||Tosses the opponent backward with both hands without turning around.||{{n|16}} | ||
|- | |- | ||
| | |[[Hero]]||Performs the tomoe nage, a judo throw.||{{n|16}} | ||
|- | |- | ||
|{{ | |[[Ice Climbers]]||{{GameIcon|SSBM}}{{GameIcon|SSBB}} Tosses the opponent backward with one arm.<br/>{{GameIcon|SSBU}} Slams the opponent onto the ground behind themselves with one arm.||{{n|16}} | ||
|- | |- | ||
| | |[[Ike]]||Launches the opponent with a roundhouse kick.||{{y|16}} | ||
|- | |- | ||
|{{ | |[[Incineroar]]||Performs a {{s|wikipedia|German suplex}}.||{{y|16}} | ||
|- | |- | ||
| | |[[Inkling]]||Spins around once, then turns into squid form and tosses the opponent.||{{n|16}} | ||
|- | |- | ||
| | |[[Isabelle]]||Tosses the opponent backward with her net.||{{n|16}} | ||
|- | |- | ||
| | |[[Ivysaur]]||Tosses the opponent backward with its vines.||{{n|16}} | ||
|- | |- | ||
|{{ | |[[Jigglypuff]]||Performs a suplex.||{{n|16}} | ||
|- | |- | ||
| | |[[Joker]]||Lifts one leg and tosses the opponent over it with a flourish.||{{n|16}} | ||
|- | |- | ||
| | |[[Kazuya]]||Performs the Steel Pedal Drop.||{{y|16}} | ||
|- | |- | ||
| | |[[Ken]]||Rolls backward twice and tosses the opponent.||{{n|16}} | ||
|- | |- | ||
| | |[[King Dedede]]||Launches the opponent with an upward hammer swing.||{{y|16}} | ||
|- | |- | ||
| | |[[King K. Rool]]||Drags the opponent backward along the ground and tosses them.||{{n|16}} | ||
|- | |- | ||
| | |[[Kirby]]||Performs a suplex.||{{n|16}} | ||
|- | |- | ||
| | |[[Link]]||Kicks the opponent away.||{{y|16}} | ||
|- | |- | ||
| | |[[Little Mac]]||Uppercuts the opponent away.||{{y|16}} | ||
|- | |- | ||
| | |[[Lucario]]||Slams the opponent onto the ground behind itself.||{{n|16}} | ||
|} | |||
|- | |- | ||
| | |[[Lucas]]||Tosses the opponent backward with PSI.||{{n|16}} | ||
|- | |- | ||
| | |[[Lucina]]||Lifts one leg and tosses the opponent over it.||{{n|16}} | ||
|- | |- | ||
|{{ | |[[Luigi]]||{{GameIcon|SSB}}{{GameIcon|SSBM}}{{GameIcon|SSBB}}{{GameIcon|SSB4}} Spins the opponent around three times with both arms, then tosses them backward.<br/>{{GameIcon|SSBU}} Slams the opponent onto the ground behind himself with the Poltergust G-00.||{{GameIcon|SSB}}{{GameIcon|SSBM}}{{GameIcon|SSBB}}{{GameIcon|SSB4}} {{y|16}} <small>(collateral)</small><br/>{{GameIcon|SSBU}} {{n|16}} | ||
|- | |- | ||
| | |[[Mario]]||Spins the opponent around three times with both arms, then tosses them backward.||{{y|16}} <small>(collateral)</small> | ||
|- | |- | ||
| | |[[Marth]]||Lifts one leg and tosses the opponent over it.||{{n|16}} | ||
|- | |- | ||
| | |[[Mega Man]]||Tosses the opponent backward with an underhanded swing of the Super Arm.||{{n|16}} | ||
|- | |- | ||
| | |[[Meta Knight]]||Warps to the other side of the opponent and slashes them away.||{{y|16}} | ||
|- | |- | ||
|{{ | |[[Mewtwo]]||{{GameIcon|SSBM}} Lifts the opponent overhead with PSI and tosses them backward.<br/>{{GameIcon|SSB4}}{{GameIcon|SSBU}} Swings one arm horizontally and tosses the opponent with PSI.||{{n|16}} | ||
|- | |- | ||
| | |[[Mii Brawler]]||Launches the opponent with a roundhouse kick.||{{y|16}} | ||
|- | |- | ||
| | |[[Mii Gunner]]||Tosses the opponent at a diagonal angle backward and fires one shot from the arm cannon.||{{y|16}} | ||
|- | |- | ||
| | |[[Mii Swordfighter]]||Kicks the opponent away.||{{y|16}} | ||
|- | |- | ||
|{{ | |[[Min Min]]||Performs a {{s|wikipedia|German suplex}}.||{{y|16}} | ||
|- | |- | ||
| | |[[Mr. Game & Watch]]||Juggles the opponent as a ball from front to back, then tosses them backward.||{{n|16}} | ||
|- | |- | ||
| | |[[Mythra]]||Kicks the opponent behind herself.||{{y|16}} | ||
|- | |- | ||
|{{ | |[[Ness]]||Lifts the opponent overhead with PSI and tosses them backward.||{{GameIcon|SSB}} {{y|16}} <small>(collateral)</small><br/>{{GameIcon|SSBM}}{{GameIcon|SSBB}}{{GameIcon|SSB4}}{{GameIcon|SSBU}} {{n|16}} | ||
|- | |- | ||
| | |[[Olimar]]||The Pikmin grabbing the opponent slams them onto the ground behind Olimar.||{{n|16}} | ||
|- | |- | ||
| | |[[Pac-Man]]||Spins around once and tosses the opponent.||{{n|16}} | ||
|- | |- | ||
|{{ | |[[Palutena]]||Tosses the opponent backward performing an inverted version of the {{iw|wikipedia|Arabesque|ballet position}}.||{{n|16}} | ||
|- | |- | ||
| | |[[Peach]]||Launches the opponent with a hip thrust.||{{y|16}} | ||
|- | |- | ||
|{{ | |[[Pichu]]||{{GameIcon|SSBM}} Rolls backward three times and tosses the opponent.<br/>{{GameIcon|SSBU}} Rolls backward once and tosses the opponent.||{{n|16}} | ||
|- | |- | ||
|{{ | |[[Pikachu]]||{{GameIcon|SSB}} Zaps the opponent on its back, then launches them backward.<br>{{GameIcon|SSBM}}{{GameIcon|SSBB}}{{GameIcon|SSB4}} Rolls backward three times and tosses the opponent.<br/>{{GameIcon|SSBU}} Rolls backward twice and tosses the opponent.||{{n|16}} | ||
|- | |- | ||
| | |[[Piranha Plant]]||Tosses the opponent with a horizontal swing of its head.||{{n|16}} | ||
|- | |- | ||
| | |[[Pit]]||Spins around once and slams the opponent onto the ground.||{{n|16}} | ||
|- | |- | ||
| | |[[Pyra]]||Kicks the opponent behind herself.||{{y|16}} | ||
|- | |- | ||
|{{ | |[[R.O.B.]]||Tosses the opponent backward with both hands.||{{n|16}} | ||
|- | |- | ||
|{{ | |[[Richter]]||Tosses the opponent backward.||{{n|16}} | ||
|- | |- | ||
| | |[[Ridley]]||Tosses the opponent backward with an underhanded swing.||{{n|16}} | ||
|- | |- | ||
| | |[[Robin]]||Tosses the opponent backward using magic.||{{n|16}} | ||
|- | |- | ||
| | |[[Rosalina]] & [[Luma]]||Telekinetically spins the opponent around herself once, then tosses them.||{{n|16}} | ||
|- | |- | ||
| | |[[Roy]]||Lifts one leg and tosses the opponent over it.||{{n|16}} | ||
|- | |- | ||
| | |[[Ryu]]||Performs the tomoe nage, a judo throw.||{{n|16}} | ||
|- | |- | ||
|{{ | |[[Samus]]||Tosses the opponent with a turnaround whip of the Grapple Beam.||{{n|16}} | ||
|- | |- | ||
| | |[[Sephiroth]]||Teleports the opponent behind him, then pumps his fist to send them away and behind himself.||{{y|16}} | ||
|- | |- | ||
| | |[[Sheik]]||Kicks the opponent away.||{{y|16}} | ||
|- | |- | ||
| | |[[Shulk]]||Stabs the opponent with the Monado.||{{y|16}} | ||
|- | |- | ||
| | |[[Simon]]||Tosses the opponent backward.||{{n|16}} | ||
|- | |- | ||
| | |[[Snake]]||Slams the opponent onto the ground behind himself.||{{y|16}} | ||
|- | |- | ||
|{{ | |[[Sonic]]||Somersaults backward several times in the air, then performs the {{s|wikipedia|tomoe nage}} upon landing.||{{n|16}} | ||
|- | |- | ||
| | |[[Sora]]||Spins the opponent around once by their legs before tossing them.||{{y|16}} <small>(collateral)</small> | ||
|- | |- | ||
|{{ | |[[Squirtle]]||{{GameIcon|SSBB}} Dropkicks the opponent away.<br/>{{GameIcon|SSBU}} Lifts the opponent and tosses them backward.||{{GameIcon|SSBB}}{{y|16}}<br/>{{GameIcon|SSBU}}{{n|16}} | ||
|- | |- | ||
| | |[[Steve]]||Throws the opponent backward with his fishing rod.||{{n|16}} | ||
|- | |- | ||
| | |[[Terry]]||Slams the opponent on the ground behind him.||{{n|16}} | ||
|- | |- | ||
|{{ | |[[Toon Link]]||Performs the tomoe nage, a judo throw.||{{GameIcon|SSBB}}{{y|16}}<br/>{{GameIcon|SSB4}}{{GameIcon|SSBU}}{{n|16}} | ||
|- | |- | ||
| | |[[Villager]]||Tosses the opponent backward with his net.||{{n|16}} | ||
|- | |- | ||
|{{ | |[[Wario]]||{{GameIcon|SSBB}} Launches the opponent with a rear thrust.<br/>{{GameIcon|SSB4}}{{GameIcon|SSBU}} Spins the opponent around three times with both hands, then tosses them.||{{GameIcon|SSBB}}{{y|16}}<br/>{{GameIcon|SSB4}}{{GameIcon|SSBU}}{{y|16}} <small>(collateral)</small> | ||
|- | |- | ||
| | |[[Wii Fit Trainer]]||Dropkicks the opponent away.||{{y|16}} | ||
|- | |- | ||
|{{ | |[[Wolf]]||{{GameIcon|SSBB}} Somersaults backward and slashes the opponent away from above.<br/>{{GameIcon|SSBU}} Slashes the opponent away with a claw uppercut.||{{y|16}} | ||
|- | |- | ||
| | |[[Yoshi]]||Spits the opponent backward.||{{n|16}} | ||
|- | |- | ||
| | |[[Young Link]]||Kicks the opponent away.||{{y|16}} | ||
|- | |- | ||
| | |[[Zelda]]||Telekinetically tosses the opponent backward.||{{n|16}} | ||
|- | |- | ||
| | |[[Zero Suit Samus]]||Launches the opponent with a roundhouse kick.||{{y|16}} | ||
|{{ | |||
|} | |} | ||
== | ==Notable back throws== | ||
[[File:Pichu Back Throw.jpg|thumb|{{SSBU|Pichu}}'s back throw in ''Ultimate''.]] | |||
*[[Fox]], [[Falco]], and [[Mii Gunner]]'s back throws are the only ones to release [[projectile]]s, in the form of lasers that can be [[reflect]]ed and [[absorb]]ed. Fox fires three lasers that cause no knockback, much like those of [[Blaster (Fox)|his neutral special]]; likewise, Falco in ''Melee'' and ''Brawl'' fires three lasers that cause weak knockback. In ''Smash 4'' and ''Ultimate'', Falco and Mii Gunner instead fire a single laser that deals much more knockback, with both throws being capable of KOing near the edge at high percentages. | |||
*{{SSBM|Kirby}}'s back throw in ''Melee'' causes him to functionally leave the ground, and can be used for a [[Kirbycide]]. However, it is one of the only two standard throws in the series that can be escaped without receiving external knockback (the other being his forward throw). From ''Brawl'' onward, this is no longer the case. From ''Smash 4'', its knockback was altered giving it more knockback scaling but less base knockback, so it is better both for combos at low percents and KOing at high percents. | |||
*[[Corrin]]'s back throw possesses a [[tipper]] hitbox that only affects nearby opponents, and can KO considerably earlier than the throw itself. This is also the case for forward throw. | |||
| | *[[Ness]]'s back throw in all games except ''Smash 64'' is the opposite of his [[forward throw]], possessing very low base knockback, but very high knockback scaling, making it noticeably more powerful at high percentages than most other back throws. It is the strongest back throw in ''Melee'', ''Brawl'', and ''Smash 4'', and one of the strongest throws overall, KOing under 140% from the center of [[Final Destination]]. | ||
|{{SSBU| | **{{SSB4|Villager}}'s back throw in ''Smash 4'', as well as {{SSBU|Isabelle}}'s in ''Ultimate'', have similar properties, although they are slightly weaker. | ||
*[[Mario]], [[Luigi]], and [[Dr. Mario]]'s back throws are among the strongest in all of their appearances. Their absolute strongest appearance is in ''Smash 64'' (specifically the Japanese version in Luigi's case) although they are still relatively strong in later games. Mario and Dr. Mario's in ''Melee'', Luigi's in ''Brawl'' and Dr. Mario's in ''Ultimate'' can all KO under 110% near the edge. | |||
**Mario’s back throw also appears to be based on his battles with [[Bowser]] in ''Super Mario 64'', where he grabs Bowser by the tail and spins him around until he throws him. This applies to both Luigi and Dr. Mario in all of their appearances up until ''Ultimate''. | |||
**{{SSBU|Banjo & Kazooie}}'s back throw is very similar to Mario's but stronger. | |||
**Additionally, [[Pac-Man]], {{SSBU|Byleth}}, and {{SSBU|Sora}} spin around once. | |||
| | *{{SSBU|Incineroar}}'s back throw in ''Ultimate'' is the strongest in the game at the edge, KOing under 100%, which slightly outpowers even Ness's back throw at the edge of Final Destination. Due to its lower knockback scaling, however, it KOs slightly later than Ness's back throw if used from center-stage or if DIed. | ||
*In ''[[Smash 64]]'', {{SSB|Pikachu}}, {{SSB|Donkey Kong}}, and {{SSB|Samus}} have the most damaging back throws in the series, dealing 18% with DK's being the strongest throw in the game. | |||
| | *[[Mewtwo]]'s back throw is very powerful and is considered one of its best finishers, KOing at around 100% near the edge. | ||
*[[Charizard]]'s back throw in ''Smash 4'' and ''Ultimate'' has almost no [[ending lag]] (only 4 [[frame]]s in ''Smash 4'', and 7 frames in ''Ultimate''), allowing it to combo into aerial attacks from low to mid percentages. If the opponent's [[air dodge]] or jump is successfully [[read]], it can even lead to an aerial [[Flare Blitz]] and KO at low percentages near the edge. | |||
*[[Mr. Game & Watch]]'s back throw and forward throw are identical. | |||
*[[Ken]], [[Pikachu]] (as of ''Melee''), and [[Pichu]]'s back throws allow them to travel a great distance backwards, allowing for great stage control. | |||
| | |||
== | ==Gallery== | ||
<gallery> | |||
Luigi back throw Brawl.jpg|Luigi's back throw in ''[[Super Smash Bros. Brawl]]''. | |||
</gallery> | |||
{{Attacks}} | {{Attacks}} | ||
[[Category:Game controls]] | [[Category:Game controls]] | ||
[[es:Lanzamiento hacia atrás]] | |||
Latest revision as of 21:03, October 8, 2023

A back throw (後投げ, Rear/back throw; commonly abbreviated as b-throw or Bthrow, and referred to as ThrowB internally) is a throw performed by tilting the control stick opposite to the direction the character is facing after having grabbed the opponent.
Back throws rarely lead to combos, but typically have good knockback (often more than forward throws) and thus can be used to set up edgeguards or KO opponents near the edges of stages. In Smash 64, all back throws have very high knockback and are viable KO moves, a trait that carries over to many back throws in future games.
List of back throws[edit]
Back throws with hitboxes consist of two or more hits on the grabbed opponent (the hitbox, then the throw), and can affect other opponents near the thrower. Additionally, some back throws may possess a collateral hitbox, which affects nearby opponents but not the victim of the throw. Unless stated otherwise, all back throws have the attacker put the opponent behind themselves in some way.
| Character | Description | Hitbox |
|---|---|---|
| Banjo & Kazooie | Banjo spins the opponent around three times with both arms, then tosses them backward. | |
| Bayonetta | Launches the opponent with a vertical roundhouse kick. | |
| Bowser | Tosses the opponent backward. | |
| Bowser Jr. | Spins around once and tosses the opponent with the Koopa Clown Car's claw. | |
| Byleth | Spins the opponent around once before tossing them. | |
| Captain Falcon | Launches the opponent with a high back kick. | |
| Charizard | Leans forward, then tosses the opponent backward with its mouth. | |
| Chrom | Lifts one leg and tosses the opponent over it. | |
| Cloud | Kicks the opponent away. | |
| Corrin | Transforms his free arm into a Dragon Fang spear and stabs the opponent with it. | |
| Daisy | Launches the opponent with a hip thrust. | |
| Dark Pit | Spins around once and slams the opponent onto the ground. | |
| Dark Samus | Tosses the opponent with a turnaround whip of the Grapple Beam. | |
| Diddy Kong | Tosses the opponent backward with both hands. | |
| Donkey Kong | ||
| Dr. Mario | ||
| Duck Hunt | The dog swings his head backward and tosses the opponent. | |
| Falco | ||
| Fox | ||
| Ganondorf | Launches the opponent with a high back kick. | |
| Greninja | Tosses the opponent backward with both hands without turning around. | |
| Hero | Performs the tomoe nage, a judo throw. | |
| Ice Climbers | ||
| Ike | Launches the opponent with a roundhouse kick. | |
| Incineroar | Performs a German suplex. | |
| Inkling | Spins around once, then turns into squid form and tosses the opponent. | |
| Isabelle | Tosses the opponent backward with her net. | |
| Ivysaur | Tosses the opponent backward with its vines. | |
| Jigglypuff | Performs a suplex. | |
| Joker | Lifts one leg and tosses the opponent over it with a flourish. | |
| Kazuya | Performs the Steel Pedal Drop. | |
| Ken | Rolls backward twice and tosses the opponent. | |
| King Dedede | Launches the opponent with an upward hammer swing. | |
| King K. Rool | Drags the opponent backward along the ground and tosses them. | |
| Kirby | Performs a suplex. | |
| Link | Kicks the opponent away. | |
| Little Mac | Uppercuts the opponent away. | |
| Lucario | Slams the opponent onto the ground behind itself. | |
| Lucas | Tosses the opponent backward with PSI. | |
| Lucina | Lifts one leg and tosses the opponent over it. | |
| Luigi | ||
| Mario | Spins the opponent around three times with both arms, then tosses them backward. | |
| Marth | Lifts one leg and tosses the opponent over it. | |
| Mega Man | Tosses the opponent backward with an underhanded swing of the Super Arm. | |
| Meta Knight | Warps to the other side of the opponent and slashes them away. | |
| Mewtwo | ||
| Mii Brawler | Launches the opponent with a roundhouse kick. | |
| Mii Gunner | Tosses the opponent at a diagonal angle backward and fires one shot from the arm cannon. | |
| Mii Swordfighter | Kicks the opponent away. | |
| Min Min | Performs a German suplex. | |
| Mr. Game & Watch | Juggles the opponent as a ball from front to back, then tosses them backward. | |
| Mythra | Kicks the opponent behind herself. | |
| Ness | Lifts the opponent overhead with PSI and tosses them backward. | |
| Olimar | The Pikmin grabbing the opponent slams them onto the ground behind Olimar. | |
| Pac-Man | Spins around once and tosses the opponent. | |
| Palutena | Tosses the opponent backward performing an inverted version of the Arabesque. | |
| Peach | Launches the opponent with a hip thrust. | |
| Pichu | ||
| Pikachu | ||
| Piranha Plant | Tosses the opponent with a horizontal swing of its head. | |
| Pit | Spins around once and slams the opponent onto the ground. | |
| Pyra | Kicks the opponent behind herself. | |
| R.O.B. | Tosses the opponent backward with both hands. | |
| Richter | Tosses the opponent backward. | |
| Ridley | Tosses the opponent backward with an underhanded swing. | |
| Robin | Tosses the opponent backward using magic. | |
| Rosalina & Luma | Telekinetically spins the opponent around herself once, then tosses them. | |
| Roy | Lifts one leg and tosses the opponent over it. | |
| Ryu | Performs the tomoe nage, a judo throw. | |
| Samus | Tosses the opponent with a turnaround whip of the Grapple Beam. | |
| Sephiroth | Teleports the opponent behind him, then pumps his fist to send them away and behind himself. | |
| Sheik | Kicks the opponent away. | |
| Shulk | Stabs the opponent with the Monado. | |
| Simon | Tosses the opponent backward. | |
| Snake | Slams the opponent onto the ground behind himself. | |
| Sonic | Somersaults backward several times in the air, then performs the tomoe nage upon landing. | |
| Sora | Spins the opponent around once by their legs before tossing them. | |
| Squirtle | ||
| Steve | Throws the opponent backward with his fishing rod. | |
| Terry | Slams the opponent on the ground behind him. | |
| Toon Link | Performs the tomoe nage, a judo throw. | |
| Villager | Tosses the opponent backward with his net. | |
| Wario | ||
| Wii Fit Trainer | Dropkicks the opponent away. | |
| Wolf | ||
| Yoshi | Spits the opponent backward. | |
| Young Link | Kicks the opponent away. | |
| Zelda | Telekinetically tosses the opponent backward. | |
| Zero Suit Samus | Launches the opponent with a roundhouse kick. |
Notable back throws[edit]

- Fox, Falco, and Mii Gunner's back throws are the only ones to release projectiles, in the form of lasers that can be reflected and absorbed. Fox fires three lasers that cause no knockback, much like those of his neutral special; likewise, Falco in Melee and Brawl fires three lasers that cause weak knockback. In Smash 4 and Ultimate, Falco and Mii Gunner instead fire a single laser that deals much more knockback, with both throws being capable of KOing near the edge at high percentages.
- Kirby's back throw in Melee causes him to functionally leave the ground, and can be used for a Kirbycide. However, it is one of the only two standard throws in the series that can be escaped without receiving external knockback (the other being his forward throw). From Brawl onward, this is no longer the case. From Smash 4, its knockback was altered giving it more knockback scaling but less base knockback, so it is better both for combos at low percents and KOing at high percents.
- Corrin's back throw possesses a tipper hitbox that only affects nearby opponents, and can KO considerably earlier than the throw itself. This is also the case for forward throw.
- Ness's back throw in all games except Smash 64 is the opposite of his forward throw, possessing very low base knockback, but very high knockback scaling, making it noticeably more powerful at high percentages than most other back throws. It is the strongest back throw in Melee, Brawl, and Smash 4, and one of the strongest throws overall, KOing under 140% from the center of Final Destination.
- Mario, Luigi, and Dr. Mario's back throws are among the strongest in all of their appearances. Their absolute strongest appearance is in Smash 64 (specifically the Japanese version in Luigi's case) although they are still relatively strong in later games. Mario and Dr. Mario's in Melee, Luigi's in Brawl and Dr. Mario's in Ultimate can all KO under 110% near the edge.
- Mario’s back throw also appears to be based on his battles with Bowser in Super Mario 64, where he grabs Bowser by the tail and spins him around until he throws him. This applies to both Luigi and Dr. Mario in all of their appearances up until Ultimate.
- Banjo & Kazooie's back throw is very similar to Mario's but stronger.
- Additionally, Pac-Man, Byleth, and Sora spin around once.
- Incineroar's back throw in Ultimate is the strongest in the game at the edge, KOing under 100%, which slightly outpowers even Ness's back throw at the edge of Final Destination. Due to its lower knockback scaling, however, it KOs slightly later than Ness's back throw if used from center-stage or if DIed.
- In Smash 64, Pikachu, Donkey Kong, and Samus have the most damaging back throws in the series, dealing 18% with DK's being the strongest throw in the game.
- Mewtwo's back throw is very powerful and is considered one of its best finishers, KOing at around 100% near the edge.
- Charizard's back throw in Smash 4 and Ultimate has almost no ending lag (only 4 frames in Smash 4, and 7 frames in Ultimate), allowing it to combo into aerial attacks from low to mid percentages. If the opponent's air dodge or jump is successfully read, it can even lead to an aerial Flare Blitz and KO at low percentages near the edge.
- Mr. Game & Watch's back throw and forward throw are identical.
- Ken, Pikachu (as of Melee), and Pichu's back throws allow them to travel a great distance backwards, allowing for great stage control.
Gallery[edit]
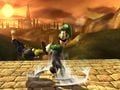
Luigi's back throw in Super Smash Bros. Brawl.

| Attacks in the Super Smash Bros. series | |
|---|---|
| Standard ground attacks | Neutral attack · Dash attack |
| Tilt attacks | Forward tilt · Up tilt · Down tilt · Crouching attack |
| Smash attacks | Forward smash · Up smash · Down smash |
| Aerial attacks | Neutral aerial · Forward aerial · Back aerial · Up aerial · Down aerial · Grab aerial · Glide attack |
| Throws | Grab · Pummel · Forward throw · Back throw · Up throw · Down throw |
| Get-up attacks | Floor attack · Edge attack |
| Special moves | Neutral special move · Side special move · Up special move · Down special move · Command-input move · Final Smash |