Super Smash Bros. 4

Toon Link (SSB4)/Neutral attack/Hit 1: Difference between revisions

From SmashWiki, the Super Smash Bros. wiki
Jump to navigationJump to search
(added an update history for the move.)
m (Text replacement - "== ([^=])" to "== $1")
 
(One intermediate revision by one other user not shown)
Line 8: Line 8:


==Hitboxes==
==Hitboxes==
{{SSB4HitboxTableHeader}}
{{SSB4HitboxTableRow
Line 96: Line 95:
{{MvSubNavToonLink|g=SSB4}}
[[Category:Toon Link (SSB4)]]
[[Category:Toon Link (SSB4)]]
[[Category:Neutral attacks (SSB4)]]

Latest revision as of 23:03, April 12, 2022

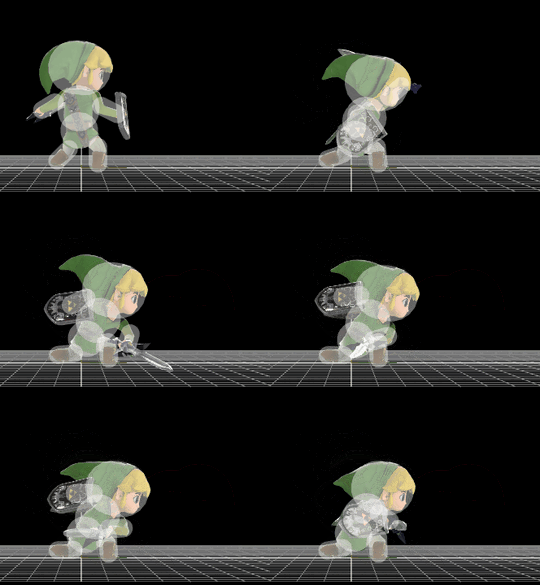
Hitbox visualization showing Toon Link's jab 1.
Competitive.png This article or section may require competitive expertise.
You can discuss this issue on the talk page or edit this page to improve it.

Update history[edit]

Super Smash Bros. 4 1.0.8

  • Buff Neutral attack's first hit's hitboxes re-positioned. Combined with the other changes to the rest of the combo, neutral attack is far more reliable at connecting.

Hitboxes[edit]

ID Part Damage SD Angle BK KS FKV Radius Bone Offset SDIx T% Clang Rebound Type Effect G A Sound Direct
0 0 3% 0 AngleIcon50.png 35 34 0 3.5 16 0.0 0.0 0.0 1.0x 1.0x 0% HitboxTableIcon(NoClang).png HitboxTableIcon(NoRebound).png Sword (type) Slash (effect) HitboxTableIcon(GroundedTrue).png HitboxTableIcon(AerialTrue).png S Punch SpecialsDirect.png
1 0 3% 0 AngleIcon80.png 25 34 0 4.2 1001 1.0 0.0 -2.0 1.0x 1.0x 0% HitboxTableIcon(Clang).png HitboxTableIcon(Rebound).png Sword (type) Slash (effect) HitboxTableIcon(GroundedTrue).png HitboxTableIcon(AerialTrue).png S Punch SpecialsDirect.png
2 0 3% 0 AngleIcon88.png 0 100 26 3.8 1001 4.2 0.0 -2.0 1.0x 1.0x 0% HitboxTableIcon(Clang).png HitboxTableIcon(Rebound).png Sword (type) Slash (effect) HitboxTableIcon(GroundedTrue).png HitboxTableIcon(AerialTrue).png S Punch SpecialsDirect.png

Timing[edit]

Hitbox 6-7
Earliest continuable frame 7
Interruptible 20
Animation length 33
FrameIcon(Lag).png FrameIcon(Lag).png FrameIcon(Lag).png FrameIcon(Lag).png FrameIcon(Lag).png FrameIcon(Hitbox).png FrameIcon(HitboxContinuableS).png FrameIcon(LagContinuableE).png FrameIcon(Lag).png FrameIcon(Lag).png FrameIcon(Lag).png FrameIcon(Lag).png FrameIcon(Lag).png FrameIcon(Lag).png FrameIcon(Lag).png FrameIcon(Lag).png FrameIcon(Lag).png FrameIcon(Lag).png FrameIcon(Lag).png FrameIcon(Interruptible).png FrameIcon(Interruptible).png FrameIcon(Interruptible).png FrameIcon(Interruptible).png FrameIcon(Interruptible).png FrameIcon(Interruptible).png FrameIcon(Interruptible).png FrameIcon(Interruptible).png FrameIcon(Interruptible).png FrameIcon(Interruptible).png FrameIcon(Interruptible).png FrameIcon(Interruptible).png FrameIcon(Interruptible).png FrameIcon(Interruptible).png
Legend (1 square = 1 frame)
Lag
Lag time
Hitbox
Hitbox
FrameIcon(Continuable).png
Continuable
Interruptibility
Interruptible