Climhazzard: Difference between revisions
m (→Overview) |
|||
| (40 intermediate revisions by 26 users not shown) | |||
| Line 1: | Line 1: | ||
{{ArticleIcons|ssb4=y}} | {{ArticleIcons|ssb4=y|ultimate=y}} | ||
{{Infobox Special Move | {{Infobox Special Move | ||
|name=Climhazzard | |name=Climhazzard | ||
|image=[[File: | |image={{tabber|title1=Normal|content1=[[File:Cloud Up B SSBU.gif|300px]]|title2=Limit Break|content2=[[File:Cloud Up B 2 SSBU.gif|300px]]}} | ||
|caption=Cloud using the normal | |caption=Cloud using the normal and Limit Break versions of Climhazzard. | ||
|universe={{uv|Final Fantasy}} | |universe={{uv|Final Fantasy}} | ||
|user=[[Cloud]] | |user=[[Cloud]] | ||
}} | }} | ||
'''Climhazzard''' ({{ja|クライムハザード|Kuraimu Hazādo}}, ''Climb Hazard'') is [[Cloud]]'s [[up special move]]. | |||
==Overview== | |||
Cloud slashes directly upwards, sending him into the air. If the special button is pressed again, Cloud slashes downwards, plummeting down till he hits the ground. This move is very similar to [[Ike]]'s [[Aether]] or [[Kirby]]'s [[Final Cutter]], though the downward swing in Cloud's case is purely optional. | |||
The first upward slash has two hitboxes: the first is a quick stab which deals 3% damage, and the second is the main slash which deals 4%. Cloud is propelled a distance about the height of Battlefield's top platform, and during this slash, Cloud can only grab ledges during the initial thrust, or when Cloud reaches its peak. Much like [[Rising Uppercut]], standard Climhazzard giving mediocre distance and completely stops Cloud's forward momentum on use, making it a notoriously weak recovery if Cloud lacks his second jump or cannot use his [[wall jump]]. | |||
If the button is pressed again within a window of time, Cloud will perform a downwards slash, causing him to fall straight down in a fixed trajectory. This downward slash deals 4.5% by itself, and 3.5% if Cloud lands on a platform. The downward slash will meteor smash the opponent most of the time, but if it lands behind Cloud or anywhere not directly below the sword, it will instead send opponents at a diagonal angle, with extremely high base knockback (enough to KO at 0% at the ledge in rare cases) but low scaling. | |||
While Cloud is under ''Limit Break'' status (see [[Limit Charge]]), the initial stab deals 6% and the rising slash deals 7% with increased knockback. This variant is extremely effective for recovering, as it propels Cloud 1.5 times higher than the original height and has significant horizontal maneuverability while rising, while additionally being able to carry Cloud's horizontal momentum as he falls. It will also [[Edge sweet spot|allow grabbing the ledge while it is in progress]]. This version also has niche offensive capabilites by catching opponents close to the top blast zone and killing them at potentially very low percents. However, Cloud players should be wary of using this variant of the move on stages where the main platform has an underside, as the horizontal component may get them stuck in a fatal position if misused. | |||
Common to both versions, if Cloud inputs for the downward slash, he cannot grab the ledge until after descending a distance slightly less than Climhazzard's normal vertical distance; grabbing the ledge while facing the opposite direction requires slightly less than Climhazzard's Limit Break upward distance before the ledge can be grabbed. Attempting to grab the ledge at any lower height will cause a [[self-destruct]]. Any horizontal momentum is utterly cancelled if the falling slash is initiated. Repeated use of the downward slash near the ledge at a grabbable height is a viable edgeguarding option, as it can hit below the ledge before Cloud grabs it. If the downward slash's meteor smash hitbox is instead used as a [[Sacrificial KO]], Cloud will almost always lose his stock first, unless the opponent is close enough to the bottom blast line or has high enough damage. | |||
In ''Smash 4'' only, if Cloud is hit near the apex of Climhazzard (Limit Break version or not) and [[tumbling|tumbles]], he is unable to perform any kind of [[tech]] to stop the knockback he sustained, usually leading to a KO. However, he is allowed to tech if he was hit more than once, was grabbed and then launched, or if his damage is over 100% and he does the reeling animation instead. | |||
==Instructional quote== | |||
{{InstructionalQuotes | |||
|ssbuchar=Cloud | |||
|ssbudesc=Thrusts his sword and then jumps into the air. Plunges with a high-speed cut if pressed again. | |||
}} | |||
==Customization== | ==Customization== | ||
| Line 25: | Line 36: | ||
==Origin== | ==Origin== | ||
[[File: | [[File:FF7 Climhazzard.gif|thumb|left|Climhazzard in ''Final Fantasy VII''.]] | ||
Climhazzard is Cloud's | [https://finalfantasy.fandom.com/wiki/Climhazzard_(Final_Fantasy_VII) Climhazzard] (called [https://finalfantasy.fandom.com/wiki/Ascension_(VII_Remake) Ascension] in the English version of ''Final Fantasy VII Remake'') is Cloud's second level 2 Limit Break in ''Final Fantasy VII''. it’s obtained after using [https://finalfantasy.fandom.com/wiki/Blade_Beam_(Final_Fantasy_VII) Blade Beam] 7 times. When used, Cloud stabs an enemy and then performs a jumping slash that inflicts 4.375 times the damage of a normal physical attack to one enemy. The downward strike is inspired by the finishing blows in some portrayals of Climhazzard like in the ''Kingdom Hearts'' series and ''Dissidia'' games. | ||
<gallery> | |||
ClimhazzardOriginPic.png|The height of Climhazzard in ''Final Fantasy VII''. | |||
</gallery> | |||
{{clrl}} | |||
==Gallery== | |||
<gallery> | |||
Climhazzard.JPG|Climhazzard in ''for Wii U''. | |||
LimitBreakClimhazzardSSB4.jpg|The charged Climhazzard in ''for Wii U''. | |||
Cloud SSBU Skill Preview Up Special.png|Climhazzard as shown by the [[Move List]] in ''Ultimate''. | |||
</gallery> | |||
==Names in other languages== | |||
{{langtable | |||
|ja={{ja|クライムハザード|Kuraimu Hazādo}}, ''Climb Hazard'' | |||
|en=Climhazzard | |||
|fr=Climhazard | |||
|es=Riesgoclimático | |||
|de=Climgefahr | |||
|it=Tabula rasa | |||
|nl=Klimslag | |||
|ru={{rollover|Клаймхазард|Klaymkhazard|?}} | |||
|ko={{rollover|클라임 해저드|Keullaim Haejeodeu|?}}, ''Climb Hazard'' | |||
|zh_cn={{rollover|破天斩|Pò Tiān Zhǎn|?}} | |||
|zh_tw={{rollover|破天斬|Pò Tiān Zhǎn|?}} | |||
}} | |||
==Trivia== | ==Trivia== | ||
*Cloud will enter helplessness after a full second of the falling slash animation (enough time to descend from the upper blast line of [[Gaur Plain]] to out-of-sight on the bottom screen). Unless in [[Smash Run]] or a stage even larger than Gaur Plain, this has no probable practical applications as Cloud maintains his dooming speed. | *Cloud will enter helplessness after a full second of the falling slash animation (enough time to descend from the upper blast line of [[Gaur Plain]] to out-of-sight on the bottom screen). Unless in [[Smash Run]] or a stage even larger than Gaur Plain, this has no probable practical applications as Cloud maintains his dooming speed. | ||
* | *Like [[Little Mac]]'s [[Straight Lunge#KO Uppercut|KO Uppercut]], the camera zoom effect from a Limit Break Climhazzard will not appear if Cloud is hit on the exact frame the move connects against an opponent. | ||
{{Special Moves|char=Cloud | {{Special Moves|char=Cloud}} | ||
[[Category:Cloud]] | [[Category:Cloud]] | ||
[[Category:Cloud (SSB4)]] | |||
[[Category:Cloud (SSBU)]] | |||
[[Category:Final Fantasy universe]] | |||
[[Category:Up special moves]] | [[Category:Up special moves]] | ||
[[Category:Square Enix]] | |||
Latest revision as of 13:07, November 27, 2024
| Climhazzard | |
|---|---|
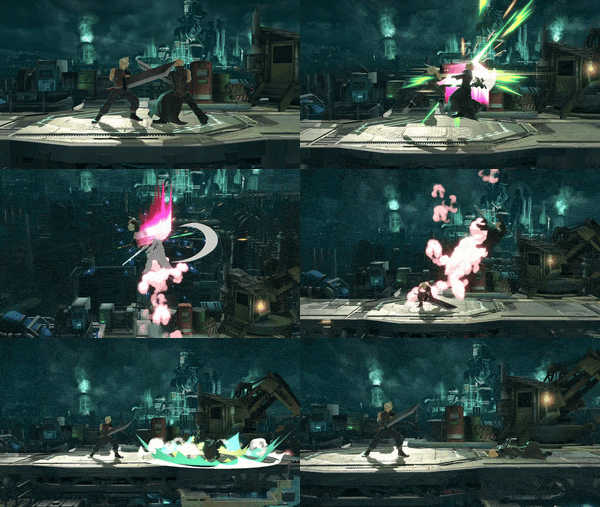
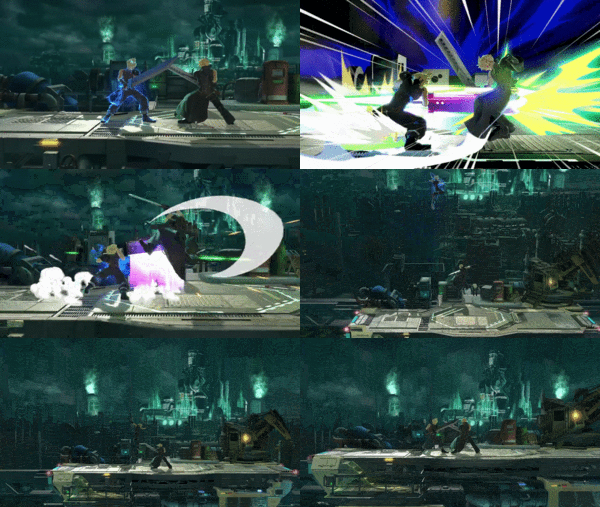
Cloud using the normal and Limit Break versions of Climhazzard. | |
| User | Cloud |
| Universe | Final Fantasy |
Climhazzard (クライムハザード, Climb Hazard) is Cloud's up special move.
Overview[edit]
Cloud slashes directly upwards, sending him into the air. If the special button is pressed again, Cloud slashes downwards, plummeting down till he hits the ground. This move is very similar to Ike's Aether or Kirby's Final Cutter, though the downward swing in Cloud's case is purely optional.
The first upward slash has two hitboxes: the first is a quick stab which deals 3% damage, and the second is the main slash which deals 4%. Cloud is propelled a distance about the height of Battlefield's top platform, and during this slash, Cloud can only grab ledges during the initial thrust, or when Cloud reaches its peak. Much like Rising Uppercut, standard Climhazzard giving mediocre distance and completely stops Cloud's forward momentum on use, making it a notoriously weak recovery if Cloud lacks his second jump or cannot use his wall jump.
If the button is pressed again within a window of time, Cloud will perform a downwards slash, causing him to fall straight down in a fixed trajectory. This downward slash deals 4.5% by itself, and 3.5% if Cloud lands on a platform. The downward slash will meteor smash the opponent most of the time, but if it lands behind Cloud or anywhere not directly below the sword, it will instead send opponents at a diagonal angle, with extremely high base knockback (enough to KO at 0% at the ledge in rare cases) but low scaling.
While Cloud is under Limit Break status (see Limit Charge), the initial stab deals 6% and the rising slash deals 7% with increased knockback. This variant is extremely effective for recovering, as it propels Cloud 1.5 times higher than the original height and has significant horizontal maneuverability while rising, while additionally being able to carry Cloud's horizontal momentum as he falls. It will also allow grabbing the ledge while it is in progress. This version also has niche offensive capabilites by catching opponents close to the top blast zone and killing them at potentially very low percents. However, Cloud players should be wary of using this variant of the move on stages where the main platform has an underside, as the horizontal component may get them stuck in a fatal position if misused.
Common to both versions, if Cloud inputs for the downward slash, he cannot grab the ledge until after descending a distance slightly less than Climhazzard's normal vertical distance; grabbing the ledge while facing the opposite direction requires slightly less than Climhazzard's Limit Break upward distance before the ledge can be grabbed. Attempting to grab the ledge at any lower height will cause a self-destruct. Any horizontal momentum is utterly cancelled if the falling slash is initiated. Repeated use of the downward slash near the ledge at a grabbable height is a viable edgeguarding option, as it can hit below the ledge before Cloud grabs it. If the downward slash's meteor smash hitbox is instead used as a Sacrificial KO, Cloud will almost always lose his stock first, unless the opponent is close enough to the bottom blast line or has high enough damage.
In Smash 4 only, if Cloud is hit near the apex of Climhazzard (Limit Break version or not) and tumbles, he is unable to perform any kind of tech to stop the knockback he sustained, usually leading to a KO. However, he is allowed to tech if he was hit more than once, was grabbed and then launched, or if his damage is over 100% and he does the reeling animation instead.
Instructional quote[edit]
| Thrusts his sword and then jumps into the air. Plunges with a high-speed cut if pressed again. |
Customization[edit]
Special Move customization was added in Super Smash Bros. 4. These are the variations:
| 1. Climhazzard |
|---|
| "Thrust your sword and then jump into the air. Push the button again for a high-speed downward cut." |
- Climhazzard: Default.
Like the other DLC characters, Cloud lacks custom move variations.
Origin[edit]
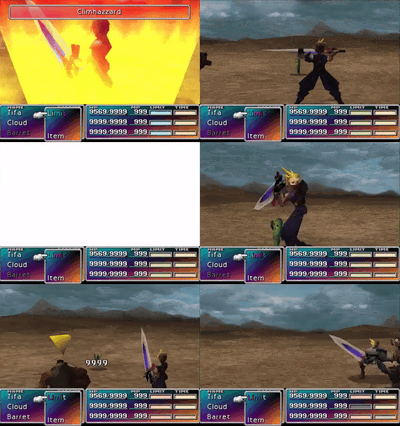
Climhazzard (called Ascension in the English version of Final Fantasy VII Remake) is Cloud's second level 2 Limit Break in Final Fantasy VII. it’s obtained after using Blade Beam 7 times. When used, Cloud stabs an enemy and then performs a jumping slash that inflicts 4.375 times the damage of a normal physical attack to one enemy. The downward strike is inspired by the finishing blows in some portrayals of Climhazzard like in the Kingdom Hearts series and Dissidia games.
Gallery[edit]
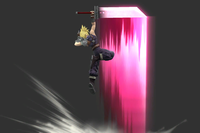
Climhazzard as shown by the Move List in Ultimate.
Names in other languages[edit]
Trivia[edit]
- Cloud will enter helplessness after a full second of the falling slash animation (enough time to descend from the upper blast line of Gaur Plain to out-of-sight on the bottom screen). Unless in Smash Run or a stage even larger than Gaur Plain, this has no probable practical applications as Cloud maintains his dooming speed.
- Like Little Mac's KO Uppercut, the camera zoom effect from a Limit Break Climhazzard will not appear if Cloud is hit on the exact frame the move connects against an opponent.


